2000 HONDA ODYSSEY tailgate
[x] Cancel search: tailgatePage 14 of 352
You
r Vehicle' s Safet y Feature s
Pre-Driv e Safet y Checklis t
To make sure you and your passengers get the maximum
protection from your vehicle's safety
features, check the following each
time before you drive away: All adults, and children who have
outgrown child safety seats, are
wearing their seat belts and
wearing them properly (see page 15).
Any infant or small child is
properly restrained in a child seat
in a back seat (see page 22). Front seat occupants are sitting
upright and as far back as possible
from the steering wheel and dashboard (see page 12). Seat-backs are upright (see page
13). Head restraints are properly
adjusted (see page 14). All doors and the tailgate are
closed and locked (see page 12). All cargo is properly stored or
secured (see page 197).
The rest of this section gives more detailed information about how you
can maximize your safety.
Remember, however, that no safety
system can prevent all injuries or
deaths that can occur in severe
crashes, even when seat belts are properly worn and the airbags deploy.
Driver an d Passenge r Safet y
Page 15 of 352
Protecting Adult s
Introductio n
The following pages provide instructions on how to properly
protect the driver and other adult
occupants.
These instructions also apply to children who have outgrown child
seats and are large enough to wear
lap/shoulder belts. (See page 39 for important additional guidelines on
how to properly protect larger
children.) 1
. Clos e an d Loc k th e Door s
After everyone has entered the
vehicle, be sure the doors and tailgate are closed and locked.
Your vehicle has a door and tailgate monitor light on the instrument
panel to indicate when a specific door or the tailgate is not tightly
closed.
For safety, locking the doors reduces
the chance that a passenger, especially a child, will open a door
while the vehicle is moving and accidentally fall out.It also reduces
the chance of someone being thrown out of the vehicle during a crash.
For security, locked doors can
prevent an outsider from
unexpectedly opening a door when
you come to a stop.
See page 79 for how to lock the
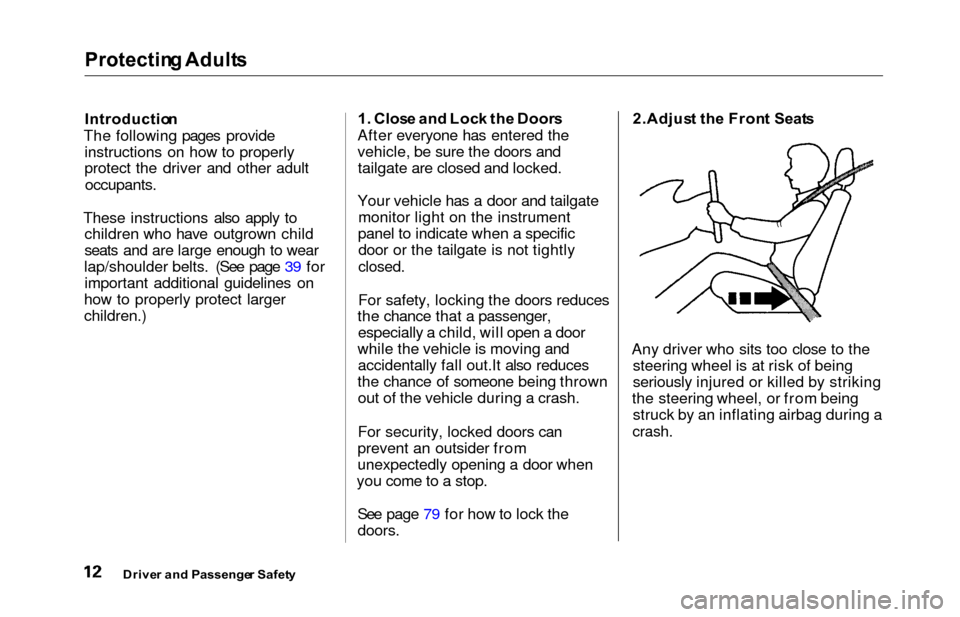
doors. 2.Adjus
t th e Fron t Seat s
Any driver who sits too close to the steering wheel is at risk of being
seriously injured or killed by striking
the steering wheel, or from being struck by an inflating airbag during a
crash.
Drive r an d Passenge r Safet y
Page 47 of 352
Protecting Childre n
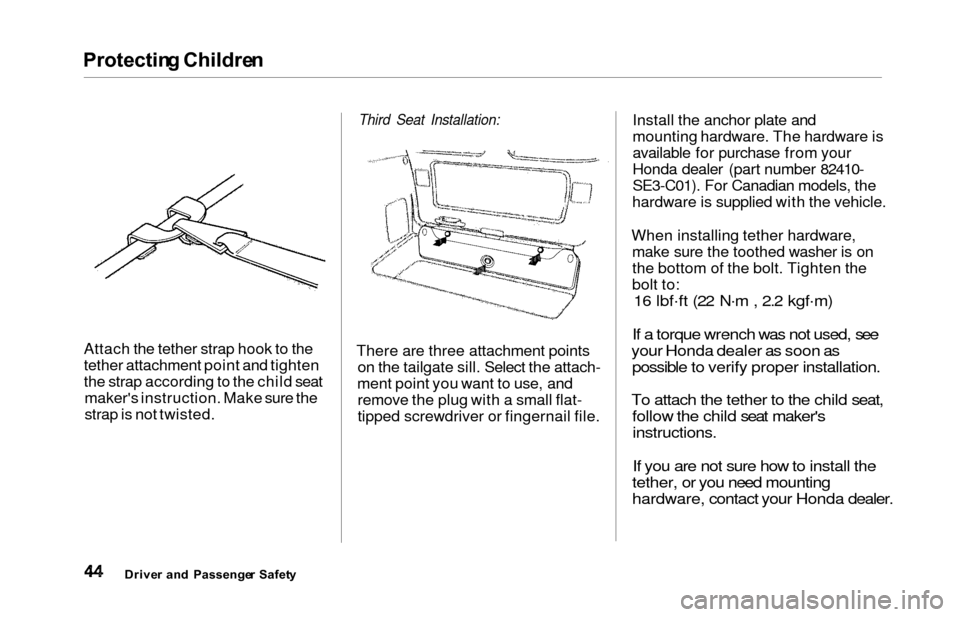
Attach the tether strap hook to the
tether attachment point and tighten
the strap according to the child seat
maker's instruction. Make sure the
strap is not twisted.
Third Seat Installation:
There are three attachment points on the tailgate sill. Select the attach-
ment point you want to use, and remove the plug with a small flat-
tipped screwdriver or fingernail file. Install the anchor plate and
mounting hardware. The hardware is
available for purchase from your
Honda dealer (part number 82410-
SE3-C01). For Canadian models, the
hardware is supplied with the vehicle.
When installing tether hardware, make sure the toothed washer is on
the bottom of the bolt. Tighten the
bolt to:
16 lbf .
ft (22 N .
m , 2.2 kgf .
m)
If a torque wrench was not used, see
your Honda dealer as soon as possible to verify proper installation.
To attach the tether to the child seat, follow the child seat maker's
instructions.
If you are not sure how to install the
tether, or you need mounting
hardware, contact your Honda dealer.
Drive r an d Passenge r Safet y
Page 56 of 352
Carbon Monoxid e Hazar d
Your vehicle's exhaust contains
carbon monoxide gas. You should
hav e no problem with carbon
monoxide entering the vehicle in
normal driving if you maintain your
vehicle properly.
Have the exhaust system inspected
for leaks whenever:
The vehicle is raised for an oil
change.
You notice a change in the soundof the exhaust.
The vehicle was in an accident that may have damaged the under-
side.
High levels of carbon monoxide can
collect rapidly in enclosed areas,such as a garage. Do not run the
engine with the garage door closed.
Even with the door open, run the engine only long enough to move the
vehicle out of the garage. With the tailgate open, air flow can
pull exhaust gas into your vehicle'sinterior and create a hazardous
condition. If you must drive with the
tailgate open, open all the windowsand set the heating and cooling
system/climate control system as
shown below.
If you must sit in your parked vehicle,
even in an unconfined area, with the
engine running, adjust the heating
and cooling system/climate controlsystem as follows:
1. Select the Fresh Air mode.
2. Select the mode.
3. Turn the fan on high speed.
4. Set the temperature control to a comfortable setting.
Drive r an d Passenge r Safet y
Carbon monoxide gas is toxic.
Breathing it can cause
unconsciousness and even kill
you.
Avoid any enclosed areas or activities that expose you to
carbon monoxide.
Page 58 of 352

Instrument
s an d Control s
This section gives information about
the controls and displays that
contribute to the daily operation of
your Honda. All the essential
controls are within easy reach.
Control Locations............................
56
Indicator Lights...............................
. 57
Gauges.............................................. 62
Controls Near the Steering
Wheel........................................ 65
Headlights.................................... 66
Automatic Lighting Off
Feature......................................
67
Daytime Runnin
g Lights.............
67
Instrument
Pane
l Brightness.....
67
Turn
Signals................................
.
68
Windshield
Wipers.....................
. 68
Windshield Washers................... 70
Rear Window Wiper and Washer...................................... 70
Hazard Warning........................ 70
Rear Windo
w Defogger.............. 71
Steering Wheel Adjustment....... 72
Steering Wheel Controls................ 73
Cruise Control.............................. 73
Remote Audio Controls .............. 76
Keys and Locks................................ 76
Keys............................................... 76
Immobilizer System..................... 77
Ignition Switch............................. 78
Power Door Locks....................... 79
Remote Transmitter.................... 81
Childproof Door Locks............... 85
Tailgate......................................... 85
Glove Box..................................... 87
Manual Sliding Doors...................... 88
Power Sliding Doors........................ 89
HomeLink Universal Transmitter.................................. 95
Seats.................................................. 99
Passenger Seating....................... 99
Seat Adjustments....................... 100
Driver's Seat Power
Adjustments........................... 102
Armrests..................................... 103
Head Restraints......................... 104
Third Seat Access...................... 105 Moving the Second Row Bucket Seat............................ 106
Removing the Bucket Seats in the Second Row................. 108
Folding the Third Seat.............. 109
Power Windows............................. 112
Mirrors............................................ 115
Parking Brake................................ 116
Digital Clock................................... 117 Center Table................................... 117
Beverage Holder............................ 118
Sunglasses Holder......................... 120
Sun Visor......................................... 121
Vanity Mirror................................. 121 Rear Compartment........................ 122
Center Pocket................................ 122Coin Holder.................................... 122
Storage Box.................................... 123
Coat Hook....................................... 123
Accessory Power Sockets............. 124 Interior Lights................................ 125
Instrument s an d Control s
Page 63 of 352

Indicator Light s
Power Slidin g Doo r
Indicato r
EX model only
This indicator comes on for a few
seconds when you turn the ignition
switch ON (II). If it comes on at anyother time, there is a problem in the
power sliding door system. With this
light on, move the main switch on
the dashboard to the OFF position, and have the system checked by
your Honda dealer as soon as possible. You can still open or closeeach sliding door manually. For
more information on the power
sliding doors, see page 90.
Tur n Signa l an d
Hazar d Warnin g
Indicator s
The left or right turn signal light blinks when you signal a lane change or turn. If the light does not blink or
blinks rapidly, it usually means one of the turn signal bulbs is burned out (see page 273). Replace the bulb as
soon as possible, since other drivers
cannot see that you are signalling.
When you turn on the Hazard
Warning switch, both turn signal lights blink. All turn signals on theoutside of the vehicle should flash. Doo
r an d Brak e Lam p Monito r
The appropriate light comes on in this display if the tailgate or any dooris not closed tightly. If a brake light
does not work, the BRAK E LAM P
indicator comes on when you push
the brake pedal with the ignition switch ON (II).
A burned out brake light is a hazard
when drivers behind you cannot tell
you are braking. Have your brake lights repaired right away.
All the lights in the monitor display come on when you turn the ignitionswitch ON (II). The lights go off
after the engine starts and the
tailgate and all doors are closed
tightly.
Instrument s an d Control s
SLIDINGDOOR
BRAKE LAMP
Page 79 of 352
Steering Whee l Controls , Key s an d Lock s
Remot e Audi o Control s
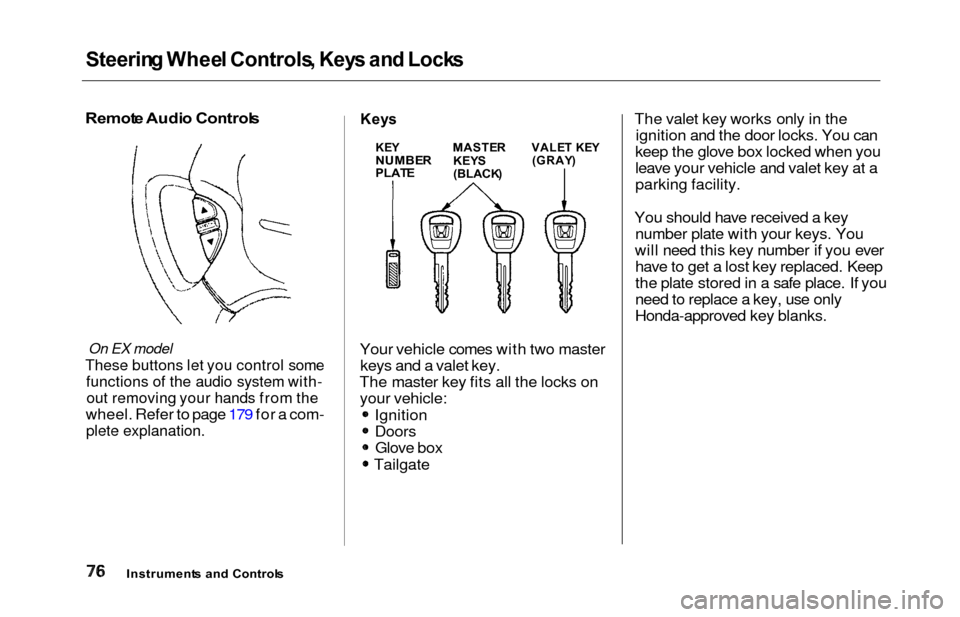
On EX model
These buttons let you control some
functions of the audio system with-
out removing your hands from the
wheel. Refer to page 179 for a com-
plete explanation.
Keys
Your vehicle comes with two master
keys and a valet key.
The master key fits all the locks on your vehicle:
Ignition
DoorsGlove box
Tailgate The valet key works only in the
ignition and the door locks. You can
keep the glove box locked when you
leave your vehicle and valet key at a
parking facility.
You should have received a key number plate with your keys. You
will need this key number if you ever have to get a lost key replaced. Keep
the plate stored in a safe place. If you
need to replace a key, use only
Honda-approved key blanks.
Instrument s an d Control s
KEYNUMBE RPLATE
MASTE R
KEY S
(BLACK )
VALET KE Y(GRAY )
Page 82 of 352
Keys an d Lock s
ACCESSOR Y (I ) — In this position,
you can operate the audio system and the accessory power socket.
O N (II ) — This is the normal key
position when driving. All features and accessories on the vehicle are
usable. Several of the lights on the instrument panel come on as a test
when you turn the ignition switch from ACCESSORY to ON. STAR
T (III ) — Use this position
only to start the engine. The switch
returns to ON (II) when you let go of
the key.
The engine will not start if the Immobilizer System does not
recognize the key's coding (see page
77).
You will hear a reminder beeper if
you leave the key in the ignition
switch in the LOCK (0) or
ACCESSORY (I) position and open the driver's door. Remove the key toturn off the beeper. Powe
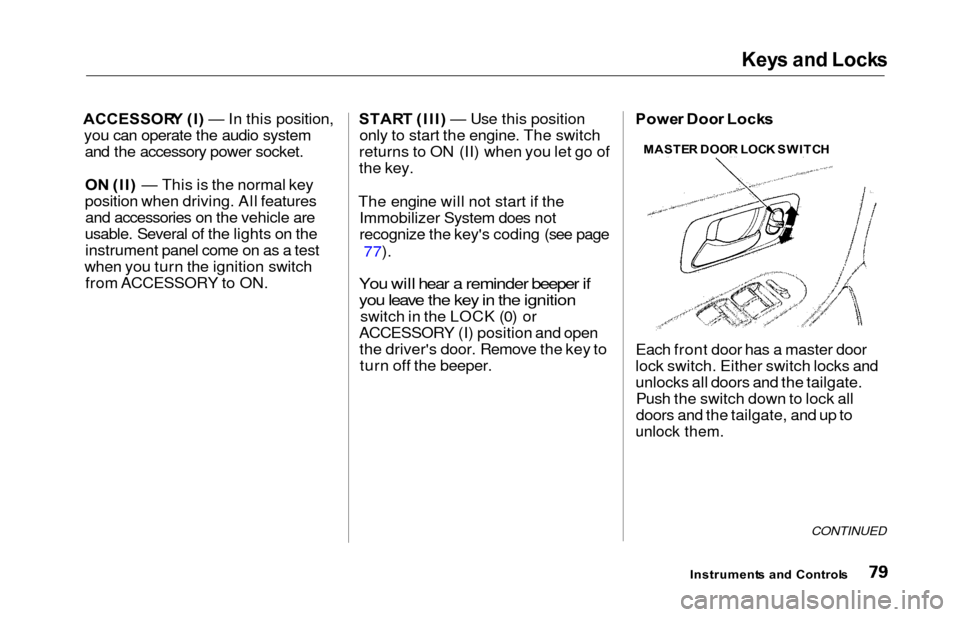
r Doo r Lock s
Each front door has a master door
lock switch. Either switch locks and
unlocks all doors and the tailgate. Push the switch down to lock all
doors and the tailgate, and up to
unlock them.
CONTINUED
Instrument s an d Control s
MASTE
R DOO R LOC K SWITC H