Page 4 of 361
Table of Contents
Keys and Door Locks
Remote Keyless Entry (RKE) System
Hatch/Trunk Lid Release
Automatic Transmission (If Equipped)
Manual Transmission (If Equipped)
Parking Brake
Windows
Tilt Wheel
Turn Signal/Multifunction Lever
Windshield WipersCruise Control
Interior and Exterior Lamps
Mirrors
Storage Compartments
Convenience Net
Accessory Power Outlet
Instrument Panel, Warning Lights and Gages
Head-Up Display
Driver Information Center
Memory Seats and Seat Controls
Safety BeltsAir Bag System
Child Restraints
Section
1
Section
2
Seats and Restraint Systems
Features and Controls
ii
Page 59 of 361

2-
2-1
Section 2 Features and Controls
Here you can learn about the many standard and optional features on your vehicle, and information on starting,
shifting and braking. Also explained are the instrument panel and the warning systems that tell you if everything is
working properly
-- and what to do if you have a problem.
2
-4 Door Locks
2
-5 Memory (Option)
2
-7 Remote Keyless Entry System
2
-12 Hatch/Trunk Lid Release
2
-15 Theft-Deterrent System
2
-17 PASS-Key�
2-18 New Vehicle ªBreak-Inº
2
-18 Ignition Switch
2
-20 Starting Your Engine
2
-22 Engine Coolant Heater (If Equipped)
2
-24 Automatic Transmission Operation
2
-27 Manual Transmission Operation
2
-31 Parking Brake
2
-32 Shifting Into PARK (P)
(Automatic Transmission Only)
2
-34 Shifting Out of PARK (P)
(Automatic Transmission)
2
-34 Parking Your Vehicle (Manual Transmission)2
-35 Parking Over Things That Burn
2
-35 Engine Exhaust
2
-36 Running Your Engine While You're Parked
(Automatic Transmission)
2
-36 Limited-Slip Rear Axle
2
-37 Selective Real Time Damping (SRTD) (Option)
2
-38 Windows
2
-40 Turn Signal/Multifunction Lever
2
-47 Exterior Lamps
2
-49 Interior Lamps
2
-51 Mirrors
2
-52 Storage Compartments
2
-57 Roof Panel (Option)
2
-63 Convertible Top (Option)
2
-70 The Instrument Panel -- Your
Information System
2
-73 Warning Lights, Gages and Messages
2
-88 Driver Information Center (DIC)
Page 70 of 361
2-12
Loss of synchronization will occur after transmitter
battery replacement or disconnection of the vehicle's
battery, fore more than three days.
If attempts to resynchronize your transmitter to the
vehicle are not successful, you may need to match the
transmitter to the vehicle. See ªMatching Transmitter(s)
to Your Vehicleº in the Index.
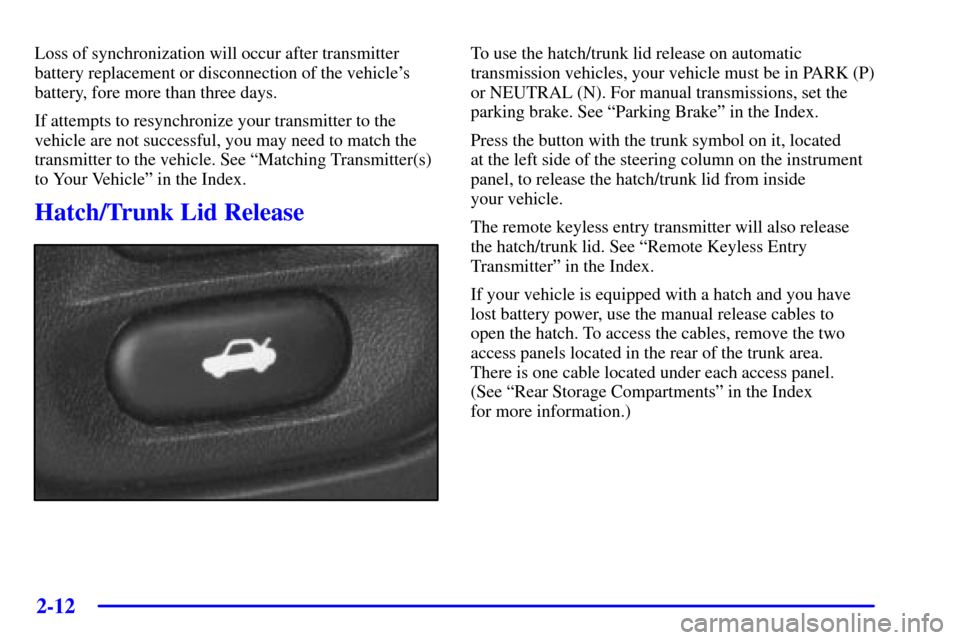
Hatch/Trunk Lid Release
To use the hatch/trunk lid release on automatic
transmission vehicles, your vehicle must be in PARK (P)
or NEUTRAL (N). For manual transmissions, set the
parking brake. See ªParking Brakeº in the Index.
Press the button with the trunk symbol on it, located
at the left side of the steering column on the instrument
panel, to release the hatch/trunk lid from inside
your vehicle.
The remote keyless entry transmitter will also release
the hatch/trunk lid. See ªRemote Keyless Entry
Transmitterº in the Index.
If your vehicle is equipped with a hatch and you have
lost battery power, use the manual release cables to
open the hatch. To access the cables, remove the two
access panels located in the rear of the trunk area.
There is one cable located under each access panel.
(See ªRear Storage Compartmentsº in the Index
for more information.)
Page 78 of 361
2-20
Retained Accessory Power (RAP)
With RAP, your power windows and the audio system
will continue to work for up to 15 minutes after the
ignition key is turned to OFF and neither door is opened.
If a door is opened, the power windows and audio
system will shut off.
Starting Your Engine
This vehicle has a computer system that monitors engine
speed, throttle and pedal position, and records the
current status.
Automatic Transmission
Move your shift lever to PARK (P) or NEUTRAL (N).
Your engine won't start in any other position
-- that's a
safety feature. To restart when you're already moving,
use NEUTRAL (N) only.
NOTICE:
Don't try to shift to PARK (P) if your vehicle
is moving. If you do, you could damage the
transmission. Shift to PARK (P) only when your
vehicle is stopped.
Manual Transmission
The gear selector should be in NEUTRAL and the
parking brake engaged. Hold the clutch pedal to the
floor and start the engine. Your vehicle won't start if
the clutch pedal is not all the way down
-- that's a
safety feature.
1. Without pushing the accelerator pedal, turn the
ignition key to START. When the engine starts, let
go of the key. The idle speed will go down as your
engine gets warm.
NOTICE:
Holding your key in START for longer than
15 seconds at a time will cause your battery to
be drained much sooner. And the excessive heat
can damage your starter motor. Wait about
15 seconds between each try to help avoid
draining your battery or damaging your starter.
Page 84 of 361
2-26
NOTICE:
Damage to your transmission caused by shifting
out of PARK (P) or NEUTRAL (N) with the
engine racing isn't covered by your warranty.
AUTOMATIC OVERDRIVE (�): This position is for
normal driving.
THIRD (3): This position is also used for normal
driving, however, it offers more power and lower fuel
economy than AUTOMATIC OVERDRIVE (�).
Here are some times you might choose THIRD (3)
instead of AUTOMATIC OVERDRIVE (�):
�When driving on hilly, winding roads.
�When going down a steep hill.SECOND (2): This position gives you more power but
lower fuel economy. You can use SECOND (2) on hills.
It can help control your speed as you go down steep
mountain roads, but then you would also want to use
your brakes off and on.
If you manually select SECOND (2) when you start the
vehicle, the transmission will drive (and stay) in second
gear. You may use this feature for reducing torque to the
rear wheels when you are trying to start your vehicle
from a stop on slippery road surfaces, or for preventing
the transmission from downshifting into FIRST (1) in
situations where a downshift would be undesirable.
FIRST (1): This position gives you even more power
(but lower fuel economy) than SECOND (2). You can
use it on very steep hills, or in deep snow or mud.
If the selector lever is put in FIRST (1), the transmission
won't shift into first gear until the vehicle is going
slowly enough.
Page 85 of 361
2-27
NOTICE:
If your rear wheels can't rotate, don't try to
drive. This might happen if you were stuck in
very deep sand or mud or were up against a solid
object. You could damage your transmission.
Also, if you stop when going uphill, don't hold
your vehicle there with only the accelerator
pedal. This could overheat and damage the
transmission. Use your brakes or shift into
PARK (P) to hold your vehicle in position
on a hill.
Maximum engine speed is limited to protect driveline
components from improper operation.
Manual Transmission Operation
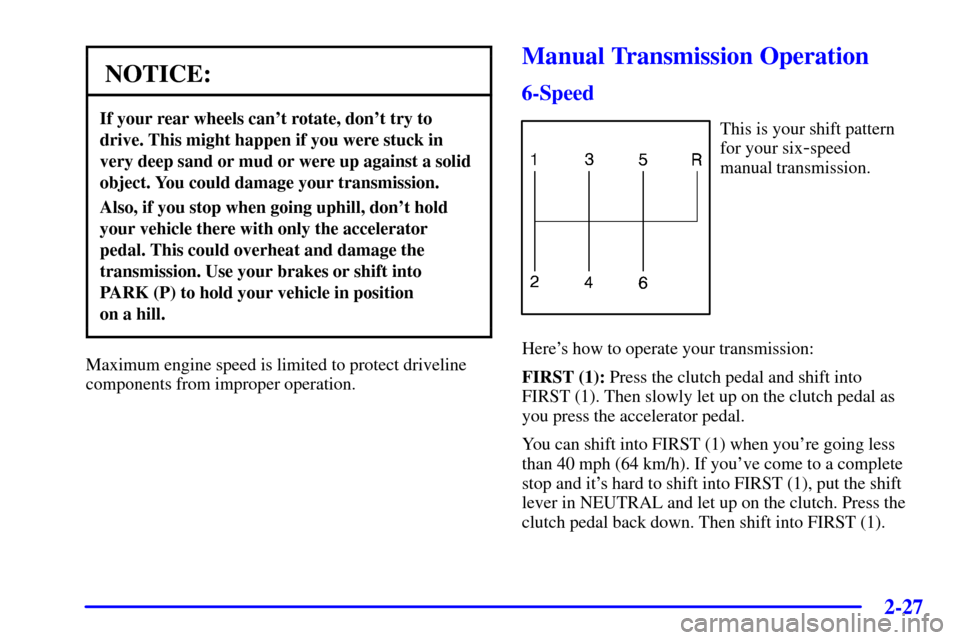
6-Speed
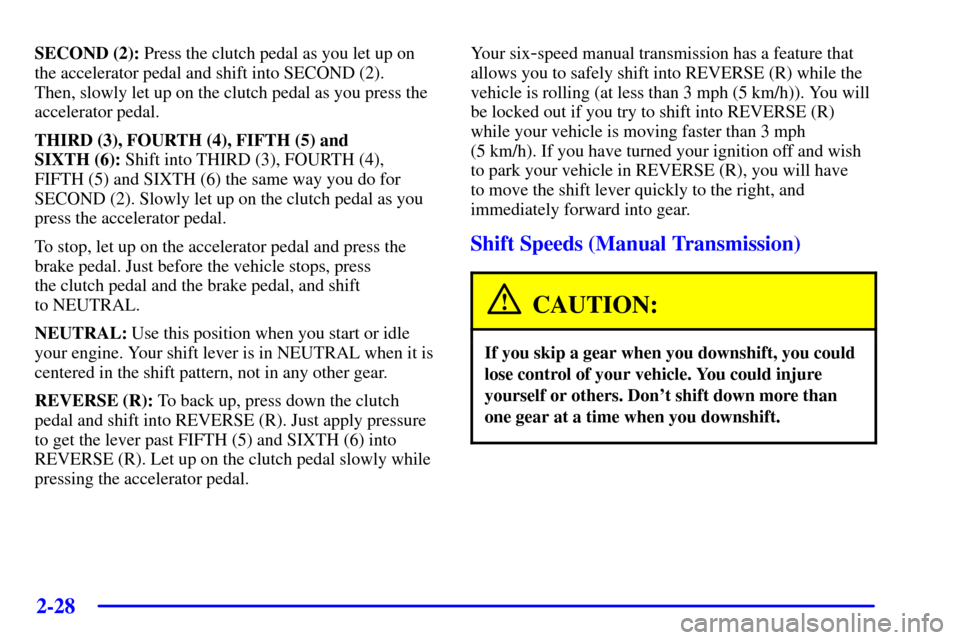
This is your shift pattern
for your six
-speed
manual transmission.
Here's how to operate your transmission:
FIRST (1): Press the clutch pedal and shift into
FIRST (1). Then slowly let up on the clutch pedal as
you press the accelerator pedal.
You can shift into FIRST (1) when you're going less
than 40 mph (64 km/h). If you've come to a complete
stop and it's hard to shift into FIRST (1), put the shift
lever in NEUTRAL and let up on the clutch. Press the
clutch pedal back down. Then shift into FIRST (1).
Page 86 of 361
2-28
SECOND (2): Press the clutch pedal as you let up on
the accelerator pedal and shift into SECOND (2).
Then, slowly let up on the clutch pedal as you press the
accelerator pedal.
THIRD (3), FOURTH (4), FIFTH (5) and
SIXTH (6): Shift into THIRD (3), FOURTH (4),
FIFTH (5) and SIXTH (6) the same way you do for
SECOND (2). Slowly let up on the clutch pedal as you
press the accelerator pedal.
To stop, let up on the accelerator pedal and press the
brake pedal. Just before the vehicle stops, press
the clutch pedal and the brake pedal, and shift
to NEUTRAL.
NEUTRAL: Use this position when you start or idle
your engine. Your shift lever is in NEUTRAL when it is
centered in the shift pattern, not in any other gear.
REVERSE (R): To back up, press down the clutch
pedal and shift into REVERSE (R). Just apply pressure
to get the lever past FIFTH (5) and SIXTH (6) into
REVERSE (R). Let up on the clutch pedal slowly while
pressing the accelerator pedal.Your six-speed manual transmission has a feature that
allows you to safely shift into REVERSE (R) while the
vehicle is rolling (at less than 3 mph (5 km/h)). You will
be locked out if you try to shift into REVERSE (R)
while your vehicle is moving faster than 3 mph
(5 km/h). If you have turned your ignition off and wish
to park your vehicle in REVERSE (R), you will have
to move the shift lever quickly to the right, and
immediately forward into gear.
Shift Speeds (Manual Transmission)
CAUTION:
If you skip a gear when you downshift, you could
lose control of your vehicle. You could injure
yourself or others. Don't shift down more than
one gear at a time when you downshift.
Page 87 of 361
2-29
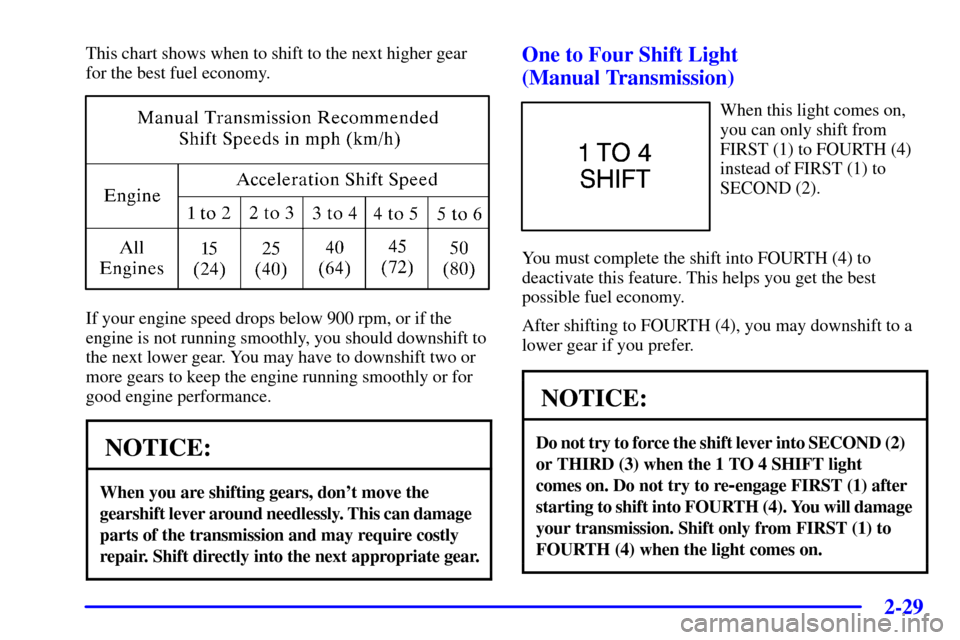
This chart shows when to shift to the next higher gear
for the best fuel economy.
If your engine speed drops below 900 rpm, or if the
engine is not running smoothly, you should downshift to
the next lower gear. You may have to downshift two or
more gears to keep the engine running smoothly or for
good engine performance.
NOTICE:
When you are shifting gears, don't move the
gearshift lever around needlessly. This can damage
parts of the transmission and may require costly
repair. Shift directly into the next appropriate gear.
One to Four Shift Light
(Manual Transmission)
When this light comes on,
you can only shift from
FIRST (1) to FOURTH (4)
instead of FIRST (1) to
SECOND (2).
You must complete the shift into FOURTH (4) to
deactivate this feature. This helps you get the best
possible fuel economy.
After shifting to FOURTH (4), you may downshift to a
lower gear if you prefer.
NOTICE:
Do not try to force the shift lever into SECOND (2)
or THIRD (3) when the 1 TO 4 SHIFT light
comes on. Do not try to re
-engage FIRST (1) after
starting to shift into FOURTH (4). You will damage
your transmission. Shift only from FIRST (1) to
FOURTH (4) when the light comes on.