Page 5 of 321
Section
3
Comfort Controls and Audio Systems
Section
4
Your Driving and the Road
Section
5
Table of Contents (cont'd)
Your Driving, the Road and Your Vehicle
Defensive Driving
Drunken Driving
Control of a Vehicle
BrakingSteering
Driving Tips for Various Road Conditions
Recreational Vehicle Towing
Loading Your Vehicle
Towing a Trailer Heating and Air Conditioning
Setting the Radio Clock
Radio/Cassette Player/CD PlayerRadio Theft-Deterrent Feature
Steering Wheel Controls
Hazard Warning Flashers
Jump Starting
Towing Your VehicleEngine Overheating
Changing a Flat Tire
If You're Stuck
Problems on the Road
Page 15 of 321

1-3
�To adjust the seat height, lift up or push down on the
center of the control.
�To move the seat forward or rearward, slide the
control in the desired direction.
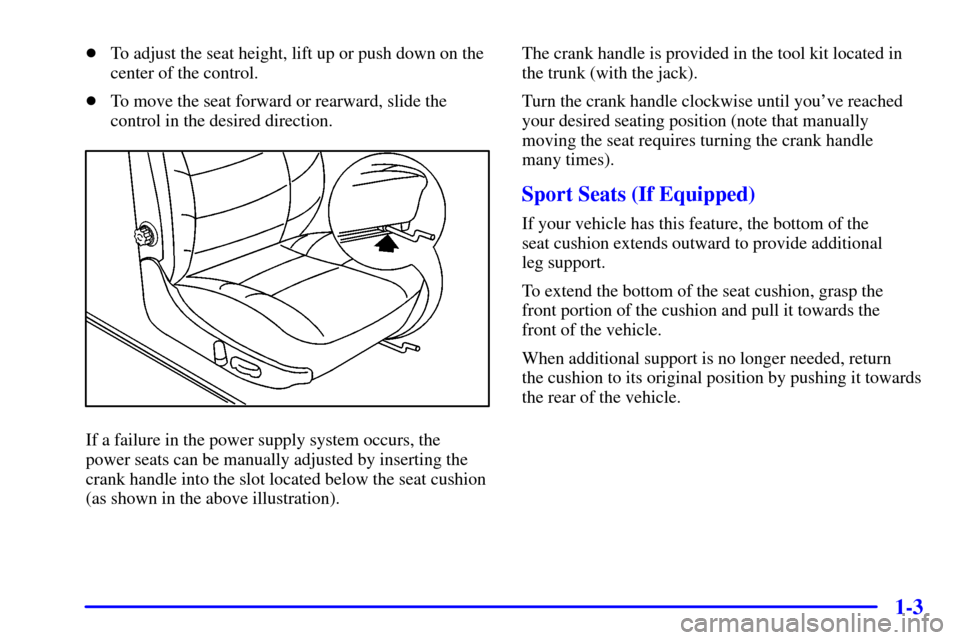
If a failure in the power supply system occurs, the
power seats can be manually adjusted by inserting the
crank handle into the slot located below the seat cushion
(as shown in the above illustration).The crank handle is provided in the tool kit located in
the trunk (with the jack).
Turn the crank handle clockwise until you've reached
your desired seating position (note that manually
moving the seat requires turning the crank handle
many times).
Sport Seats (If Equipped)
If your vehicle has this feature, the bottom of the
seat cushion extends outward to provide additional
leg support.
To extend the bottom of the seat cushion, grasp the
front portion of the cushion and pull it towards the
front of the vehicle.
When additional support is no longer needed, return
the cushion to its original position by pushing it towards
the rear of the vehicle.
Page 17 of 321
1-5 Heated Front Seats (Option)
The controls for the heated
front seats are located next
to the climate controls on
either side of the center
console. Turning the driver
or passenger side control
counterclockwise from the
off position activates the
heated seat.
The control can be adjusted to one of five heat settings,
numbered 1 through 5, with 1 being the lowest setting
and 5 being the highest setting.An indicator light in the control reminds you that the
heating system is in use. The heated seats can only be
used when the ignition is turned on.
To turn the heated seat off, turn the control clockwise to
the off position.
Reclining Front Seatbacks
The power control is
located on the outboard
side of each front seatback.
Press the control forward
or rearward to adjust
the seatback.
Page 22 of 321
1-10
Return the safety belts to
their original positions so
they will be available for
rear seat passengers to use.
To do so, slide the buckle
into the latch as shown.
The panel behind the rear seat armrest also folds down.
Turn the knob counterclockwise and pull the panel
forward to gain access to the trunk. When finished using
the panel, return it to its original position and turn the
knob clockwise to secure.
Page 69 of 321

2-4
Door Locks
CAUTION:
Unlocked doors can be dangerous.
Passengers -- especially children -- can easily
open the doors and fall out. When a door is
locked, the inside handle won't open it.
Outsiders can easily enter through an unlocked
door when you slow down or stop your vehicle.
This may not be so obvious: You increase the
chance of being thrown out of the vehicle in a
crash if the doors aren't locked. Wear safety belts
properly, lock your doors, and you will be far
better off whenever you drive your vehicle.
There are several ways to lock and unlock your vehicle.
From the outside, use your key or the remote keyless
entry transmitter. This will avoid setting off the optional
theft
-deterrent alarm.
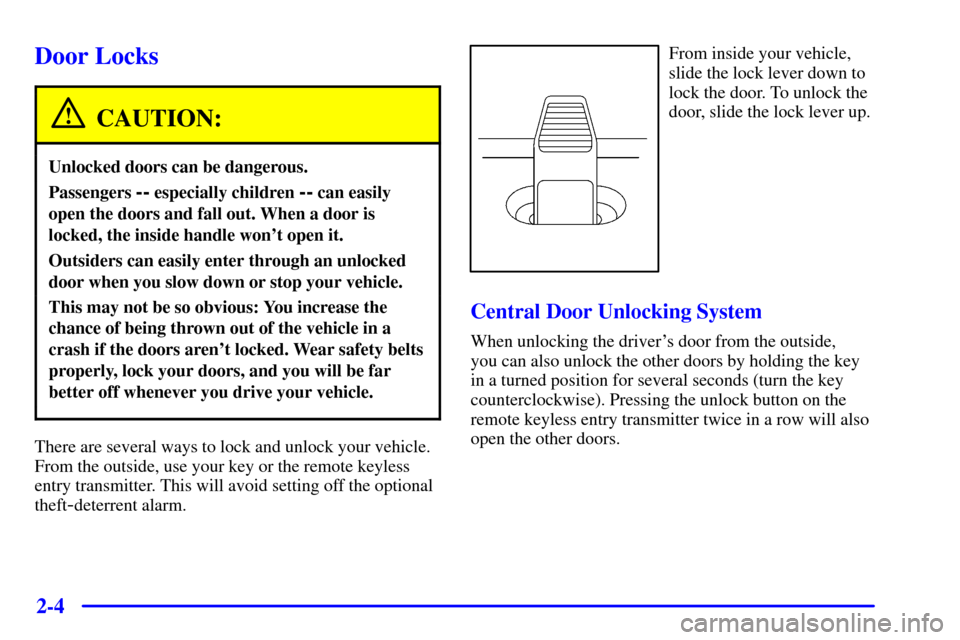
From inside your vehicle,
slide the lock lever down to
lock the door. To unlock the
door, slide the lock lever up.
Central Door Unlocking System
When unlocking the driver's door from the outside,
you can also unlock the other doors by holding the key
in a turned position for several seconds (turn the key
counterclockwise). Pressing the unlock button on the
remote keyless entry transmitter twice in a row will also
open the other doors.
Page 99 of 321
2-34
Rear Window Lockout
Moving this switch to the
left will disable the rear
passenger window controls.
A red indicator light in
the control will illuminate
as a reminder the rear
passenger window
controls are disabled.
Move the switch to the right to enable the rear passenger
window controls again. A green indicator light in the
control will illuminate to indicate the rear passenger
window controls are active.
Horn
The horn can be sounded by pressing either horn symbol
on the steering wheel. The symbols are located at about
the 9 and 3 o'clock positions.
Tilt Wheel
Tilt steering allows you to adjust the steering wheel
before you begin driving. Raising the steering wheel to
the highest level gives your legs more room when you
enter and exit your vehicle.
Hold the steering wheel and pull the lever toward
you to tilt the wheel. Adjust the steering wheel to a
comfortable position and then release the lever to lock
the wheel in place.
Page 107 of 321

2-42
Headlamps.
Fog lamps.
Twilight Sentinel.
Turns the Twilight Sentinel system off.
Instrument panel brightness control.
Turn the lamp control dial clockwise (to the first
position) to turn on the parking lamps, front and rear
sidemarker lamps, taillamps, license plate lamps, ashtray
lamps, instrument panel lights and backlighting to the
center console controls. Turn the lamp control dial all
the way clockwise (to the second position) to turn on
the low
-beam headlamps.
Turn the lamp control dial counterclockwise to turn
the lamps off.
Headlamps
Turn the lamp control dial all the way to the right to turn
on the low
-beam headlamps.
To turn on the high
-beam headlamps, the low-beam
headlamps must already be on. Push the turn signal lever on
the left side of the steering wheel away from you to engage
the high
-beam headlamps. Pull the lever toward you to
return to the low
-beam headlamps. For more information,
see ªHeadlamp High/Low Beamº in the Index.
Turn the lamp control dial all the way to the left to turn
the headlamps off.
Please note that if the headlamps are activated while
driving and then you turn your vehicle's ignition off
while the lamp dial is still turned on, the headlamps will
turn off. If, however, you open the driver's door while
the lamp dial is still turned on, a warning chime will
sound reminding you to turn the lamp control dial to
OFF. This will stop the warning chime from sounding.
(If you want the headlamps to remain on, you must
manually turn the lamp control dial off and then back
on to the headlamp position. The headlamps will stay
on until manually turned off again.)
Page 115 of 321

2-50 Convex Outside Mirror
Your passenger's side mirror is convex. A convex
mirror's surface is curved so you can see more from the
driver's seat.
CAUTION:
A convex mirror can make things (like other
vehicles) look farther away than they really are.
If you cut too sharply into the right lane, you
could hit a vehicle on your right. Check your
inside mirror or glance over your shoulder before
changing lanes.
Heated Rearview Mirrors
The manual folding outside rearview mirrors are heated.
To heat the mirrors, press the rear window defogger
button. See ºRear Window Defoggerº in the Index.
Manual Folding Outside Rearview Mirrors
The driver's and passenger's outside mirrors move
forward and rearward (ªbreak
-awayº) to help prevent
injury and/or damage to your vehicle.
Storage Compartments
Glove Box
The glove box is located in front of the passenger's seat.
To lock the glove box door, insert the key in the lock
cylinder and turn it counterclockwise. Turn the key
clockwise to unlock the door.
The glove box is air conditioned. This helps to keep
snack items cool while traveling. In order for cool air to
enter the glove box, the air conditioning must be turned
on. Use the slide control inside and at the rear of the
glove box to turn the air flow on and off. Moving the
slide control over the small hole turns the cool air off
and moving the control away from the hole turns the
cool air on.