2000 AUDI ALLROAD checking oil
[x] Cancel search: checking oilPage 141 of 306

CONT
ROLS AND
EQUIPMENT--------------------
Test button
The test button can be used to perform the
following functions:
Checking the display
With the car stationary and with the ignition
on, you can check the symbols one after the
other by briefly push ing on the knob. The en
gine can either be running or not. Perform
ing this brief check assures you that the dis
play is functioning properly. When driving,
you canno t check the function.
14 0 Calling
up driver information
When a first priority symbol is flashed up,
the accompanying driver information can be
called up in the display for assis tance.
For example: "SWITCH OFF ENGINE ;
CHECK OIL LEVEL".
Press the test button to call up this display.
The information disappears about 5 sec
onds after the button is released again.
Operation
After switching on the ignition in selector le
ver position P or N, the driver instruction
"WHEN STATIONARY APPLY FOOT
BRAKE WHILE SELECTING GEAR'' will ap
pear.
When a gear ("R", "0", etc.) is selected,
the driver instruction disappears and a func
ti onal check is carr ied out automatically as
a result of operati ng the brake pedal.
If the functions monitored by the auto
check system are working properly, the let
ters "OK" will light up for a few seconds.
Page 236 of 306

Engine
oil consumption
The rate of the oil consumption depends on
the quality and viscosity of oil, the speed at
which the engine is operated, the climate,
and road conditions as well as amount of
dilution and oxidation of the lubricant.
Because of these variables, no standard
rate of oil consumption can be established,
but drivers should expect higher oil con
sumption at high speeds and when the en
gine is new.
Therefore, we recommend that you check
the oil level at regular intervals (for example,
each time you are refuelling, or before going
on a long trip).
If the oil level should go below the minimal
level, the check engine oil level warn
ing light* in the instrument cluster will
come on. See page 144. You should check
the oil level using the oil dip stick as soon as
possible, and then top off the oil as neces
sary. Notes
• The engine in your vehicle de
pends on oil to lubricate and cool all
of its moving parts. Therefore the
engine oil should be checked regu
larly and kept at the required level.
• Lack of sufficient engine oil may
lead to severe engine damage.
• The oil pressure warning light is
not an oil level indicator.
A Always
heed all WAR NINGS
� on page 232.
Checking the engine oil level
The best time to check the engine oil level
is when the oil is warm.
To get a true reading, the vehicle must be on
level ground.
A Always heed all WAR NINGS
� on page 232.
• After turning off the engine, wait a few
minu tes for the oil to return to the oil pan. VE
HICLE CARE
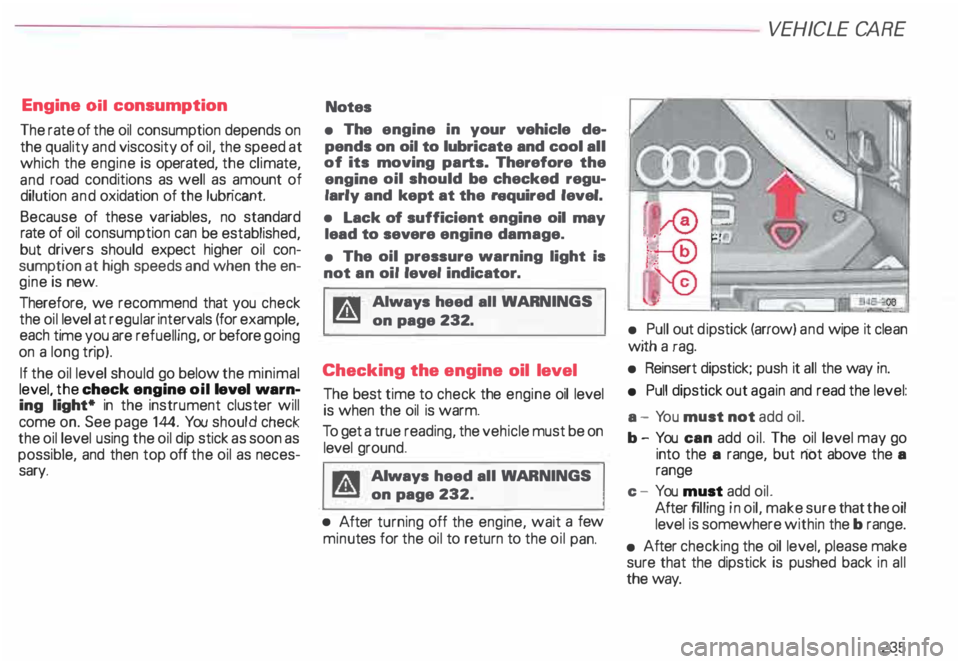
• Pull out dipstick (arrow) and wipe it clean
with a rag.
• Reinsert dipstick; push it all the way in.
• Pull dipstick out again and read the level:
a - Yo u must not add oil.
b- You can add oil. The oil level may go
into the a range, but riot above the a
range
c - You must add oil.
After filling in oil, make sure that the oil
level is somewhere within the b range.
• After checking the oil level, please make
sure that the dipstick is pushed back in all
the way.
235
Page 240 of 306

Checking the
engine coolant
level
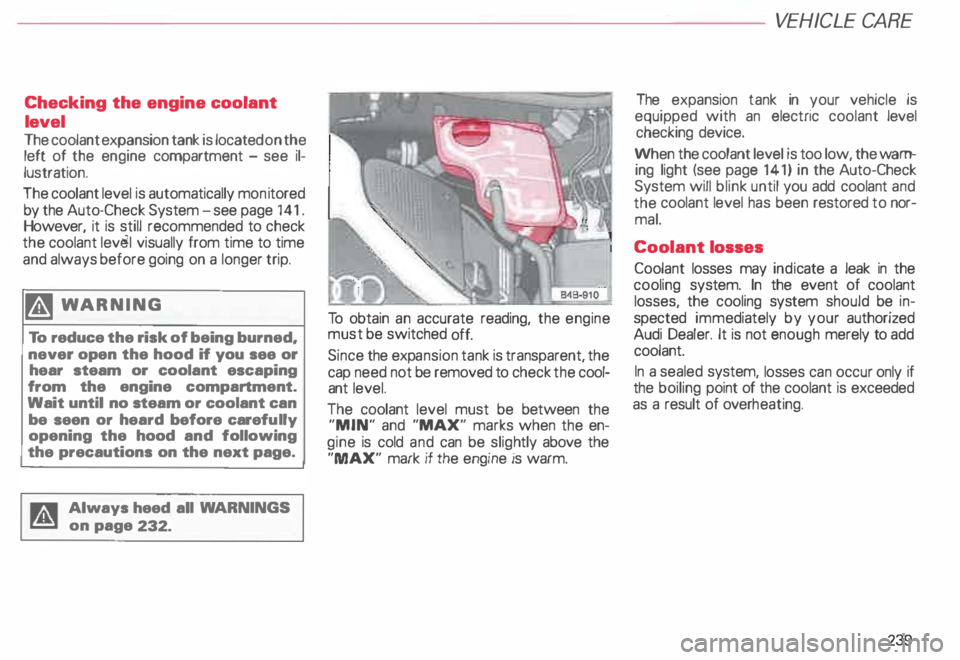
The coolant expansion tank is located on the
left of the engine compartment -see il
lustration.
The coolant level is automatically monitored
by the Auto-Check System -see page 141.
However, it is still recommended to check
the coolant lev�l visually from time to time
and always before going on a longer trip.
�W ARNING
To reduce the risk of being burned.
never open the hood if you see or
hear steam or coolant escaping
from the engine compartment.
Wait until no steam or coolant can
be seen or heard before carefully
opening the hood and following
the precautions on the next page.
Always heed all WA RNINGS
on page 232. To
obtain an accurate reading, the engine
must be switched off.
Since the expa nsion tank is transparent, the
cap need not be removed to check the cool
ant level.
The coolant level must be between the
"MIN" and "MAX" marks when the en
gine is cold and can be slig htly above the
"MAX" mark if the engine is warm. VE
HICLE CARE
The expansion tank in your vehicle is
equipped with an electric coolant level
checking device.
When the coolant level is too low, the warn
ing light (see page 141) in the Auto-Check
System will blink until you add coolant and
the coolant level has been restored to nor
mal.
Coolant losses
Coolant losses may indicate a leak in the
cooling system. In the event of coolant
losses, the cooling system should be in
spected immediately by your authorized
Audi Dealer. It is not enough merely to add
coolant.
In a sealed system, losses can occur only if
the boiling point of the coolant is exceeded
as a result of overheating.
239
Page 243 of 306

VE
HICLE CA
RE----------------------------------------------------
Brake fluid
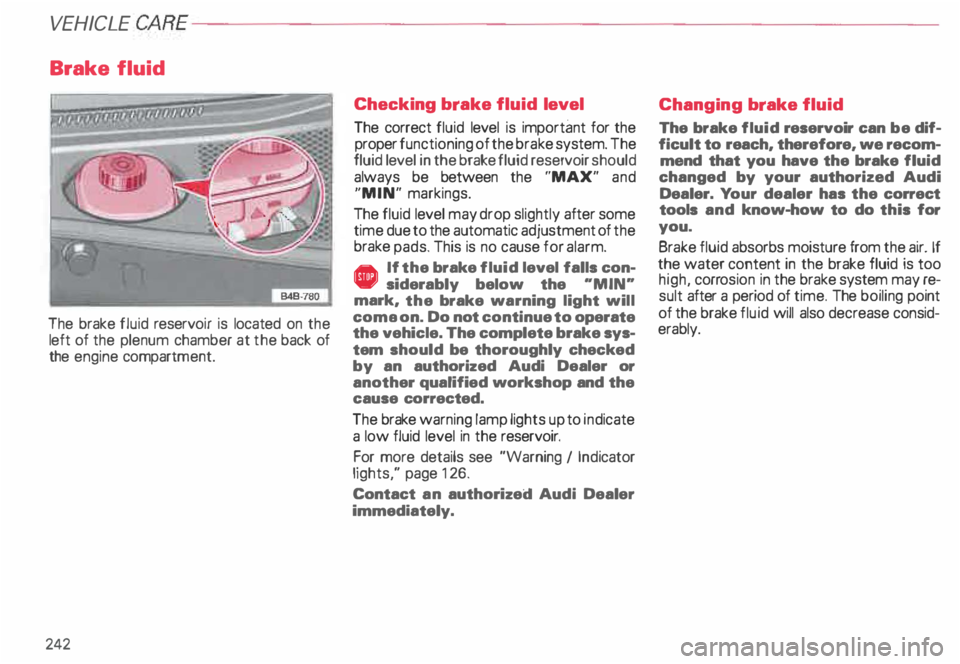
The brake fluid reservo ir is located on the
left of the plenum chamber at the back of
the engine compartm ent.
242 Checking
brake fluid level
The correct fluid level is important for the
proper functioning of the brake system. The
fluid level in the brake fluid reservoir should
always be between the "MAX" and
"MIN" markings.
The fluid level may drop slightly after some
time due to the automatic adjustment of the
brake pads. This is no cause for alarm.
• If the brake fluid level falls con
siderably below the "MIN"
mark, the brake warning light will
coma on. Do not continue to operate
the vehicle. The complete brake sys
tem should be thoroughly checked
by an authorized Audi Dealer or
another qualified workshop and the
cause corrected.
The brake warning lamp lights up to indicate
a low fluid level in the reservoir.
For more details see "Warning I Ind icator
lights," page 126.
Contact an authorized Audi Dealer
immediately. Changing
brake fluid
The brake fluid reservoir can be dif
ficult to reach, therefore, we recom
mend that you have the brake fluid
changed by your authorized Audi
Dealer. Your dealer has the correct
tools and know-how to do this for
you.
Brake fluid absorbs moisture from the air. If
the water content in the brake fluid is too
high, corrosion in the brake system may re
sult after a period of time. The boiling point
of the brake fluid will also decrease consid
erably.
Page 298 of 306

c
Capacities ...• ••.•. .......• o o 287
Care of
-e xterior . 212
-i nterior . . 217
Cargo net . .
89
earphone . . •
• . . • • 190
Catalytic converter •
. . . • • o 197
CB radios . . . . . . . . . . . . . . . . • . . . 189
CD changer . . . . . . . . . . . . . . . . . . . 184
Central locking system .. ... . 0 • • 59
- Rear lid . . . . . . . . . . . . • . . . • . • . 63
Changing a wheel . . . . . . . .. o • • 267
Changing engine oil . . . . . . . . • 236
Checking engine oil level . . . . . . . 235
Child restra int anc horages . . . . . . . 53
Child safety ... ........... .. ... 44
Child safety lock for rear doors . . . 62
Child seat bench . . . . 92
Child seats
- Booster seats . . . . . . • • • • • . . 48
-C onvertible seats .. • .. o •• 47
- Infant seats . . . . .
. .. ... .. . 45
-O lder children . . . • . . . . . . . . 49 Chime
...
Ciga rette lighter
Cleaning 57,
113, 14 9
18 1
- Engine compartment ..... . 219
217
-
Glass ............. ... .. . .
- Inside of vehicle . . . . 217
- Leather upholstery . . . . . . . 217
-O utside of vehicle .... . • .. 212
- Safety belts . . . . . . . . . . . . . . . 218
-W indows· . . . . . . . . . . . • . . . . 215
Cleaning and protection . . . . . . . . 212
Clima te controls . . . . . . . . .... o • 16 2
Clock .. .. . .. .. . .. .. .. .. .. .
117
Coat hooks . . . . . . . . . . . . . . • . •
179
Com partment for Service
Literature Wallet ......... .... 18 3 .,)
Convenient entry function . . . . . . 1 01
Convertible locking retractor .... . 51
Convertible seats......... . ... 47
Coolant temperature gauge . . . . . 118
Cooling system . . . . . . . .
238
- Expansion tank 0 • • • • • • • • • 239
Cruise control . . . . 15
8
Cup holder . . . . . . . . . • . • . . • . . 182
Curb weight . . . . . . . . _. . . . ... 289 ALP
HABETICAL INDEX
D
Dashboard ...... •••• .••.• .... 8
Data . . . . . . . o • • • • • • • • • • • • • 286
Date display . . . . . .
• .. 0 • 117
Daytime running lights .
148
Deflated full size spare tire ..... 266
Defrosting windows . . . . . . . • . . . 151
Difficult operating conditions . . . . 262
Digital clock . . . . . . . . . . . . . . . . . 117
Dimensions . . . . . . . . . . . . . . . . . . 288
Doors ....................... 0. 59
Driver information system . . . . . . 130
-C alling up the menu ....... . 131
- Display types . . . . . . . . . • . • 133
- Entering settings . . . . • . • . . . 134
- Menu display . . . . . . . • • • . . . 131
- Navigation display ..... _ . . . . 130
Driving economically . . . . 19
5
Dri ving in foreign countries . . . . . 292
Driving on slopes . . . . . . . . . . . . . 200
Driving under difficult conditions
262
Driving with Four-Wheel Drive . . 207
Dupl icate key ....... .... ....... 57
297
Page 299 of 306

AL
PHABET ICAL INDEX----------------
Dust filter . . . . . . . . . . . . . . . . . . . 167
Dynamic headlight dimmer
control .
144
E
Electric adjustable seats . . . . . . . . . 78
Electrical socket....... . 181
Electrical socket in the luggage
compartment . . . . . . . . . . . . . . 181
Electrically heated seats. . . . . . . 150
Electromagnetic interference
compliance . . . . . . . . . . . . . . . . 291
Electronic differential lock . . . . . . 204
Electronic immobilizer . . . . . 57, 124
Electronic speed limiter . . . . . . . . 129
Electronic Stability Program
(ESP) . . . . .
. . 124, 152, 205
Emergency
· - Flasher
-K ey ... 12
5, 152
. 56
- Starting . _. • • • • . . . • • ... .
-T owing . . . . _ .... .. _ .. ... .
- Unlocking fuel tank flap .... .
298 278
281
224 -W
arning triangle ....... .... 263
Emission control system . . . . . . . 197
- Malfunction Indicator Lamp 125
Engine
- Compartment .
. . . • • • • . 232
- Cooling . . . .
. . . . • . • . • . . 238
-D ata .......•• •.... ..•. ... 286
-H ood .... .. ... ... .. •... ... 231
-O il .... ..•• .... . , • 234
- Oil level . . . . . . . . . . . • . . . . . 144
- Oil pressure . . . . . . . 143
-O il sensor defective . . . . . . . 14 4
.E ngine oil
- Adding . . . . . . . . . . . . . . . . . . • . 236
- Additives . . • • • • • . . . . • • 234
- Changing . • • . . . . 236
- Checking ... _ . _ ... ... _ .. _ . . 235
- Grades . .
234
- Te mperature gauge 117
Entering selections into the
menu . . . . . . . . . . . . . . . . . . . . .
132
c£' Envir onment
- Brake fluid . . . . . . . . . . . • . . . 243
-C leaning and protection .... . 212 -C
oolant ...... .... ... ... ... 240
- Driving to minimi ze pollution
and noise . . . .
195
- Engine oil . . . . . . . . . . . . . .
237
-F uel. ............ . •. . . . 223
- Mai ntenance . . . . . . . . . . . . 228
-S tarting procedures .... :. . . 114
- Tire pressure . . . . 253
- Unleaded fuel . . . . . • • . . . . . . 225
-W ashing .. . ... ... ...... . _ 213
Exhaust system .. , .. , • . • • . . 19
7
Expansion tank
. . • . . .. • . . .
239
F
Fan speed ...... ...... ....... . 164
Fastening eyes ...... .....•.. •. _ 89
Fas tening the safety belt 20
Filler cap . . . . . . . . . . . 223
First aid kit . . . . . . . . . . • .
263
Floor jack . . . . . . . . . . . . • 283
Floor mat fasteners . . . • 1 02
Fluid
- Brake
242