2000 AUDI ALLROAD seats
[x] Cancel search: seatsPage 103 of 306
CONTROLS AND EQUIPMENT---------------------
Pedals
The movement of the pedals must
never be obstructed by a floor mat
or any other object.
• In case one of the two brake circuits fails,
incr eased brake pedal travel is required to
bring the vehicle to a full stop.
• You should always be able to depress the
accelerator and the clutch pedals all the way
down to the floor.
• All pedals must be able to return to their
original position unhindered.
Only use floor mats which leave the pedal
area free and can be secured with floor mat
faste ners.
�W ARNING
Never place any objects in the area
of the pedals. In case of sudden
braking or an accident. an object
could interfere with pedal
function. You would not be able to
brake or accelerate.
10 2
I -
.· t\
•J I ·. ·· -· I
--···· ·-· ..... ___ -..... . .
- - _ _I
__ l_�4B·31 1 ij
Floor mats. floor mat fasteners
Floor mats are factory installed in your ve
hicle.
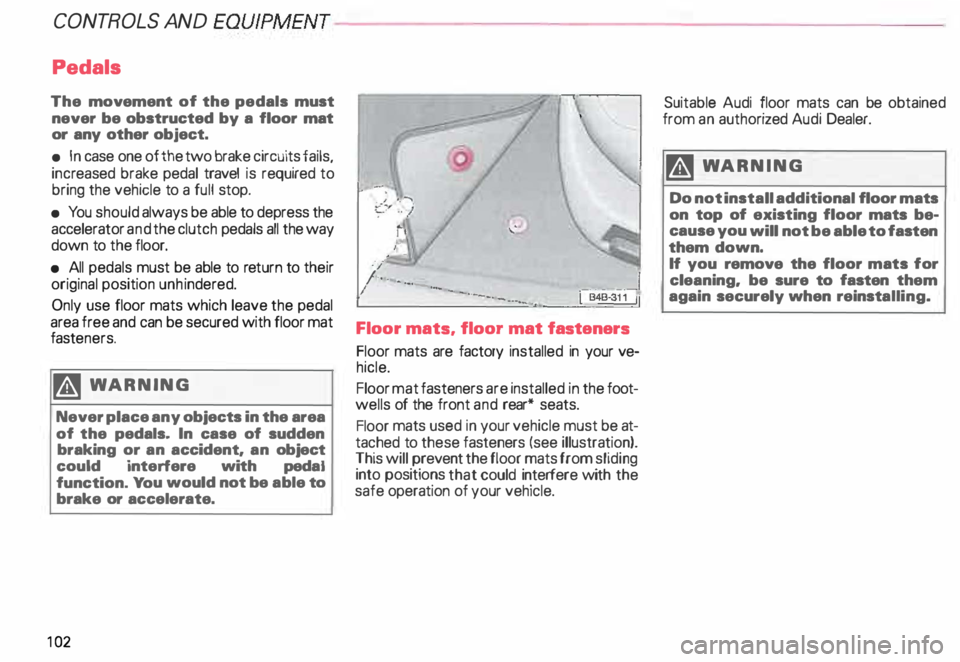
Floor mat fasteners are installed in the foot
wells of the front and rear* seats.
Floor mats used in your vehicle must be at
tached to these fasteners (see illustration).
This will prevent the floor mats from sliding
into positions that could interfere with the
safe operation of your vehicle. Suitable Audi
floor mats can be obtained
from an auth orized Audi Dealer.
�W ARNING
Do not install additional floor mats
on top of existing floor mats be
cause you will not be able to fasten
them down.
If you remove the floor mats for
cleaning. be sure to fasten them
again securely when reinstalling.
Page 104 of 306
Parking
brake lever
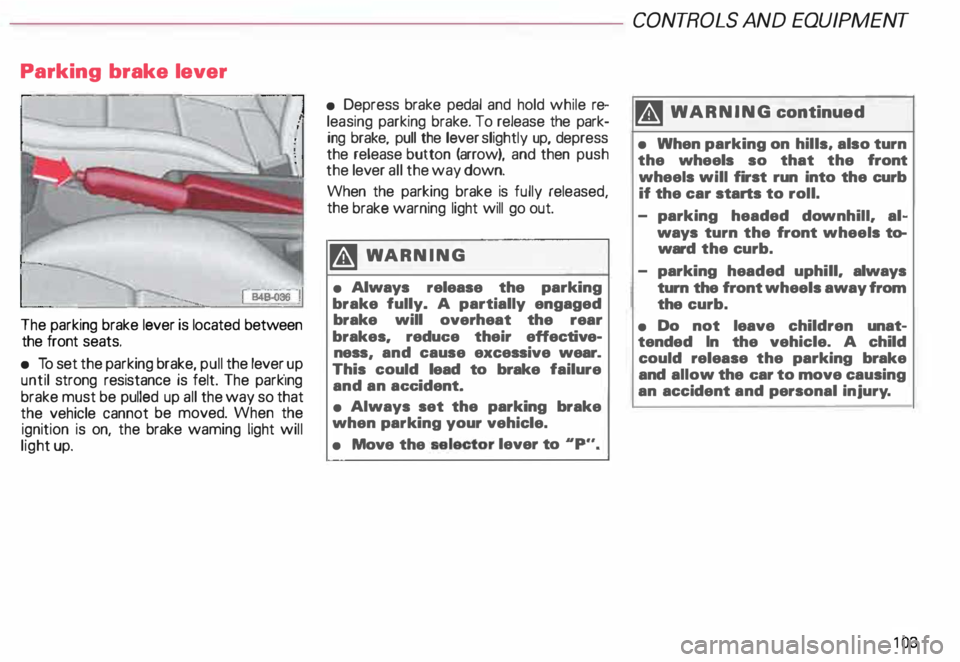
The parking brake lever is located between
the front seats.
• To set the parking brake, pull the lever _up
until strong resistance is felt. The park1ng
brake must be pulled up all the way so that
the vehicle cannot be moved. When the
ignition is on, the brake waming light will
light up. •
Depress brake pedal and hold while re
leasing parking brake. To release the park
ing brake, pull the lever slightly up, depress
the release button (arrow), and then push
the lever all the way down.
When the parking brake is fully released,
the brake warning light will go out.
�W ARNING
• Always release the parking
brake fully. A partially engaged
brake will overheat the rear
brakes. reduc:e their effective
ness and cause excessive wear.
This • could lead to brake failure
and an ac:c:ident.
• Always set the parking brake
when parking your vehicle.
• Move the selector
lever to .. p.,. CONT
ROLS AND EQUIPMENT
II WARNING continued
• When parking on hills, also turn
the wheels so that the front
wheels will first run into the curb
if the car starts to roll.
- parking headed downhill. al
ways turn the front wheels to
ward the curb.
- parking headed uphill. always
turn the front wheels away from
the curb.
• Do not leave children unat
tended In the vehicle. A child
could release the parking brake
and allow the c:ar to move causing
an accident and personal injury.
10 3
Page 151 of 306

CONTROLS AND
EQUIPMENT--------------------
1 and 4-Electrically heated ... 8
seats• utJ
The heating elements in both seats can be
turned on and regulated separately with the
two thumb wheel switches.
With the ignition on, the seat cushion and
backrest of the front seats can be heated
electrically.
15 0 1
- Use this thumb wheel switch to activate
and regulate the heating elements in the
driver's seat.
4- Use this thumbwheel switch to activate
and regulate the heating elements in the
front passenger's seat.
From position 0, roll thumbwheel upward to
activate the heating elements.
Select the desired temperature setting be
tween positions 1-6. When the heating ele
ments are activated, the numbers on the
thumb wheel will light up.
The steering wheel heating* is
swit ched on automatically when the seat
heating is switched on. The temperature.
however, remains at a constant preset level
and cannot be regulated with the thumb
wheel (1).
Note
To prevent possible damage to the heating
elements, do not kneel on the seats or in
any other way apply a heavy load to relative
ly small areas of the seat. The
heating elements* for the left and right
seating positions of the rear seat bench are
switched on and off and regulated by the
thumbwheel in the center console:
a - left
b- right
The rear seat heating* only operates when
a sensor registers the weight of the occu
pant on the seat.
Select the desired temperature setting be
tween positions 1-6. When the heating ele
ments are activated, the numb ers on the
thumbwheel will light up.
Page 165 of 306

CONTROLS AND
EQUIPMENT---------------------
C... -Air recirculation
In the air recirculation mode, the supply of
outside air is blocked and the air in the pas
senger compartment is recirculated. This
helps to prevent pollutant-conta ining out
side air from entering the passenger
compartment. It is best not to use this set
ting for exte nded periods of time.
If the windows begin to fog or ice
up, select the ® program setting as
soon as possible.
�W ARNING
• You will not receive any fresh
outside air when air recirculation
is on. Do not use this setting over
long periods of time because stale
air contributes to fatigue and re
duced driver alertness.
• If the windows fog up, press the
air recirculation button again im
mediately to switch off the air re
circulation function or select de
frost.
16 4 ECON -
Economy
The air conditioner compressor can be
turned off to save fuel. However, the com
fort level that the system can achieve in this
mode limited.
If the interior of the vehicle gets too hot, or
if the windows begin to fog or ice up, press
the ECON button again to tum the compres
sor on again and switch back to AUTO .
OFF -Switching air conditioner oft
The air conditioner can be switched off by
pressing the button briefly. This cuts off the
supply of air from the outside.
To reactivate the air conditioner,
press the AUTO button or one of the blower,
temperature or air distribution selector but
tons, or press OFF again.
It is not normally necessary to switch off the
air condition er.
- + Fan speed
The automatically selected fan speed (vol
ume of air delivery) can be reduced or in
creased manually by operati ng these but
tons. The selected fan speed is shown by a
segment display above the buttons. 4iiJ
-Rear window defogger
See page 151.
Air distribution selector
buttons
The automatically programmed air distribu
tion can be altered manually with the but
tons {},� . and {).. The buttons can be op
erated singly or in combination.
To return to the automatically programmed
air distribution, switch off the selected
manual functions separately or by pressing
the "AUTO" or ® butto ns.
iJ -Air directed to windows
Unlike setting ®, this setting directs all
the air to outlets 1 and 2.
1 :s::
1 -
Air
from dashboard outlets
-
and rear of center console
All the air comes from outlets 3 and 4.
0 -Air to footwall&
All the air comes from outlets 5 and from
the outlets under the front seats.
Page 167 of 306
CONT
ROLS AND EQUIPMENT
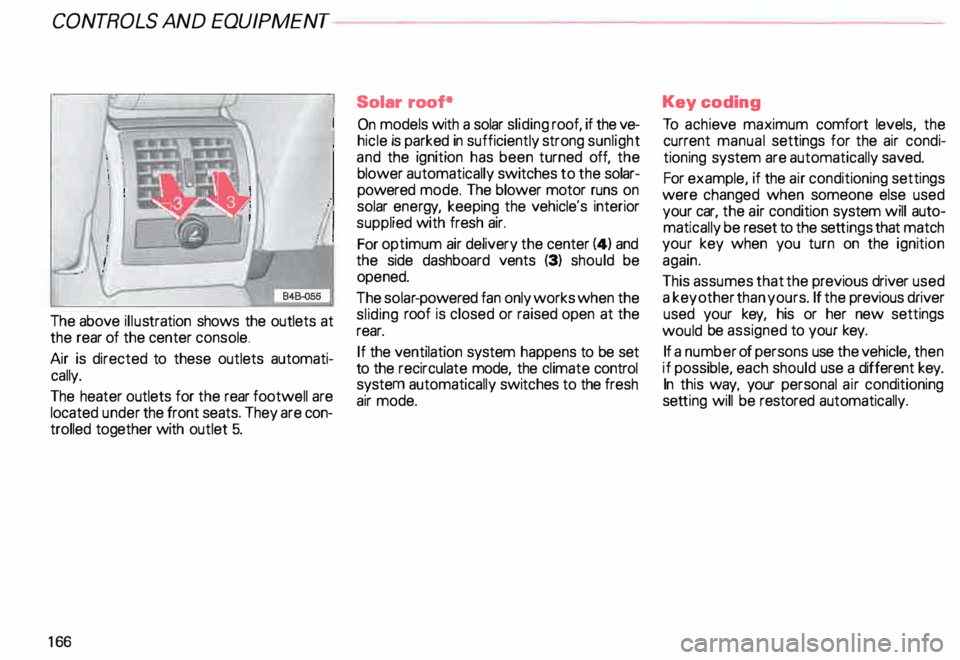
The above illustration shows the outlets at
the rear of the center console.
Air is directed to these outlets automati
cally.
The heater outlets for the rear footwall are
located under the front seats. They are con
trolled together with outlet 5.
16 6 Solar
roof*
On models with a solar sliding roof, if the ve
hicle is parked in sufficiently strong sunlight
and the ignition has been turned off, the
blower automatically switches to the solar
powered mode. The blower motor runs on
solar energy, keeping the vehicle's interior
supplied with fresh air.
For optimum air delivery the center (4) and
the side dashboard vents (3) should be
opened.
The solar -powered fan only works when the
sliding roof is closed or raised open at the
rear.
If the ventilation system happens to be set
to the recirculate mode, the climate control
system automatically switches to the fresh
air mode. Key
coding
To achie ve maximum comfort levels, the
current manual settings for the air condi
tioning system are automatically saved.
For example, if the air conditioning settings
were changed when someone else used
your car, the air condition system will auto
matically be reset to the settings that match
your key when you turn on the ignition
again.
This assumes that the previous driver used
a key other than yours. If the previous driver
used your key, his or her new settings
would be assigned to your key.
If a number of persons use the vehicle, then
if possible, each should use a different key.
In this way, your personal air conditioning
set ting will be restored automatically.
Page 191 of 306
CONT
ROLS AND EQUIPMENT---------------------
earphone*
The Audi is prepared for the installation of a
mobile earphone 1) in the center armrest.
Please refer the earphone instruction manu
al on operating the mobile phone.
Adj usting armrest
The armrest can be set to a numb er of dif
ferent positions for greater comfort and to
facilitate using the phone from the front or
rear seats.
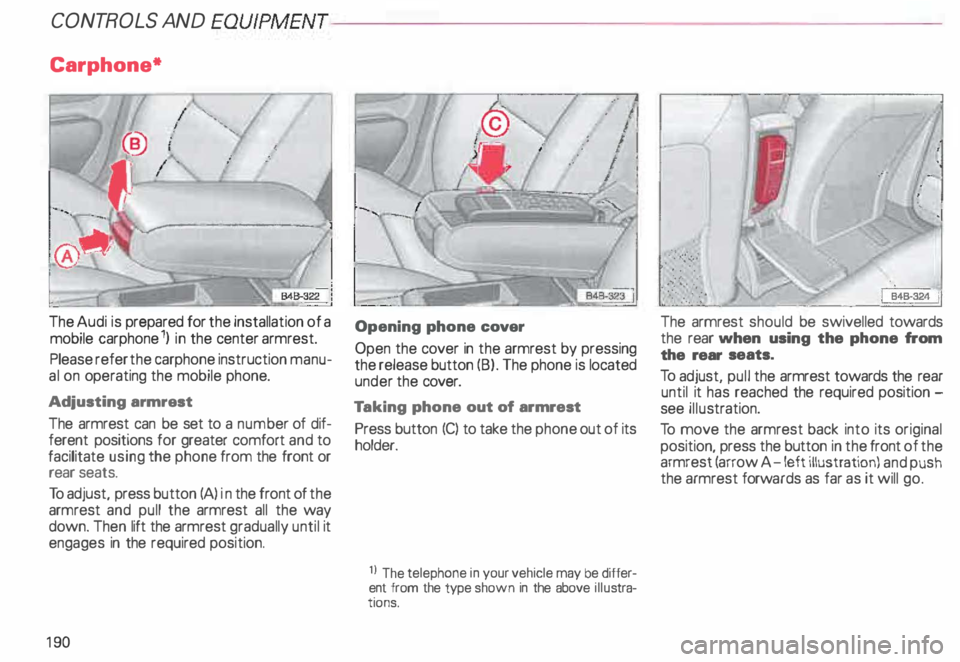
To adjust, press button (A) in the front of the
armrest and pull the armrest all the way
down. Then lift the armrest gradually until it
engages in the required position.
19 0 Opening
phone cover
Open the cover in the armrest by pressing
the release button (B). The phone is located
under the cover.
Ta king phone out of armrest
Press button (C) to take the phone out of its
holder.
1 I The telephone
in your vehicle may be differ
ent from the type shown in the above illustra
tions. ·
. .. . . ·
:·· ·.· ·.
· .: ·· ... .- .. :·
The armrest should be swivelled towards
the rear when using the phone from
the rear seats.
To adjust, pull the armrest towards the rear
until it has reached the required position
see illus tration.
To move the armrest back into its original
position, press the button in the front of the
armrest (arrow A -left illustration) and push
the armrest forwards as far as it will go.
Page 249 of 306
VEHICLE CA
RE----------------------------------------------------
When disconnecting and
connecting the battery ...
When you disconnect the vehicle battery
please note the following:
- some data stored in the driver informa-
tion system are erased,
- the clock goes out,
- the factory installed radio locks up,
- the Engine management system,
- the one-touch-u p and one-touch-down
functions of the power windows no lon
ger work,
- all stored seat positions in the memory*
are erased.
Af teryou reconnect the battery, you must
reset the clock. � page 118.
You also have to reset the Engine manage
ment system -see "Starter Switch "
�pa ge 113.
You also have to reset the one-touch-up and
one-touch�down feature on power win
dows -see "Power windows "
�p age 71.
248 You
have also reset the seat memory* -see
"Seats"
� page 81.
The radio must be re-coded with the correct
radio code - see your radio Operating In
structions.
Replacement battery
A replacement battery must have the same
specifications and dimensions as the origi
nal equipment battery. Specifications are
listed on the battery housing.
When installing the battery, make sure the
ignition and all electrical consumers are
switched off.
r.Gb. Because of the problem of �proper di
sposal of a battery, we
recommend that you have your au
thorized Audi Dealer change the
battery for you. Batteries contain
sulfuric acid and lead and must al
ways be disp osed of properly ob
serving all environmental regula
tions. Air
cleaner
A dir ty air cleaner element not only reduces
the engine output and increases fuel con
sumption considerably but can also cause
premature engine wear.
Normally, it is not necessary to service the
air cleaner more often than recommended
in the Maintenance booklet. If the vehicle is
driven on very dusty roads, the air cleaner
must be serviced more frequently, even dai
ly.
If your air cleaner element must be
changed mora frequently, we rec
ommend that you have the air clean
er serviced by your authorized Audi
Dealer or a qualified workshop.
The air cleaner element must never
be cleaned or soaked with gasoline,
cleaning solvents or oil.
g Always heed all WARN INGS
t!!3 on page 232.
Page 264 of 306
----------------------DO-IT-YOURSELF SERVICE
First aid kit
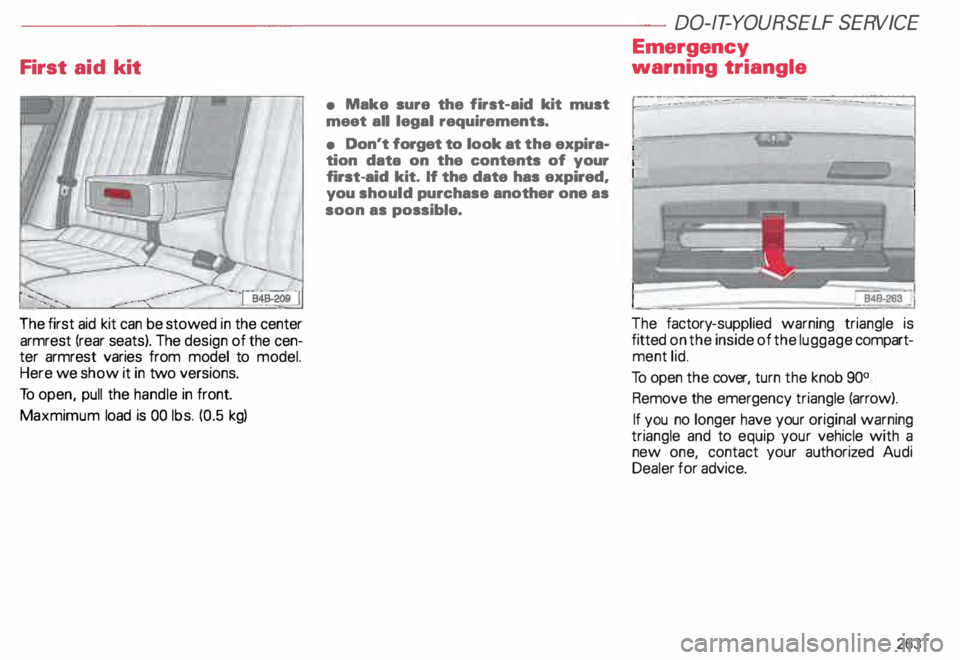
The first aid kit can be stowed in the center
armrest (rear seats). The design of the cen
ter armrest varies from model to model.
Here we show it in two versions.
To open, pull the handle in front.
Maxmimum load is 00 lbs. (0.5 kg) •
Make sure the first-aid kit must
meet all legal requirements.
• Don't forget to look at the expira
tion data on the contents of your
first-aid kit. If the date has expired,
you should purchase another one as
soon as possible. Emergency
warning triangle
The factory -supplied warning triangle is
fitted on the inside of the luggage compart
ment lid.
To open the cover, turn the knob 90°
Remove the emergency triangle (arrow).
If you no longer have your original warning
triangle and to equip your vehicle with a
new one, contact your authorized Audi
Dealer for advice.
263