Page 57 of 273

Indicato
r Light s
Sea t Bel t Reminde r Ligh t
This indicator lights when you turn
the ignition switch ON (II). It is a
reminder to you and your passengers
to protect yourselves by fastening the seat belts. A beeper also sounds
if you have not fastened your seat
belt.
If you do not fasten your seat belt,
the beeper will stop after a few seconds but the light stays on until
you do. Both the light and the beeper
stay off if you fasten your seat belt
before turning on the ignition. Chargin
g Syste m
Indicato r
If this light comes on when the
engine is running, the battery is not
being charged. For complete
information, see page 232 .
Low Oi l Pressur e
Indicato r
The engine can be severely damaged
if this light flashes or stays on when the engine is running. For complete
information, see page 231.
Parkin
g Brak e an d
Brak e Syste m Indicato r
This light has two functions:
1. It lights as a reminder that you have not released the parking
brake. Driving with the parking
brake applied can damage thebrakes and tires, and cause the
Anti-lock brake system to turn off (see page 142).
2. If it remains lit after you release the parking brake while the engine
is running, or comes on while
driving, it can indicate a problem
in the brake system. For complete
information, see page 234.
Instrument s an d Control s
BRAK
E
Page 58 of 273

Indicato
r Light s
Supplementa l Restrain t
Syste m Indicato r
This indicator lights when you turn
the ignition switch ON (II). If it comes on at any other time, it
indicates a problem in the supplemental restraint system. For
complete information, see page 45.
Anti-lock Brak e Syste m
(ABS ) Indicato r
This light normally comes on for a
few seconds when you turn the ignition switch ON (II), and when
the ignition switch is turned to START (III). If this light comes on at
any other time, there is a problem in the ABS. If this happens, take the
car to your dealer to have it checked.
With the light on, your car still has normal braking ability but no anti-
lock. For complete information, see
page 144.
Lo
w Fue l Indicato r
This light comes on as a reminder
that you must refuel soon. Immobilize r Syste m
Indicato r
This indicator comes on for a few
seconds when you turn the ignition
switch ON (II). It will then go off if
you have inserted a properly-coded
ignition key. If it is not a properly-
coded key, the indicator will blink
and the engine will not start (see
page 69 ).
This indicator also blinks several
times when you turn the ignition switch from ON (II) to ACCESSORY
(I) or LOCK (0).
Malfunctio
n Indicato r
Lam p
See page 233.
Trunk-ope n Indicato r
This light comes on if the trunk lid is
not closed tightly.
Door-ope n Indicato r
This light comes on if a door is not
closed tightly.
Instrument s an d Control s
S
R
S
A
B S
Page 59 of 273
Indicato
r Light s
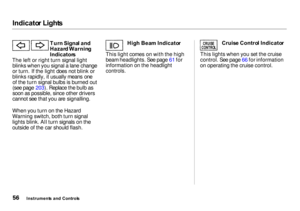
Tur n Signa l an d
Hazar d Warnin g
Indicator s
The left or right turn signal light blinks when you signal a lane change
or turn. If the light does not blink or
blinks rapidly, it usually means one of the turn signal bulbs is burned out
(see page 203). Replace the bulb as
soon as possible, since other drivers
cannot see that you are signalling.
When you turn on the Hazard
Warning switch, both turn signal
lights blink. All turn signals on the
outside of the car should flash. Hig
h Bea m Indicato r
This light comes on with the high
beam headlights. See page 61 for
information on the headlight
controls.
Cruis
e Contro l Indicato r
This lights when you set the cruise
control. See page 66 for information
on operating the cruise control.
Instrument s an d Control s
CRUIS
E
CONTRO L
Page 60 of 273
Gauge
s
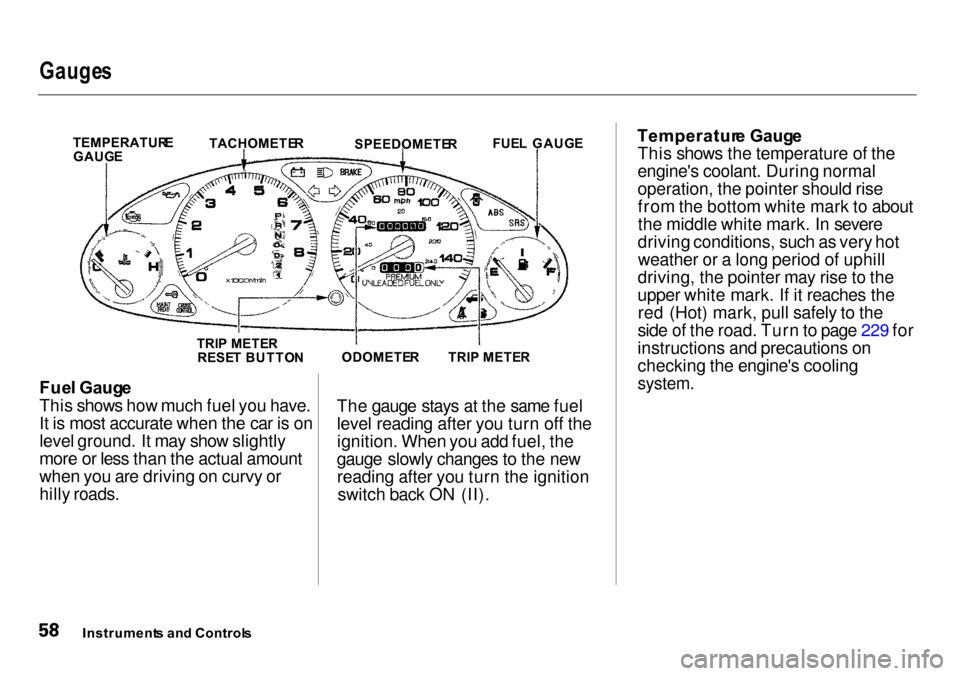
Speedometer
This shows your speed in miles per
hour (mph). The smaller inner
numbers are the speed in kilometers
per hour (km/h). Tachomete
r
The tachometer shows the engine
speed in revolutions per minute (rpm). To protect the engine from
damage, never drive with the
tachometer needle in the red zone. Odomete
r
The odometer shows the total
number of miles your car has been
driven. It is illegal under U.S. federal
law to disconnect, reset, or alter the
odometer with the intent to change
the number of miles indicated.
Tri p Mete r
This meter shows the number of
miles driven since you last reset it.
To reset it, push the trip meter reset button.
Instrument s an d Control s
TRI
P METE R
RESE T BUTTO N
TRIP METE R
ODOMETE R
SPEEDOMETE
R
FUE
L GAUG E
TACHOMETE R
TEMPERATUR E
GAUG E
Page 61 of 273

Gauge
s
Fue l Gaug e
This shows how much fuel you have.
It is most accurate when the car is on
level ground. It may show slightly
more or less than the actual amount
when you are driving on curvy or
hilly roads. The gauge stays at the same fuel
level reading after you turn off the
ignition. When you add fuel, the
gauge slowly changes to the new reading after you turn the ignitionswitch back ON (II). Temperatur
e Gaug e
This shows the temperature of the
engine's coolant. During normal
operation, the pointer should rise from the bottom white mark to about
the middle white mark. In severe
driving conditions, such as very hot weather or a long period of uphill
driving, the pointer may rise to the
upper white mark. If it reaches the red (Hot) mark, pull safely to the
side of the road. Turn to page 229 for
instructions and precautions on
checking the engine's cooling
system.
Instrument s an d Control s
TRI
P METE R
ODOMETE R
TRI
P METE R
RESE T BUTTO N FUE
L GAUG E
SPEEDOMETE R
TACHOMETE
R
TEMPERATUR
E
GAUG E
Page 62 of 273

Gauge
s
Maintenanc e Require d Indicato r
This indicator reminds you that it is
time to take your vehicle in for sched-
uled maintenance.
Refer to the Maintenance Schedules
for Normal and Severe Driving Conditions on pages 158 — 162.
For the first 6,000 miles (9,600 km) after the Maintenance Required
Indicator is reset, it will come on for
two seconds when you turn the ignition switch ON (II).
Between 6,000 miles (9,600 km) and
7,500 miles (12,000 km) this
indicator will light for two seconds
when you first turn the ignition switch ON (II), and then flash for
ten seconds.
If you exceed 7,500 miles (12,000
km) without having the scheduled
maintenance performed, this
indicator will remain on as a constant
reminder.
Your dealer will reset this indicatorafter completing the scheduled
maintenance. If this maintenance is
done by someone other than your
Acura dealer, reset the indicator by
pressing the reset button. This
button is located on the bottom of the dashboard to the right of the
steering column.
Instrument s an d Control s
MAIN
T
REQ D
Page 63 of 273
Control
s Nea r th e Steerin g Whee l
The two levers on the steering
column contain controls for driving
features you use most often. The left
lever controls the turn signals,
headlights, and high beams. The right lever controls the windshield
washers and wipers.
The controls on the dashboard to the right of the steering column are for
the instrument panel brightness,
hazard warning lights and rear
window defogger.
The moonroof switch and cruise
control switch are to the left of thesteering column.
The tilt adjustment lever on the
underside of the steering column allows you to tilt the steering wheel.
Instrument s an d Control s
WINDSHIEL
D
WIPERS/WASHER S
HOR
N
BUTTON S
TIL T ADJUSTMEN T
HEADLIGHTS /
TUR N SIGNAL S
MOONROO
F
HAZAR
D WARNIN G
REA
R WINDO W
DEFOGGE R
INSTRUMEN
T PANE L
BRIGHTNES S
CRUIS
E
CONTRO L
Page 64 of 273
Control
s Nea r th e Steerin g Whee l
Headlight s
The rotating switch on the left lever
controls the lights. Turning this switch to the position turns
on the parking lights, taillights,
instrument panel lights, side-marker
lights, and rear license plate lights. Turning the switch to the
position turns on the headlights. If you leave the lights on with the
ignition switch in ACCESSORY (I)
or LOCK (0), you will hear a
reminder chime when you open the driver's door.
To change between low beams and high beams, pull the turn signal lever
until you hear a click, then let go.
The blue high beam indicator will
light (see page 56). To flash the high beams, pull the
turn signal lever back lightly, then
release it. The high beams will come
on and go off.
The high beams will stay on for as long as you hold the lever back, no
matter what position the headlight
switch is in.
CONTINUED
Instrument s an d Control s