Page 2554 of 4592

EM07Y±05
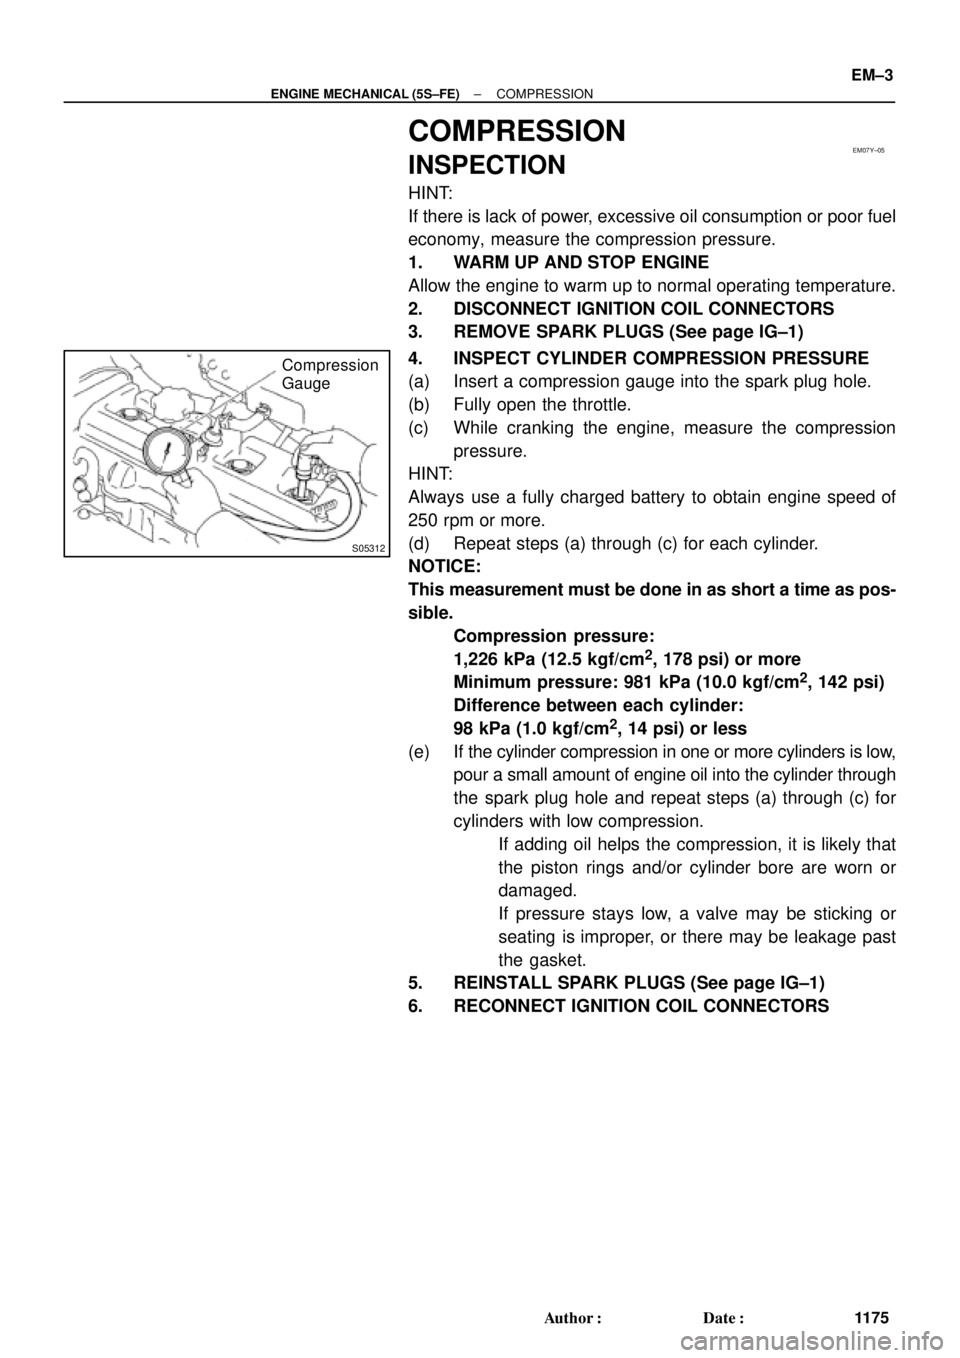
S05312
Compression
Gauge
± ENGINE MECHANICAL (5S±FE)COMPRESSION
EM±3
1175 Author�: Date�:
COMPRESSION
INSPECTION
HINT:
If there is lack of power, excessive oil consumption or poor fuel
economy, measure the compression pressure.
1. WARM UP AND STOP ENGINE
Allow the engine to warm up to normal operating temperature.
2. DISCONNECT IGNITION COIL CONNECTORS
3. REMOVE SPARK PLUGS (See page IG±1)
4. INSPECT CYLINDER COMPRESSION PRESSURE
(a) Insert a compression gauge into the spark plug hole.
(b) Fully open the throttle.
(c) While cranking the engine, measure the compression
pressure.
HINT:
Always use a fully charged battery to obtain engine speed of
250 rpm or more.
(d) Repeat steps (a) through (c) for each cylinder.
NOTICE:
This measurement must be done in as short a time as pos-
sible.
Compression pressure:
1,226 kPa (12.5 kgf/cm
2, 178 psi) or more
Minimum pressure: 981 kPa (10.0 kgf/cm
2, 142 psi)
Difference between each cylinder:
98 kPa (1.0 kgf/cm
2, 14 psi) or less
(e) If the cylinder compression in one or more cylinders is low,
pour a small amount of engine oil into the cylinder through
the spark plug hole and repeat steps (a) through (c) for
cylinders with low compression.
�If adding oil helps the compression, it is likely that
the piston rings and/or cylinder bore are worn or
damaged.
�If pressure stays low, a valve may be sticking or
seating is improper, or there may be leakage past
the gasket.
5. REINSTALL SPARK PLUGS (See page IG±1)
6. RECONNECT IGNITION COIL CONNECTORS
Page 2668 of 4592

EM04J±03
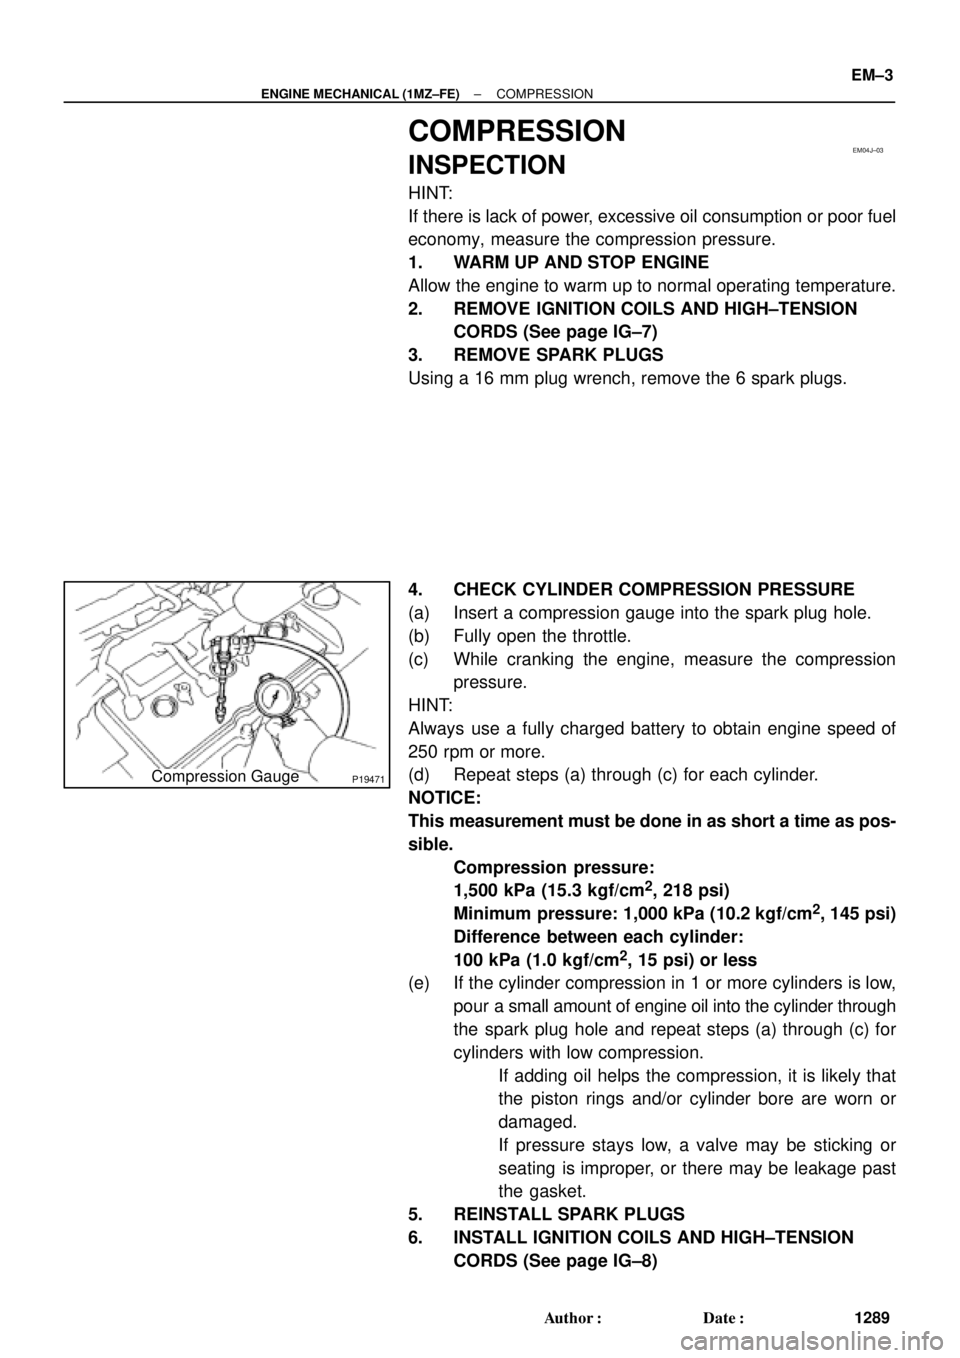
P19471Compression Gauge
± ENGINE MECHANICAL (1MZ±FE)COMPRESSION
EM±3
1289 Author�: Date�:
COMPRESSION
INSPECTION
HINT:
If there is lack of power, excessive oil consumption or poor fuel
economy, measure the compression pressure.
1. WARM UP AND STOP ENGINE
Allow the engine to warm up to normal operating temperature.
2. REMOVE IGNITION COILS AND HIGH±TENSION
CORDS (See page IG±7)
3. REMOVE SPARK PLUGS
Using a 16 mm plug wrench, remove the 6 spark plugs.
4. CHECK CYLINDER COMPRESSION PRESSURE
(a) Insert a compression gauge into the spark plug hole.
(b) Fully open the throttle.
(c) While cranking the engine, measure the compression
pressure.
HINT:
Always use a fully charged battery to obtain engine speed of
250 rpm or more.
(d) Repeat steps (a) through (c) for each cylinder.
NOTICE:
This measurement must be done in as short a time as pos-
sible.
Compression pressure:
1,500 kPa (15.3 kgf/cm
2, 218 psi)
Minimum pressure: 1,000 kPa (10.2 kgf/cm
2, 145 psi)
Difference between each cylinder:
100 kPa (1.0 kgf/cm
2, 15 psi) or less
(e) If the cylinder compression in 1 or more cylinders is low,
pour a small amount of engine oil into the cylinder through
the spark plug hole and repeat steps (a) through (c) for
cylinders with low compression.
�If adding oil helps the compression, it is likely that
the piston rings and/or cylinder bore are worn or
damaged.
�If pressure stays low, a valve may be sticking or
seating is improper, or there may be leakage past
the gasket.
5. REINSTALL SPARK PLUGS
6. INSTALL IGNITION COILS AND HIGH±TENSION
CORDS (See page IG±8)
Page 3855 of 4592

REFINISHING REPLACEMENT BUMPER COVERS ± PA003-02June 14, 2002
Page 2 of 2
2.Scrub the bumper covers with the soap and water solution, making sure all
difficult±to±reach areas are thoroughly cleaned.
3. Rinse the entire bumper cover with clean deionized water, making sure all
difficult±to±reach areas are thoroughly rinsed.
4. Dry the surface with a clean towel before water dries on the surface. Clean, dry
compressed air from an oil±less compressor may be substituted for drying with a
towel.
5. Degrease the surface with a wax, grease, and silicone
remover.
NOTE:
Lacquer thinner or brake cleaner will NOT
remove silicone. You MUST use a wax,
grease, and silicone
remover. Carefully follow application instructions on the container
label. Fish eyes or other paint irregularities may result from not following instructions.
6. Apply a generous amount of sanding paste with a gray 3M� ScotchBrite pad. Only a
gray pad should be used during the sanding process. Sand the entire bumper cover
surface. Be sure all difficult±to±reach areas are thoroughly sanded.
7. Clean the entire bumper cover with car wash soap and water. Be sure all
difficult±to±reach areas are thoroughly cleaned.
8. Rinse the entire bumper with clean deionized water. Be sure all difficult±to±reach
areas are thoroughly rinsed.
9. Degrease the surface with an anti±static plastic parts cleaner
and a white body shop
towel or paper towel.
NOTE:
Never use a red shop towel to wipe the surface (contains silicone).
10. Assure the bumper is firmly held in place to a steady fixture.
11. Apply a plastic parts adhesion promoter to the surface, according to the
manufacturer 's recommendations.
12. Apply plastic parts primer to the surface, according to the paint manufacturer's
recommendations.
13. Since bumpers are made of flexible plastic urethane material, use a two±part
urethane finish paint system with plasticizer (flex agent) for all bumper and cladding
repairs. Apply the appropriate top coat to the surface, according to the paint
manufacturer 's recommendations.
14. If heat is applied to cure the paint, assure the surface temperature does not exceed
80�C (176�F. )
For additional information concerning the refinish process for plastic bumpers/cladding,
please contact your respective refinish paint manufacturer's local representative.
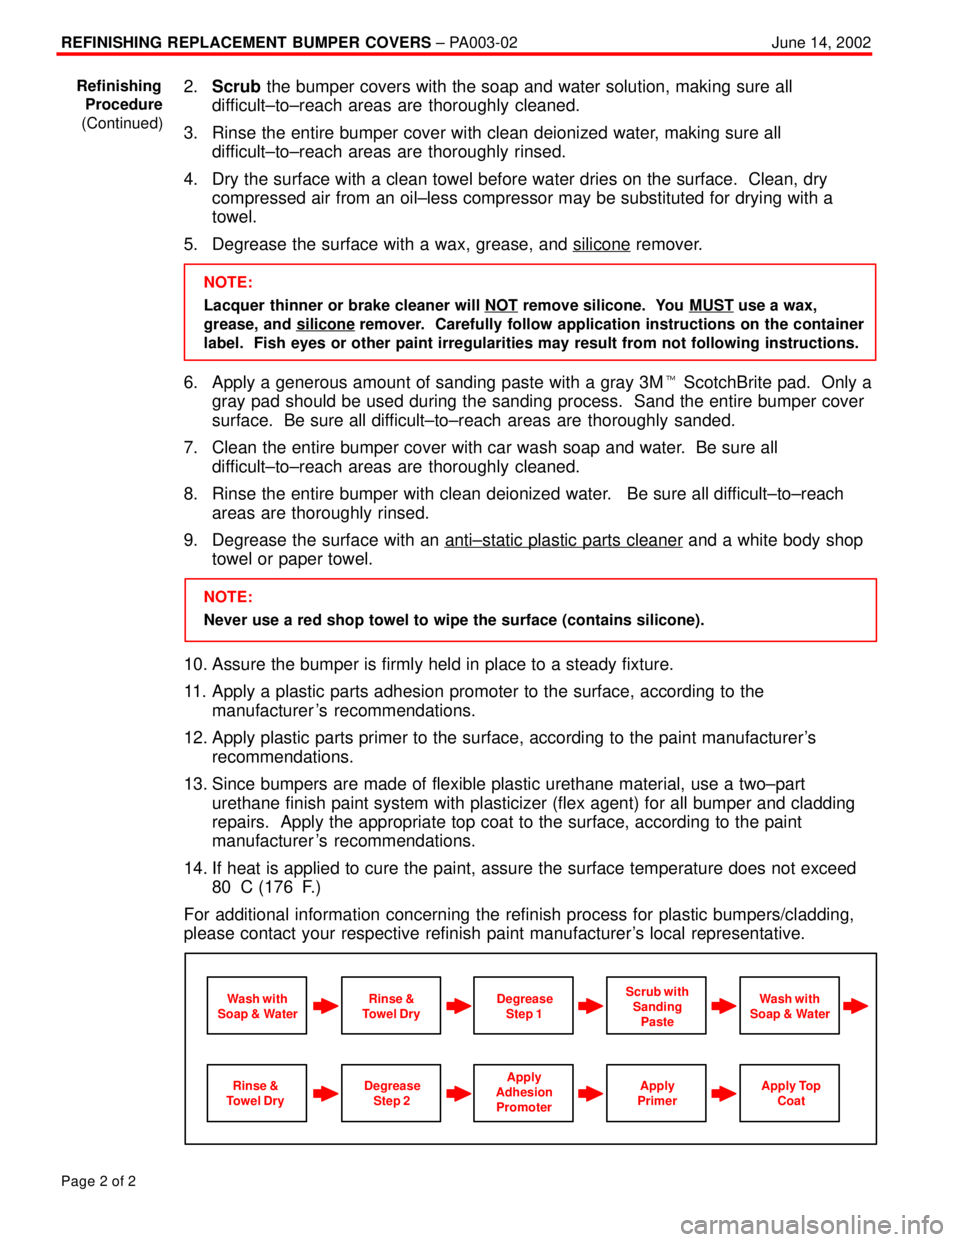
Apply
Primer
Wash with
Soap & WaterScrub with
Sanding
PasteWash with
Soap & WaterRinse &
Towel DryDegrease
Step 1
Apply
Adhesion
PromoterApply Top
CoatRinse &
Towel DryDegrease
Step 2
Refinishing
Procedure
(Continued)