Page 185 of 345

1. Hood
A: REMOVAL AND INSTALLATION
NOTE:
The hood lock has a dual locking design which
consists of a main lock and a safety lock mecha-
nism. When the release knob located at the front
pillar on the driver's side is pulled back, the main
lock is released through the cable attached to the
knob.
The safety lock can be released by pushing the
lever protruding above the front grill while opening
the hood.
1. HOOD
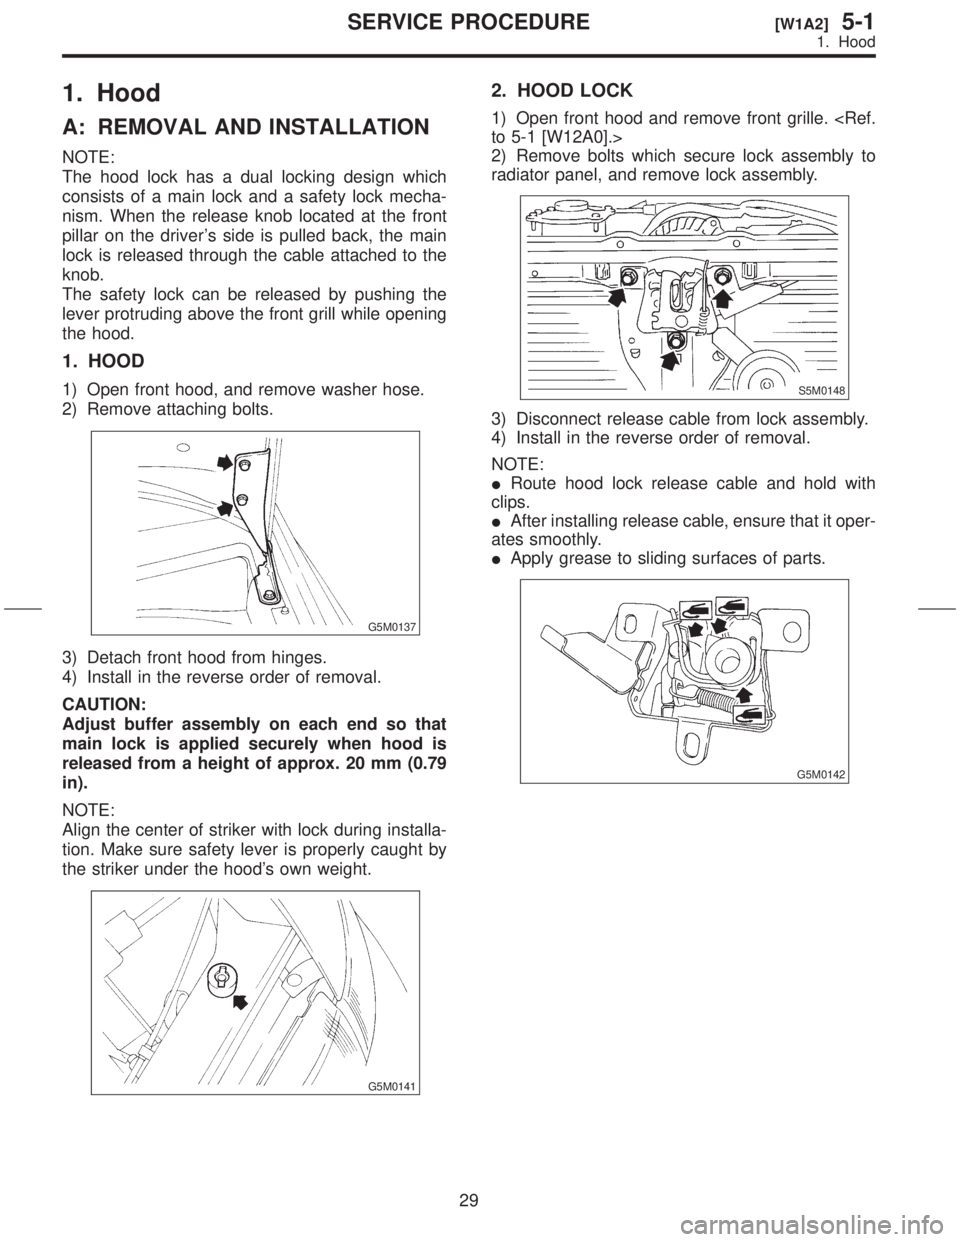
1) Open front hood, and remove washer hose.
2) Remove attaching bolts.
G5M0137
3) Detach front hood from hinges.
4) Install in the reverse order of removal.
CAUTION:
Adjust buffer assembly on each end so that
main lock is applied securely when hood is
released from a height of approx. 20 mm (0.79
in).
NOTE:
Align the center of striker with lock during installa-
tion. Make sure safety lever is properly caught by
the striker under the hood's own weight.
G5M0141
2. HOOD LOCK
1) Open front hood and remove front grille.
to 5-1 [W12A0].>
2) Remove bolts which secure lock assembly to
radiator panel, and remove lock assembly.
S5M0148
3) Disconnect release cable from lock assembly.
4) Install in the reverse order of removal.
NOTE:
IRoute hood lock release cable and hold with
clips.
IAfter installing release cable, ensure that it oper-
ates smoothly.
IApply grease to sliding surfaces of parts.
G5M0142
29
[W1A2]5-1SERVICE PROCEDURE
1. Hood
Page 204 of 345

15. Sunroof
A: REMOVAL AND INSTALLATION
1. GLASS LID
1) Completely close glass lid and open sunshade.
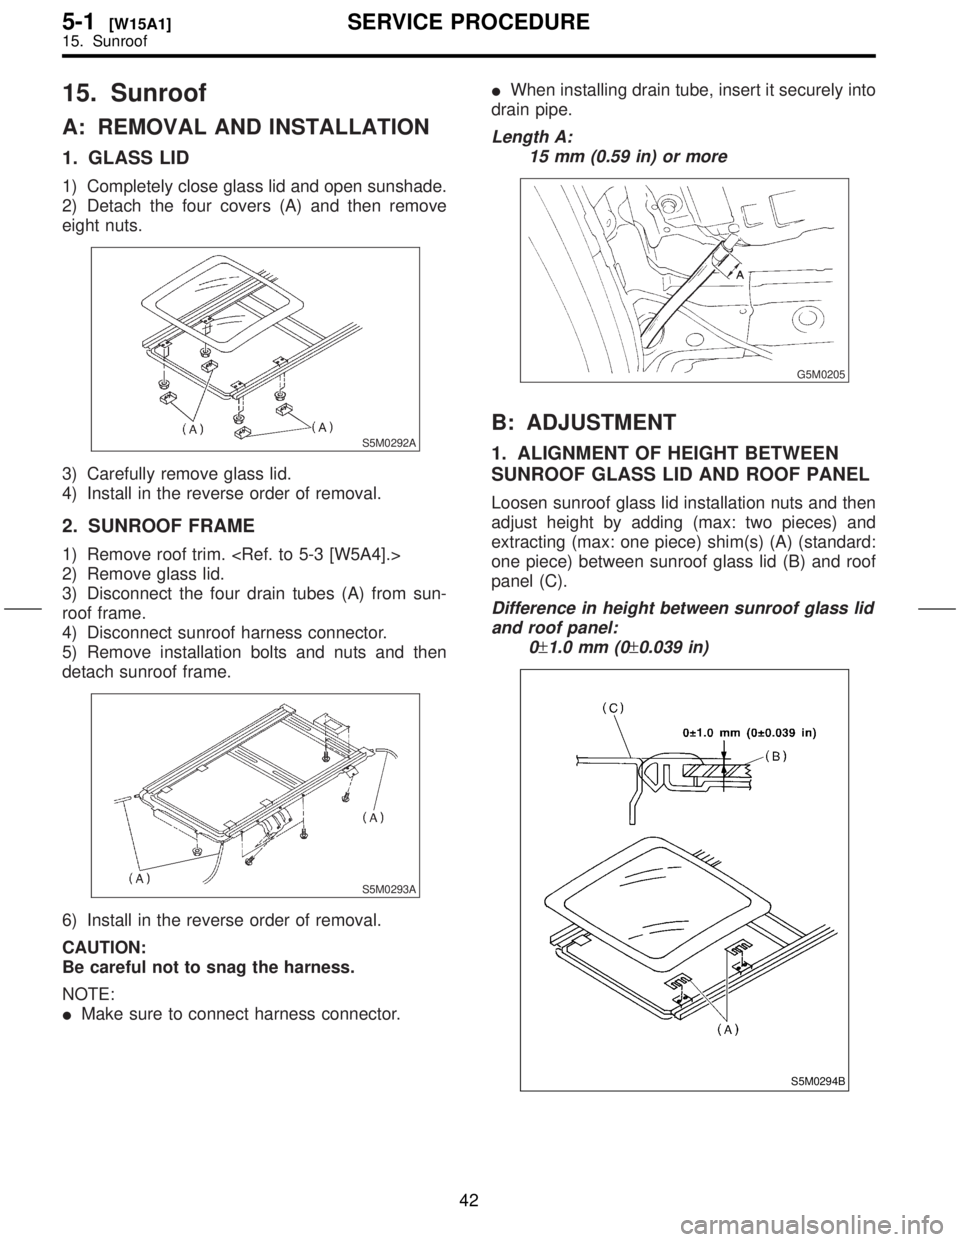
2) Detach the four covers (A) and then remove
eight nuts.
S5M0292A
3) Carefully remove glass lid.
4) Install in the reverse order of removal.
2. SUNROOF FRAME
1) Remove roof trim.
2) Remove glass lid.
3) Disconnect the four drain tubes (A) from sun-
roof frame.
4) Disconnect sunroof harness connector.
5) Remove installation bolts and nuts and then
detach sunroof frame.
S5M0293A
6) Install in the reverse order of removal.
CAUTION:
Be careful not to snag the harness.
NOTE:
IMake sure to connect harness connector.IWhen installing drain tube, insert it securely into
drain pipe.
Length A:
15 mm (0.59 in) or more
G5M0205
B: ADJUSTMENT
1. ALIGNMENT OF HEIGHT BETWEEN
SUNROOF GLASS LID AND ROOF PANEL
Loosen sunroof glass lid installation nuts and then
adjust height by adding (max: two pieces) and
extracting (max: one piece) shim(s) (A) (standard:
one piece) between sunroof glass lid (B) and roof
panel (C).
Difference in height between sunroof glass lid
and roof panel:
0
±1.0 mm (0±0.039 in)
S5M0294B
42
5-1[W15A1]SERVICE PROCEDURE
15. Sunroof
Page 240 of 345

8) Installation of glass:
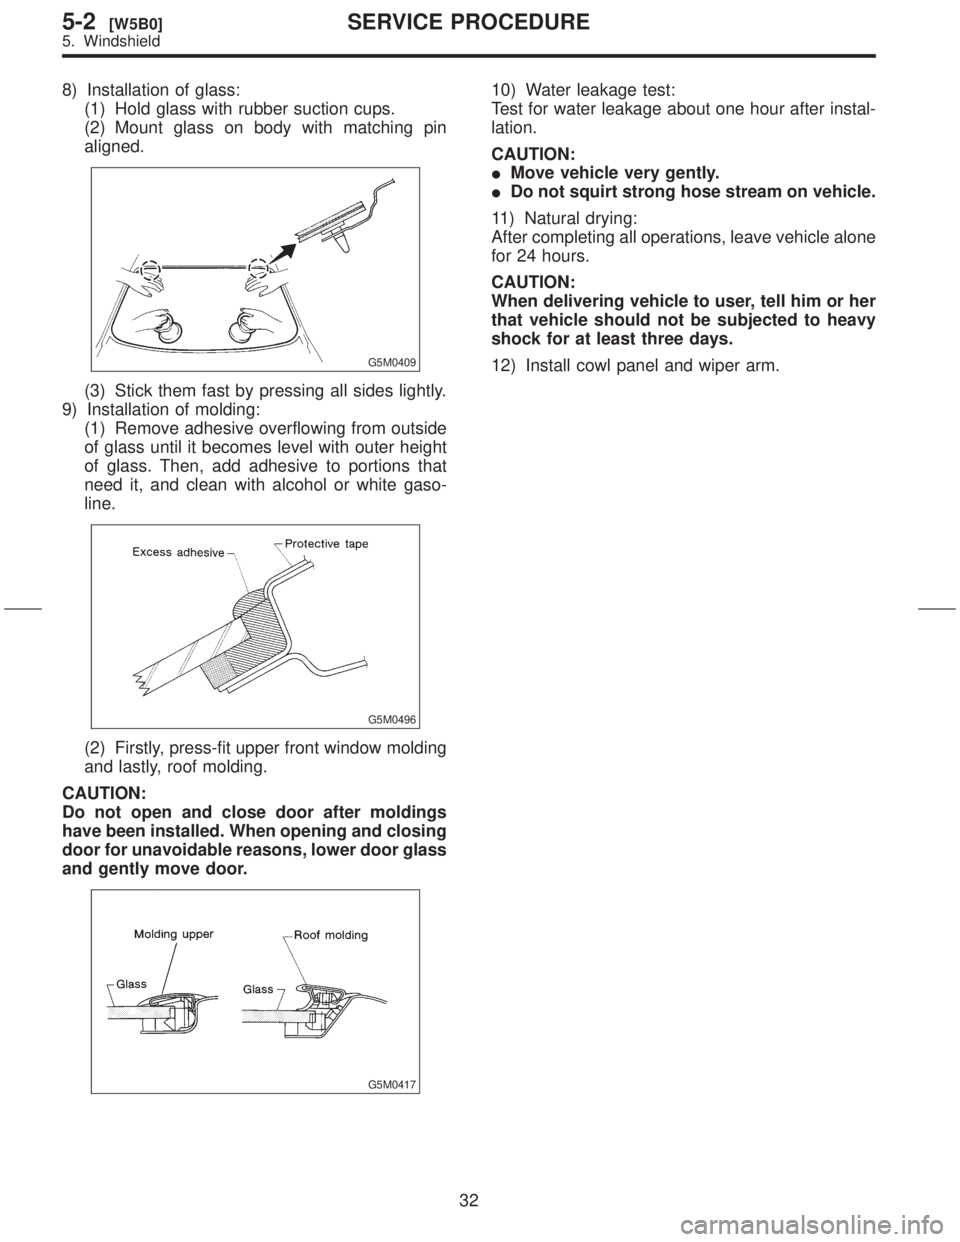
(1) Hold glass with rubber suction cups.
(2) Mount glass on body with matching pin
aligned.
G5M0409
(3) Stick them fast by pressing all sides lightly.
9) Installation of molding:
(1) Remove adhesive overflowing from outside
of glass until it becomes level with outer height
of glass. Then, add adhesive to portions that
need it, and clean with alcohol or white gaso-
line.
G5M0496
(2) Firstly, press-fit upper front window molding
and lastly, roof molding.
CAUTION:
Do not open and close door after moldings
have been installed. When opening and closing
door for unavoidable reasons, lower door glass
and gently move door.
G5M0417
10) Water leakage test:
Test for water leakage about one hour after instal-
lation.
CAUTION:
IMove vehicle very gently.
IDo not squirt strong hose stream on vehicle.
11) Natural drying:
After completing all operations, leave vehicle alone
for 24 hours.
CAUTION:
When delivering vehicle to user, tell him or her
that vehicle should not be subjected to heavy
shock for at least three days.
12) Install cowl panel and wiper arm.
32
5-2[W5B0]SERVICE PROCEDURE
5. Windshield