1999 HONDA ODYSSEY homelink
[x] Cancel search: homelinkPage 56 of 343

Instruments and Controls
This section gives information about
the controls and displays that
contribute to the daily operation of
your Honda. All the essential
controls are within easy reach.
Control Locations............................ 56
Indicator Lights................................ 57
Gauges.............................................. 62
Controls Near the Steering
Wheel........................................65
Headlights...................................
. 66
Automatic Lightin g
Off
Feature......................................67
Daytime Running Lights............. 67
Instrument Panel Brightness..... 67
Turn Signals................................. 68
Windshield Wipers.....................
. 68
Windshield Washers..................
. 70
Rear Windo w
Wiper and
Washer......................................70
Hazard Warning........................... 70
Rear Window Defogger.............. 71
Steering Wheel Adjustment....... 72
Steering Wheel Controls ................ 73
Cruise Control.............................. 73
Remote Audio Controls .............. 76
Keys and Locks................................ 76
Keys............................................... 76
Immobilizer System..................... 77
Ignition Switch............................. 78
Power Door Locks....................... 79
Remote Transmitter.................... 81Childproof Door Locks............... 85
Tailgate......................................... 85
Glove Box..................................... 87
Sliding Doors.................................... 88
Manual Sliding Doors.................. 88
Power Sliding Doors.................... 90
Important Safety Precautions.... 94
HomeLink Universal Transmitter.................................. 95
Seats.................................................. 99
Passenger Seating....................... 99
Seat Adjustments....................... 100
Driver's Seat Power
Adjustments........................... 102
Armrests..................................... 103
Head Restraints......................... 104
Third Seat Access...................... 105 Moving the Second Row Bucket Seat............................ 106
Removing the Bucket Seats in the Second Row................. 108
Removing the Bench Seat in the Second Row................. 109
Folding the Third Seat.............. 110
Power Windows............................. 113
Mirrors............................................ 115 Parking Brake................................ 116
Digital Clock................................... 117
Center Table................................... 117
Beverage Holder............................ 118
Sunglasses Holder......................... 120
Sun Visor......................................... 121
Vanity Mirror................................. 121 Rear Compartment........................ 122Center Pocket................................ 122
Coin Holder.................................... 122
Storage Box.................................... 123 Coat Hook....................................... 123
Accessory Power Sockets............. 124 Interior Lights................................ 125
Instruments and ControlsProCarManuals.comMain Menu s t
Page 96 of 343

HomeLink Universal Transmitter
On EX model
The HomeLink Universal Transmit- ter built into your vehicle can be
programmed to operate remotely-controlled devices around your home,
such as garage doors, lighting, or
home security systems. It can
replace up to three remote
transmitters.
Customer Assistance
If you have problems with training
the HomeLink Universal
Transmitter, or would like information on home products that
can be operated by the transmitter,
call (800) 355-3515.
Important Safety Precautions
Always refer to the operating instruc- tions and safety information thatcame with your garage door opener
or other equipment you intend to
operate with the HomeLink
Universal Transmitter. If you do not
have this information, you should contact the manufacturer of the
equipment.
While training or using the transmitter, make sure you have a
clear view of the garage door or gate,and that no one will be injured by its
movement.
If your garage door opener was
manufactured before April 1982, you
may not be able to program the
HomeLink Universal Transmitter to operate it. Garage door openers
manufactured before that date do
not have a safety feature that causes
them to stop and reverse if an obstacle is detected during closing,
increasing the risk of injury. If you
have questions, call (800) 355-3515. Training the Transmitter
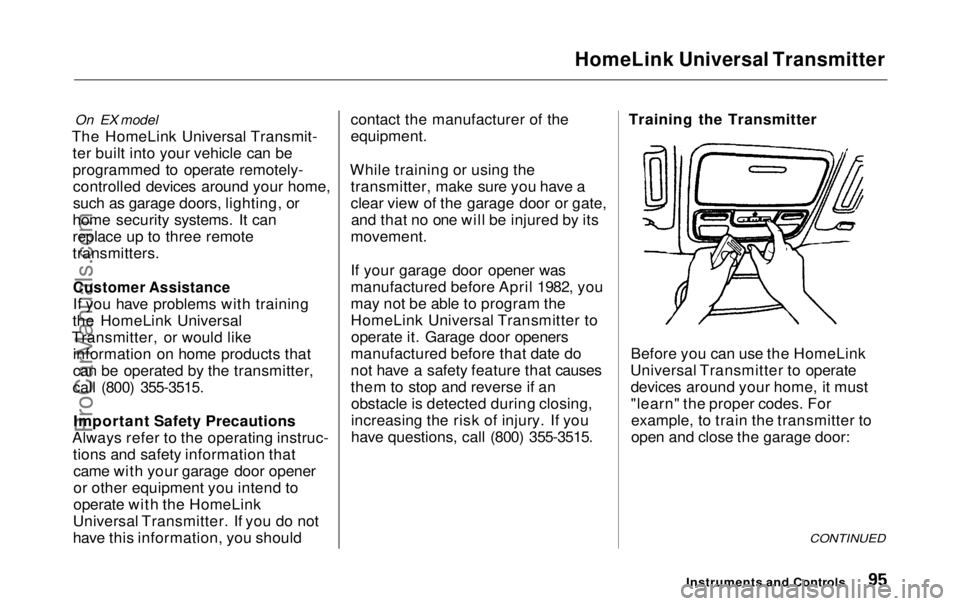
Before you can use the HomeLink
Universal Transmitter to operate devices around your home, it must
"learn" the proper codes. Forexample, to train the transmitter to
open and close the garage door:
CONTINUED
Instruments and ControlsProCarManuals.comMain Menu Table of Contents s t
Page 97 of 343

HomeLink Universal Transmitter
1. This step erases all previously learned
codes. Perform this step before
training the transmitter for the very
first time. Press and hold the two
outside buttons until the red light
in the transmitter flashes (approximately 20 seconds).
Release the buttons.
2. Hold the end of the garage door opener remote control 1 to 3
inches from the HomeLink
transmitter. Make sure you are
not blocking your view of the redlight in the transmitter.
3. Select the transmitter button you want to train.
4. Press the button on the remote control and the button on the
transmitter at the same time. Holddown both buttons. 5. The red light in the transmitter
should begin flashing. It will flashslowly at first, then rapidly.
6. When the red light flashes rapidly, release both buttons. The
transmitter should have learned
the code from the remote control.
7. Test the transmitter button by pushing it. It should operate the
garage door.
8. Repeat these steps to train the other two transmitter buttons to
operate any other remotely-
controlled devices around your
home (lighting, automatic gate, security system, etc.).
Canadian Owners:
The remote control you are training from may stop transmitting after twoseconds. This is not long enough for
the HomeLink transmitter to learn
the code. Release and press the
button on the remote control every
two seconds until the transmitter has
learned the code.
If you are programming the
transmitter to operate a garage door or gate, it is recommended that you
unplug the motor for that device during programming. Repeatedly
pressing the remote control button could burn out the motor.
The HomeLink transmitter stores the code in a permanent memory.
There should be no need to retrain the transmitter if your vehicle's
battery goes dead or is disconnected.
Instruments and ControlsProCarManuals.comMain Menu Table of Contents s t
Page 98 of 343

HomeLink Universal Transmitter
Retrainings Button
To train an already programmed transmitter button to operate a new
device:
1. Select the transmitter button you want to train.
2. Press and hold the transmitter button until the red light begins to
flash slowly (approximately 20
seconds).
3. While continuing to hold the transmitter button, place the
remote control for the device 1 to 3 inches from the HomeLink
transmitter.
4. Press and hold the button on the remote control. Hold both buttons
until the red light begins to flash
rapidly.
5. Release both buttons. The transmitter, should now be trained
to operate the device. Training With a Rolling Code
System
For security purposes, newer garage
door opening systems use a "rolling"
or variable code. If you know that
your garage door opener has a rolling code, or you have been
unable to train the transmitter afterseveral attempts, use the following
procedure. You will need someone to
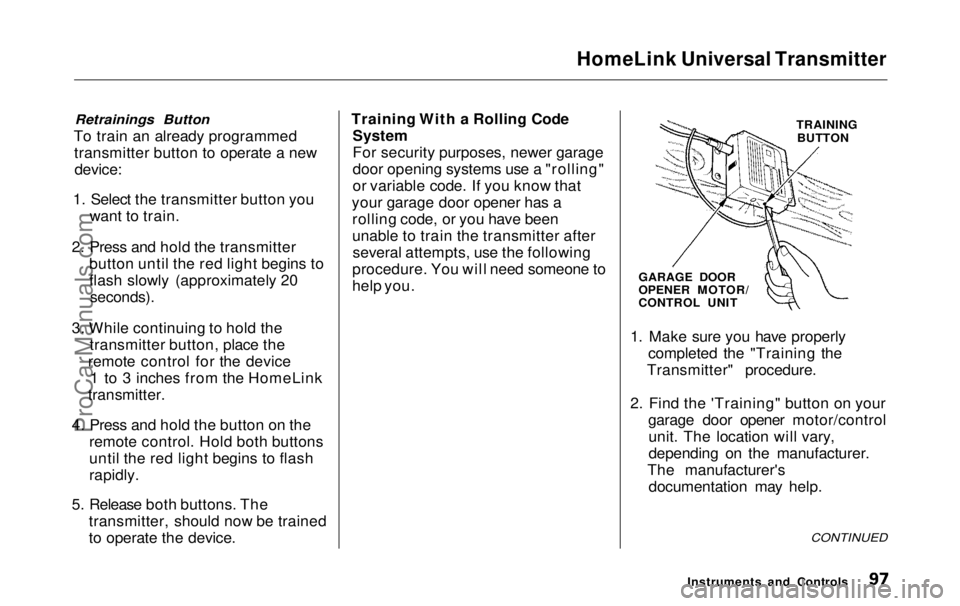
help you. TRAINING
BUTTON
GARAGE DOOR
OPENER MOTOR/
CONTROL UNIT
1. Make sure you have properly completed the "Training the
Transmitter" procedure.
2. Find the 'Training" button on your garage door opener motor/controlunit. The location will vary,
depending on the manufacturer.
The manufacturer's documentation may help.
CONTINUED
Instruments and ControlsProCarManuals.comMain Menu Table of Contents s t
Page 99 of 343

HomeLink Universal Transmitter
3. Press the Training button on the motor/control unit until the
Training light comes on, then release it.
4. Press and release the desired button on the HomeLink
transmitter.
5. Press and release the HomeLink transmitter button again. Thisshould turn off the training light
on the motor/control unit. (Some
systems may require you to press
and release the button three times.)
6. Press the transmitter button again. It should operate the garage door.
Erasing Codes
To erase the codes stored in all three buttons, press and hold the two outside buttons until the red light
begins to flash, then release the
buttons.
You should erase all three codes before selling the vehicle. As required by the FCC:
This device complies with Part 15 of the
FCC rules. Operation is subject to the
following two conditions: (1) This device
may not cause harmful interference, and (2) this device must accept any
interference received, including
interference that may cause undesired
operation.
This device complies with DOC
regulations in Canada.
Changes or modifications not expressly
approved by the party responsible for compliance could void the user's
authority to operate the equipment.
Instruments and ControlsProCarManuals.comMain Menu Table of Contents s t
Page 337 of 343

Index
GAWR (Gross Axle Weight
Rating)........................................ 213
GCWR (Gross Combined Weight
Rating)........................................ 213
Gearshift Lever Positions............. 199
Glass Cleaning............................... 281
Glove Box......................................... 87
GVWR (Gross Vehicle Weight
Rating) ........................................ 213
Halogen Headlight Bulbs.............. 266
Hazard Warning Flashers............... 70
Headlights......................................... 66 Aiming......................................... 266
Automatic Lighting Off............... 67
Daytime Running Lights............. 67
High Beam Indicator................... 61
High Beams, Turning on............ 66
Low Beams, Turning on............. 66
Reminder Chime.......................... 66
Replacing Halogen Bulbs ......... 266
Turning on.................................... 66
Head Restraints............................. 104
Heated Mirror................................ 116 Heating and Cooling...................... 130
High Altitude, Starting at.............. 197
High-Low Beam Switch .................. 66
HomeLink Universal
Transmitter.................................. 95
Hood Latch..................................... 248
Hood, Opening the ........................ 184
Horn................................................... 65
Hot Coolant, Warning about........ 237
Hydroplaning.................................. 211
Identification Number, Vehicle.... 314
If Your Vehicle Has to be
Towed......................................... 311
Ignition
Keys...............................................76
Switch............................................78
Timing Control System............. 324
Immobilizer System......................... 77
Important Safety Precautions .......... 6
Indicator Lights, Instrument
Panel.............................................. 57
Individual Map Lights................... 127
Infant Restraint................................ 30
Inflation, Proper Tire .................... 257
Inside Mirror.................................. 115
Inspection,Tire.............................. 259
Instrument Panel........................ 2, 56
Instrument Panel Brightness......... 67
Interior Cleaning............................ 280
Interior Lights................................ 125
Introduction......................................... i
Jacking up the Vehicle.................. 290
Jack, Tire........................................ 288
Jump Starting................................. 297
Keys...................................................76
Label, Certification........................ 314
Lane Change, Signaling.................. 68
Lap/Shoulder Belts.................. 15, 45
CONTINUEDProCarManuals.comMain Menu s t