Page 76 of 343

Steering Wheel Controls
Even with the cruise control turned
on, you can still use the accelerator
pedal to speed up for passing. After
completing the pass, take your foot off the accelerator pedal. The vehicle
will return to the set cruising speed.
Resting your foot on the brake pedal
will cause the cruise control to
cancel.
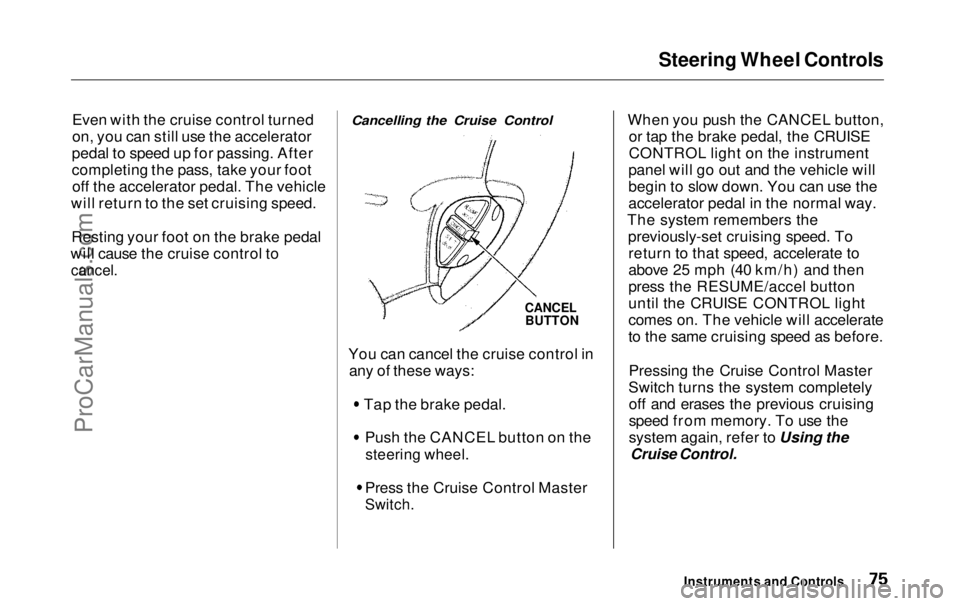
Cancelling the Cruise Control
CANCEL
BUTTON
You can cancel the cruise control in any of these ways: Tap the brake pedal.
Push the CANCEL button on the
steering wheel.
Press the Cruise Control Master
Switch.
When you push the CANCEL button,
or tap the brake pedal, the CRUISE
CONTROL light on the instrument
panel will go out and the vehicle will
begin to slow down. You can use the
accelerator pedal in the normal way.
The system remembers the previously-set cruising speed. Toreturn to that speed, accelerate to
above 25 mph (40 km/h) and then
press the RESUME/accel button
until the CRUISE CONTROL light
comes on. The vehicle will accelerate
to the same cruising speed as before.
Pressing the Cruise Control Master
Switch turns the system completely off and erases the previous cruising
speed from memory. To use the
system again, refer to Using the
Cruise Control.
Instruments and ControlsProCarManuals.comMain Menu Table of Contents s t
Page 77 of 343
Steering Wheel Controls, Keys and Locks
Remote Audio Controls
On EX model
These buttons let you control some functions of the audio system with-out removing your hands from the
wheel. Refer to page 179 for a com- plete explanation. Your vehicle comes with two master
keys and a valet key.
The master key fits all the locks on your vehicle: Ignition
DoorsGlove box TailgateThe valet key works only in the
ignition, the door locks and the
tailgate. You can keep the glove box locked when you leave your vehicle
and the valet key at a parking facility.
You should have received a key number plate with your keys. You
will need this key number if you ever
have to get a lost key replaced. Keep the plate stored in a safe place. If you
need to replace a key, use only
Honda-approved key blanks.
Instruments and Controls
KEY
NUMBER
PLATE
MASTER
KEYS
(BLACK)
VALET KEY
(GRAY)
KeysProCarManuals.comMain Menu Table of Contents s t
Page 79 of 343

Keys and Locks
As required by the FCC:
This device complies with Part 15 of the
FCC rules. Operation is subject to the
following two conditions: (1) This device way not cause harmful interference, and (2) this device must accept any
interference received, including interference that may cause undesired
operation.
This device complies with DOC
regulations in Canada.
Changes or modifications not expressly
approved by the party responsible for
compliance could void the user's
authority to operate the equipment.
Ignition Switch
The ignition switch is on the right side of the steering column. It has
four positions: LOCK (0)
ACCESSORY (I)
ON (II)
START (III)LOCK (0) — You can insert or
remove the key only in this position.
To switch from ACCESSORY to LOCK, you must push the key inslightly as you turn it. The shift lever
must also be in Park. The anti-theft
lock will lock the steering column
when you remove the key.
If the front wheels are turned, the
anti-theft lock may sometimes make
it difficult to turn the key from LOCK to ACCESSORY. Firmly turn
the steering wheel to the left or to
the right as you turn the key.
Instruments and ControlsProCarManuals.comMain Menu Table of Contents s t
Page 91 of 343

Sliding Doors
Power Sliding Doors
On EX model
The sliding doors on your vehicle are electrically-powered. You can openor close each power sliding door with
the switches on the dashboard, with
the inside or outside door handles, or
with the remote transmitter. The power sliding doors operate
with the ignition switch in anyposition. In addition: The shift lever must be in Park.
The MAIN switch on the
dashboard must be in the ON
position.
The sliding door you want to
operate must be unlocked. To open the door with the inside
handle, the childproof door lockon the door you want to operate
must be unlocked (see page 85).
You should close each sliding door before you start driving.
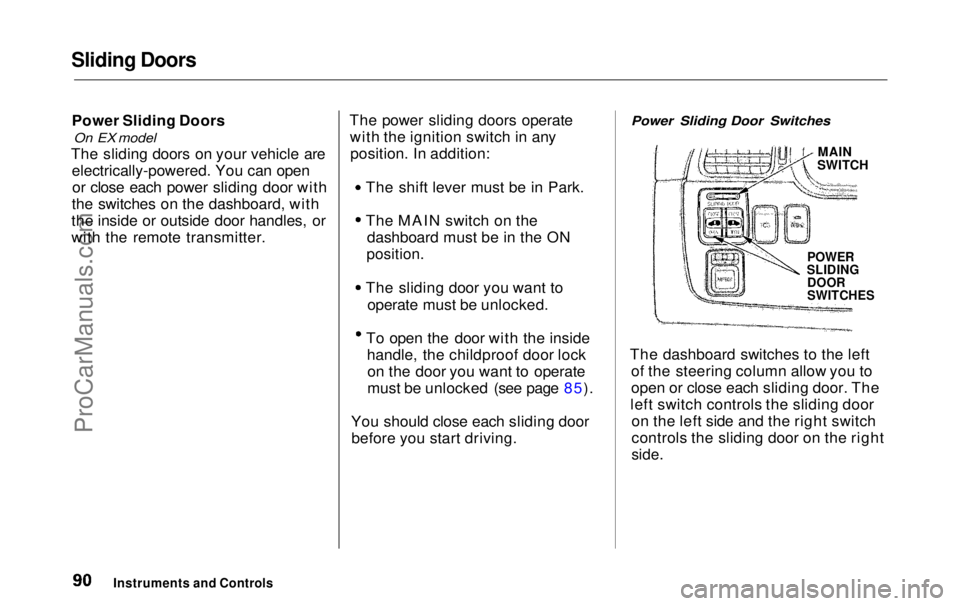
Power Sliding Door Switches
MAIN
SWITCH
POWER
SLIDING
DOOR
SWITCHES
The dashboard switches to the left of the steering column allow you to
open or close each sliding door. The
left switch controls the sliding door on the left side and the right switch
controls the sliding door on the right
side.
Instruments and ControlsProCarManuals.comMain Menu Table of Contents s t
Page 146 of 343
Climate Control System
Sunlight Sensor/Temperature
Sensor
The climate control system has two sensors. A sunlight sensor is located
in the top of the dashboard and a
temperature sensor is next to the steering column. Do not cover the
sensors or spill any liquid on them. TEMPERATURE SENSOR
Comfort and Convenience Features
SUNLIGHT SENSORProCarManuals.comMain Menu Table of Contents s t
Page 180 of 343

Audio System
Remote Audio Controls
On EX model
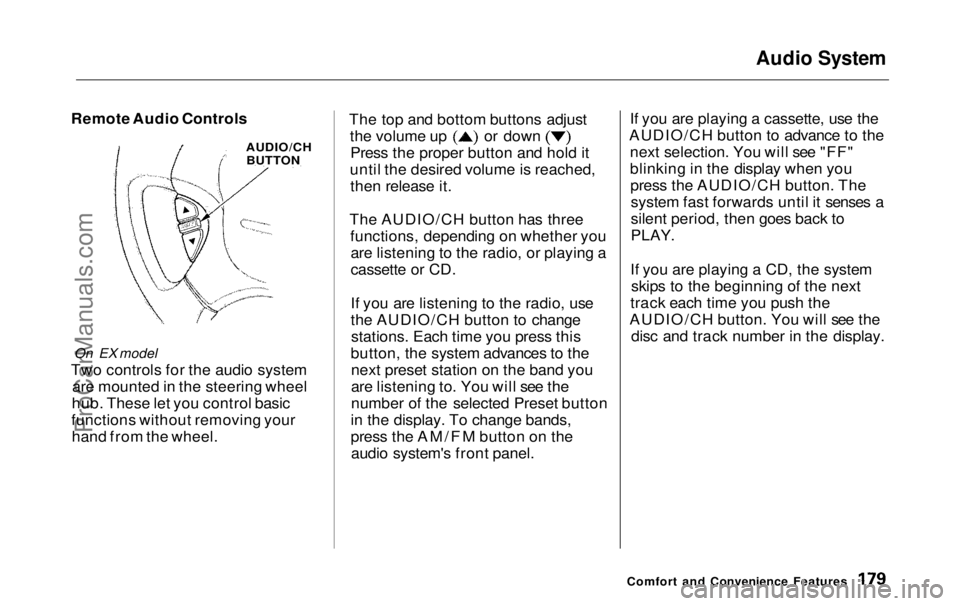
Two controls for the audio system are mounted in the steering wheel
hub. These let you control basic
functions without removing your hand from the wheel. The top and bottom buttons adjust the volume up or down
Press the proper button and hold it
until the desired volume is reached, then release it.
The AUDIO/CH button has three functions, depending on whether youare listening to the radio, or playing a
cassette or CD.
If you are listening to the radio, use
the AUDIO/CH button to changestations. Each time you press this
button, the system advances to the next preset station on the band you
are listening to. You will see the
number of the selected Preset button
in the display. To change bands,
press the AM/FM button on the audio system's front panel. If you are playing a cassette, use the
AUDIO/CH button to advance to the next selection. You will see "FF"
blinking in the display when youpress the AUDIO/CH button. Thesystem fast forwards until it senses a
silent period, then goes back to
PLAY.
If you are playing a CD, the system skips to the beginning of the next
track each time you push the
AUDIO/CH button. You will see the disc and track number in the display.
Comfort and Convenience Features
AUDIO/CH
BUTTONProCarManuals.comMain Menu Table of Contents s t
Page 191 of 343

Accessories and Modifications
Modifications
Do not remove any original
equipment or modify your vehicle in any way that would alter its design or
operation. This could make your
vehicle unsafe and illegal to drive.
For example, do not make any
modifications that would change the
ride height of your vehicle, or install
wheels and tires with a different overall diameter.
Such modifications can adversely affect handling, and interfere with
the operation of the vehicle's anti-
lock brakes and other systems. In addition, any modifications that
decrease ground clearance increase
the chance of undercarriage parts striking a curb, speed bump, or other
raised object, which could cause
your airbags to deploy.
Do not modify your steering wheelor any other part of your
Supplemental Restraint System.
Modifications could make thesystem ineffective. Additional Safety Precaution
Do not attach or place objects on the
airbag covers. Any object attached to
or placed on the covers marked "SRS
AIRBAG," in the center of the steering wheel and on top of the
dashboard, could interfere with the
proper operation of the airbags. Or,
if the airbags inflate, the objects could be propelled inside the vehicle
and hurt someone.
Before DrivingProCarManuals.comMain Menu Table of Contents s t
Page 197 of 343

Preparing to Drive
You should do the following checks and adjustments every day before
you drive your vehicle.
1. Make sure all windows, mirrors, and outside lights are clean and
unobstructed. Remove frost, snow, or ice.
2. Check that the hood and tailgate are fully closed.
3. Visually check the tires. If a tire looks low, use a gauge to check its
pressure.
4. Check that any items you may be carrying with you inside are storedproperly or fastened downsecurely. 5. Check the adjustment of the seat
(see page 100).
6. Check the adjustment of the inside and outside mirrors (see
page 115).
7. Check the adjustment of the steering wheel (see page 72 ).
8. Make sure the doors and tailgate are securely closed and locked.
9. Fasten your seat belt. Check that your passengers have fastenedtheir seat belts (see page 15). 10.Turn the ignition switch ON (II).
Check the indicator lights in the
instrument panel.
11.Start the engine (see page 197). 12. Check the gauges and indicator lights in the instrument panel (seepage 57).
DrivingProCarManuals.comMain Menu Table of Contents s t