1999 HONDA CIVIC COUPE steering wheel
[x] Cancel search: steering wheelPage 154 of 269

Driving in Bad Weather
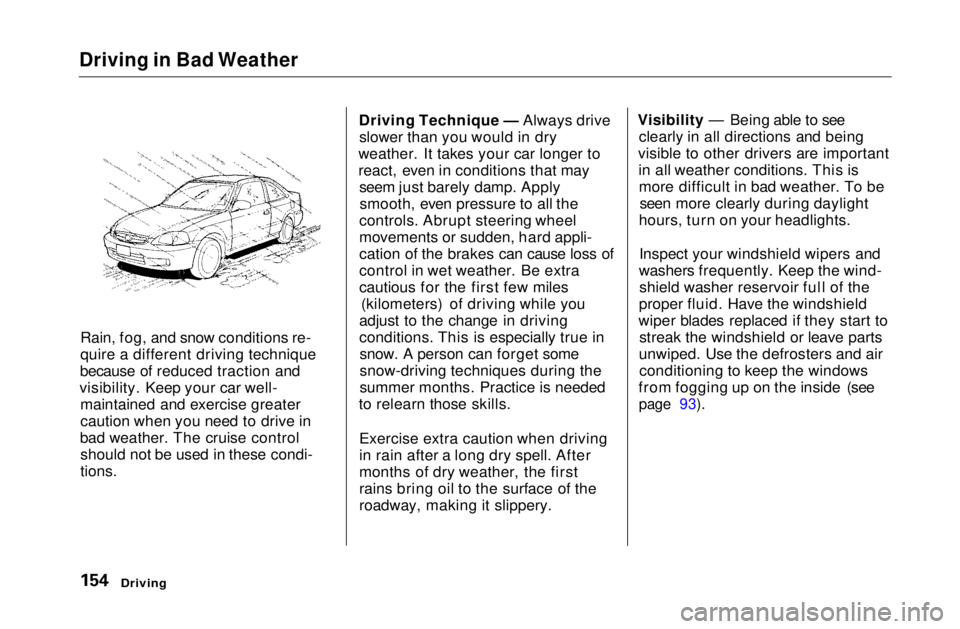
Rain, fog, and snow conditions re-
quire a different driving technique
because of reduced traction and
visibility. Keep your car well- maintained and exercise greater
caution when you need to drive in
bad weather. The cruise control should not be used in these condi-
tions.
Driving Technique — Always drive
slower than you would in dry
weather. It takes your car longer to
react, even in conditions that may seem just barely damp. Applysmooth, even pressure to all the
controls. Abrupt steering wheel
movements or sudden, hard appli-
cation of the brakes can cause loss of
control in wet weather. Be extra
cautious for the first few miles (kilometers) of driving while you
adjust to the change in driving
conditions. This is especially true in snow. A person can forget some
snow-driving techniques during the
summer months. Practice is needed
to relearn those skills.
Exercise extra caution when driving
in rain after a long dry spell. After
months of dry weather, the first
rains bring oil to the surface of the
roadway, making it slippery. Visibility — Being able to see
clearly in all directions and being
visible to other drivers are important in all weather conditions. This ismore difficult in bad weather. To be seen more clearly during daylight
hours, turn on your headlights.
Inspect your windshield wipers and
washers frequently. Keep the wind- shield washer reservoir full of the
proper fluid. Have the windshield
wiper blades replaced if they start to streak the windshield or leave parts
unwiped. Use the defrosters and air conditioning to keep the windows
from fogging up on the inside (see
page 93).
DrivingMain Menu Table of Contents s t
Page 156 of 269

Maintenance
This section explains why it is important to keep your car wellmaintained and to follow basic
maintenance safety precautions.
This section also includes Maintenance Schedules for normal
driving and severe driving conditions,
a Maintenance Record, and instruc-
tions for simple maintenance tasks
you may want to take care of yourself.
If you have the skills and tools to per-form more complex maintenance
tasks on your Honda, you may want
to purchase the Service Manual. See
page 263 for information on how to obtain a copy, or see your Honda
dealer.
Maintenance Safety....................... 158
Important Safety Precautions.. 159
Maintenance Schedule.................. 160
Maintenance Record..................... 167 Owner Maintenance Checks........ 169
Fluid Locations............................... 170
Engine Oil....................................... 171
Adding Oil................................... 171
Recommended Oil..................... 171Synthetic Oil............................... 172
Additives..................................... 172
Changing the Oil and Filter...... 173
Cooling System.............................. 175
Adding Engine Coolant............. 175Replacing Engine Coolant........ 177
Windshield Washers..................... 180
Transmission Fluid........................ 180
Automatic
Transmission.......................... 180
5-speed Manual
Transmission.......................... 182
Brake and Clutch Fluid................. 182
Brake System............................. 183
Clutch System............................ 183
Power Steering............................... 184
Air Cleaner Element...................... 185 Hood Latch..................................... 186
Spark Plugs..................................... 187
Replacement............................... 187
Specifications............................. 188
Battery............................................ 189
Wiper Blades.................................. 191
Air Conditioning System............... 193 Drive Belts...................................... 194
Timing Belt..................................... 194
Tires................................................ 195 Inflation....................................... 195
Recommended Tire Pressures
for Normal Driving............ 196
Inspection................................... 197
Maintenance............................... 197
Tire Rotation.............................. 198
Replacing Tires and Wheels .... 199
Wheels and Tires....................... 200
Winter Driving........................... 200
Snow Tires.............................. 200
Tire Chains............................. 201
Lights.............................................. 202 Replacing Bulbs......................... 204
Storing Your Car............................ 212
MaintenanceMain Menu s t
Page 183 of 269

Power Steering
Check the level when the engine is
cold. Look at the side of the
reservoir. The fluid should be
between the UPPER LEVEL and LOWER LEVEL. If it is below the
LOWER LEVEL, add power steering
fluid to the UPPER LEVEL.
Always use Genuine Honda PowerSteering Fluid. If it is not available,
you may use another power steering fluid as an emergency replacement.However, continued use can cause
increased wear and poor steering in cold weather. Have the powersteering system flushed and refilled
with Honda PSF as soon as possible. A low power steering fluid level can
indicate a leak in the system. Check
the fluid level frequently and have
the system inspected as soon as
possible.
Turning the steering wheel to full left
or right lock and holding it there can
damage the power steering pump.
Maintenance
NOTICE
UPPER LEVEL
LOWER LEVELMain Menu Table of Contents s t
Page 198 of 269

Tires
Replacing Tires and Wheels
The tires that came with your car were selected to match the perform- ance capabilities of the car while
providing the best combination of
handling, ride comfort, and long life.
You should replace them with radial tires of the same size, load range, speed rating, and maximum cold tire
pressure rating (as shown on the
tire's sidewall). Mixing radial and
bias-ply tires on your car can reduce its braking ability, traction, andsteering accuracy. It is best to replace all four tires at
the same time. If that is not possible
or necessary, then replace the two
front tires or the two rear tires as a
pair. Replacing just one tire can seriously affect your car's handling. The ABS works by comparing the
speed of the wheels. When replacing
tires, use the same size originally supplied with the car. Tire size and
construction can affect wheel speed and may cause the system to work in-
consistently.
If you ever need to replace a wheel,
make sure the wheel's specifications
match those of the original wheel
that came on your car. Replacement
wheels are available at your Honda dealer.
Maintenance
Installing improper tires on your
car can affect handling and
stability. This can cause a crash in which you can be seriouslyhurt or killed.
Always use the size and type of
tires recommended in this owner's manual.Main Menu Table of Contents s t
Page 204 of 269

Lights
4. Unclip the end of the hold-down wire from its slot. Pivot it out ofthe way and remove the bulb.
5. Insert the new bulb into the hole, making sure the tabs are in theirslots. Pivot the hold-down wire
back in place and clip the end into
the slot.
6. Install the rubber seal over the back of the headlight assembly.Make sure it is right side up; it is
marked "TOP."
7. Push the electrical connector onto the tabs of the new bulb. Makesure it locks in place.
Turn on the headlights to test the new bulb.
8. (Driver's side) Reinstall the power steering
reservoir.
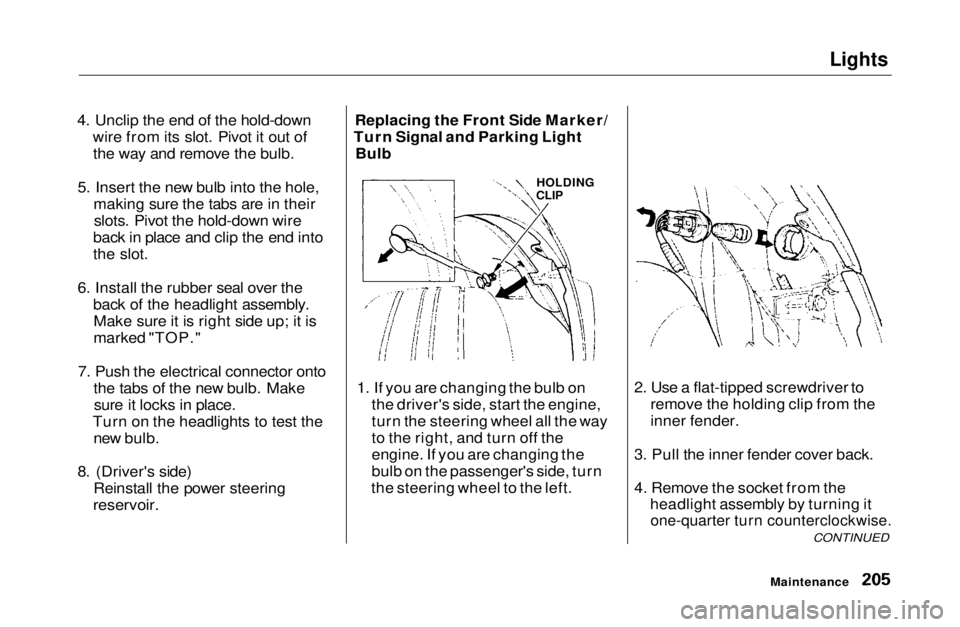
Replacing the Front Side Marker/
Turn Signal and Parking Light Bulb
1. If you are changing the bulb on the driver's side, start the engine,
turn the steering wheel all the way
to the right, and turn off the
engine. If you are changing the
bulb on the passenger's side, turn
the steering wheel to the left. 2. Use a flat-tipped screwdriver to
remove the holding clip from the
inner fender.
3. Pull the inner fender cover back.
4. Remove the socket from the headlight assembly by turning it
one-quarter turn counterclockwise.
CONTINUED
Maintenance
HOLDING
CLIPMain Menu Table of Contents s t
Page 240 of 269

Emergency Towing
If your vehicle needs to be towed,
call a professional towing service or, if you belong to one, an
organization that provides roadside
assistance. Never tow your vehicle
behind another vehicle with just a rope or chain. It is very dangerous.
There are three popular types of
professional towing equipment.
Flat-bed Equipment — The operator loads your vehicle on the back of a
truck. This is the best way to
transport your Honda.
Wheel-Lift Equipment — The tow
truck uses two pivoting arms that
go under the tires (front or rear) and
lift them off the ground. The other
two tires remain on the ground. This is an acceptable way to tow
your Honda.
Sling-type Equipment — The tow truck uses metal cables with hooks on the ends. These hooks go around
parts of the frame or suspension and
the cables lift that end of the vehicle
off the ground. Your vehicle's suspension and body can beseriously damaged. This method of
towing is unacceptable.
If your Honda cannot be transported
by flat-bed, it should be towed by
wheel-lift equipment with the front
wheels off the ground. If due to
damage, your vehicle must be towed with the front wheels on the ground,
do the following.
5-speed Manual Transmission Release the parking brake.
Shift the transmission to Neutral.
Automatic Transmission Release the parking brake.
Start the engine.
Shift to D4, then to N.
Turn off the engine. Improper towing preparation will
damage the transmission. Followthe above procedure exactly. If youcannot shift the transmission or
start the engine (automatictransmission), your vehicle must be
transported with the front wheels
off the ground.
With the front wheels on the ground, it is best to tow the vehicleno farther than 50 miles (80 km),
and keep the speed below 35 mph
(55 km/h).
If you decide to tow your vehicle
with all four wheels on the ground,
make sure you use a properly-
designed and attached tow bar. Prepare the vehicle for towing as
described above, and leave theignition switch in Accessory (I) so
the steering wheel does not lock.
Make sure the radio and any items
Taking Care of the Unexpected
NOTICEMain Menu Table of Contents s t
Page 241 of 269

Emergency Towing
plugged into the accessory powersocket are turned off so they do not
run down the battery.
Trying to lift or tow your vehicle by
the bumpers will cause serious
damage. The bumpers are not designed to support the vehicle's
weight.
Taking Care of the Unexpected
The steering system can be
damaged if the steering wheel is locked. Leave the ignition switch in
Accessory (I), and make sure the steering wheel turns freely before
you begin towing.
NOTICE
NOTICEMain Menu Table of Contents s t
Page 260 of 269

Index
Accessories and Modifications.... 130 Accessories................................. 130Additional Safety Precaution.... 131 Modifications............................. 131
ACCESSORY (Ignition Key Position)........................................ 70
Accessory Power Socket................ 85
Adding Automatic Transmission
Fluid........................................ 180
Brake Fluid................................. 183 Clutch Fluid................................ 183
Engine Coolant........................... 175
Engine Oil................................... 171
Manual Transmission Fluid..... 182
Power Steering Fluid................. 184
Windshield Washer Fluid......... 180
Additional Information About Your Seat Belts........................ 42
Lap Belt......................................... 43
Lap/Shoulder Belt....................... 42
Seat Belt Maintenance................ 44
Seat Belt System Components... 42 Additional Information About
Your SRS................................... 45
Additional Safety Precautions.... 48 How Your Airbags Work............ 45
How Your SRS Indicator
Works........................................ 47
SRS Components......................... 45
Additives, Engine Oil..................... 171
Adjustments
Head Restraints........................... 77
Mirrors.......................................... 81
Seats.............................................. 76
Steering Wheel............................ 65
Airbag (SRS)...................................... 9
Air Cleaner Element...................... 185 Air Conditioning............................... 88 Maintenance............................... 193
Usage............................................. 90
Air Outlets (Vents).......................... 90
Air Pressure, Tires........................ 196 High Speed Driving................... 250
Normal Driving.......................... 196
Alcohol in Gasoline........................ 252
Antifreeze....................................... 175
Anti-lock Brakes (ABS) Indicator Light.................... 55, 153
Operation.................................... 152
Anti-theft Steering Column
Lock............................................... 70
Appearance Care........................... 213
Ashtrays (Optional)......................... 85
Audio System................................... 96
Automatic Speed Control................ 66
Automatic Transmission............... 140
Capacity, Fluid........................... 247
Checking Fluid Level................ 180
Shifting........................................ 141
Shift Lever Position Indicator.. 140
Shift Lever Positions................. 141
Shift Lock Release..................... 144
Battery Charging SystemIndicator............................ 55, 232
Jump Starting............................. 227 Maintenance............................... 189
Specifications............................. 248
CONTINUEDMain Menu s t