Page 145 of 204

CELICA U
145
—After changing wheels
11. Check the air pressure of the re-placed tire.
Adjust the air pressure to the specification
designated in Part 8. If the pressure is
lower, drive slowly to the nearest service
station and fill to the correct pressure.
Do not forget to reinstall the tire inflation
valve cap as dirt and moisture could get
into the valve core and possibly cause air
leakage. If the cap is missing, have a new
one put on as soon as possible.
12. Restow all the tools, jack and flat tire securely.
As soon as possible after changing
wheels, tighten the wheel nuts to the
torque specified in Part 8 with a torque
wrench, have a technician repair the flat
tire and replace the spare tire with it.
CAUTION
Before driving, make sure all the
tools, jack and flat tire are securely
in place in their storage location to
reduce the possibility of personal in-
jury during a collision or s udden
braking.
(a) Towing with wheel lift type truck—
—From front
—From rear
(b) Using flat bed truckIf towing is necessary, we recommend
you to have it done by your Toyota
dealer or a commercial tow truck ser-
vice. In consultation with them, have
your vehicle towed using either (a) or
(b).
Only when you cannot receive a towing
service from a Toyota dealer or
commercial tow truck service, tow your
vehicle carefully in accordance with the
instructions given in ”—Emergency
towing” in this Part.
Proper equipment will help ensure that
your vehicle is not damaged while being
towed. Commercial operators are generally
aware of the state/provincial and local
laws pertaining to towing.
Your vehicle can be damaged if it is
towed incorrectly. Although most operators
know the correct procedure, it is possible
to make a mistake. To avoid damage to
your vehicle, make sure the following few
precautions are observed. If necessary,
show this page to the tow truck driver.
TOWING PRECAUTIONS:
Use a safety chain system for all towing,
and abide by the state/provincial and local
laws. The wheels and axle on the ground
must be in good condition. If they are
damaged, use a towing dolly.
If your vehicle needs to be
towed—
ProCarManuals.com
Page 146 of 204

CELICA U
146
(a) Towing with wheel lift type truck
From front—Release the parking brake.
NOTICE
When lifting wheels, take care to en-
sure adequate ground clearance for
towing at the opposite end of the
raised vehicle. Otherwise, the bumper
and/or underbody of the towed vehicle
will be damaged during towing.
From rear—
Manual transmission:
We recommend using a towing dolly
under the front wheels. If you do not
use a towing dolly, place the ignition
key in the ”ACC” position and put the
transmission in neutral.
NOTICE
Do not tow with the key removed
or in the ”LOCK” position when
towing from the rear without a
towing dolly. The steering lock
mechanism is not strong enough
to hold the front wheels straight.
Automatic transmission:
Use a towing dolly under the front
wheels.
NOTICE
Never tow a vehicle with an auto-
matic transmission from the rear
with the front wheels on the
ground, as this may cause serious
damage to the transmission.
(b) Using flat bed truck
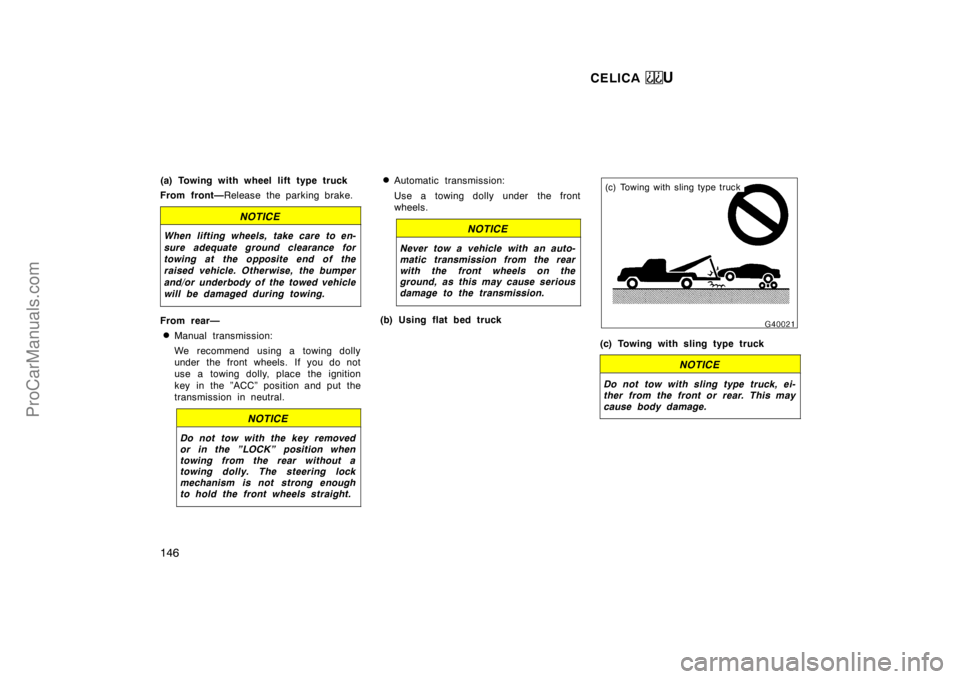
(c) Towing with sling type truck
NOTICE
Do not tow with sling type truck, ei-
ther from the front or rear. This may
cause body damage.
ProCarManuals.com
Page 147 of 204

CELICA U
147
—Emergency towing
If towing is necessary, we recommend
you to have it done by your Toyota
dealer or a commercial tow truck ser-
vice.
If towing service is not available in an
emergency, your vehicle may be tempo-
rarily towed by a cable or chain se-
cured to one of the emergency towing
eyelets under the front of the vehicle.
Use extreme caution when towing ve-
hicles.
A driver must be in the vehicle to steer
it and operate the brakes.Towing in this manner may be done only
on hard−
surfaced roads for a short dis-
tance and at low speeds. Also, the
wheels, axles, drive train, steering and
brakes must all be in good condition.
CAUTION
Use extreme caution when towing ve-
hicles. Avoid sudden starts or erratic
driving maneuvers which would place
excessive stress on the emergency
towing hook or eyelet and towing
cable or chain. The hook or eyelet
and towing cable or chain may break
and cause serious injury or damage.
NOTICE
Use only a cable or chain specifically
intended for use in towing vehicles.
Securely fasten the cable or chain to
the towing hook or eyelet provided.
Before towing, release the parking brake
and put the transmission in neutral (manu-
al) or ”N” (automatic). The key must be
in ”ACC” (engine off) or ”ON” (engine run-
ning).
CAUTION
If the engine is not running, the pow-
er assist for the brakes and steering
will not work so steering and braking
will be much harder than usual.
ProCarManuals.com
Page 148 of 204

CELICA U
148
If you cannot shift the selector lever
out of ”P” position to other positions
even though the brake pedal is de-
pressed, use the shift lock override but-
ton as follows:1. Turn the ignition key to ”LOCK” position. Make sure the parking
brake is set.
2. Pry up the cover with a flat −bladed
screwdriver or equivalent.3. Insert the screwdriver or equivalent into the hole to push down the shift
lock override button. You can shift
out of ”P” position only while push-
ing the button.
4. Shift into ”N” position.
5. Insert the cover.
6. Start the engine. For your safety, keep the brake pedal depressed.
Be sure to have the system checked by
your Toyota dealer as soon as possible.If the power mechanism for the convert-
ible top should become inoperative, you
may operate the convertible top manu-
ally. Have the system checked as soon
as possible at your Toyota dealer.
RAISING THE CONVERTIBLE TOP
MANUALLY 1. Open the trunk and remove the cov- er from the front trim. Push the
manual control switch on the
”MANUAL” side.
2. Lower the sun visors. Check that all the side windows and quarter win-
dows are lowered.
If the battery is discharged and the win-
dows cannot be lowered, open both side
doors.
If you cannot shift automatic
transmission selector lever If the convertible top does not
raise or lower
ProCarManuals.com
Page 149 of 204
CELICA U
149
3. From the rear seat, place one handon top of the rear seatback. With the
other hand, grasp the convertible top
edge at the center and slowly raise
the top half way.4. Move to the front seat, grasp thehandle which is under the convert-
ible top and pull the top fully for-
ward.5. While holding the convertible topagainst the windshield frame, push
the latch handles fully forward till
they are hooked.
Visually check that the latch handles are
fully seated in the strikers. Also, pull on
the convertible top side rails to make sure
the top is securely hooked.
ProCarManuals.com
Page 150 of 204
CELICA U
150
6. Return the manual control switch tothe opposite side of the ”MANUAL”
position, attach the cover, and close
the trunk. Raise all the side win-
dows, quarter windows, and sun vi-
sors.LOWERING THE CONVERTIBLE TOP
MANUALLY
1. Open the trunk and remove the cov- er from the front trim. Push the
manual control switch on the
”MANUAL” side.2. Lower all the side windows, quarterwindows, and sun visors. Then pull
the latch handles fully backward.
If the battery is discharged and the win-
dows cannot be lowered, open both side
doors.
ProCarManuals.com
Page 151 of 204
CELICA U
151
3. Place your palms under either frontconvertible top side rail around its
center and lower the convertible top
all the way down. Raise the sun vi-
sors.
CAUTION
To prevent personal injury, do not
grasp the convertible top side rails.
4. Return the manual control switch tothe opposite side of the ”MANUAL”
position, attach the cover, and close
the trunk.
If you lose your keys
Many Toyota dealers can make a new
key if you can give them the key num-
ber.
See the suggestion given in ”Keys” in
Chapter 1 −2.
If your keys are locked in the vehicle and
you cannot get a duplicate, many Toyota
dealers can still open the door for you,
using their special tools. If you must
break a window to get in, we suggest
breaking the smallest side window be-
cause it is the least expensive to replace.
Be extremely cautious to avoid cuts from
the glass.
ProCarManuals.com
Page 152 of 204
CELICA U
152
ProCarManuals.com