1998 PONTIAC GRAND PRIX Engine
[x] Cancel search: EnginePage 154 of 402
0 FUEL USED 0 OIL LIFE
0 AVG ECON ORANGE
I
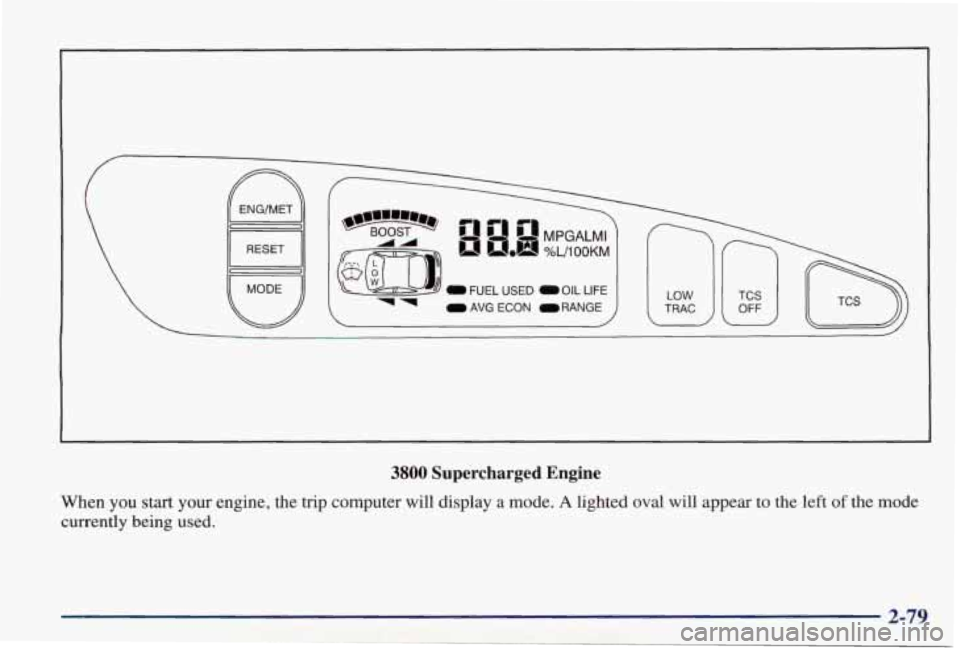
3800 Supercharged Engine
When you start your engine, the trip computer will display a mode. A lighted oval will appear to the left of the mode
currently being used.
2-79
Page 155 of 402

Control Buttons
The trip computer has three buttons that control its functions.
ENGMET: Press this button to change the display from
English to metric units or metric to English.
RESET Press this button for two seconds to reset the
mode displayed.
MODE: Press this button to change the mode
being displayed.
Functions
FUEL USED: Shows the total amount of fuel used
since you last reset this mode. The amount can be
displayed in gallons
or liters.
AVG ECON: Shows your average fuel economy since
you last reset this mode.
OIL LIFE: Shows a percentage of the oil’s remaining
useful life. The system predicts remaining oil life using
inputs from length of drives, coolant temperature,
engine rpm and vehicle speed. Each time
you get an oil
change, be sure to reset this function
so that it will give
you an accurate percentage.
To reset the Oil Life Indicator after the oil has been
changed, press the
MODE button until the light appears lit next
to
OIL LIFE. Press and hold the RESET button
for
three seconds. The oil life percentage should change
to
100%.
RANGE: Shows how much farther you can travel with
the fuel you have before refueling.
LOW WASHER FLUID: This light will come on when
your ignition
is on and the fluid container is low.
DOOR AJAR: If one of your doors is left ajar, a light
will appear next to that
door on the vehicle outline.
BOOST GAGE: If you have the supercharged engine,
this gage will show the amount of boost your engine
is receiving.
TRUNK AJAR: If your trunk is not fully closed or
open, a light will outline the trunk
area on your
vehicle outline.
TCS SWITCH: If your vehicle has the Traction Control
System, you will have
a disable switch on the far right
side of your Trip Computer. Your Traction Control
System
is automatically activated when you turn the
ignition on. This switch will activate/deactivate the
Traction Control System.
If you need to disable the
system, such as when you
are stuck and are rocking your
vehicle back and forth, push
this switch. See “Stuck: In
Sand, Mud, Ice or Snow’’ in
the Index.
Page 157 of 402

When the HUD is on, the speedometer reading will be displayed continually. The current radio station
or CD
track number will only be displayed for three seconds
after the radio or
CD track status changes. This will
happen whenever one
of the radio controls is pressed,
either on
the radio itself or on the optional steering
wheel controls.
To adjust the HUD so you can see it properly:
1. Start your engine and turn the DIM dial to the
desired
HUD image brightness.
2. Adjust your seat, if necessary, to a
comfortable position.
3. Press the top of the UP/DN switch until the HUD
image stops moving. Then press the bottom of the
switch until the image is as low as possible but in
full view.
4. Turn the DIM dial down until the HUD image is no
brighter than necessary.
To turn the HUD off, turn
the
DIM dial all the way down.
If the sun comes out, it becomes cloudy, or if you turn
on your headlamps, you may need to adjust the HUD
brightness again. Polarizing sunglasses could make the
HUD image harder to see.
I
I A CAUTION:
If the HUD image is too bright, or too high in
your field of view, it may take more time to see
things
you need to see when it’s dark outside. Be
sure to keep the
HUD image dim and placed low
in your field of view.
2-82
Page 163 of 402
Heating
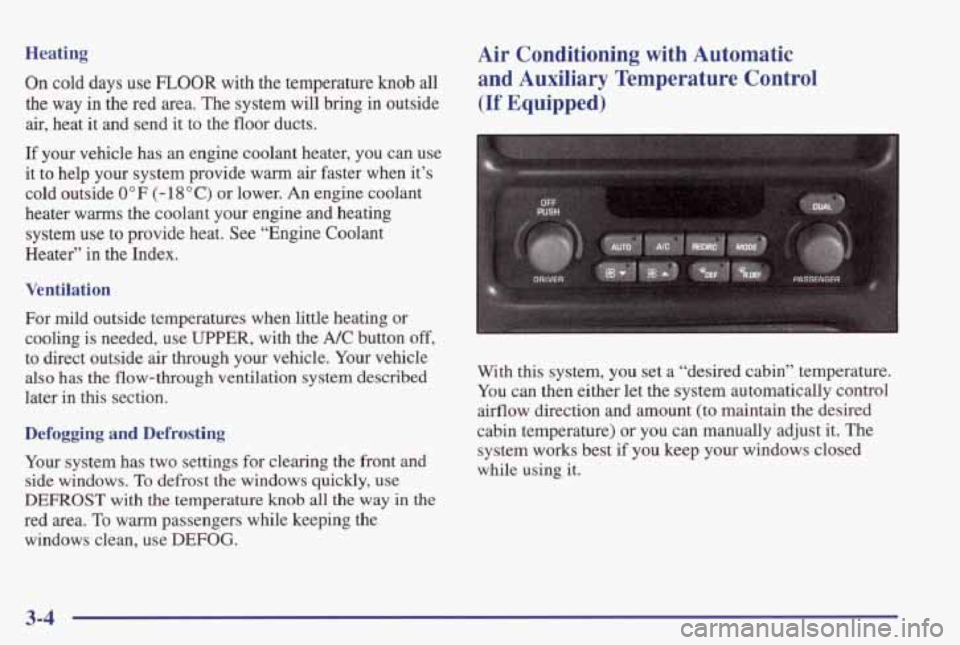
On cold days use FLOOR with the temperature knob all
the
way in the red area. The system will bring in outside
air, heat it and send it to the floor ducts.
If your vehicle has
an engine coolant heater, you can use
it to help your system provide warm
air faster when it’s
cold outside
0 OF (- 18 O C) or lower. An engine coolant
heater warms the coolant your engine and heating
system use to provide heat. See “Engine Coolant
Heater”
in the Index.
Ventilation
For mild outside temperatures when little heating or
cooling
is needed, use UPPER, with the A/C button off,
to direct outside air through your vehicle. Your vehicle
also has the flow-through ventilation system described
later in this section.
Defogging and Defrosting
Your system has two settings for clearing the front and
side windows.
To defiost the windows quickly, use
DEFROST with the temperature knob all the way in the
red area. To warm passengers while keeping the
windows clean, use
DEFOG.
Air Conditioning with Automatic
and Auxiliary Temperature Control
(If Equipped)
With this system, you set a “desired cabin” temperature.
You can then either let the system automatically control
airflow direction and amount (to maintain the desired
cabin temperature) or you can manually adjust it. The
system works best if
you keep your windows closed
while using it.
3-4
Page 164 of 402
Dual Zone Button Light
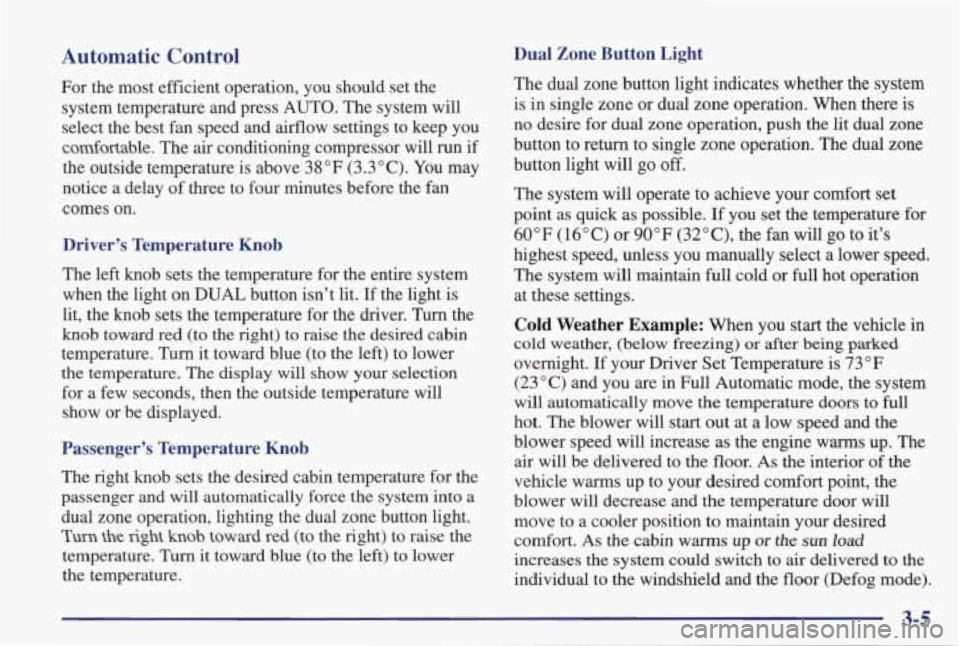
The dual zone button light indicates whether the system
is in single zone or dual zone operation. When there is
no desire for dual zone operation, push the lit dual zone
button to return to single zone operation. The dual zone
button light will
go off.
The system will operate to achieve your comfort set
point as quick
as possible. If you set the temperature for
60°F (16°C) or 90°F (32"C), the fan will go to it's
highest speed, unless you manually select
a lower speed.
The system
will maintain full cold or full hot operation
at these settings.
Cold Weather Example: When you start the vehicle in
cold weather, (below freezing) or after being parked
overnight. If your Driver Set Temperature is 73°F
(23°C) and you are in Full Automatic mode, the system
will automatically move the temperature doors to
full
hot. The blower will start out at a low speed and the
blower speed will increase as the engine warms up. The
air will be delivered to the floor.
As the interior of the
vehicle warms up to your desired comfort point, the
blower
will decrease and the temperature door will
move to a cooler position to maintain your desired
comfort. As the cabin
warms up or the SUR load
increases the system could switch to air delivered to the
individual to the windshield and the floor (Defog mode).
Automatic Control
For the most efficient operation, you should set the
system temperature and press AUTO. The system will
select the best fan speed and airflow settings to keep you
comfortable. The
air conditioning compressor will run if
the outside temperature is above 38 OF (3.3 " C). You may
notice a delay of three to four minutes before the fan
comes on.
Driver's Temperature Knob
The left knob sets the temperature for the entire system
when the light on DUAL button isn't lit. If the light is
lit, the knob sets the temperature for the driver.
Turn the
knob toward red (to the right) to raise the desired cabin
temperature. Turn it toward blue (to the left) to lower
the temperature. The display
will show your selection
for a
few seconds, then the outside temperature will
show or be displayed.
.x: - J -refs Temperature Knob
The right knob sets the desired cabin temperature for the
passenger and will automatically force the system into a
dual zone operation, lighting the dual zone button light.
Turn the right knob toward red (to the right) to raise the
temperature. Turn it toward blue (to the left)
to lower
the temperature.
3-5
Page 167 of 402
Heating Ventilation System
On cold days use LOWER. The system will bring in
outside
air, heat it and send it to the floor ducts.
If your vehicle has
an engine coolant heater, you can use
it to help
your system provide warm air faster when it’s
cold outside
0°F (- 18°C) or lower. An engine coolant
heater
warms the coolant your engine and heating
system uses to provide heat. See “Engine Coolant
Heater” in the Index.
Ventilation
For mild, outside temperatures when little heating or
cooling is needed, use
UPPER with the A/C button off,
to direct outside air through your vehicle. Your vehicle
also has the flow-through ventilation system described
later in this section.
Defogging and Defrosting
Your system has two settings for clearing the front and
side windows. To defrost the windows quickly, use DEE
To warm passengers while keeping the windows clean,
use
DEFOG.
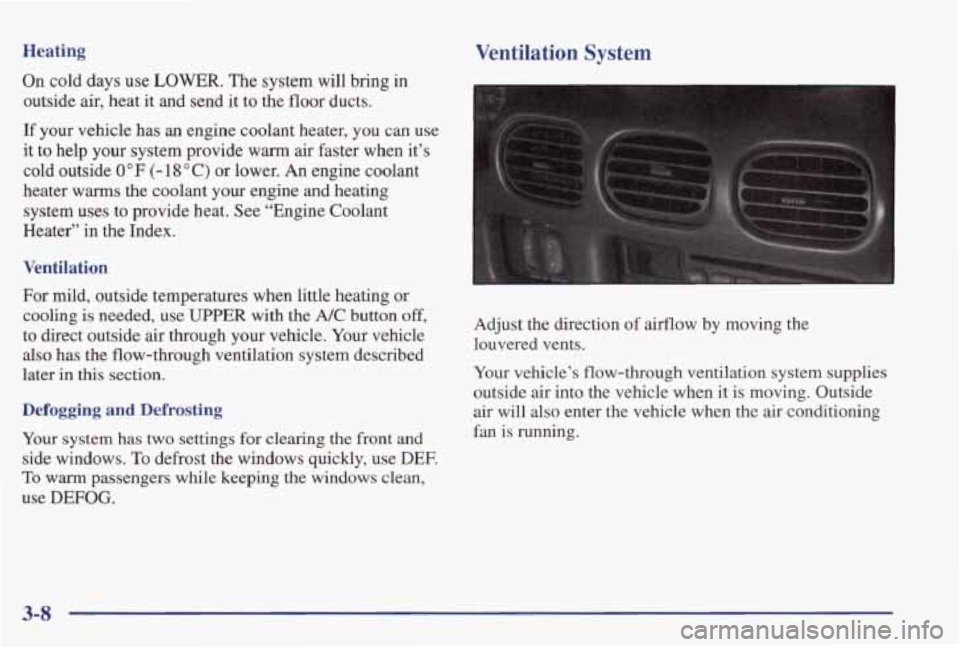
Adjust the direction of airflow by moving the
louvered vents.
Your vehicle’s flow-through ventilation system supplies
outside
air into the vehicle when it is moving. Outside
air will also enter the vehicle when the
air conditioning
fan is running.
3-8
Page 169 of 402

The rear window defogger uses a warming grid to
remove fog from the rear window. Press the button to
turn the rear defogger on. It will turn itself off after
about ten minutes.
If you turn it on again, the rear defogger will only run
for about five minutes before
turning off. You can also
turn it off by pressing the button again.
Do not attach anything like a temporary vehicle license
or decal across the defogger grid.
NOTICE:
Don’t use a razor blade or anything else sharp on
the inside
of the rear window. If you do, you
could cut or damage the warming grid,
and the
repairs wouldn’t be covered by your warranty.
Audio Systems
Your Delco Electronics audio system has been designed
to operate easily and give years of listening pleasure,
You will get the most enjoyment out
of it if you acquaint
yourself with it
first. Find out what your Delco
Electronics system can do and how
to operate all its
controls, to be sure you’re getting the most
out of the
advanced engineering that went into it.
Setting the Clock for AM-FM Stereo
Press SET. Within five seconds, press and hold the
SEEK down arrow until the correct hour appears on the
display. Press
and hold the SEEK up arrow until the
correct minute appears on the display.
Setting the Clock for All Systems Except
AM-FM Stereo
Press and hold HR until the correct hour appears. Press
and hold MIN until the correct minute appears. There
will be a two-second delay before the clock goes into
time-set mode,
and the colon on the display will blink
while in this mode.
3-10
Page 189 of 402
Understanding Radio Reception
AM
The range for most AM stations is greater than for FM,
especially at night. The longer range, however, can
cause stations to interfere with each other.
AM can pick
up noise from things like storms and power lines. Try
reducing the treble to reduce
this noise if you ever get it.
FM Stereo
FM stereo will give you the best sound, but FM signals
will reach only about 10 to 40 miles (16 to 65 km). Tall
buildings or hills can interfere with FM signals, causing
the sound to come and go.
Tips About Your Audio System
Hearing damage from loud noise is almost undetectable
until it is too late. Your hearing can adapt
to higher
volumes of sound. Sound that seems
normal can be loud
and harmful to
your hearing. Take precautions by
adjusting
the volume control on your radio to a safe
sound level before your hearing adapts to it.
To help avoid hearing loss or damage:
0 Adjust the volume control to the lowest setting.
0 Increase volume slowly until you hear comfortably
and clearly.
NOTICE:
Before you add any sound equipment to your
vehicle
-- like a tape player, CB radio, mobile
telephone or two-way radio
-- be sure you can
add what you want.
If you can, it's very
important to do it properly. Added sound
equipment may interfere with the operation
of
your vehicle's engine, Delco Electronics radio or
other systems, and even damage them. Your
vehicle's systems may interfere with the
operation
of sound equipment that has been
added improperly.
So, before adding sound equipment, check with
your dealer and be sure to check Federal rules
covering mobile radio and telephone units.
3-30