1998 PONTIAC GRAND PRIX change time
[x] Cancel search: change timePage 231 of 402

Making lhms
NOTICE:
Making very sharp turns while trailering could
cause the trailer to come in contact with the
vehicle. Your vehicle could be damaged. Avoid
making very sharp turns while trailering.
When you’re turning with a trailer, make wider turns
than normal.
Do this so your trailer won’t strike soft
shoulders, curbs, road signs, trees or other objects.
Avoid jerky
or sudden maneuvers. Signal well
in advance.
Thrn Signals When Towing a Trailer
When you tow a trailer, your vehicle may need a
different
turn signal flasher and/or extra wiring. Check
with your Pontiac dealer. The green arrows on your
instrument panel will flash whenever you signal a turn
or lane change. Properly hooked
up, the trailer lamps
will
also flash, telling other drivers you’re about to turn,
change lanes or stop.
When towing a trailer, the green mows on your
instrument panel will flash for turns
even if the bulbs on
the trailer are burned out. Thus, you may think drivers
behind you are seeing your signal when
they are not. It’s
important to check occasionally to be sure the trailer
bulbs are still working.
Your vehicle has bulb warning lights. When you plug a
trailer lighting system into
your vehicle’s lighting
system, its bulb warning lights may not let you
know if
one of your lamps goes out.
So, when you have a trailer
lighting system plugged in, be sure to check your
vehicle and trailer lamps from time to time to be sure
they’re
all working. Once you disconnect the trailer
lamps, the bulb warning lights again can tell you if one
of your vehicle lamps is out.
4-38
Page 261 of 402
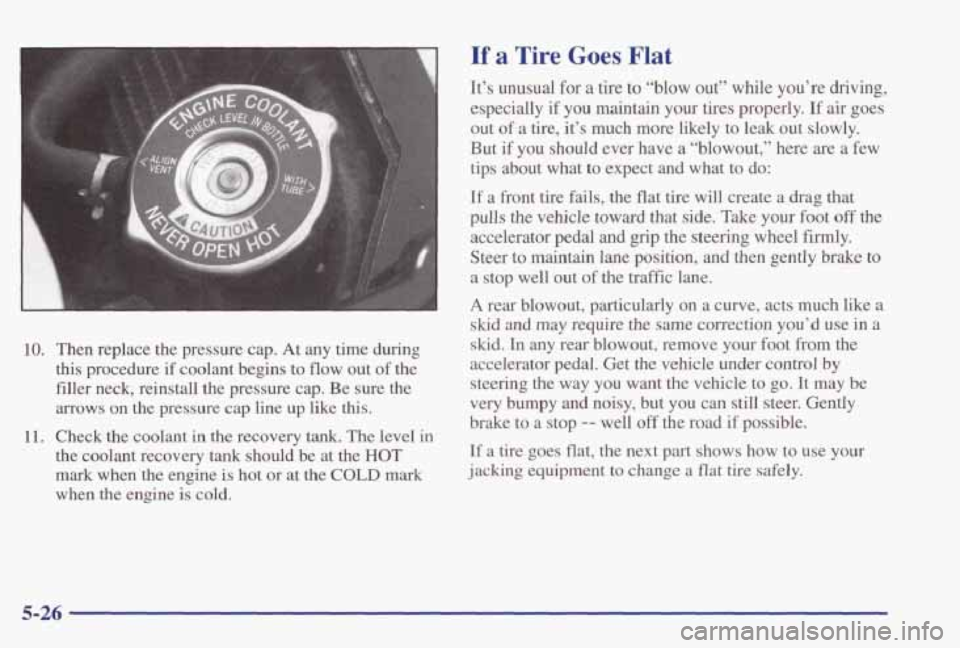
10. Then replace the pressure cap. At any time during
this procedure if coolant begins to flow out of the
filler neck, reinstall the pressure cap. Be sure the
arrows on the pressure cap line up like this.
11. Check the coolant in the recovery tank. The level in
the coolant recovery tank should be at the
HOT
mark when the engine is hot or at the COLD mark
when the engine
is cold.
If a Tire Goes Flat
It’s unusual for a tire to “blow out” while you’re driving,
especially if
you maintain your tires properly. If air goes
out
of a tire, it’s much more likely to leak out slowly.
But if
you should ever have a “blowout,” here are a few
tips about what to expect and what to do:
If a front tire fails, the flat tire will create a drag that
pulls the vehicle toward that side. Take your foot
off the
accelerator pedal
and grip the steering wheel firmly.
Steer to maintain lane position,
and then gently brake to
a stop well out of the tr&k lane.
A rear blowout, particularly on a curve, acts much like a
skid and may require the same correction you’d use in a
skid. In any rear blowout, remove your foot from the
accelerator pedal. Get
the vehicle under control by
steering the way you want the vehicle to
go. It may be
very bumpy and noisy, but you can still steer. Gently
brake to a stop
-- well off the road if possible.
If a tire goes flat, the next part shows how to use your
jacking equipment
to change a flat tire safely.
5-26
Page 268 of 402
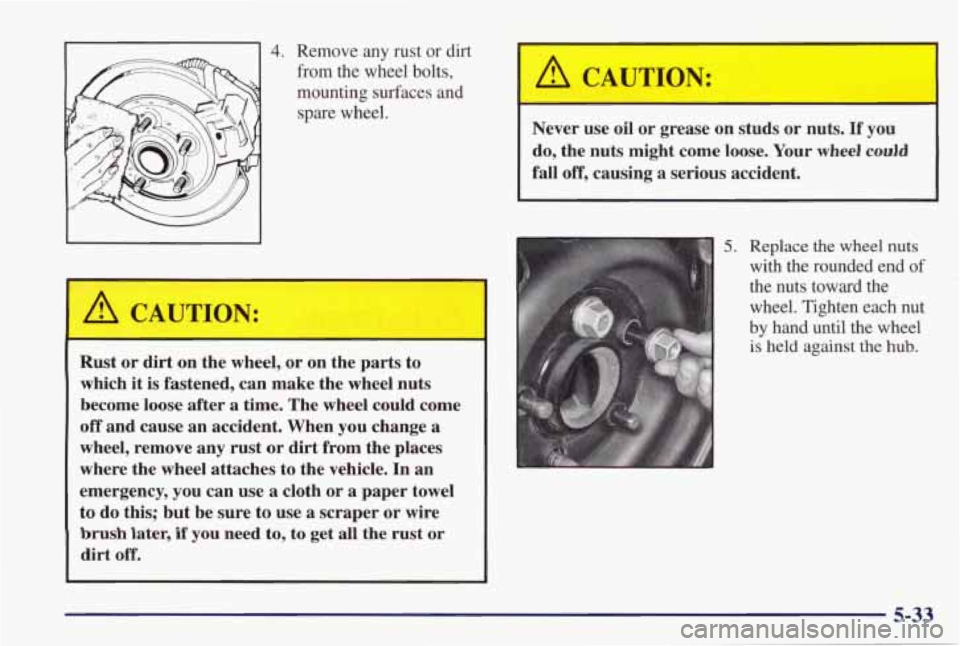
4. Remove any rust or dirt
-1 from the wheel bolts,
mounting surfaces and
spare wheel.
A CAUTION:
Rust or dirt on the wheel, or on the parts to
which
it is fastened, can make the wheel nuts
become loose after a time. The wheel could come
off and cause an accident. When you change a
wheel, remove any rust or dirt from the places
where the wheel attaches to the vehicle. In an
emergency, you can use a cloth or
a paper towel
to do this; but be sure to use a scraper or wire
brush later, if you need to, to get all the rust or
dirt off.
.h CAUTION:
Never use oil or grease on studs or nuts. If you
do, the nuts might come loose. Your wheel
could
fall off, causing a serious accident.
5. Replace the wheel nuts
with the rounded end of
the nuts toward the
I wheel. Tighten each nut
by hand until the wheel
is held against the hub.
5-33
Page 294 of 402
Engine Oil Additives
Don’t add anything to your oil. Your dealer is ready to advise
if you think something should be added.
How to Reset the CHANGE OIL SOON Light
When to Change Engine Oil
Your vehicle has an Oil Life Monitor. This feature
will let you know when to change your oil and
filter
-- usually between 3,000 miles (5 000 km) and
7,500 miles (12 500 km) since your last oil change.
Under severe conditions, the indicator may come
on
before 3,000 miles (5 000 km). Never drive your vehicle
more than
7,500 miles (12 500 km) or 12 months
(whichever occurs first) without an oil change.
The system won’t detect dust in the oil. So, if you
drive in a dusty area, be sure to change your oil every
3,000 miles (5 000 km) or sooner. Remember to reset
the Oil Life Monitor when the oil has been changed. For
more information, see “CHANGE
OIL SOON Light” in
the Index.
To reset your CHANGE OIL SOON light after an oil
change, turn
the key to ON, without the engine running
and pump the accelerator three times within five seconds.
What to Do with Used Oil
Did you know that used engine oil contains certain
elements that may be unhealthy for your skin and could
even cause cancer? Don’t let used oil stay on your skin
for very long. Clean your skin and nails with soap and
water, or a good hand cleaner. Wash or properly
throw
away clothing or rags containing used engine oil. (See
the manufacturer’s warnings about the use and
disposal
of oil products.)
Used oil can
be a real threat to the environment. If you
change your own oil, be sure to drain
all free-flowing oil
from the filter before disposal. Don’t ever dispose of oil
by putting it in the trash, pouring it on the ground, into
sewers, or into streams or bodies of water. Instead,
recycle it by taking it to a place that collects used oil.
If
you have a problem properly disposing of your used oil,
ask your dealer, a service station or a local recycling
center for help.
6-19
Page 297 of 402
Automatic Transaxle Fluid
When to Check and Change
A good time to check your automatic transaxle fluid
level is when the engine oil is changed.
Change both the fluid and filter every
50,000 miles
(83 000 km) if the vehicle is mainly driven under one or
more of these conditions:
0 In heavy city traffic where the outside temperature
In hilly or mountainous terrain.
regularly reaches
90” F (32 O C) or higher.
0 When doing frequent trailer towing.
0 Uses such as found in taxi, police or delivery service.
If you do not use
your vehicle under any of these
conditions, the fluid and filter
do not require changing.
See “Scheduled Maintenance Services” in the Index.
How to Check
Because this operation can be a little difficult, you may
choose to have
this done at your Pontiac dealership
Service Department.
If you do
it yourself, be sure to follow all the
instructions here, or you could get a false reading on
the dipstick.
NOTICE:
Too much or too little fluid can damage your
transaxle.
Too much can mean that some of the
fluid could come out and fall on
hot engine parts
or exhaust system parts, starting a fire. Be sure to get an accurate reading if you check your
transaxle fluid.
6-22
Page 311 of 402
Some driving conditions or climates may cause a brake
squeal when the brakes are first applied or lightly
applied.
This does not mean something is wrong with
your brakes.
Properly torqued wheel nuts are necessary to help
prevent brake pulsation. When tires are rotated, inspect
brake pads for wear and evenly torque wheel nuts in the
proper sequence to GM specifications.
Brake linings should always be replaced as complete
axle sets.
See “Brake System Inspection” in Section
7 of
this manual under Part C “Periodic
Maintenance Inspections.”
Brake Pedal Travel
See your dealer if the brake pedal does not return to
normal height, or
if there is a rapid increase in pedal
travel.
This could be a sign of brake trouble.
Brake Adjustment
Every time you apply the brakes, with or without the
vehicle moving, your brakes adjust for wear.
Replacing Brake System Parts
The braking system on a modem vehicle is complex. Its
many parts have to
be of top quality and work well
together
if the vehicle is to have really good braking.
Your vehicle was designed and tested with top-quality
GM brake parts.
When you replace parts of your braking
system
-- for example, when your brake linings wear
down and you have to have new ones put in
-- be sure
you get new approved GM replacement parts. If you
don’t, your brakes
may no longer work properly. For
example, if someone puts in brake linings that are wrong
for your vehicle, the balance between your front and
rear brakes can change
-- for the worse. The braking
performance you’ve
come to expect can change in many
other ways if someone puts in the wrong replacement
brake parts.
Battery
Every new Pontiac has an ACDelco Freedom@ battery.
You never have to add water to one of these. When it’s
time for a
new battery, we recommend an ACDelco
Freedom battery. Get one that has the replacement
number shown on the original battery’s label.
6-36
Page 322 of 402
After the tires have been rotated, adjust the front and rear inflation pressures as shown on
the Tire-Loading
Information label. Make certain that all wheel nuts are properly tightened. See “Wheel
Nut Torque” in
the Index.
L
Rust or dirt on a wheel, or on the parts to which
it is fastened, can make wheel nuts become loose
after a time. The wheel could come
off and cause
an accident. When you change a wheel, remove
any rust or
dirt from places where the wheel
attaches to the vehicle. In an emergency, you can
use a cloth or a paper towel to do this; but be
sure to use
a scraper or wire brush later, if you
need to, to get all the rust or dirt
off. (See
“Changing
a Flat Tire” in the Index.)
I I
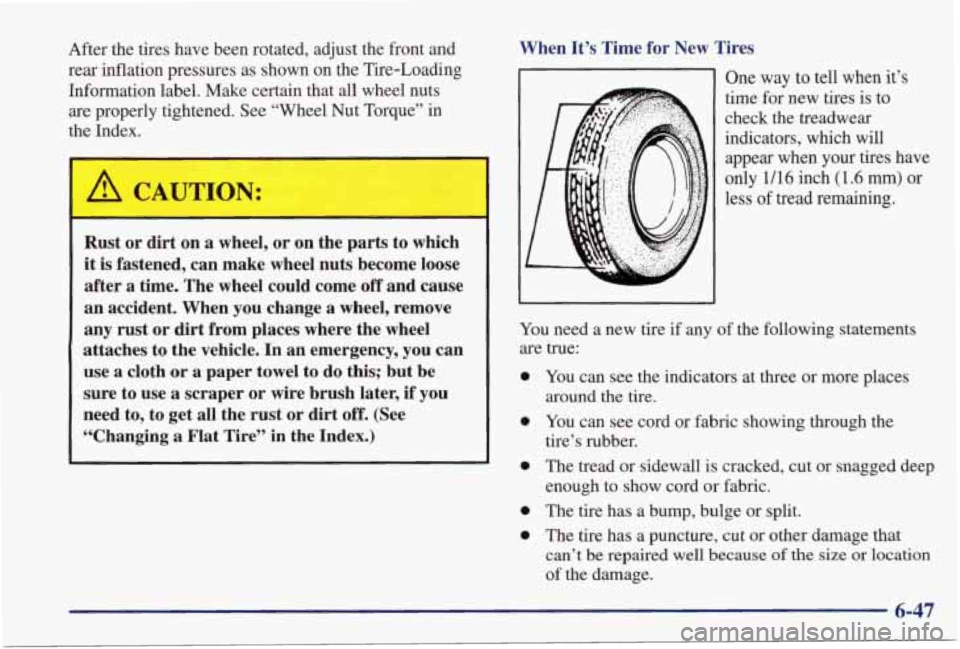
When It’s Time for New Tires
.. I
One way to tell when it’s
time for
new tires is to
check the treadwear
indicators, which will appear when your tires have
only 1/16 inch (1.6 mm) or
less
of tread remaining.
YOU need a new tire if any of the following statements
are true:
0
0
0
0
0
You can see the indicators at three or more places
around the tire.
You can see cord or fabric showing through the
tire’s rubber.
The tread or sidewall is cracked, cut or snagged deep
enough to show cord or fabric.
The tire has a bump, bulge or split.
The tire has a puncture, cut or other damage that can’t be repaired well
because of the size or location
of the damage.
6-47
Page 340 of 402
AUWCNSL CD CHG
ECM
CRUISE
UP-IGN
SIR
TURN
ABS
BTSI
PWR DROP HVAC CTRL
DIC/HVAC
DRL Auxiliary Power, Overhead Console
CD Changer
Underhood Electrical Center
-- Passenger’s Side
ECM
Cruise Control
ChimeNall Module, Cluster, Trip
Computer, Head-Up Display,
Brake-Transaxle Shift Interlock
Supplemental Inflatable Restraint
Turn Signal
(Air Bag)
Anti-Lock Brakes
PRNDL, Brake-Transaxle Shift Interlock
Power Drop Ignition
Blower Control, HVAC
Rear Defog, HVAC, Driver
Information Center, Daytime
Running Lamps, Heated Seats
Canister
Vent Solenoid
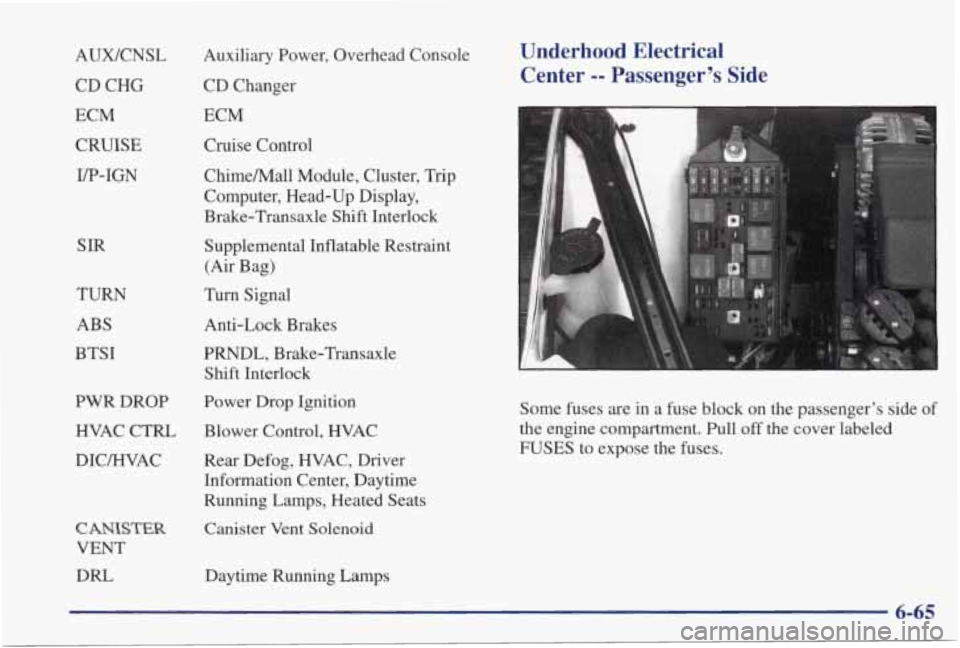
Daytime Running Lamps Some fuses are in a fuse block on the passenger’s side
of
the engine compartment. Pull
off the cover labeled
FUSES
to expose the fuses.
6-65