1998 PONTIAC BONNEVILLE engine
[x] Cancel search: enginePage 135 of 395
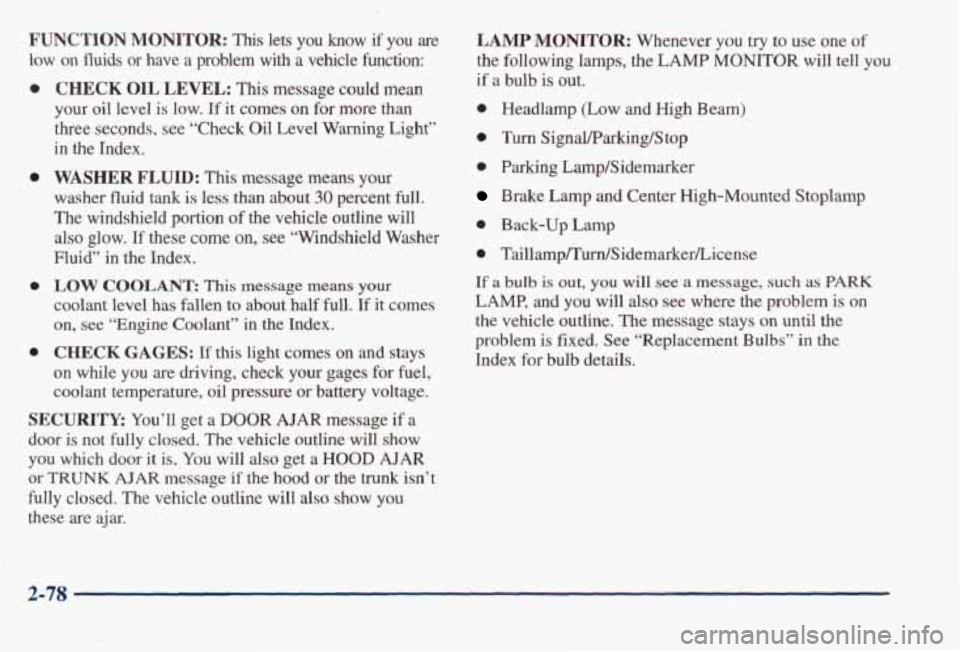
FUNCTION MONITOR: This lets you know if you are
low on fluids or have a problem with a vehicle function:
0
0
0
0
CHECK OIL LEVEL: This message could mean
your oil level
is low. If it comes on for more than
three seconds, see “Check Oil
Level Warning Light”
in the Index.
WASHER FLUID: This message means your
washer fluid
tank is less than about 30 percent full.
The windshield portion
of the vehicle outline will
also glow,
If these come on, see “Windshield Washer
Fluid” in the Index.
LOW COOLANT: This message means your
coolant level has fallen to about half full. If it comes
on,
see “Engine Coolant” in the Index.
CHECK GAGES: If this light comes on and stays
on while you are driving, check your gages for fuel,
coolant temperature, oil pressure or battery voltage.
SECURITY: You’ll get a DOOR AJAR message if a
door is not fully closed. The vehicle outline will show
you which door
it is. You will also get a HOOD AJAR
or TRUNK AJAR message if the hood or the trunk isn’t
fully closed. The vehicle outline will
also show you
these are ajar.
LAMP MONITOR: Whenever you try to use one of
the following lamps, the LAMP MONITOR will tell you
if a bulb is out.
0 Headlamp (Low and High Beam)
0 Turn Signal/Parking/Stop
0 Parking Lamp/Sidemarker
Brake Lamp and Center High-Mounted Stoplamp
0 Back-up Lamp
0 Taillamp~rn/Sidemarker/License
If a bulb is out, you will see a message, such as PARK
LAMP, and you will also see where the problem is on
the vehicle outline.
The message stays on until the
problem
is fixed. See “Replacement Bulbs” in the
Index for bulb details.
2-78
Page 145 of 395
To find your comfort zone, start with 75" F (24" C)
temperature setting and allow about 20 minutes for the
system to regulate. Press the
TEMP button up or down
to adjust the temperature setting if necessary, If you
choose the temperature setting of
60°F (15 "C), the
system will remain
at that maximum cooling setting and
will not regulate the
fan speed. If you choose the
temperature setting
of 90°F (33"c), the system will
remain at that maximum heating setting and will not
regulate the fan speed. Choosing either maximum
setting will not cause the system to heat
or cool
any faster.
Pressing
the AUTO button will display the requested
temperature, fan speed and air delivery mode for five
seconds, then change
to display the outside air
temperature. Be careful not to put
anythmg over the
sensor located
in the middle of the instrument panel near
the windshield,
or over the sensor in the grille above the
radio. These sensors are used by the automatic system to
regulate temperature.
The exterior temperature display sensor is in front of the
vehicle, near the radiator. The displayed temperature is
most accurate when the vehicle is moving. During stops,
or while idling, the display shows the previous driving
temperature for best system control.
To avoid blowing cold air in cold weather, the system
will delay
turning on the fan until warm air is available.
The length of delay depends on outside
air temperature,
engine coolant temperature, and time since
the engine
was last started. Pushing the fan button will override this
delay and change the fan to a selected single speed.
If you leave your vehicle, the system will remember the
control setting
the next time you start your engine.
Manual Operation
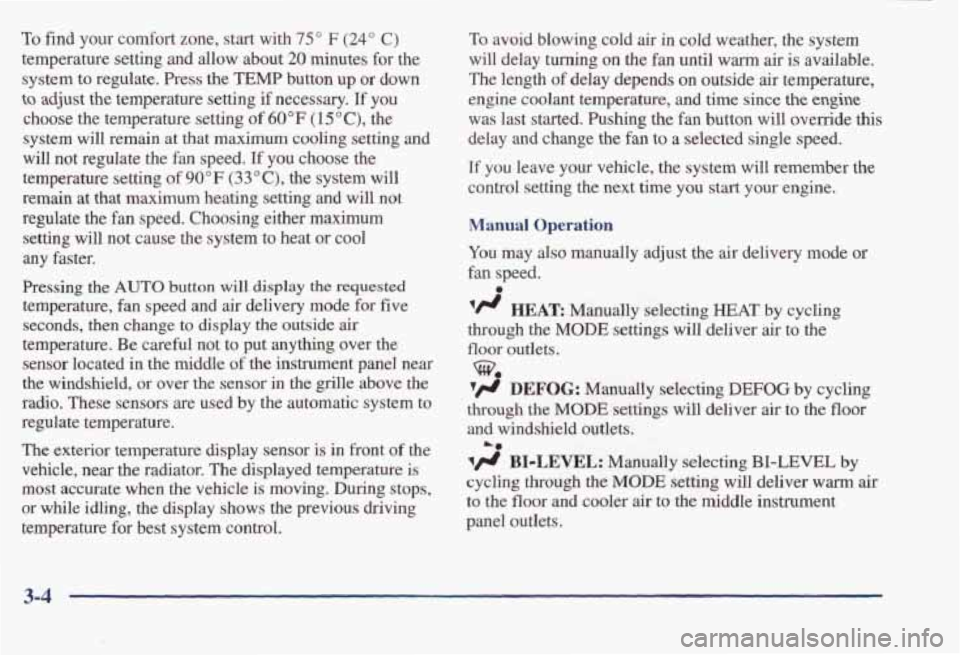
You may also manually adjust the air delivery mode or
fan speed.
'/J HEAR Manually selecting HEAT by cycling
through
the MODE settings will deliver air to the
floor outlets.
3 DEFOG: Manually selecting DEFOG by cycling
through the
MODE settings will deliver air to the floor
and windshield outlets.
a
Lo
BIDLEVEL: Manually selecting BI-LEVEL by
cycling through the MODE setting will deliver warm air
to the floor and cooler air to the middle instrument
panel outlets.
3-4
Page 148 of 395
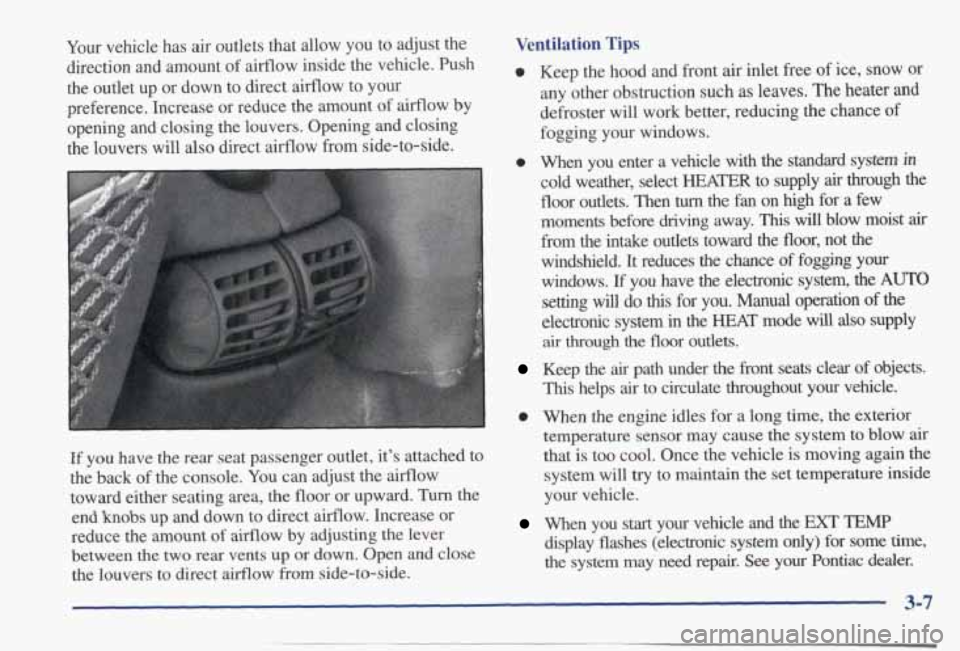
Your vehicle has air outlets that allow you to adjust the
direction and amount of airflow inside the vehicle. Push
the outlet up or down to direct airflow to your
preference. Increase or reduce the amount of airflow by
opening and closing the louvers. Opening and closing
the louvers
will also direct airflow from side-to-side.
If you have the rear seat passenger outlet, it's attached to
the back
of the console. You can adjust the airflow
toward either seating area, the floor or upward. Turn the
end
knobs up and down to direct airflow. Increase or
reduce the amount of airflow by adjusting the lever
between
the two rear vents up or down. Open and close
the louvers to direct airflow from side-to-side.
Ventilation Tips
0 Keep the hood and front air inlet free of ice, snow or
any other obstruction such as leaves. The heater and
defroster will work better, reducing the chance of
fogging your windows.
0 When you enter a vehicle with the standard system in
cold weather, select HEATER to supply air through the
floor outlets. Then turn the fan on high for a few
moments before driving away.
This will blow moist air
from the intake outlets toward the floor, not the
windshield. It reduces the chance
of fogging your
windows. If you have the electronic system, the AUTO
setting will do this for you. Manual operation of the
electronic system in the HEAT mode will also supply
air through the floor outlets.
Keep the air path under the front seats clear of objects.
This helps air to circulate throughout your vehicle.
0 When the engine idles for a long time, the exterior
temperature sensor may cause the system to blow
air
that is too cool. Once the vehicle is moving again the
system
will try to maintain the set temperature inside
your vehicle.
When you start your vehicle and the EXT TEMP
display flashes (electronic system only) for some time,
the system may
need repair. See your Pontiac dealer.
Page 150 of 395
EICE: I
~~
Do not try to clear frost or other material from
the inside of the rear window with a razor blade
or anything else that is sharp. This may damage
the defogger grid. The repairs wouldn’t
be
covered by your warranty.
Audio Systems
Your Delco Electronics audio system has been designed
to operate easily
and give years of listening pleasure.
You will get the most enjoyment out of it if you acquaint
yourself with it first. Find out what your Delco
Electronics system can do
and how to operate all its
controls, to be sure you’re getting the most out of the
advanced engineering that went into
it.
Setting the Clock for AM-FM Stereo
Press SET. Within five seconds, press and hold the
SEEK down arrow until the correct hour appears on the
display. Press and hold the
SEEK up arrow until the
correct minute appears on the display.
Setting the Clock for All Systems Except
AM-FM Stereo
Press and hold HR until the correct hour appears. Press
and hold MIN until the correct minute appears. There
will be a two-second delay before the clock goes into
time-set mode, and the colon on the display
will blink
while in this mode.
3-9
Page 169 of 395
NOTICE:
Before you add any sound equipment to your
vehicle
-- like a tape player, CB radio, mobile
telephone or two-way radio
-- be sure you can
add what you want.
If you can, it’s very
important to do it properly. Added sound
equipment may interfere with the operation of
your vehicle’s engine, Delco Electronics radio or
other systems, and even damage them. Your
vehicle’s systems may interfere with the
operation of sound equipment that has been
added improperly.
So, before adding sound equipment, check with
your dealer and be sure to check Federal rules
covering mobile radio and telephone units.
Care of Your Cassette Tape Player
A tape player that is not cleaned regularly can cause
reduced sound quality, ruined cassettes or a damaged
mechanism. Cassette tapes should be stored in their
cases away from contaminants, direct sunlight and
extreme heat.
If they aren’t, they may not operate
properly or may cause failure
of the tape player.
Your tape player should be cleaned regularly after every
50 hours of use. Your radio may display CLN to indicate
that
you have used your tape player for 50 hours without
resetting the tape clean timer.
If this message appears on
the display, your cassette tape player needs to be
cleaned. It will still play tapes, but you should clean it as
soon as possible to prevent damage to your tapes and
player. If
you notice a reduction in sound quality, try a
known good cassette to see
if it is the tape or the tape
player at fault. If this other cassette has no improvement
in sound quality, clean the tape player.
The recommended cleaning method for your cassette
tape player is the
use of a scrubbing action,
non-abrasive cleaning
cassette with pads which scrub
the tape head as
the hubs of the cleaner cassette turn.
The recommended cleaning cassette is available through
your dealership (GM Part No. 12344789).
3-28
Page 180 of 395
Avoid needless heavy braking. Some people drive in spurts
-- heavy acceleration followed by heavy
braking
-- rather than keeping pace with traffic. This is a
mistake. Your brakes may not have time to cool between
hard stops. Your brakes will wear out much faster if you
do a lot of heavy braking.
If you keep pace with the
traffic and allow realistic following distances, you will
eliminate a lot of unnecessary braking. That means
better braking and longer brake life.
If your engine ever stops while you’re driving, brake
normally but don’t
pump your brakes. If you do, the
pedal may get harder to push down.
If your engine
stops, you will still have some power brake assist. But
you
will use it when you brake. Once the power assist is
used up, it may take longer to stop and the brake pedal
will
be harder to push.
Anti-Lock Brakes (ABS)
Your vehicle has anti-lock brakes (ABS). ABS is an
advanced electronic braking system that will help
prevent a braking
skid.
When you start your engine, or when you begin to drive
away, your anti-lock brake system will check itself. You
may hear a momentary motor or clicking noise while
this test is going on, and you may even notice that your
brake pedal moves or pulses
a little. This is normal.
I
ANTILOCK (e)
If there’s a problem with the
anti-lock brake system,
this
warning light will stay on.
See “Anti-Lock Brake
System Warning Light” in
the Index.
4-7
Page 182 of 395
Remember: Anti-lock doesn’t change the time you need to get your foot up to the brake pedal or always decrease
stopping distance.
If you get too close to the vehicle in
fiont of you, you won’t have time to apply your brakes
if that vehicle suddenly slows or stops. Always leave
enough room up ahead to stop, even though you have anti-lock brakes.
Using Anti-Lock
Don’t pump the brakes. Just hold the brake pedal down
fiiy and let anti-lock work for you. You may feel a
slight brake pedal pulsation or notice some noise, but
this is normal.
Traction Control System (If Equipped)
Your vehicle may have a traction control system that
limits wheel spin. This is especially useful in slippery
road conditions. The system operates only if it senses
that one or both of the front wheels
are spinning or
beginning to lose traction. When this happens, the system works the front brakes and reduces engine power
to
limit wheel spin.
You may feel
or hear the system working, but this
is normal.
If your vehicle is in cruise control when the traction
control system begins to limit wheel spin, the cruise
control will automatically disengage. When road
conditions allow you to safely use it again, you may
reengage the cruise control. (See “Cruise Control”
in the Index.)
TRACTION
OFF
This light should come on
briefly when you start the
engine.
If it stays on or
comes on while you are
driving, there’s a problem
with your traction
control system.
See “Traction Control System Warning Light” in the
Index. When this warning light is on, the system will not
limit wheel spin. Adjust
your driving accordingly.
The traction control system automatically comes on
whenever you start your vehicle. To limit wheel spin,
especially in slippery road conditions, you should
always leave the system on. But you can turn the
traction control system
off if you ever need to. (You
should turn the system
off if your vehicle ever gets stuck
in
sand, mud, ice or snow. See ‘‘Rockiniz Your Vehicle”
in the Index.)
4-9
Page 183 of 395
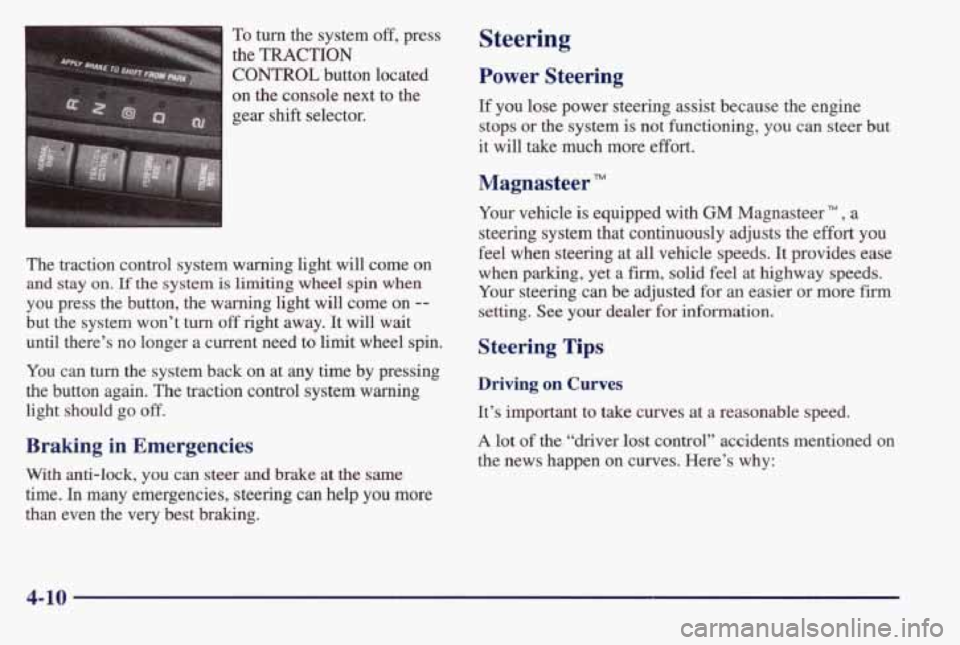
To turn the system off, press
the
TRACTION
CONTROL button located
on the console next to the
gear
shift selector.
The traction control system warning light will come on
and stay on. If the system is limiting wheel spin when
you press the button, the warning light will come on --
but the system won’t turn off right away. It will wait
until there’s no longer a current need to limit wheel spin.
You can
turn the system back on at any time by pressing
the button again. The traction control system warning
light should go
off.
Braking in Emergencies
With anti-lock, you can steer and brake at the same
time. In many emergencies, steering can help you more
than even the very best braking.
Steering
Power Steering
If you lose power steering assist because the engine
stops or the system is not functioning, you
can steer but
it will take much more effort.
Magnasteer TM
Your vehicle is equipped with GM Magnasteer m, a
steering system that continuously adjusts
the effort you
feel when steering at
all vehicle speeds. It provides ease
when parking, yet a
firm, solid feel at highway speeds.
Your steering can be adjusted for an easier or more firm
setting. See your dealer for information.
Steering Tips
Driving on Curves
It’s important to take curves at a reasonable speed.
A lot of the “driver lost control” accidents mentioned on
the news happen on curves. Here’s why:
4-10