1998 NISSAN QUEST ECU
[x] Cancel search: ECUPage 122 of 260
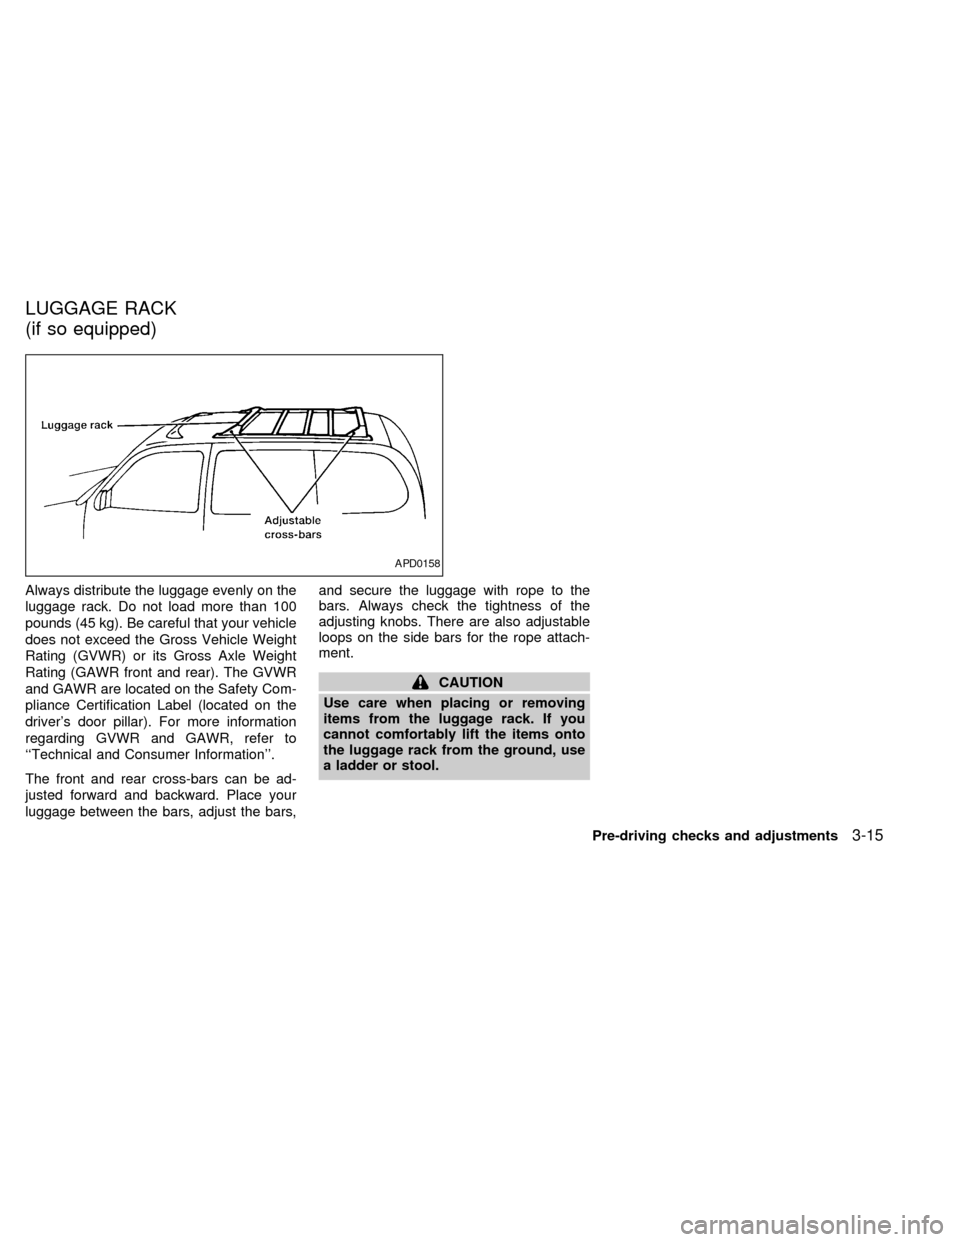
Always distribute the luggage evenly on the
luggage rack. Do not load more than 100
pounds (45 kg). Be careful that your vehicle
does not exceed the Gross Vehicle Weight
Rating (GVWR) or its Gross Axle Weight
Rating (GAWR front and rear). The GVWR
and GAWR are located on the Safety Com-
pliance Certification Label (located on the
driver's door pillar). For more information
regarding GVWR and GAWR, refer to
``Technical and Consumer Information''.
The front and rear cross-bars can be ad-
justed forward and backward. Place your
luggage between the bars, adjust the bars,and secure the luggage with rope to the
bars. Always check the tightness of the
adjusting knobs. There are also adjustable
loops on the side bars for the rope attach-
ment.
CAUTION
Use care when placing or removing
items from the luggage rack. If you
cannot comfortably lift the items onto
the luggage rack from the ground, use
a ladder or stool.
APD0158
LUGGAGE RACK
(if so equipped)
Pre-driving checks and adjustments3-15
ZX
Page 123 of 260
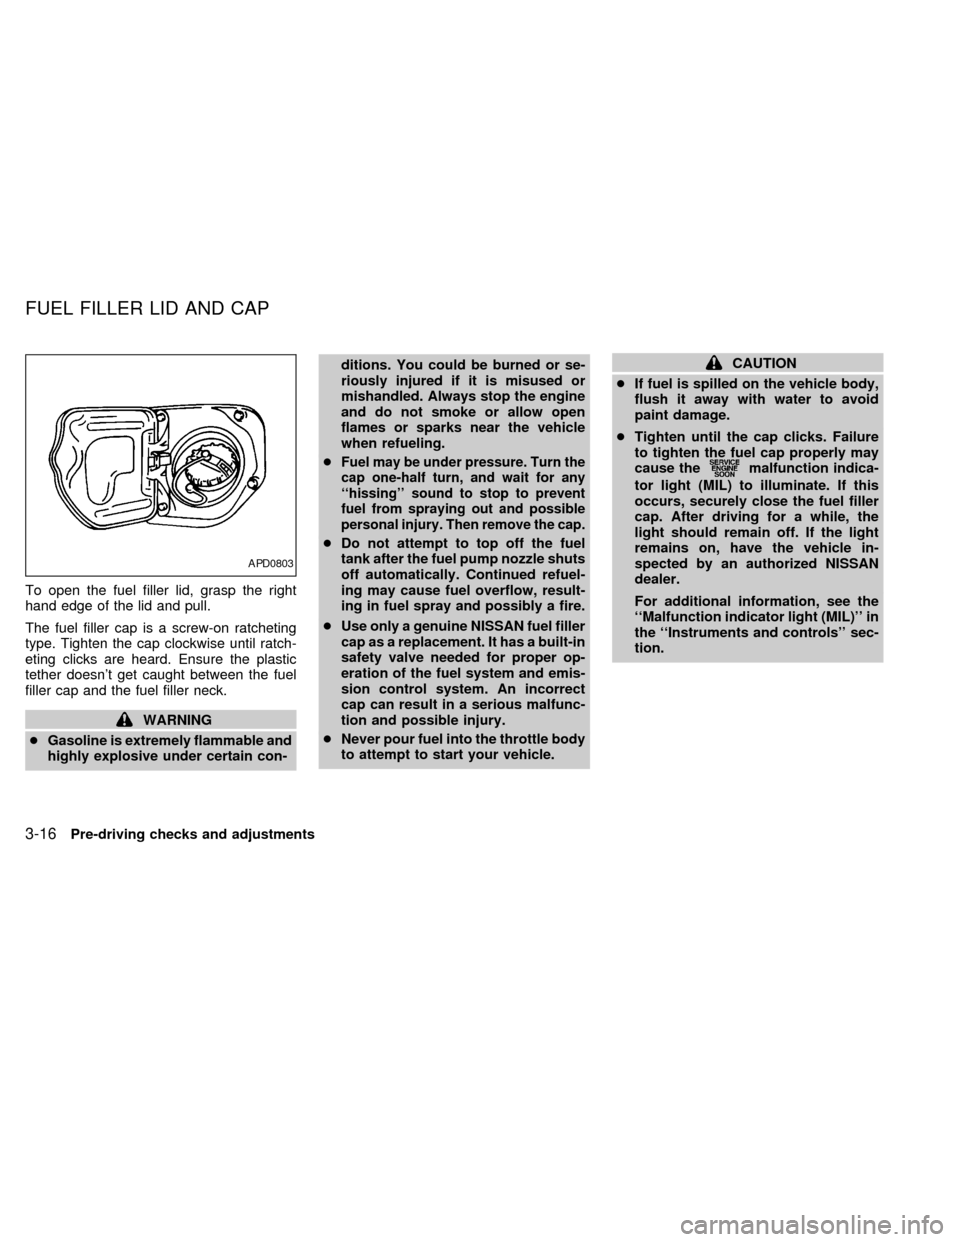
To open the fuel filler lid, grasp the right
hand edge of the lid and pull.
The fuel filler cap is a screw-on ratcheting
type. Tighten the cap clockwise until ratch-
eting clicks are heard. Ensure the plastic
tether doesn't get caught between the fuel
filler cap and the fuel filler neck.
WARNING
cGasoline is extremely flammable and
highly explosive under certain con-ditions. You could be burned or se-
riously injured if it is misused or
mishandled. Always stop the engine
and do not smoke or allow open
flames or sparks near the vehicle
when refueling.
c
Fuel may be under pressure. Turn the
cap one-half turn, and wait for any
``hissing'' sound to stop to prevent
fuel from spraying out and possible
personal injury. Then remove the cap.
cDo not attempt to top off the fuel
tank after the fuel pump nozzle shuts
off automatically. Continued refuel-
ing may cause fuel overflow, result-
ing in fuel spray and possibly a fire.
cUse only a genuine NISSAN fuel filler
cap as a replacement. It has a built-in
safety valve needed for proper op-
eration of the fuel system and emis-
sion control system. An incorrect
cap can result in a serious malfunc-
tion and possible injury.
cNever pour fuel into the throttle body
to attempt to start your vehicle.
CAUTION
cIf fuel is spilled on the vehicle body,
flush it away with water to avoid
paint damage.
cTighten until the cap clicks. Failure
to tighten the fuel cap properly may
cause the
malfunction indica-
tor light (MIL) to illuminate. If this
occurs, securely close the fuel filler
cap. After driving for a while, the
light should remain off. If the light
remains on, have the vehicle in-
spected by an authorized NISSAN
dealer.
For additional information, see the
``Malfunction indicator light (MIL)'' in
the ``Instruments and controls'' sec-
tion.
APD0803
FUEL FILLER LID AND CAP
3-16Pre-driving checks and adjustments
ZX
Page 170 of 260
chain manufacturer's suggestions. In ad-
dition, drive at a reduced speed, other-
wise, your vehicle may be damaged
and/or vehicle handling and performance
may be adversely affected.
Tire chains
Use of tire chains may be prohibited accord-
ing to location. Check the local laws before
installing tire chains. When installing tire
chains, make sure they are of proper size
for the tires on your vehicle and are installed
according to the chain manufacturer's sug-
gestions.Use only SAE Class ``S'' chains.
Other types may damage your vehicle. Use
chain tensioners when recommended by
the tire chain manufacturer to ensure a tight
fit. Loose end links of the tire chain must be
secured or removed to prevent the possibil-
ity of whipping action damage to the fenders
or undercarriage. If possible, avoid fully
loading your vehicle when using tire chains.
In addition, drive at a reduced speed. Do not
exceed the maximum speed suggested by
chain manufacturer. Otherwise, your ve-
hicle may be damaged and/or vehicle han-
dling and performance may be adversely
affected.Never install tire chains on T-type and small
size spare tires. Do not use tire chains on
dry roads.
Special winter equipment
It is recommended that the following items
be carried in the vehicle during winter:
1. A scraper and stiff-bristled brush to re-
move ice and snow from the windows
and wiper blades.
2. A sturdy, flat board to be placed under
the jack to give it firm support.
3. A shovel to dig the vehicle out of snow-
drifts.
4. Extra window washer fluid to refill the
reservoir tank.
Driving on snow or ice
WARNING
cWet ice (32ÉF, 0ÉC and freezing rain),
very cold snow or ice can be slick
and very hard to drive on. The ve-
hicle will have a lot less traction or
``grip'' under these conditions. Try to
avoid driving on wet ice until the
road is salted or sanded.cWhatever the condition, drive with
caution. Accelerate and slow down
with care. If accelerating or down-
shifting too fast, the drive wheels
will lose even more traction.
cAllow more stopping distance under
these conditions. Braking should be
started sooner than on dry pave-
ment.
cAllow greater following distances on
slippery roads.
cWatch for slippery spots (glare ice).
These may appear on an otherwise
clear road in shaded areas. If a patch
of ice is seen ahead, brake before
reaching it. Try not to brake while
actually on the ice, and avoid any
sudden steering maneuvers.
cDo not use the cruise control on
slippery roads.
cSnow can trap dangerous exhaust
gases under your vehicle. Keep
snow clear of the exhaust pipe and
from around your vehicle.
Starting and driving
5-17
ZX
Page 176 of 260
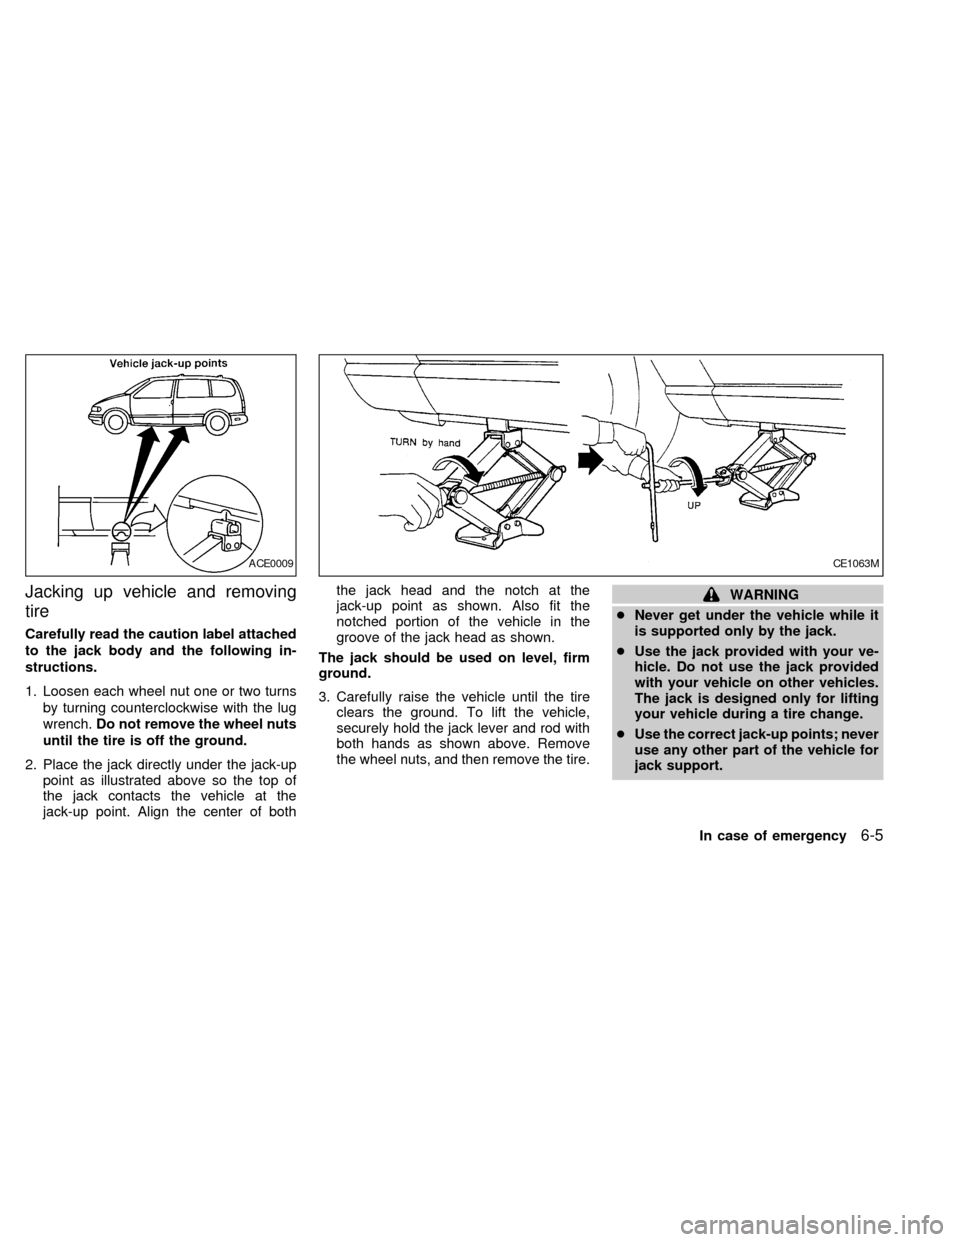
Jacking up vehicle and removing
tire
Carefully read the caution label attached
to the jack body and the following in-
structions.
1. Loosen each wheel nut one or two turns
by turning counterclockwise with the lug
wrench.Do not remove the wheel nuts
until the tire is off the ground.
2. Place the jack directly under the jack-up
point as illustrated above so the top of
the jack contacts the vehicle at the
jack-up point. Align the center of boththe jack head and the notch at the
jack-up point as shown. Also fit the
notched portion of the vehicle in the
groove of the jack head as shown.
The jack should be used on level, firm
ground.
3. Carefully raise the vehicle until the tire
clears the ground. To lift the vehicle,
securely hold the jack lever and rod with
both hands as shown above. Remove
the wheel nuts, and then remove the tire.
WARNING
cNever get under the vehicle while it
is supported only by the jack.
cUse the jack provided with your ve-
hicle. Do not use the jack provided
with your vehicle on other vehicles.
The jack is designed only for lifting
your vehicle during a tire change.
cUse the correct jack-up points; never
use any other part of the vehicle for
jack support.
ACE0009CE1063M
In case of emergency6-5
ZX
Page 177 of 260
cNever jack up the vehicle more than
necessary.
cNever use blocks on or under the
jack.
cDo not start or run engine while
vehicle is on the jack as it may cause
the vehicle to move.
cDo not allow passengers to stay in
the vehicle while it is on the jack.
cNever run the engine with the wheels
off of the ground. It may cause the
vehicle to move.
Installing wheel
The T-type spare tire is designed for
emergency use. See specific instruc-
tions under the heading ``Wheels and
tires'' in the ``Do-it-yourself'' section of
this manual.
1. Clean any mud or dirt from the surface
between the wheel and hub.
2. Carefully put the wheel on and tighten
the lug nuts finger tight.
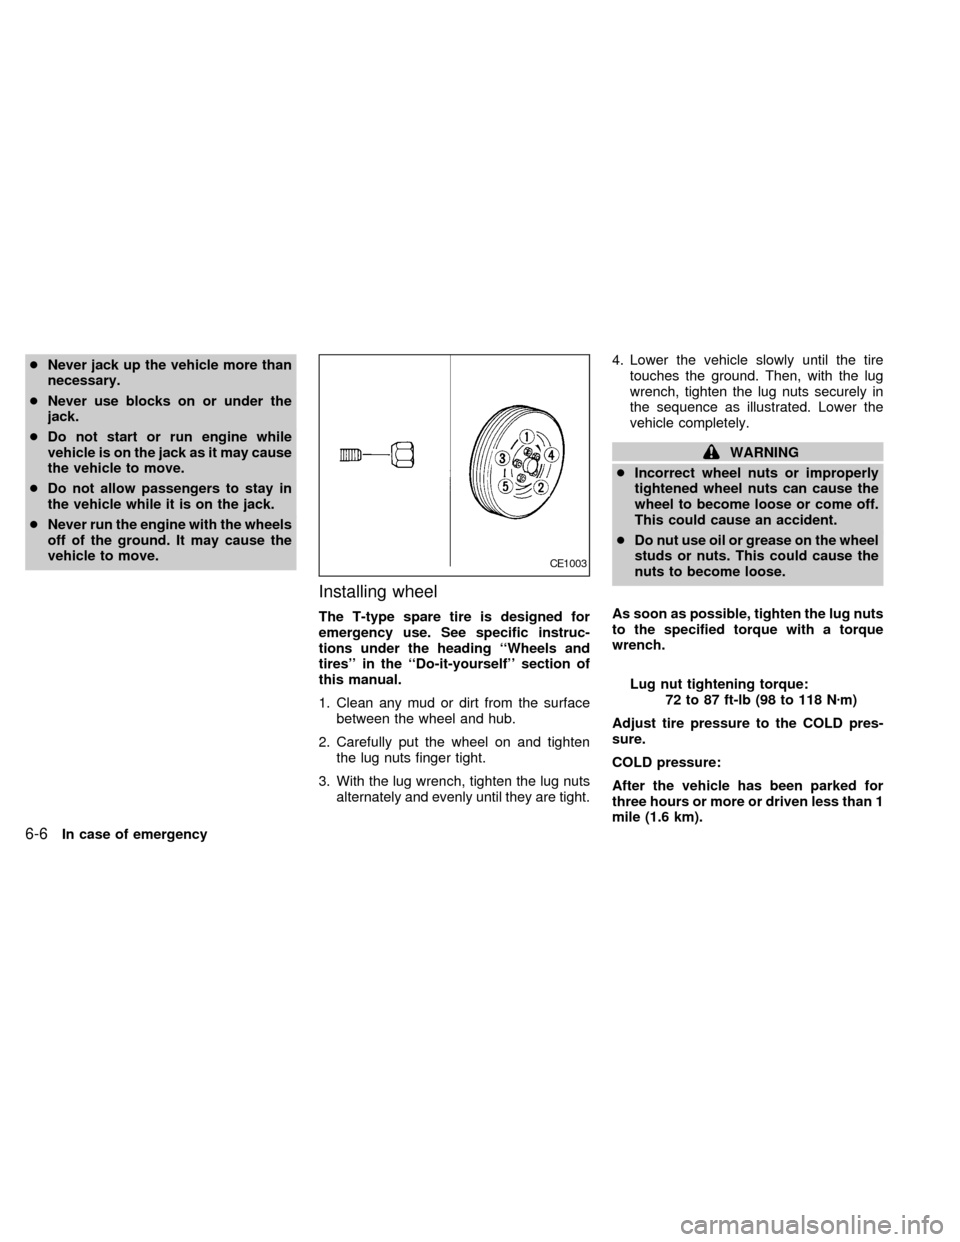
3. With the lug wrench, tighten the lug nuts
alternately and evenly until they are tight.4. Lower the vehicle slowly until the tire
touches the ground. Then, with the lug
wrench, tighten the lug nuts securely in
the sequence as illustrated. Lower the
vehicle completely.
WARNING
cIncorrect wheel nuts or improperly
tightened wheel nuts can cause the
wheel to become loose or come off.
This could cause an accident.
cDo nut use oil or grease on the wheel
studs or nuts. This could cause the
nuts to become loose.
As soon as possible, tighten the lug nuts
to the specified torque with a torque
wrench.
Lug nut tightening torque:
72 to 87 ft-lb (98 to 118 Nzm)
Adjust tire pressure to the COLD pres-
sure.
COLD pressure:
After the vehicle has been parked for
three hours or more or driven less than 1
mile (1.6 km).
CE1003
6-6In case of emergency
ZX
Page 178 of 260
COLD tire pressures are shown on the
tire placard affixed to the driver's door
center pillar.
cRetighten the lug nuts when the ve-
hicle has been run for 600 miles (1,000
km) after installing the aluminum
wheel.
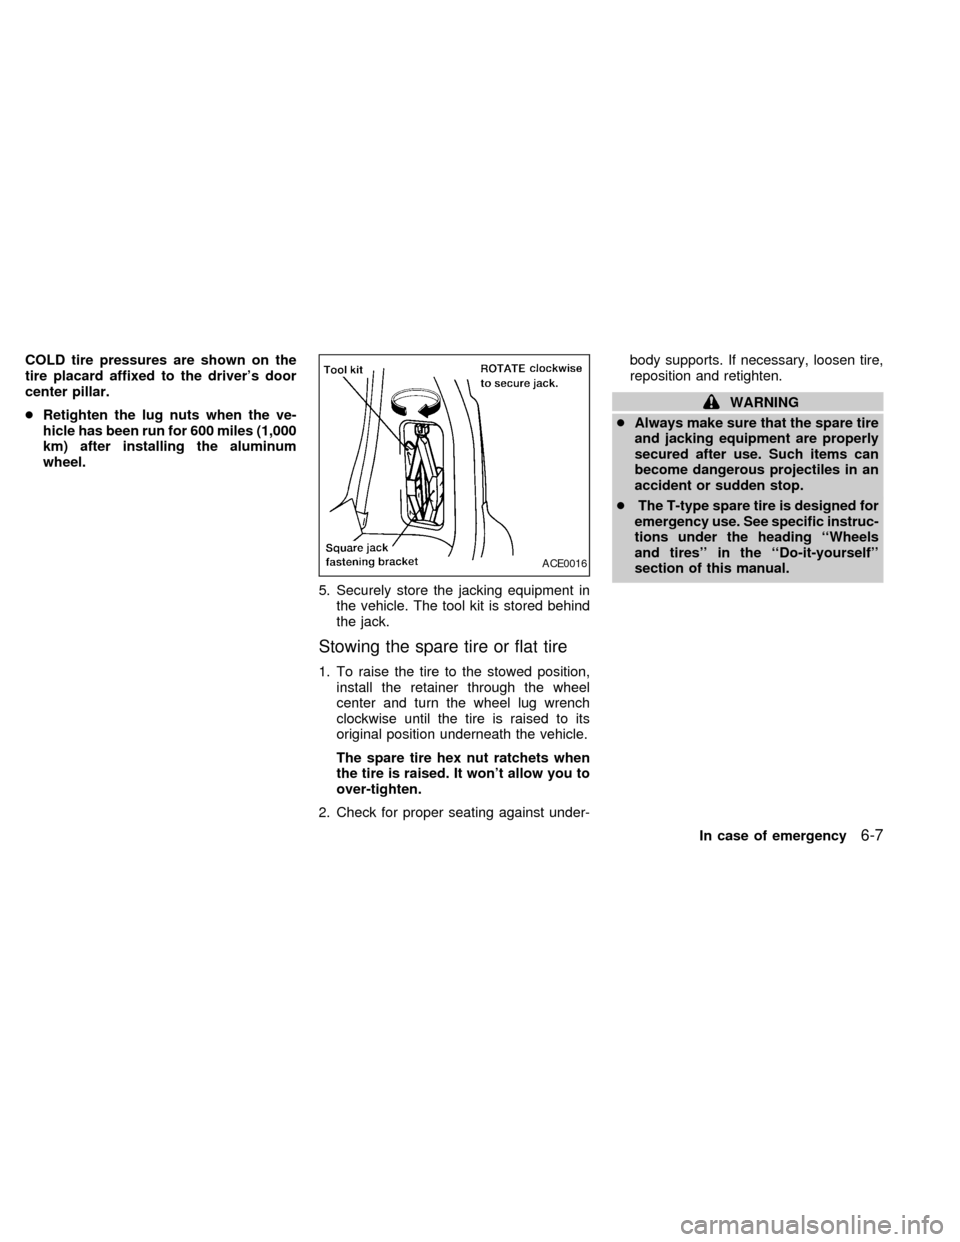
5. Securely store the jacking equipment in
the vehicle. The tool kit is stored behind
the jack.
Stowing the spare tire or flat tire
1. To raise the tire to the stowed position,
install the retainer through the wheel
center and turn the wheel lug wrench
clockwise until the tire is raised to its
original position underneath the vehicle.
The spare tire hex nut ratchets when
the tire is raised. It won't allow you to
over-tighten.
2. Check for proper seating against under-body supports. If necessary, loosen tire,
reposition and retighten.
WARNING
cAlways make sure that the spare tire
and jacking equipment are properly
secured after use. Such items can
become dangerous projectiles in an
accident or sudden stop.
cThe T-type spare tire is designed for
emergency use. See specific instruc-
tions under the heading ``Wheels
and tires'' in the ``Do-it-yourself''
section of this manual.
ACE0016
In case of emergency6-7
ZX
Page 183 of 260
When towing your vehicle, U.S. States, Ca-
nadian Provinces and local regulations for
towing must be followed. Incorrect towing
equipment could damage your vehicle.
Towing instructions are available from an
authorized NISSAN dealer. Local service
operators are generally familiar with the
applicable laws and procedures for towing.
To assure proper towing and to prevent
accidental damage to your vehicle, NISSAN
recommends that you have a service opera-
tor tow your vehicle. It is advisable to have
the service operator carefully read the fol-
lowing precautions.
WARNING
cNever ride in a vehicle that is being
towed.
cNever get under your vehicle after it
has been lifted by a tow truck.
CAUTION
cWhen towing, make sure that the
transmission, axles, steering system
and powertrain are in working con-
dition. If any unit is damaged, dollies
must be used.
cNever use a tow bar that attaches to
the bumper when you tow your ve-
hicle. It may damage the bumper and
cause damage to the transmission.
cWhen towing with the front wheels
on dollies:
Turn the ignition key to the OFF
position and secure the steering
wheel in a straight-ahead position
with a rope or similar device. Never
place the ignition key in the LOCK
position. This will result in damage
to the steering lock mechanism.
Move the gearshift lever to the N
(Neutral) position.
cWhen towing with the rear wheels on
the ground, release the parking
brake.
cAttach safety chains for all towing.
TOW TRUCK TOWING
6-12In case of emergency
ZX
Page 193 of 260
When performing any inspection or mainte-
nance work on your vehicle, always take
care to prevent serious accidental injury to
yourself or damage to the vehicle. The
following are general precautions which
should be closely observed.
WARNING
cPark the vehicle on a level surface,
apply the parking brake securely and
block the wheels to prevent the ve-
hicle from moving. Move the gear-
shift lever to N (neutral).
cBe sure the ignition key is OFF when
performing any replacement or re-
pair.
c
Be sure to turn the ignition key to the
OFF or LOCK position. When the igni-
tion key is in the ON or ACC position,
the cooling fan may start to operate
suddenly even when the engine is not
running. To avoid injury always dis-
connect the negative battery cable
before working near the fan.
cIf you must work with the engine run-
ning, keep your hands, clothing, hair
and tools away from moving fans,
belts and any other moving parts.
cIt is advisable to remove ties and any
jewelry, such as rings, watches, etc.
before working on your vehicle.
cAlways wear eye protection when-
ever you work on your vehicle.
cIf you must run the engine in an
enclosed space such as a garage, be
sure there is proper ventilation for
exhaust gases.
cNever get under the vehicle while it
is supported only by a jack. If it is
necessary to work under the vehicle,
support it with safety stands.
cKeep smoking materials, flame and
sparks away from fuel and the bat-
tery.
cOn gasoline engine models with the
multiport fuel injection (MFI) system,
the fuel filter or fuel lines should be
serviced by an authorized NISSAN
dealer because the fuel lines are
under high pressure even when the
engine is off.CAUTION
cDo not work under the hood while
the engine is hot. Turn off the engine
and wait until it cools down.
cNever connect or disconnect either
the battery or any transistorized
component connector while the igni-
tion is ON.
cAvoid contact with used engine oil.
Improperly disposed motor oil and/
or other vehicle fluids can hurt the
environment. Always conform to lo-
cal regulations for disposal of ve-
hicle fluid.
This ``Do-it-yourself'' section gives instruc-
tions regarding only those items which are
relatively easy for an owner to perform.
You should be aware that incomplete or
improper servicing may result in operating
difficulties or excessive emissions, and
could affect your warranty coverage.If in
doubt about any servicing, have it done
by an authorized NISSAN dealer.
MAINTENANCE
PRECAUTIONS
8-2Do-it-yourself
ZX