1998 NISSAN FRONTIER stop start
[x] Cancel search: stop startPage 126 of 224
The brake system has two separate hydrau-
lic circuits. If one circuit develops a problem,
you will still have braking at two wheels.
Vacuum assisted brakes
The brake booster aids braking by using
engine vacuum. If the engine stops, you can
stop the vehicle by depressing the brake
pedal. However, greater foot pressure on
the brake pedal will be required to stop the
vehicle and stopping distance will be longer.
Wet brakes
When the vehicle is washed or driven
through water, the brakes may get wet. As a
result, your braking distance will be longer
and the vehicle may pull to one side during
braking.
To dry the brakes, drive the vehicle at a safe
speed while lightly pressing the brake pedal
to heat the brakes. Do this until the brakes
return to normal. Avoid driving the vehicle at
high speeds until the brakes function cor-
rectly.Using the brakes
Avoid resting your foot on the brake pedal
while driving. This will overheat the brakes,
wear out the brake linings and pads faster,
and reduce gas mileage.
To help reduce brake wear, and to prevent
the brakes from overheating, reduce speed
and downshift to a lower gear before going
down a slope or long grade.
WARNING
cWhile driving on a slippery surface,
be careful when braking, accelerat-
ing or downshifting. Abrupt braking
actions or sudden acceleration
could cause the wheels to skid and
result in an accident.
cIf the engine is not running or is
turned off while driving, the power
assist for the brakes will not work.
Braking will be harder.
Normal Operation
The anti-lock brake system does not oper-
ate at speeds below 3 to 6 MPH (5 to 10
km/h). (The speeds vary according to road
conditions.)
When driving, the anti-lock brake system
controls the wheels so they will not lock
when braking abruptly or when braking on a
slippery road. Thus, difficult steering and
swerving of the vehicle due to locked
wheels is minimized. The system detects
the wheel rotation rate and electronically
controls the pressure applied to each brake.
Slight vibration on the brake pedal accom-
panied by noise usually occurs while the
ABS system is operating. Such vibration
and noise encountered during abrupt brak-
ing is not a problem, but indicates that the
system is functioning.
Even with the rear anti-lock brake sys-
tem, your front wheels can still lock. If
this happens, release the brake pedal
slightly and then reapply pressure.
Self-test feature
The anti-lock brake system consists of elec-
tronic sensors and hydraulic solenoids con-
trolled by a computer. The computer has a
BRAKE SYSTEM ANTI-LOCK BRAKE SYSTEM
(ABS)
Starting and driving5-25
ZX
Page 127 of 224
built-in diagnostic feature that tests the sys-
tem each time you start the engine and
move the vehicle at a low speed in forward
or reverse. When the self-test occurs, you
may hear a ``clunk'' noise and/or feel a
pulsation in the brake pedal. This is normal
and is not an indication of any malfunction. If
the computer senses any malfunction, it
switches the anti-lock brake system off and
turns on the ABS brake warning light in the
dashboard. The brake system then operates
normally, but without anti-lock assistance.
If an abnormality occurs in the system, the
anti-lock function will cease but the ordinary
brakes will continue to operate normally. The
ABS brake warning light will then come on.
If the light comes on while you are driving,
contact an authorized NISSAN dealer for
repair.
Using the System
Depress the brake pedal and hold it down.
WARNING
Do not pump the brake pedal. Doing so
may result in increased stopping dis-
tances.
WARNING
The anti-lock brake system is a sophis-
ticated device. But it cannot prevent
accidents resulting from careless or
dangerous driving techniques. It can
help maintain vehicle control under
some conditions, but remember that
the stopping distance on slippery sur-
faces will be longer than on normal
surfaces even with ABS. Stopping dis-
tances may also be longer on rough,
gravel, or snow covered roads, or if you
are using tire chains. Always maintain
a safe distance from the vehicle in front
of you. Ultimately, the responsibility for
safety of self and others rests in the
hands of the driver.
Tire type and condition may also affect
braking effectiveness.
cWhen replacing tires, install the
specified size of tires on all four
wheels.
cWhen installing a spare tire, make
sure it is the proper size and type as
specified on the tire placard. See
``Tire placard'' in the ``Technical and
consumer information'' section.Freeing a frozen door lock
To prevent a door lock from freezing, apply
de-icer or glycerin through the key hole. If
the lock becomes frozen, heat the key be-
fore inserting it in the key hole.
Anti-freeze
In the winter when it is anticipated that the
temperature will drop below 32ÉF (0ÉC),
check anti-freeze (ethylene glycol base) to
assure proper winter protection. For details,
see ``Engine cooling system'' in the ``Do-it-
yourself'' section of this manual.
Battery
If the battery is not fully charged during
extremely cold weather conditions, the bat-
tery fluid may freeze and damage the bat-
tery. To maintain maximum efficiency, the
battery should be checked regularly. For
details, see ``Battery'' in the ``Do-it-yourself''
section of this manual.
Draining of coolant water
If the vehicle is to be left outside without
anti-freeze, drain the cooling system by
opening the drain valves located under the
radiator and on the engine block. Refill
COLD WEATHER DRIVING
5-26Starting and driving
ZX
Page 128 of 224
before operating the vehicle. For details,
see ``Changing engine coolant'' in the ``Do-
it-yourself'' section of this manual.
Tire equipment
1. SUMMER tires have a tread designed to
provide superior performance on dry
pavement. However, the performance of
these tires will be substantially reduced
in snowy and icy conditions. If you oper-
ate your vehicle on snowy or icy roads,
NISSAN recommends the use on all four
wheels of MUD & SNOW or ALL SEA-
SON tires. Please consult your NISSAN
dealer for the tire type, size, speed rating
and availability information.
2. For additional traction on icy roads, stud-
ded tires may be used. However, some
U.S. states and Canadian provinces pro-
hibit their use. Check local, state and
provincial laws before installing studded
tires.
Skid and traction capabilities of studded
snow tires on wet or dry surfaces may be
poorer than that of non-studded snow
tires.
3. Tire chains may be used. Use of tire
chains may be prohibited according tolocation. Check the local laws before
installing tire chains. When installing tire
chains, make sure they are of proper size
for the tires on your vehicle and are
installed according to the chain manufac-
turer's suggestions.Use only SAE
Class ``S'' chains.Other types may
damage your vehicle. Use chain tension-
ers when recommended by the tire chain
manufacturer to ensure a tight fit. Loose
end links of the tire chain must be se-
cured or removed to prevent the possi-
bility of whipping action damage to the
fenders or undercarriage. If possible,
avoid fully loading your vehicle when
using tire chains. In addition, drive at a
reduced speed, otherwise, your vehicle
may be damaged and/or vehicle handling
and performance may be adversely af-
fected. Never install tire chains on a
TEMPORARY USE ONLY spare tire. Do
not use tire chains on dry roads.
Special winter equipment
It is recommended that the following items
be carried in the vehicle during winter:
1. A scraper and stiff-bristled brush to re-
move ice and snow from the windows
and wiper blades.2. A sturdy, flat board to be placed under
the jack to give it firm support.
3. A shovel to dig the vehicle out of snow-
drifts.
4. Extra window washer fluid to refill the
reservoir tank.
Driving on snow or ice
WARNING
cWet ice (32ÉF, 0ÉC and freezing rain),
very cold snow, or ice can be slick
and very hard to drive on. The ve-
hicle will have a lot less traction or
``grip'' under these conditions. Try to
avoid driving on wet ice until the
road is salted or sanded.
cWhatever the condition, drive with
caution. Accelerate and slow down
with care. If accelerating or down-
shifting too fast, the drive wheels
will lose even more traction.
c
Allow more stopping distance under
these conditions. Braking should be
started sooner than on dry pavement.
cAllow greater following distances on
slippery roads.
Starting and driving
5-27
ZX
Page 153 of 224

7. Open and close the air release plug to
release air. Then fill the radiator again
and install the radiator cap.
8. Start the engine and warm it up until it
reaches normal operating temperature.
Then race the engine two or three times
under no load. Watch the engine coolant
temperature gauge for signs of overheat-
ing.
9. Stop the engine. After it completely cools
down, refill the radiator up to the filler
opening. Fill the reservoir tank up the
MAX level.10. Open and close the air release plug to
release air. Then fill the radiator again
and install the radiator cap.
11. Check the drain valve on the radiator
and drain plug on the engine block for
any sign of leakage.CHECKING ENGINE OIL LEVEL
1. Park the vehicle on a level surface and
apply the parking brake.
2. Start the engine and let it idle until it
reaches operating temperature.
3. Turn off the engine.Wait a few minutes
for the oil to drain back into the oil
pan.
4. Remove the dipstick and wipe it clean.
Reinsert it all the way.
5. Remove the dipstick again and check the
oil level. It should be between the H
ADI1028ADI1029ADI1030
ENGINE OIL
8-6Do-it-yourself
ZX
Page 163 of 224
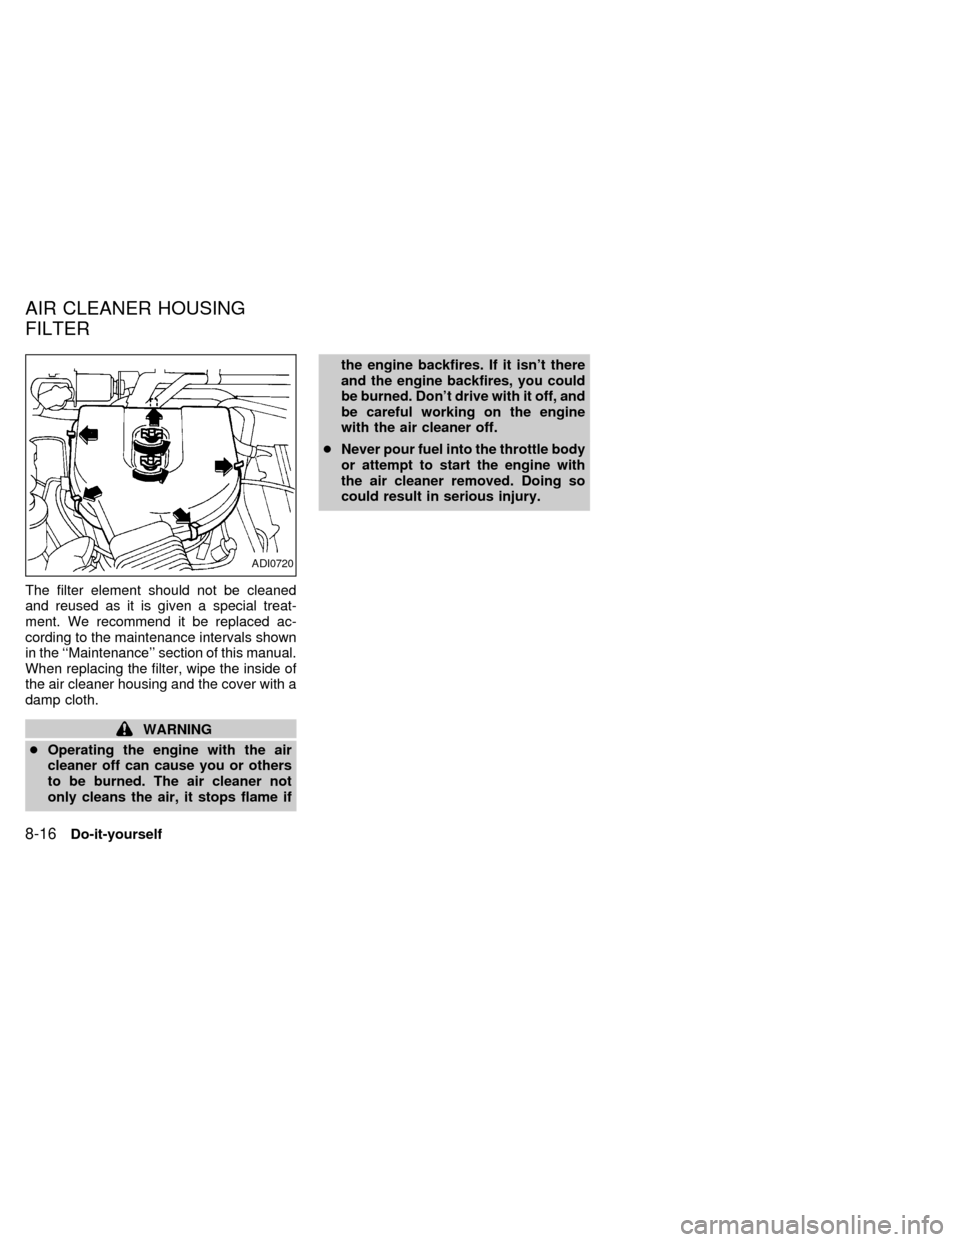
The filter element should not be cleaned
and reused as it is given a special treat-
ment. We recommend it be replaced ac-
cording to the maintenance intervals shown
in the ``Maintenance'' section of this manual.
When replacing the filter, wipe the inside of
the air cleaner housing and the cover with a
damp cloth.
WARNING
cOperating the engine with the air
cleaner off can cause you or others
to be burned. The air cleaner not
only cleans the air, it stops flame ifthe engine backfires. If it isn't there
and the engine backfires, you could
be burned. Don't drive with it off, and
be careful working on the engine
with the air cleaner off.
cNever pour fuel into the throttle body
or attempt to start the engine with
the air cleaner removed. Doing so
could result in serious injury.
ADI0720
AIR CLEANER HOUSING
FILTER
8-16Do-it-yourself
ZX
Page 167 of 224
Self-adjusting brakes
Your vehicle is equipped with self-adjusting
brakes.
The front disc-type brakes self-adjust every
time the brake pedal is applied. The rear
drum-type brakes on two-wheel drive trucks
self-adjust every time the parking brake is
applied. The rear drum-type brakes on four-
wheel drive trucks self-adjust every time the
brake pedal is applied. If the brake pedal
goes down farther than normal, it may be
due to a lack of adjustment of the rear drum
brakes. Apply the parking brake several
times.
WARNING
If the brake pedal height does not re-
turn to normal, see an authorized NIS-
SAN dealer and have it checked.
Brake pad wear indicators
The disc brake pads on your vehicle have
audible wear indicators. When a brake pad
requires replacement, it will make a high
pitched scraping or screeching sound when
the vehicle is in motion whether or not the
brake pedal is depressed. Have the brakeschecked as soon as possible if the wear
indicator sound is heard.
Under some driving or climate conditions,
occasional brake squeak, squeal or other
noise may be heard. Occasional brake
noise during light to moderate stops is nor-
mal and does not affect the function or
performance of the brake system.
The rear drum brakes (if so equipped) do
not have audible wear indicators. Should
you ever hear an unusually loud noise from
the rear drum brakes, have them inspected
as soon as possible by an authorized NIS-
SAN dealer.
Proper brake inspection intervals should
be followed.For more information regard-
ing brake inspections, see the appropriate
maintenance schedule information in the
``Maintenance Schedule'' section of this
manual.Check the brake booster function with the
following steps:
1. With the engine off, press and release
the brake pedal several times. When
brake pedal movement (distance of
travel) remains the same from one pedal
application to the next, continue on to
next step.
2. While depressing the brake pedal, start
the engine. The pedal height should drop
a little.
3. With the brake pedal depressed, stop the
engine. Keeping the pedal depressed for
about 30 seconds, the pedal height
should not change.
4. Run the engine for one minute without
depressing the brake pedal, then turn it
off. Depress the brake pedal several
times. The pedal travel distance will de-
crease gradually with each depression
as the vacuum is released from the
booster.
If the brakes do not operate properly, have
the brakes checked by an authorized NIS-
SAN dealer.
BRAKE BOOSTER
8-20Do-it-yourself
ZX
Page 212 of 224

prevent load shift while driving.
cBe certain your outside mirrors conform
to all federal, state or local regulations. If
not, install any mirrors required for towing
before driving the vehicle.
Trailer towing tips
In order to gain skill and an understanding
of the vehicle's behavior, you should prac-
tice turning, stopping and backing up in an
area which is free from traffic. Steering,
stability and braking performance will be
somewhat different than under normal driv-
ing conditions.
cAlways secure items in the trailer to
prevent load shift while driving.
c
Avoid abrupt starts, acceleration or stops.
cAvoid sharp turns or lane changes.
cAlways drive your vehicle at a moderate
speed.
cAlways block the wheels on both vehicle
and trailer when parking. Parking on a
slope is not recommended; however, if
you must do so, and if your vehicle is
equipped with automatic transmission,
first block the wheels and apply the park-ing brake, and then move the transmis-
sion shift selector lever into the P (Park)
position. If you move the shift lever to the
P (Park) position before blocking the
wheels and applying the parking brake,
transmission damage could occur.
cWhen going down a hill, shift into a lower
gear and use the engine braking effect.
When ascending a long grade, downshift
the transmission to a lower gear and
reduce speed to reduce chances of en-
gine overloading and/or overheating.
However, for long steep grades, do not
stay in 1st or 2nd gear when driving
above 35 MPH (56 km/h).
cIf the engine coolant rises to an ex-
tremely high temperature when the air
conditioning system is on, turn off the air
conditioner. Coolant heat can be addi-
tionally vented by opening the windows,
switching the fan control to high and
setting the temperature control to the
HOT position.
cTrailer towing requires more fuel than
normal circumstances.
cAvoid towing a trailer for your vehicle's
first 500 miles (805 km).cHave your vehicle serviced more often
than at intervals specified in the recom-
mended Maintenance Schedule.
cWhen making a turn, your trailer wheels
will be closer to the inside of the turn than
your vehicle wheels. To compensate for
this, make a larger than normal turning
radius during the turn.
cCrosswinds and rough roads adversely
affect vehicle/trailer handling, possibly
causing vehicle sway. When being
passed by larger vehicles, be prepared
for possible changes in crosswinds that
could affect vehicle handling. If swaying
does occur, firmly grip the steering
wheel, steer straight ahead, and immedi-
ately (but gradually) reduce vehicle
speed. This combination helps to stabi-
lize the vehicle. Never increase speed.
cBe careful when passing other vehicles.
Passing while towing a trailer requires
considerably more distance than normal
passing. Remember the length of the
trailer must also pass the other vehicle
before you can safely change lanes.
cTo maintain engine braking efficiency
and electrical charging performance, do
Technical and consumer information
10-23
ZX
Page 215 of 224
Due to legal requirements in some states
and Canadian provinces, your vehicle may
be required to be in the ready condition for
an Inspection/Maintenance (I/M) test of the
emission control system.
The vehicle is set to the ready condition
when it is driven through certain driving
patterns. Usually, the ready condition can
be obtained by ordinary usage of the ve-
hicle.
If a powertrain system component is re-
paired or the battery is disconnected, the
vehicle may be reset to a not ready condi-
tion. Before taking the I/M test, drive the
vehicle through the following pattern to set
the vehicle to the ready condition. If you
cannot or do not want to perform the driving
pattern, an authorized NISSAN dealer can
conduct it for you.
WARNING
Always drive the vehicle in a safe man-
ner according to traffic conditions and
obey all traffic laws.1. Start the engine when the engine coolant
temperature gauge needle points to C.
Allow the engine to idle until the gauge
needle points between the C and H (nor-
mal operating temperature).
2. Accelerate the vehicle to 55 mph (88
km/h), then quickly release the accelera-
tor pedal completely and keep it released
for at least 6 seconds.
3. Quickly depress the accelerator pedal for
a moment, then drive the vehicle at a
speed of 53 to 60 mph (85 to 97 km/h) for
at least 5 minutes.
4. Stop the vehicle.
5. Accelerate the vehicle to 35 mph (55
km/h) and maintain the speed for 20
seconds.
6. Repeat steps four through five least three
times.
7. Accelerate the vehicle to 55 mph (88
km/h) and maintain the speed for at least
3 minutes.
8. Stop the vehicle and turn the engine off.
9. Repeat steps one through eight at least
one more time.
If step one through seven interrupted, repeat
the preceding step. Any safe driving mode is
acceptable between steps. Do not stop the
engine until step seven is completed.
READINESS FOR
INSPECTION/MAINTENANCE
(I/M) TEST
10-26Technical and consumer information
ZX