1998 LINCOLN CONTINENTAL ignition
[x] Cancel search: ignitionPage 68 of 176

The inside lights will not turn off if:
²they have been turned on with the dimmer control or
²any door is open.
The battery saver will shut off the interior lamps 40 minutes after the
ignition has been turned to the OFF position.
KEYLESS ENTRY SYSTEM
With the keyless entry keypad, you
can:
²lock or unlock the vehicle doors
without using the key.
²arm and disarm the perimeter
alarm system (if equipped).
²reprogram remote entry transmitters.
See alsoRemote entry systemandPerimeter alarm systemin this
chapter for more information.
Your vehicle has a factory-set 5 digit code that operates the keyless entry
system. You can also program your own 5 digit personal entry code.
The factory-set code is located:
²on the owner's wallet card in the glove compartment
²taped to the computer module
²in the interior of the trunk
When pressing the controls on the keyless entry keypad, press the
middle of the buttons to ensure a good activation.
Programming your own entry code
1. Enter the factory-set code (keypad will illuminate when pressed).
2. Press the 1/2 control within five
seconds of step 1.
3. Enter your personal 5 digit code.
Enter each digit within five seconds
of the previous one.
4. Enter a sixth digit to indicate which personality feature should be
recalled by the personal code.
²1/2 recalls personality 1
123
45678
90
123
45678
90
Controls and features
68
Page 70 of 176

After the factory-set code or personal code has been entered, you can
unlock all doors (press 3/4) and release the trunk (press 5/6) as long as
the controls are pressed within 5 seconds of each other.
Locking doors with the keyless entry system
It is not necessary to enter the factory-set code prior to locking all doors.
To lock the doors:
1. Press 7/8 and 9/0 at the same
time.
Autolock
The autolock feature will lock all of the doors when:
²all vehicle doors are fully closed
²the ignition key is turned to the ON position
²the vehicle is in a forward gear and
²you exceed 5 km/h (3 mph).
The autolock feature repeats when:
²the ignition key remains in the ON position
²a door is opened and then closed
²the vehicle is in a forward gear, and
²you exceed 5 km/h (3 mph).
The autolock feature can be turned on/off by using the feature menu in
the message center. Refer toElectronic message centerfor more
information.
123
45678
90
Controls and features
70
Page 79 of 176
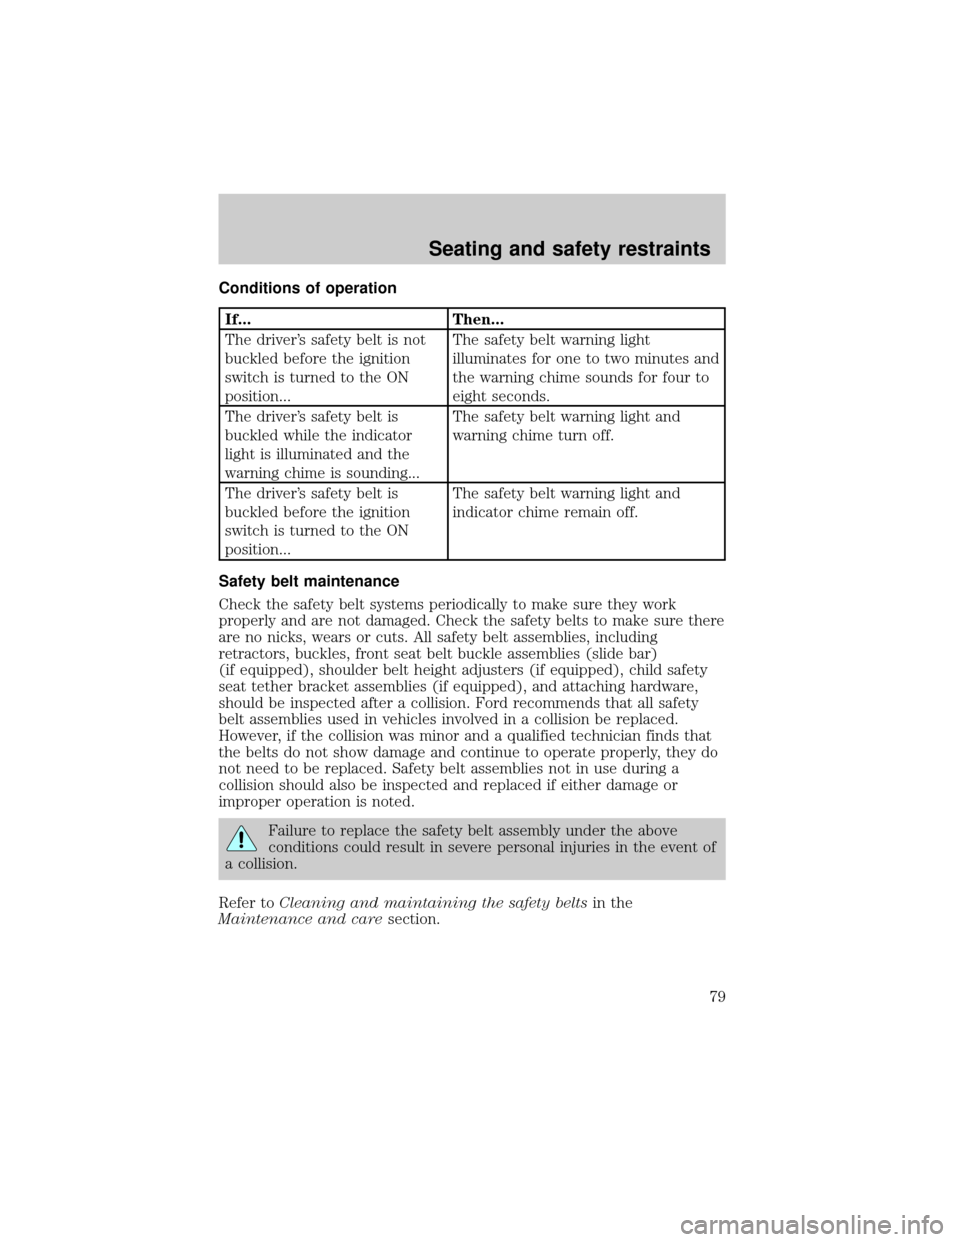
Conditions of operation
If... Then...
The driver's safety belt is not
buckled before the ignition
switch is turned to the ON
position...The safety belt warning light
illuminates for one to two minutes and
the warning chime sounds for four to
eight seconds.
The driver's safety belt is
buckled while the indicator
light is illuminated and the
warning chime is sounding...The safety belt warning light and
warning chime turn off.
The driver's safety belt is
buckled before the ignition
switch is turned to the ON
position...The safety belt warning light and
indicator chime remain off.
Safety belt maintenance
Check the safety belt systems periodically to make sure they work
properly and are not damaged. Check the safety belts to make sure there
are no nicks, wears or cuts. All safety belt assemblies, including
retractors, buckles, front seat belt buckle assemblies (slide bar)
(if equipped), shoulder belt height adjusters (if equipped), child safety
seat tether bracket assemblies (if equipped), and attaching hardware,
should be inspected after a collision. Ford recommends that all safety
belt assemblies used in vehicles involved in a collision be replaced.
However, if the collision was minor and a qualified technician finds that
the belts do not show damage and continue to operate properly, they do
not need to be replaced. Safety belt assemblies not in use during a
collision should also be inspected and replaced if either damage or
improper operation is noted.
Failure to replace the safety belt assembly under the above
conditions could result in severe personal injuries in the event of
a collision.
Refer toCleaning and maintaining the safety beltsin the
Maintenance and caresection.
Seating and safety restraints
79
Page 83 of 176
section in theInstrumentationchapter. Routine maintenance of the air
bag is not required.
A difficulty with the system is indicated by one or more of the following:
²The readiness light will either
flash or stay lit.
²The readiness light will not
illuminate immediately after
ignition is turned on.
²A series of five beeps will be heard. The tone pattern will repeat
periodically until the problem and light are repaired.
If any of these things happen, even intermittently, have the SRS serviced
at your dealership or by a qualified technician immediately. Unless
serviced, the system may not function properly in the event of a
collision.
Disposal of air bags and air bag equipped vehicles
For disposal of air bags or air bag equipped vehicles, see your local
dealership or qualified technician. Air bags MUST BE disposed of by
qualified personnel.
SAFETY RESTRAINTS FOR CHILDREN
Important child restraint precautions
You are required by law to use safety restraints for children in the U.S.
and Canada. If small children ride in your vehicle (generally children who
are four years old or younger and who weigh 18 kg [40 lbs] or less), you
must put them in safety seats made especially for children. Check your
local and state or provincial laws for specific requirements regarding the
safety of children in your vehicle.
Never let a passenger hold a child on his or her lap while the
vehicle is moving. The passenger cannot protect the child from
injury in a collision.
Always follow the instructions and warnings that come with any infant or
child restraint you might use.
When possible, place children in the rear seat of your vehicle. Accident
statistics suggest that children are safer when properly restrained in the
rear seating positions than in the front seating position.
AIR
BAG
Seating and safety restraints
83
Page 90 of 176
PREPARING TO START YOUR VEHICLE
Engine starting is controlled by the ignition system. This system meets
all Canadian Interference-Causing Equipment standard requirements
regulating the impulse electrical field strength of radio noise.
When starting a fuel-injected engine, avoid pressing the accelerator
before or during starting. Only use the accelerator when you have
difficulty starting the engine. For more information on starting the
vehicle, refer toStarting the enginein this chapter.
Extended idling at high engine speeds can produce very high
temperatures in the engine and exhaust system, creating the risk
of fire or other damage.
Do not park, idle, or drive your vehicle in dry grass or other dry
ground cover. The emission system heats up the engine
compartment and exhaust system, which can start a fire.
Do not start your vehicle in a closed garage or in other enclosed
areas. Exhaust fumes can be toxic. Always open the garage door
before you start the engine. SeeGuarding against exhaust fumesin
this chapter for more instructions.
If you smell exhaust fumes inside your vehicle, have your dealer
inspect your vehicle immediately. Do not drive if you smell
exhaust fumes.
Important safety precautions
A computer system controls the engine's idle revolutions per minute
(RPM). When the engine starts, the idle RPM runs faster to warm the
engine. If the engine idle speed does not slow down automatically, have
the vehicle checked. Do not allow the vehicle to idle for more than ten
minutes at fast rpm.
Before starting the vehicle:
1. Make sure all vehicle occupants have buckled their safety belts. For
more information on safety belts and their proper usage, refer to the
Seating and safety restraintschapter.
Starting
90
Page 96 of 176
light will remain on and your vehicle should be serviced as soon as
possible.
Normal braking is still effective
unless the BRAKE warning lamp is
also illuminated.
Using ABS
²In an emergency or when maximum efficiency from the ABS is
required, apply continuous full force on the brake. The ABS will be
activated immediately, thus allowing you to retain full steering control
of your vehicle and, providing there is sufficient space, will enable you
to avoid obstacles and bring the vehicle to a controlled stop.
²We recommend that you familiarize yourself with this braking
technique. However, avoid taking any unnecessary risks.
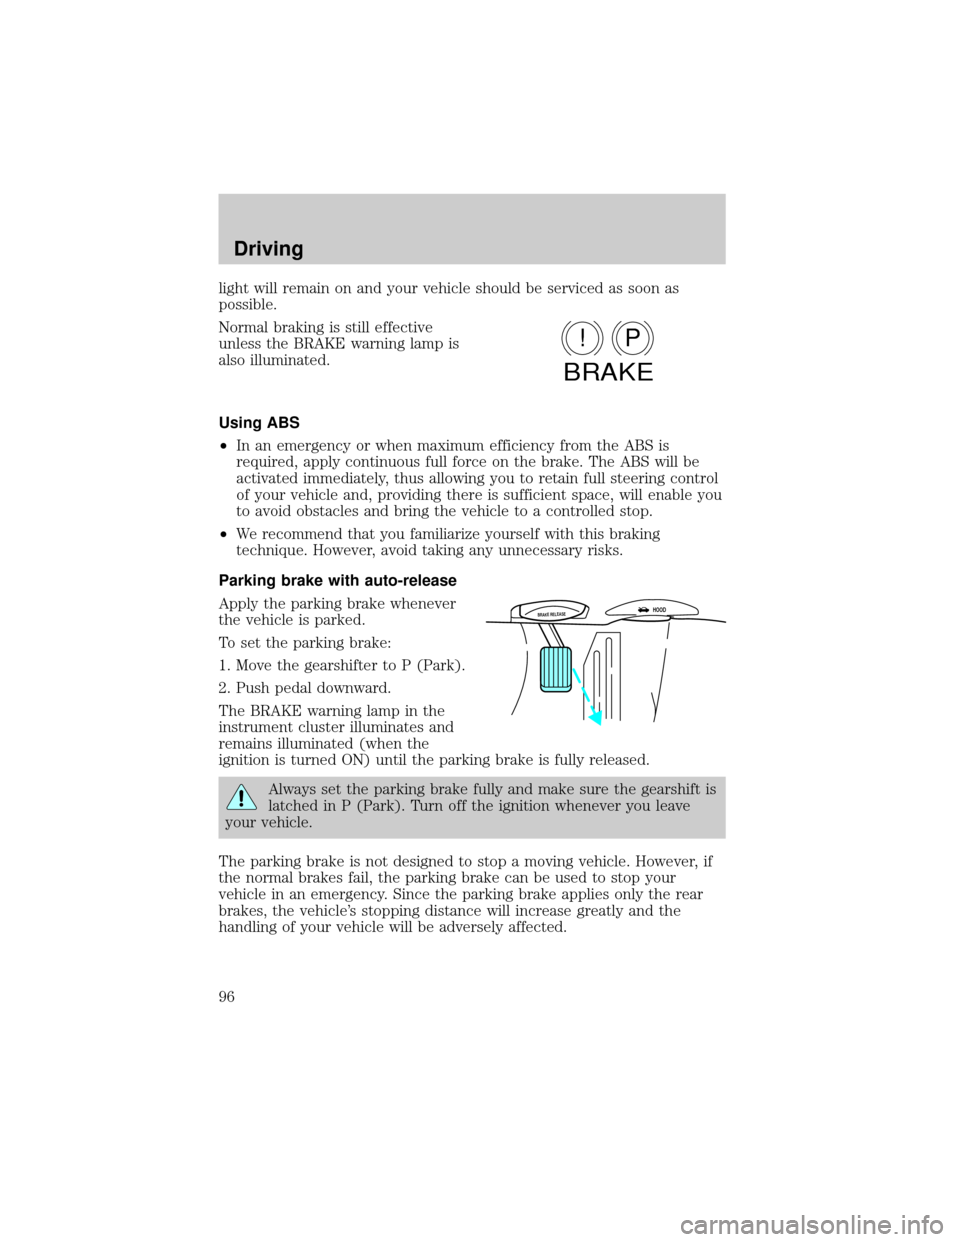
Parking brake with auto-release
Apply the parking brake whenever
the vehicle is parked.
To set the parking brake:
1. Move the gearshifter to P (Park).
2. Push pedal downward.
The BRAKE warning lamp in the
instrument cluster illuminates and
remains illuminated (when the
ignition is turned ON) until the parking brake is fully released.
Always set the parking brake fully and make sure the gearshift is
latched in P (Park). Turn off the ignition whenever you leave
your vehicle.
The parking brake is not designed to stop a moving vehicle. However, if
the normal brakes fail, the parking brake can be used to stop your
vehicle in an emergency. Since the parking brake applies only the rear
brakes, the vehicle's stopping distance will increase greatly and the
handling of your vehicle will be adversely affected.
P!
BRAKE
BRAKE RELEASEHOOD
Driving
96
Page 97 of 176

Your vehicle has an automatic parking brake release. To release the
parking brake:
1. Turn the ignition to the RUN position.
2. Press the brake pedal.
3. Move the gearshifter from the P (Park) position to one of the forward
gears (the parking brake will not release automatically when you shift
into reverse). The brake pedal must remain pressed while the gearshifter
is moved.
If the parking brake fails to release
after completing this procedure, use
the manual parking brake release
lever.
Pull the lever to manually release
the parking brake.
TRACTION CONTROLY
Traction Controlyhelps maintain the stability and steerability of your
vehicle. It is especially useful on slippery and/or hilly road surfaces. The
system operates by detecting and controlling wheel spin. The system
borrows many of the electronic and mechanical elements already present
in the anti-lock braking system (ABS).
Wheel-speed sensors allow excess front wheel spin to be detected by the
Traction Controlyportion of the ABS computer. Any excessive wheel
spin is controlled by automatically applying and releasing the front
brakes in conjunction with engine torque reductions. Engine torque
reduction is realized via the fully electronic spark and fuel injection
systems. This process is very sensitive to driving conditions and very fast
acting. The front wheels ªsearchº for optimum traction several times a
second and adjustment are made accordingly.
The Traction Controlysystem will allow your vehicle to make better use
of available traction on slippery surfaces. The system is a driver aid
which makes your vehicle easier to handle primarily on snow and ice
covered roads.
During Traction Controlyoperation, TRACTION CONTROL ACTIVE is
displayed on the message center. You may hear an electric motor type of
BRAKE RELEASEHOOD
Driving
97
Page 99 of 176
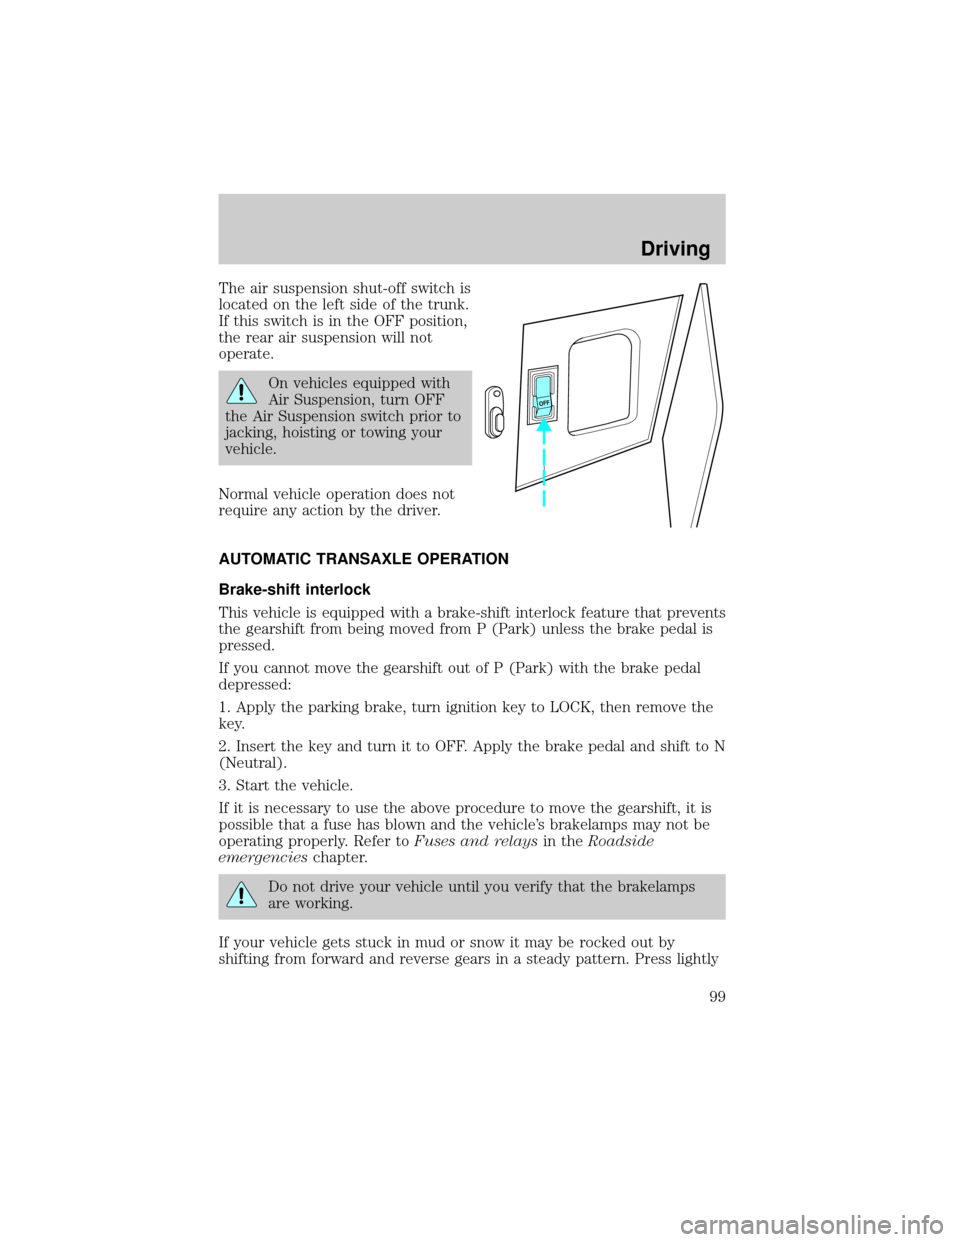
The air suspension shut-off switch is
located on the left side of the trunk.
If this switch is in the OFF position,
the rear air suspension will not
operate.
On vehicles equipped with
Air Suspension, turn OFF
the Air Suspension switch prior to
jacking, hoisting or towing your
vehicle.
Normal vehicle operation does not
require any action by the driver.
AUTOMATIC TRANSAXLE OPERATION
Brake-shift interlock
This vehicle is equipped with a brake-shift interlock feature that prevents
the gearshift from being moved from P (Park) unless the brake pedal is
pressed.
If you cannot move the gearshift out of P (Park) with the brake pedal
depressed:
1. Apply the parking brake, turn ignition key to LOCK, then remove the
key.
2. Insert the key and turn it to OFF. Apply the brake pedal and shift to N
(Neutral).
3. Start the vehicle.
If it is necessary to use the above procedure to move the gearshift, it is
possible that a fuse has blown and the vehicle's brakelamps may not be
operating properly. Refer toFuses and relaysin theRoadside
emergencieschapter.
Do not drive your vehicle until you verify that the brakelamps
are working.
If your vehicle gets stuck in mud or snow it may be rocked out by
shifting from forward and reverse gears in a steady pattern. Press lightly
OFF
Driving
99