Page 2157 of 2490
Installation
8. Remove seat squab.
Lift squab clear of inertia reel assemblies withdrawing
dowels from top panel.
Carefully feed seat belt anch or plates and tongues through squab apertures.
9. Disconnect heater element harness multiplugs (if fitted) and
remove seat squab via rear passenger door.
1. Position squab in vehicle and pass seat belt tongues and
anchor plates through apertures.
2. Lift squab top roll over inertia reel assemblies, locate dowels in
panel apertures and lower and fully seat squab.
3. Fit and tighten the four squab securing screws.
4. Fit seat belt escutcheons to squab top roll.
5. Fit and fully tighten outer seat be lt lower anchor securing bolts.
6. Fit and fully tighten bolts securing centre seat belt lower
anchor plate and buckle cable.
7. Fit rear cushion. Refer to 76.70.37.
8. Fit rear head restraints.
Page 2164 of 2490
Seating - Rear Seat Backrest Heater Mat
Removal and Installation
Removal
1. Remove the rear seat squab. Fo r additional information, refer
to the procedure in this section: Rear Seat Backrest.
2. Remove the seat squab cover.
3. Detach the seat armrest cover.
4. Remove the seat armrest.
5. Detach the seat squab cover.
Page 2165 of 2490
Installation
6. Remove the seat squab cover.
Remove the seat headrest guides.
7. Remove the seat squab heater element.
1. To install, reverse the removal procedure.
Page 2166 of 2490

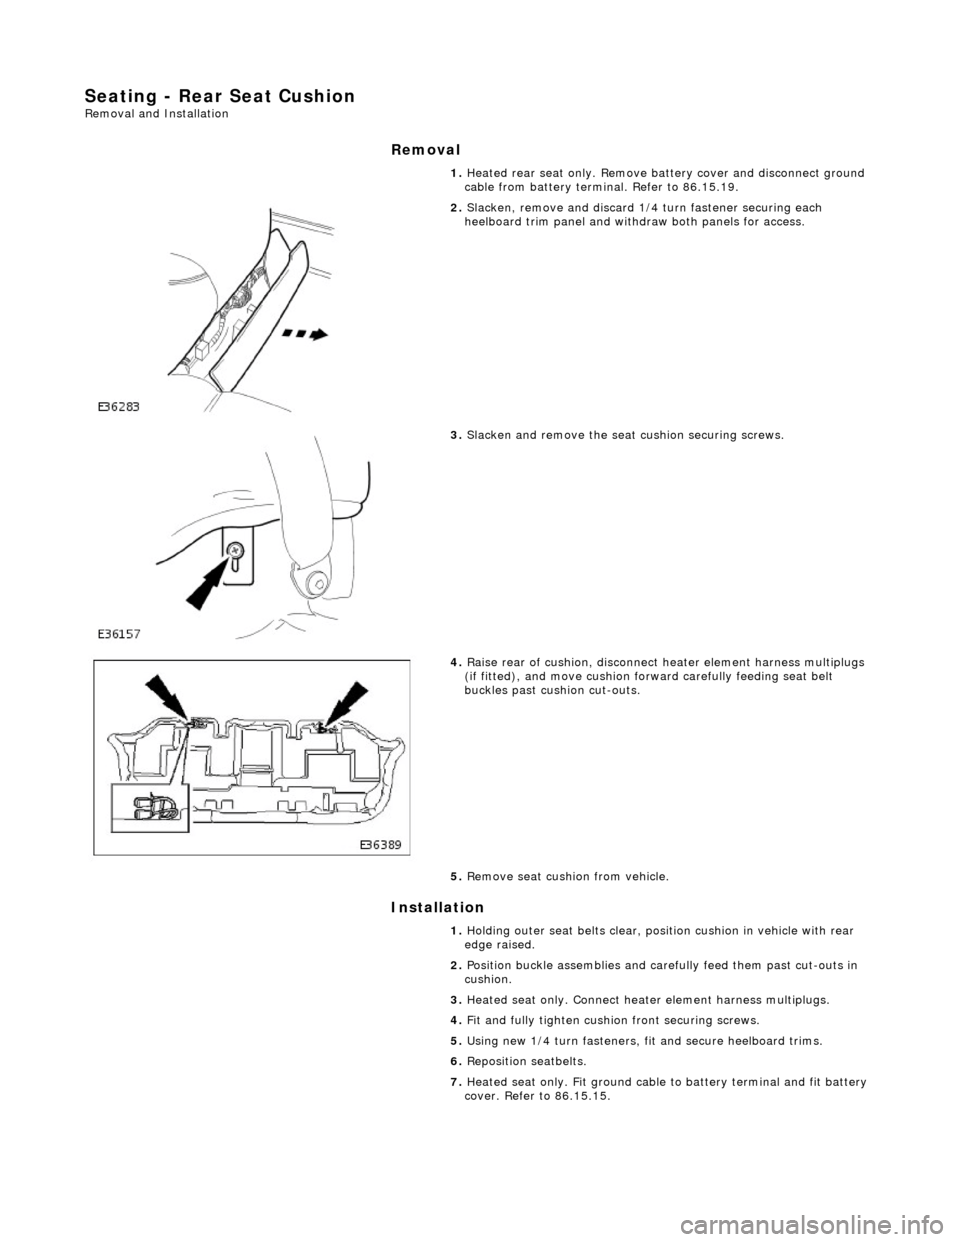
Seating - Rear Seat Cushion Removal and Installation
Removal
Installation
1.
Heated rear seat only. Remove battery cover and disconnect ground
cable from battery terminal. Refer to 86.15.19.
2. Slacken, remove and discard 1/4 turn fastener securing each
heelboard trim panel and withdraw both panels for access.
3. Slacken and remove the seat cushion securing screws.
4. Raise rear of cushion, disconnect heater element harness multiplugs
(if fitted), and move cushion forw ard carefully feeding seat belt
buckles past cushion cut-outs.
5. Remove seat cushion from vehicle.
1. Holding outer seat belts clear, posi tion cushion in vehicle with rear
edge raised.
2. Position buckle assemblies and carefully feed them past cut-outs in
cushion.
3. Heated seat only. Connect heat er element harness multiplugs.
4. Fit and fully tighten cushion front securing screws.
5. Using new 1/4 turn fasteners, fi t and secure heelboard trims.
6. Reposition seatbelts.
7. Heated seat only. Fit ground cable to battery terminal and fit battery
cover. Refer to 86.15.15.
Page 2171 of 2490
Seating - Rear Seat Cushion Heater Mat
Removal and Installation
Removal
Installation
1.
Remove the rear seat cushion. Fo r additional information, refer
to the procedure in this section: Rear Seat Cushion
.
2. Remove the seat cushion cover.
3. Detach the seat cushion heater element electrical connectors.
4. Remove the seat cushion heater element.
1. To install, reverse the removal procedure.
Page 2173 of 2490
Seating - Rear Seat Track
Removal and Installation
Removal
1. Remove battery cover and disc onnect ground cable from
battery terminal. Refer to 86.15.19.
2. Slacken and remove the two seat cushion front securing bolts
and nuts.
3. Move the seat cushion forward to release it from the two frame
rear tangs.
4. Disconnect the cushion heater harness multiplug and remove
cushion from seat frame.
5. Remove and discard pl astic scrivet securing lower end of side
trim to inner wheela rch stud and withdraw trim from stud.
Page 2175 of 2490
Installation
12. Disconnect seat motor and squab heater harness multiplugs.
13. Slacken and remove four bolts securing seat frame to floor
and remove seat from vehicle.
1. Position seat in vehi cle and fit but do not tighten four bolts
securing frame to floor.
2. Fit and fully tighten the two bolt s securing squab frame to rear
panel.
3. Fully tighten bolts securing frame to floor.
4. Connect seat motor and squab heater harness multiplugs.
5. Position side trim panel and carefully pass seat belt lower
anchor through escutcheon and trim aperture.
6. Fit and tighten seat belt anchor securing bolt.
7. Position side trim and push do wnwards to engage keyhole on
squab outer fixing.
8. Position trim lower end over st ud and fit and fully seat new
scrivet.
9. Position seat cushion for access and connect cushion heater
harness multiplug.
10. Push seat cushion rearwards to engage it in rear securing
lugs.
Page 2191 of 2490

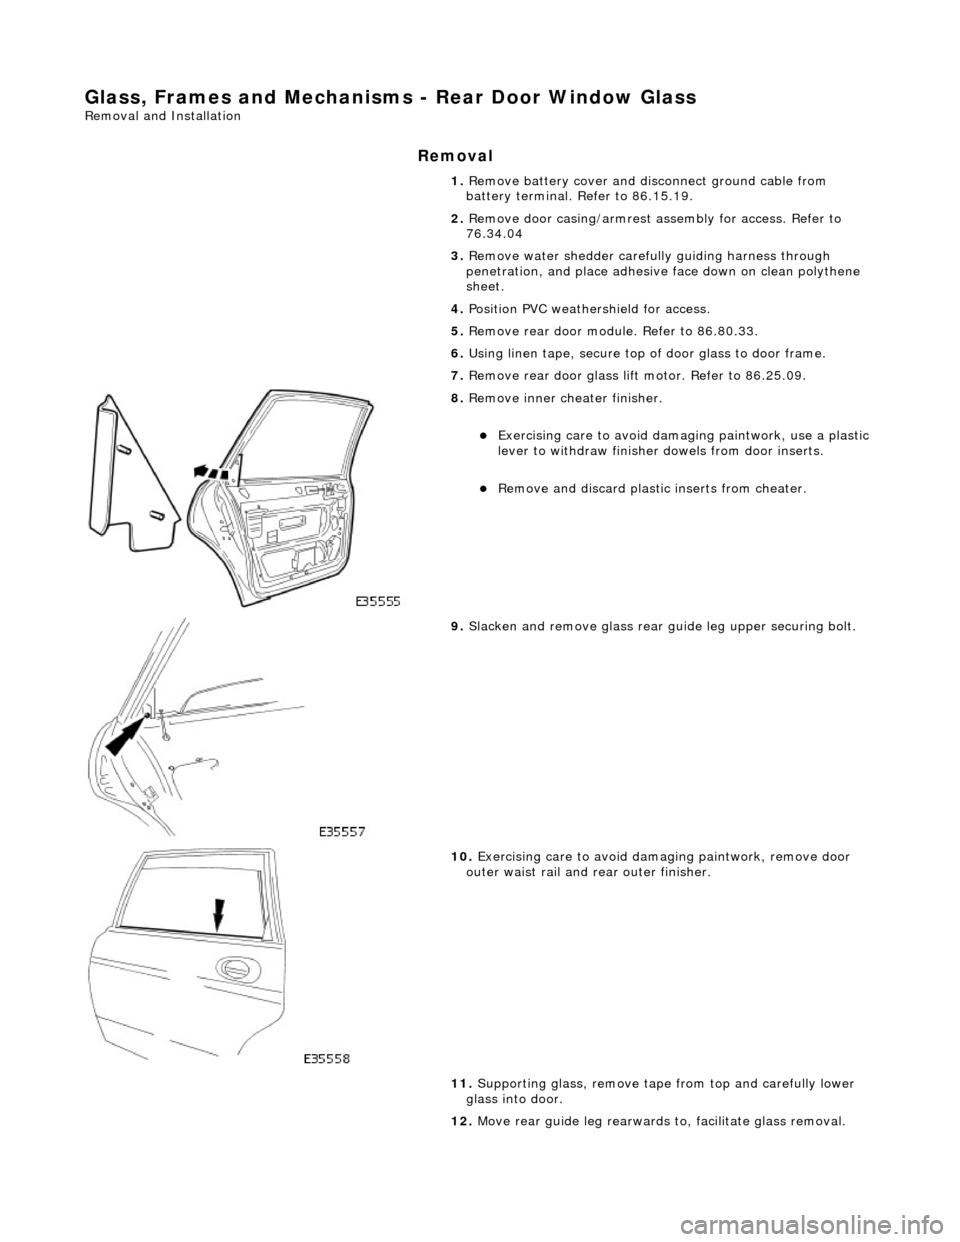
Glass, Frames and Mechanisms - Rear Door Window Glass
Removal and Installation
Removal
1. Remove battery cover and disc onnect ground cable from
battery terminal. Refer to 86.15.19.
2. Remove door casing/armrest as sembly for access. Refer to
76.34.04
3. Remove water shedder carefu lly guiding harness through
penetration, and place adhesive face down on clean polythene
sheet.
4. Position PVC weathe rshield for access.
5. Remove rear door module. Refer to 86.80.33.
6. Using linen tape, secure top of door glass to door frame.
7. Remove rear door glass lift motor. Refer to 86.25.09.
8. Remove inner cheater finisher.
Exercising care to avoid dama ging paintwork, use a plastic
lever to withdraw finisher dowels from door inserts.
Remove and discard plasti c inserts from cheater.
9. Slacken and remove glass rear guide leg upper securing bolt.
10. Exercising care to avoid damaging paintwork, remove door
outer waist rail and rear outer finisher.
11. Supporting glass, remove tape from top and carefully lower
glass into door.
12. Move rear guide leg rearwards to, facilitate glass removal.