Page 48 of 272
Carbon Monoxide Hazard
Your vehicle's exhaust contains carbon monoxide gas. You should
have no problem with carbon monoxide entering the vehicle in
normal driving if you maintain your
vehicle properly.
Have the exhaust system inspected
for leaks whenever: The vehicle is raised for an oil
change.
You notice a change in the sound
of the exhaust. The vehicle was in an accident
that may have damaged the under-
side.
High levels of carbon monoxide can
collect rapidly in enclosed areas,
such as a garage. Do not run the
engine with the garage door closed.
Even with the door open, run the
engine only long enough to move the
vehicle out of the garage. With the tailgate open, air flow can
pull exhaust gas into your vehicle's
interior and create a hazardouscondition. If you must drive with the
tailgate open, open all the windows and set the heating and coolingsystem as shown below.
If you must sit in your parked vehicle,
even in an unconfined area, with the engine running, adjust the heating
and cooling system as follows:
1. Select the Fresh Air mode. 2. Select the mode.
3. Turn the fan on high speed.
4. Set the temperature control to a
comfortable setting.
Driver and Passenger Safety
Carbon monoxide gas is toxic.
Breathing it can cause
unconsciousness and even kill
you.
Avoid any enclosed areas or
activities that expose you to
carbon monoxide.ProCarManuals.comMain Menu Table of Contents s t
Page 127 of 272
Before Driving
Before you begin driving your Honda,
you should know what gasoline to use, and how to check the levels of
important fluids. You also need to
know how to properly store luggageor packages. The information in this
section will help you. If you plan to
add any accessories to your vehicle,
please read the information in this section first. Break-in Period.............................. 128
Gasoline.......................................... 128
Service Station Procedures .......... 129 Filling the Fuel Tank................. 129
Opening the Hood..................... 130 Oil Check................................ 131
Engine Coolant Check.......... 132
Fuel Economy................................ 133 Vehicle Condition...................... 133
Driving Habits............................ 133
Accessories and Modifications.... 134 Carrying Cargo.............................. 136
Before DrivingProCarManuals.comMain Menu s t
Page 131 of 272
Service Station Procedures
Check the engine oil level every time you fill the vehicle with fuel. Wait a
few minutes after turning the engineoff before you check the oil.
1. Remove the dipstick (orange
handle).
2. Wipe the dipstick with a clean
cloth or paper towel. 3. Insert it all the way back in its tube.
CONTINUED
Before Driving
Oil Check
DIPSTICKProCarManuals.comMain Menu Table of Contents s t
Page 132 of 272
Service Station Procedures
4. Remove the dipstick again and check the level. It should be
between the upper and lower
marks.
If it is near or below the lower mark,
see Adding Oil on page 173. Look at the coolant level in the
radiator reserve tank. Make sure it is
between the MAX and MIN lines. If
it is below the MIN line, see Adding
Engine Coolant on page 177 for
information on adding the proper
coolant. Refer to Owner Maintenance
Checks on page 171 for information
on checking other items in your
Honda.
Before Driving
UPPER MARK
LOWER MARK Engine Coolant Check
MAX MIN
RESERVE TANKProCarManuals.comMain Menu Table of Contents s t
Page 170 of 272
Owner Maintenance Checks
You should check the following items at the specified intervals. If
you are unsure of how to perform any check, turn to the page given. Engine oil level — Check every
time you fill the fuel tank. See
page 131.
Engine coolant level — Check the
radiator reserve tank every time
you fill the fuel tank. See page 132.
Windshield washer fluid — Check the level in the reservoir monthly.If weather conditions cause you to
use the washers frequently, check
the reservoir each time you stop
for fuel. See page 181.
Automatic transmission — Check the fluid level monthly. See page
182.
Brakes — Check the fluid level
monthly. See page 183. Tires — Check the tire pressure
monthly. Examine the tread for
wear and foreign objects. See page 196. Lights — Check the operation of
the headlights, parking lights,
taillights, high-mount brake light,
turn signals, brake lights, and
license plate lights monthly. See
page 202.
MaintenanceProCarManuals.comMain Menu Table of Contents s t
Page 172 of 272
Engine Oil
ENGINE OIL FILL CAP
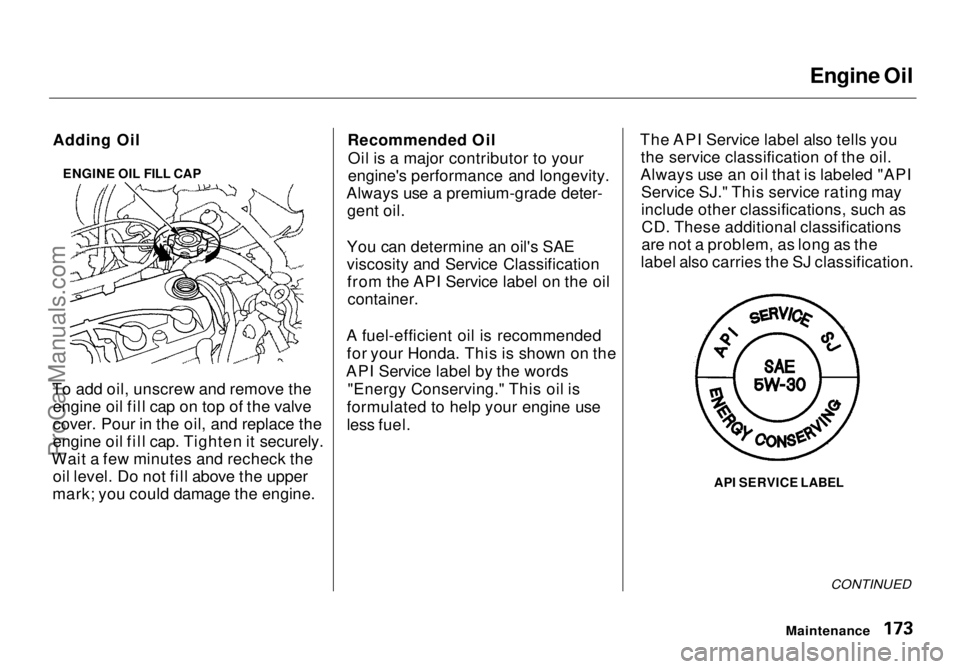
To add oil, unscrew and remove the engine oil fill cap on top of the valve
cover. Pour in the oil, and replace the
engine oil fill cap. Tighten it securely.
Wait a few minutes and recheck the oil level. Do not fill above the upper
mark; you could damage the engine. Recommended Oil
Oil is a major contributor to your
engine's performance and longevity.
Always use a premium-grade deter- gent oil.
You can determine an oil's SAE
viscosity and Service Classification from the API Service label on the oilcontainer.
A fuel-efficient oil is recommended for your Honda. This is shown on the
API Service label by the words "Energy Conserving." This oil is
formulated to help your engine use
less fuel. The API Service label also tells you
the service classification of the oil.
Always use an oil that is labeled "API Service SJ." This service rating may
include other classifications, such asCD. These additional classifications
are not a problem, as long as the
label also carries the SJ classification.
API SERVICE LABEL
CONTINUED
Maintenance
Adding OilProCarManuals.comMain Menu Table of Contents s t
Page 175 of 272
Engine Oil
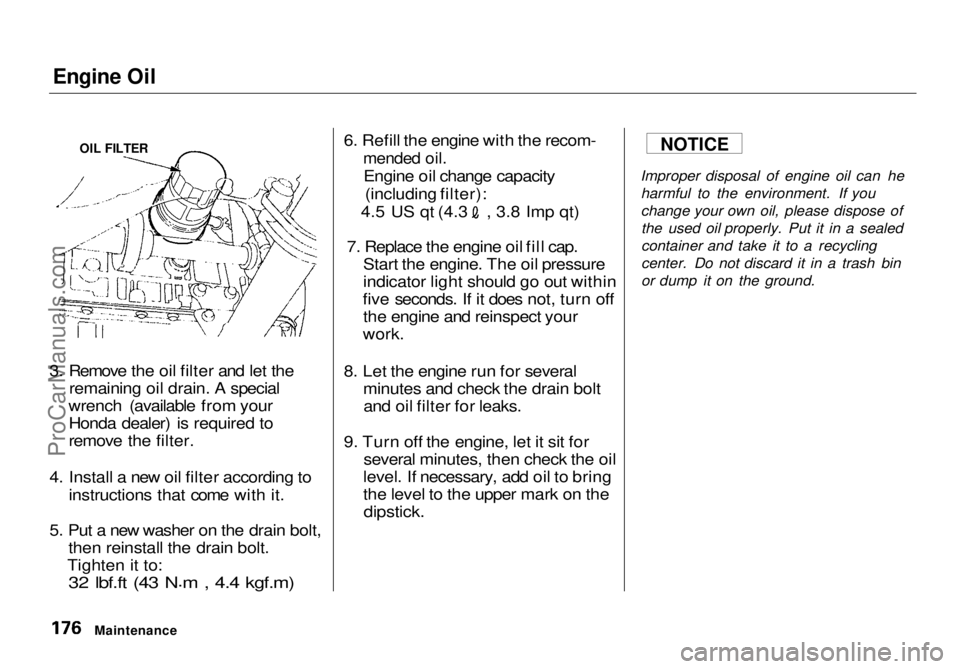
3. Remove the oil filter and let the remaining oil drain. A special
wrench (available from your Honda dealer) is required to
remove the filter.
4. Install a new oil filter according to instructions that come with it.
5. Put a new washer on the drain bolt, then reinstall the drain bolt.
Tighten it to:32 lbf.ft (43 N .
m , 4.4 kgf.m)
6. Refill
the engine with the recom-
mended oil.
Engine oil change capacity (including filter): 4.5 US qt (4.3 , 3.8 Imp qt)
7. Replace the engine oil fill cap. Start the engine. The oil pressure
indicator light should go out within
five seconds. If it does not, turn off the engine and reinspect your
work.
8. Let the engine run for several minutes and check the drain boltand oil filter for leaks.
9. Turn off the engine, let it sit for several minutes, then check the oil
level. If necessary, add oil to bring
the level to the upper mark on the
dipstick.
Improper disposal of engine oil can he
harmful to the environment. If you
change your own oil, please dispose ofthe used oil properly. Put it in a sealed
container and take it to a recycling
center. Do not discard it in a trash bin
or dump it on the ground.
Maintenance
OIL FILTER
NOTICEProCarManuals.comMain Menu Table of Contents s t
Page 231 of 272
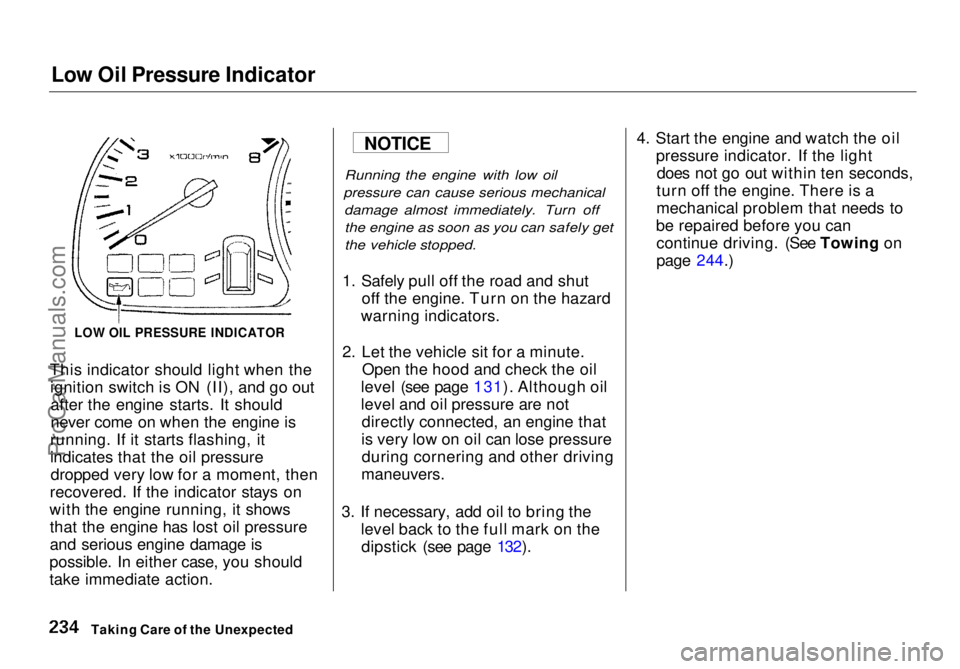
Low Oil Pressure Indicator
This indicator should light when the ignition switch is ON (II), and go outafter the engine starts. It should
never come on when the engine is
running. If it starts flashing, it
indicates that the oil pressure dropped very low for a moment, then
recovered. If the indicator stays on
with the engine running, it shows that the engine has lost oil pressure
and serious engine damage is
possible. In either case, you should
take immediate action.
Running the engine with low oil
pressure can cause serious mechanical damage almost immediately. Turn offthe engine as soon as you can safely get
the vehicle stopped.
1. Safely pull off the road and shut off the engine. Turn on the hazard
warning indicators.
2. Let the vehicle sit for a minute. Open the hood and check the oil
level (see page 131). Although oil
level and oil pressure are not directly connected, an engine that
is very low on oil can lose pressure during cornering and other driving
maneuvers.
3. If necessary, add oil to bring the level back to the full mark on thedipstick (see page 132). 4. Start the engine and watch the oil
pressure indicator. If the lightdoes not go out within ten seconds,
turn off the engine. There is a
mechanical problem that needs to
be repaired before you can continue driving. (See Towing on
page 244.)
Taking Care of the Unexpected
LOW OIL PRESSURE INDICATOR
NOTICEProCarManuals.comMain Menu Table of Contents s t