1998 HONDA CIVIC COUPE steering
[x] Cancel search: steeringPage 179 of 251
Drive Belts, Timing Belt
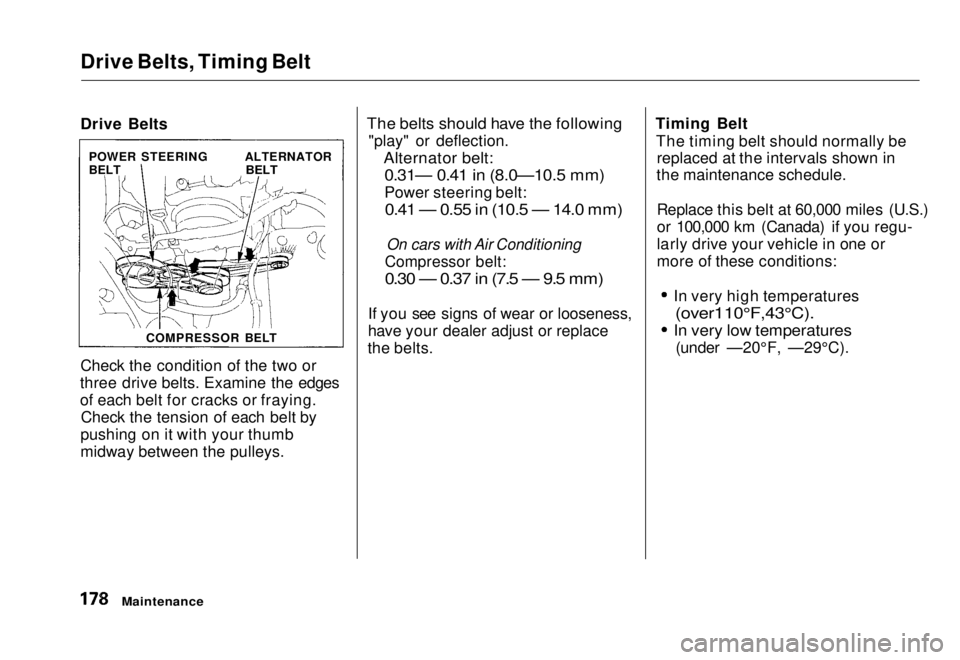
Drive Belts
Check the condition of the two or
three drive belts. Examine the edges
of each belt for cracks or fraying. Check the tension of each belt by
pushing on it with your thumb
midway between the pulleys.
The belts should have the following
"play" or deflection.
Alternator belt:
0.31— 0.41 in (8.0—10.5 mm)
Power steering belt:
0.41 — 0.55 in (10.5 — 14.0 mm)
On cars with Air Conditioning
Compressor belt:
0.30 — 0.37 in (7.5 — 9.5 mm)
If you see signs of wear or looseness,
have your dealer adjust or replace
the belts. Timing Belt
The timing belt should normally be replaced at the intervals shown in
the maintenance schedule.
Replace this belt at 60,000 miles (U.S.)
or 100,000 km (Canada) if you regu-
larly drive your vehicle in one or
more of these conditions: In very high temperatures
(over110°F,43°C).
In very low temperatures
(under —20°F, —29°C).
Maintenance
POWER STEERING
BELT
ALTERNATOR
BELT
COMPRESSOR BELTMain Menu Table of Contents s t
Page 184 of 251
Tires
Replacing Tires and Wheels
The tires that came with your vehicle were selected to match the performance capabilities of the
vehicle while providing the best combination of handling, ride
comfort, and long life. You should
replace them with radial tires of thesame size, load range, speed rating,
and maximum cold tire pressure
rating (as shown on the tire's sidewall). Mixing radial and bias-ply
tires on your vehicle can reduce its
braking ability, traction, and steering
accuracy.
It is best to replace all four tires at
the same time. If that is not possible
or necessary, then replace the two
front tires or the two rear tires as a
pair. Replacing just one tire can seriously affect your vehicle's han-
dling.
The ABS works by comparing the
speed of the wheels. When replacing
tires, use the same size originally supplied with the vehicle. Tire size
and construction can affect wheel speed and may cause the system to
work inconsistently.
If you ever need to replace a wheel,
make sure the wheel's specifications
match those of the original wheel
that came on your vehicle. Re-
placement wheels are available at
your Honda dealer.
Maintenance
Installing improper tires on your
vehicle can affect handling and
stability. This can cause a crash in which you can be seriously
hurt or killed.
Always use the size and type of
tires recommended in this owner's manual.Main Menu Table of Contents s t
Page 191 of 251
Lights
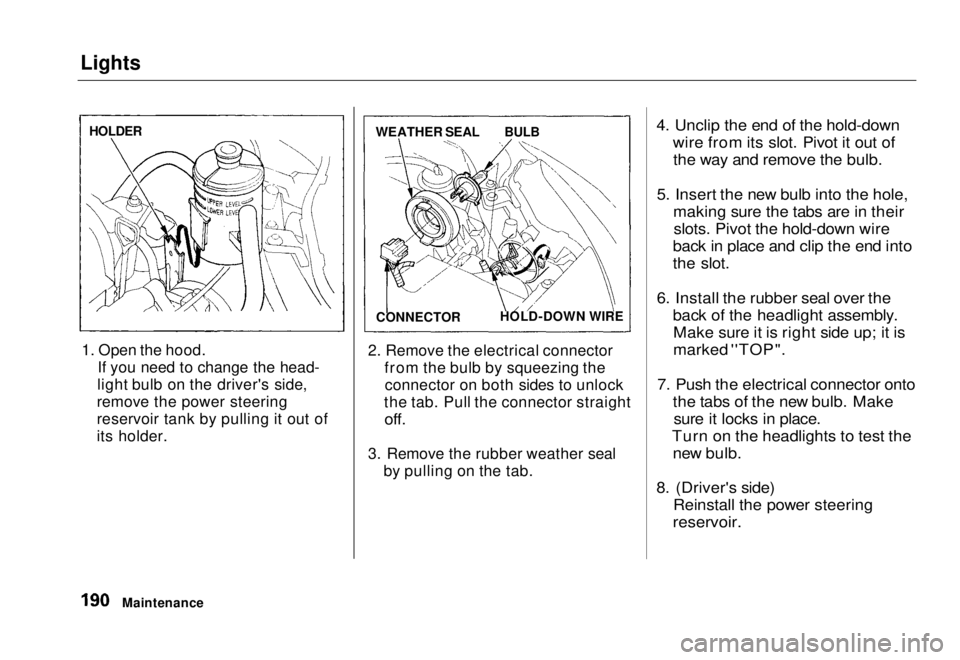
1. Open the hood. If you need to change the head-
light bulb on the driver's side,
remove the power steering
reservoir tank by pulling it out of
its holder. 2. Remove the electrical connector
from the bulb by squeezing theconnector on both sides to unlock
the tab. Pull the connector straight
off.
3. Remove the rubber weather seal by pulling on the tab.
4. Unclip the end of the hold-down
wire from its slot. Pivot it out ofthe way and remove the bulb.
5. Insert the new bulb into the hole, making sure the tabs are in theirslots. Pivot the hold-down wire
back in place and clip the end into
the slot.
6. Install the rubber seal over the back of the headlight assembly.Make sure it is right side up; it is
marked ''TOP".
7. Push the electrical connector onto the tabs of the new bulb. Makesure it locks in place.
Turn on the headlights to test the new bulb.
8. (Driver's side) Reinstall the power steering
reservoir.
Maintenance
HOLDER
WEATHER SEAL
BULB
CONNECTOR HOLD-DOWN WIREMain Menu Table of Contents s t
Page 192 of 251
Lights
Replacing the Front Side Marker/
Turn Signal and Parking Light Bulb
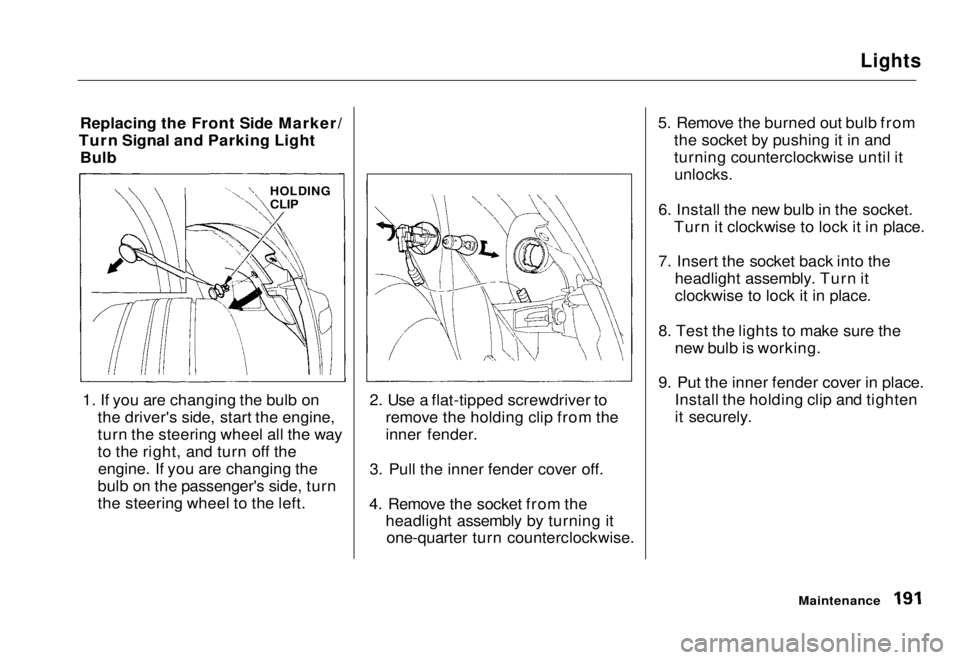
1. If you are changing the bulb on the driver's side, start the engine,
turn the steering wheel all the way
to the right, and turn off theengine. If you are changing the
bulb on the passenger's side, turn
the steering wheel to the left. 2. Use a flat-tipped screwdriver to
remove the holding clip from the
inner fender.
3. Pull the inner fender cover off.
4. Remove the socket from the headlight assembly by turning itone-quarter turn counterclockwise. 5. Remove the burned out bulb from
the socket by pushing it in and
turning counterclockwise until it
unlocks.
6. Install the new bulb in the socket. Turn it clockwise to lock it in place.
7. Insert the socket back into the headlight assembly. Turn it
clockwise to lock it in place.
8. Test the lights to make sure the new bulb is working.
9. Put the inner fender cover in place. Install the holding clip and tighten
it securely.
Maintenance
HOLDING
CLIPMain Menu Table of Contents s t
Page 227 of 251
Emergency Towing
If your vehicle needs to be towed,
call a professional towing service or,
if you belong to one, an organization
that provides roadside assistance.
Never tow your vehicle behind another vehicle with just a rope or
chain. It is very dangerous.
There are three popular types of
professional towing equipment.Flat-bed Equipment - The operatorloads your vehicle on the back of a
truck. This is the best way to transport your Honda.
Wheel-Lift Equipment - The tow
truck uses two pivoting arms that go under the tires (front or rear) and lift
them off the ground. The other two
tires remain on the ground.This is an acceptable way to tow
your Honda.
Sling-type Equipment - The tow
truck uses metal cables with hookson the ends. These hooks go around parts of the frame or suspension and
the cables lift that end of the vehicle off the ground. Your vehicle's
suspension and body can be seriously
damaged. This method of towing is
unacceptable.
If your Honda cannot be transported
by flat-bed, it should be towed by
wheel-lift equipment with the front
wheels off the ground. If, due to damage, your vehicle must be towed
with the front wheels on the ground, do the following.
5-speed Manual Transmission
Release the parking brake.Shift the transmission to Neutral.
Automatic Transmission Release the parking brake.Start the engine.
Shift to D4, then to N.
Turn off the engine.
Improper towing preparation will
damage the transmission. Follow
the above procedure exactly. If you
cannot shift the transmission or
start the engine (automatic
transmission), your vehicle must be
transported with the front wheels
off the ground.
With the front wheels on the
ground, it is best to tow the vehicle
no farther than 50 miles (80 km), and keep the speed below 35 mph
(55 km/h).
If you decide to tow your vehicle
with all four wheels on the ground,
make sure you use a properly-
designed and attached tow bar.
Prepare the vehicle for towing as
described above, and leave theignition switch in Accessory (I) so
the steering wheel does not lock.
Make sure the radio and any items
Taking Care of the Unexpected
NOTICEMain Menu Table of Contents s t
Page 228 of 251
Emergency Towing
plugged into the accessory power
socket are turned off so they do not
run down the battery.
Trying to lift or tow your vehicle by
the bumpers will cause serious
damage. The bumpers are not
designed to support the vehicle's
weight.
Taking Care of the Unexpected
The steering system can be
damaged if the steering wheel is
locked. Leave the ignition switch in
Accessory (I), and make sure the
steering wheel turns freely before
you begin towing.
NOTICE
NOTICEMain Menu Table of Contents s t
Page 246 of 251
Gasoline:
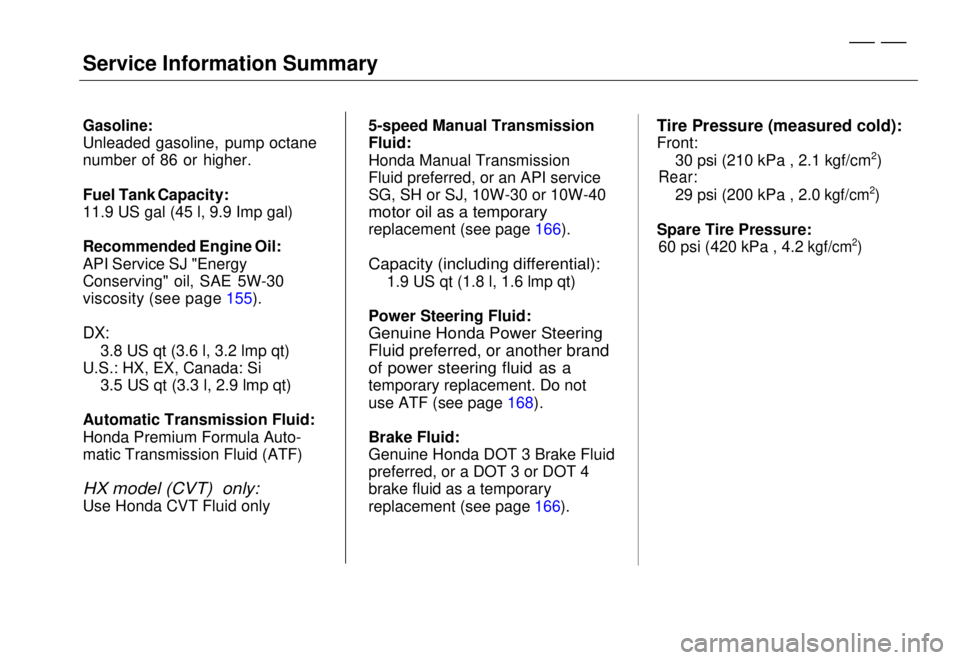
Unleaded gasoline, pump octane
number of 86 or higher.
Fuel Tank Capacity:
11.9 US gal (45 l, 9.9 Imp gal)
Recommended Engine Oil:
API Service SJ "Energy
Conserving" oil, SAE 5W-30
viscosity (see page 155).
DX:
3.8 US qt (3.6 l, 3.2 lmp qt)
U.S.: HX, EX, Canada: Si
3.5 US qt (3.3 l, 2.9 lmp qt)
Automatic Transmission Fluid:
Honda Premium
Formula Auto-
matic Transmission Fluid (ATF)
HX model (CVT)
only:
Use Honda CVT Fluid only 5-speed Manual Transmission
Fluid:
Honda Manual Transmission
Fluid preferred, or an API service
SG, SH or SJ,
10W-30 or 10W-40
motor oil as a temporary
replacement (see page 166).
Capacity (including differential):
1.9 US qt (1.8 l, 1.6 lmp qt)
Power Steering Fluid:
Genuine Honda Power Steering
Fluid preferred, or another brand
of power steering fluid as a
temporary replacement. Do not
use ATF (see page 168).
Brake
Fluid:
Genuine Honda DOT 3 Brake Fluid
preferred, or a DOT 3 or DOT 4
brake fluid as a temporary
replacement (see page
166).
Tire Pressure (measured cold):
Front:
30 psi (210 kPa , 2.1 kgf/cm2)
Rear:
29 psi (200 kPa , 2.0
kgf/cm2
)
Spare Tire Pressure:
60 psi (420 kPa , 4.2
kgf/cm 2
)
Service
Information SummaryMain Menu s t
Page 247 of 251
Index
Accessories and Modifications.... 114 Accessories................................. 114
Additional Safety Precaution.... 115Modifications............................. 115
ACCESSORY (Ignition Key Position)........................................ 68
Accessory Power Socket................ 83
Adding Automatic Transmission
Fluid........................................ 164
Brake Fluid................................. 167 Clutch Fluid................................ 167
Engine Coolant........................... 159
Engine Oil................................... 155
Manual Transmission Fluid..... 166Power Steering Fluid................. 168
Windshield Washer Fluid......... 164
Additional Information About Your Seat Belts........................ 40
Lap Belt......................................... 41
Lap/Shoulder Belt....................... 40
Seat Belt Maintenance................ 42
Seat Belt System Components... 40 Additional Information About
Your SRS................................... 43
Additional Safety Precautions.... 46 How Your Airbags Work............ 43
How Your SRS Indicator
Works........................................ 45
SRS Components......................... 43
Additives, Engine Oil..................... 156
Adjustments
Headlights.................................. 188
Head Restraints........................... 75
Mirrors.......................................... 79
Seats.............................................. 74
Steering Wheel............................ 63
Airbag (SRS)...................................... 7
Air Cleaner Element...................... 169
Air Conditioning............................... 86 Maintenance............................... 177
Usage............................................. 86
Air Outlets (Vents).......................... 88
Air Pressure, Tires........................ 180 High Speed Driving................... 236
Normal Driving.......................... 180
Alcohol in Gasoline........................ 238
Antifreeze....................................... 159
Anti-lock Brakes (ABS)
Indicator Light.....................
53, 137
Operation.................................... 13 6
Anti-thef
t Steering Column
Lock...............................................68
Appearance Care........................... 199
Ashtrays (Optional)......................... 83
Audio System................................... 94
Automatic Speed Control................ 64
Automatic Transmission............... 124
Capacity, Fluid........................... 233
Checking Fluid Level................ 164
Shifting........................................ 125
Shift Lever Position Indicator.. 124
Shift Lever Positions................. 125
Shift Lock Release..................... 128
Battery Charging SystemIndicator............................ 53,
218
Jump Starting............................ .
213
Maintenance............................... 173
Specifications............................. 234
CONTINUEDMain Menu s t