Page 162 of 452

Comfort Controls
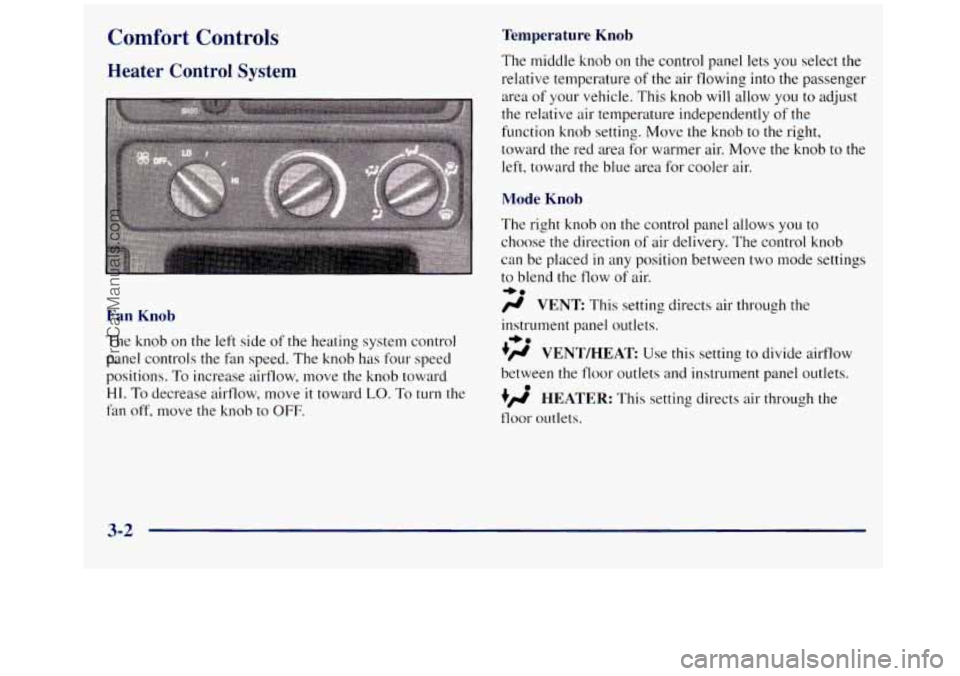
Heater Control System
Fan Knob
The knob on the left side of the heating system control
panel controls the fan speed. The knob has four speed
positions.
To increase airflow, move the knob toward
HI. To decrease airflow, move it toward LO. To turn the
fan off, move the knob to OFF.
Temperature Knob
The middle knob on the control panel lets you select the
relative temperature
of the air flowing into the passenger
area of your vehicle. This knob will allow you to adjust
the relative air temperature independently
of the
function knob setting. Move the knob to the right,
toward the red area for warmer air. Move the knob
to the
left, toward the blue area for cooler air.
Mode Knob
The right knob on the control panel allows you to
choose the direction
of air delivery. The control knob
can be placed
in any position between two mode settings
to blend the flow of air.
/r VENT This setting directs air through the
-bo
instrument panel outlets.
.)rr VENT/HEAT Use this setting to divide ailflow
between the floor outlets and instrument panel outlets.
+/r HEATER: This setting directs air through the
floor outlets.
+e
0
3-2
ProCarManuals.com
Page 163 of 452

w.
+’ DEFOG: This setting directs air to the heater
outlets and toward the windshield.
DEFROST: This setting directs air toward
the windshield.
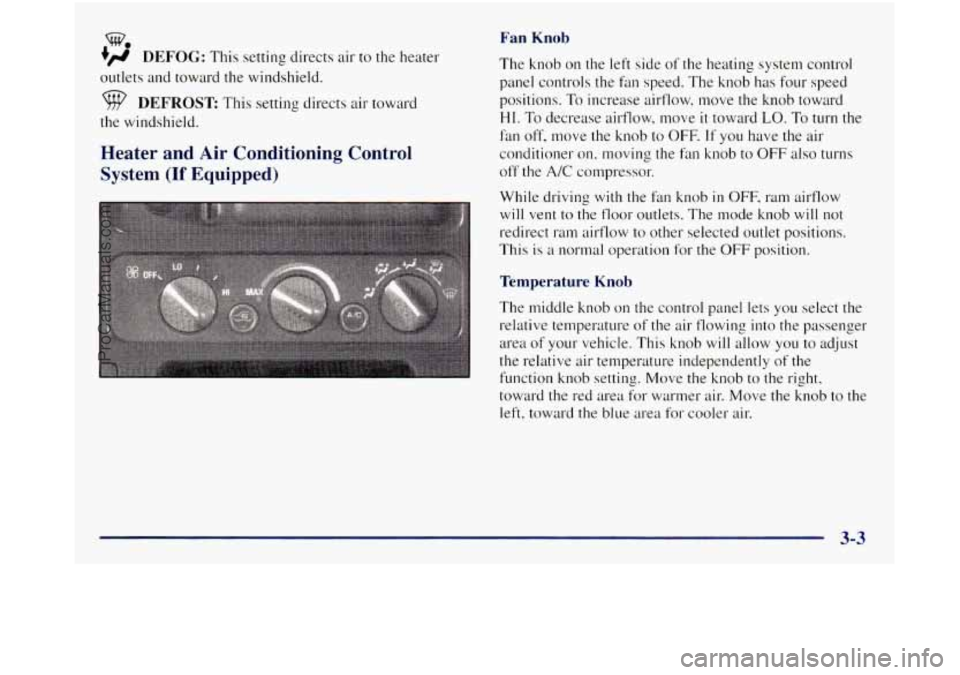
Heater and Air Conditioning Control
System
(If Equipped)
Fan Knob
The knob on the left side of the heating system control
panel controls the fan speed. The knob has four speed
positions. To increase airflow. move the knob toward
HI. To decrease airflow, move it toward LO. To turn the
fan
off, move the knob to OFF. If you have the air
conditioner
on. moving the fan knob to OFF also turns
off the
A/C compressor.
While driving
with the fan knob in OFF, ram airtlow
will vent to the
floor outlets. The mode knob will not
redirect ram airflow to other selected outlet positions.
This is
a normal operation for the OFF position.
Temperature Knob
The middle knob on the control panel lets you select the
relative temperature of the air flowing into the passenger
area of your vehicle. This knob will allow you to adjust
the relative air temperature independently
of the
function knob setting. Move the
knob to the right,
toward the red area for warmer
air. Move the knob to the
left, toward the blue area for cooler air.
3-3
ProCarManuals.com
Page 248 of 452

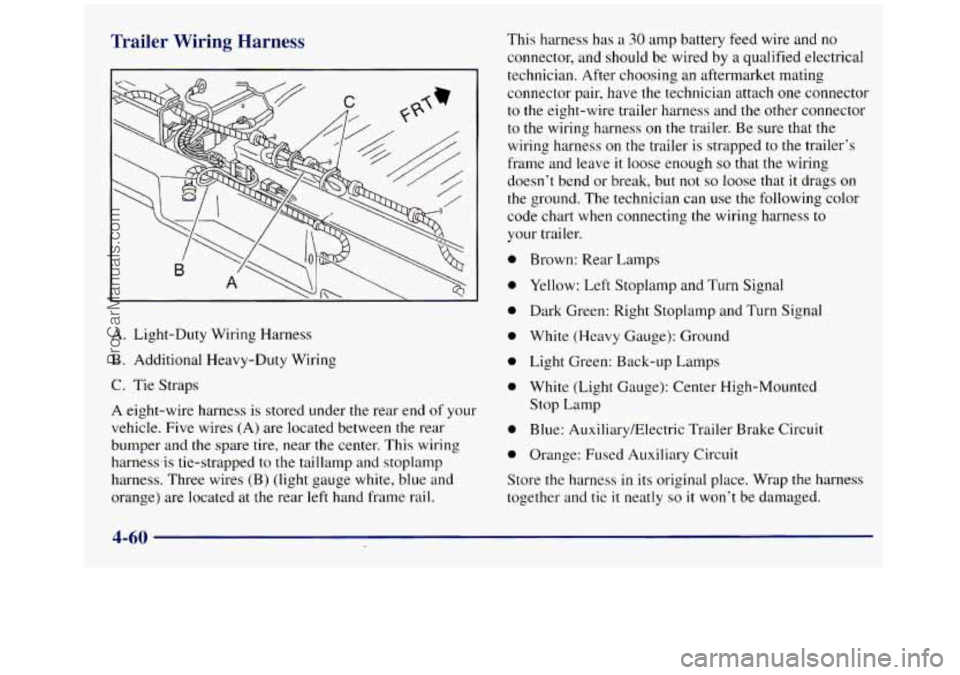
Trailer Wiring Harness
A. Light-Duty Wiring Harness
B. Additional Heavy-Duty Wiring
C. Tie Straps
A eight-wire harness is stored under the rear end of your
vehicle. Five wires (A) are located between the rear
bumper and the spare tire, near the center. This wiring
harnewis tie-strapped to the taillamp and stoplamp
harness. Three wires (B) (light gauge white, blue and
orange) are located at
the rear left hand frame rail. This
harness has a
30 amp battery feed wire and no
connector, and should be wired
by a qualified electrical
technician. After choosing an aftermarket mating
connector pair, have the technician attach one connector
to the eight-wire trailer harness and the other connector
to the wiring harness on the trailer. Be sure that the
wiring harness on the trailer is strapped to the trailer’s
frame and leave
it loose enough so that the wiring
doesn’t bend or break, but not
so loose that it drags on
the ground. The technician can use the following color
code chart when connecting the wiring harness to
your trailer.
0 Brown: Rear Lamps
0 Yellow: Left Stoplamp and Turn Signal
0 Dark Green: Right Stoplamp and Turn Signal
0 White (Heavy Gauge): Ground
0 Light Green: Back-up Lamps
0 White (Light Gauge): Center High-Mounted
Stop Lamp
0 Blue: Auxiliary/Electric Trailer Brake Circuit
0 Orange: Fused Auxiliary Circuit
Store the harness
in its original place. Wrap the harness
together and tie
it neatly so it won’t be damaged.
4-60
ProCarManuals.com