1998 GMC SIERRA ABS
[x] Cancel search: ABSPage 140 of 452
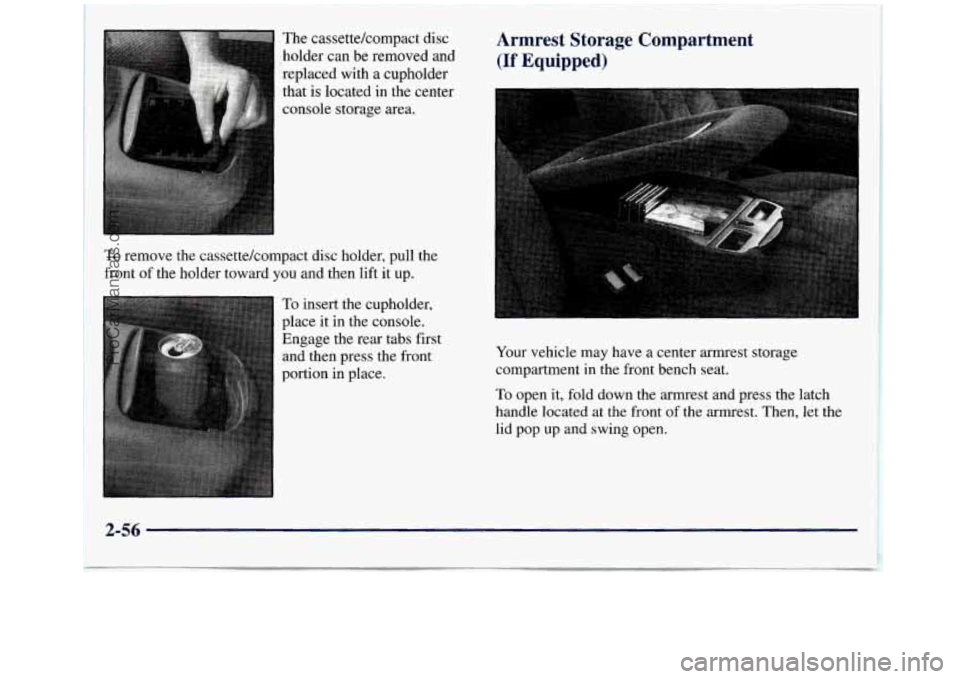
The cassettekompact disc
holder can be removed and
replaced with a cupholder
that is located in the center
console storage area.
To remove the cassettekompact disc holder, pull the
front
of the holder toward vou and then lift it up.
To insert the cupholder,
place it in the console.
Engage the rear tabs first and then press the front
portion in place.
Armrest Storage Compartment
(If Equipped)
Your vehicle may have a center armrest storage
compartment in the front bench seat.
To open it, fold down the armrest and press the latch
handle located at the front of the armrest. Then, let the
lid pop up and swing open.
2-56
ProCarManuals.com
Page 142 of 452
Ashtrays and Cigarette L - ;er
l Front Ashtray
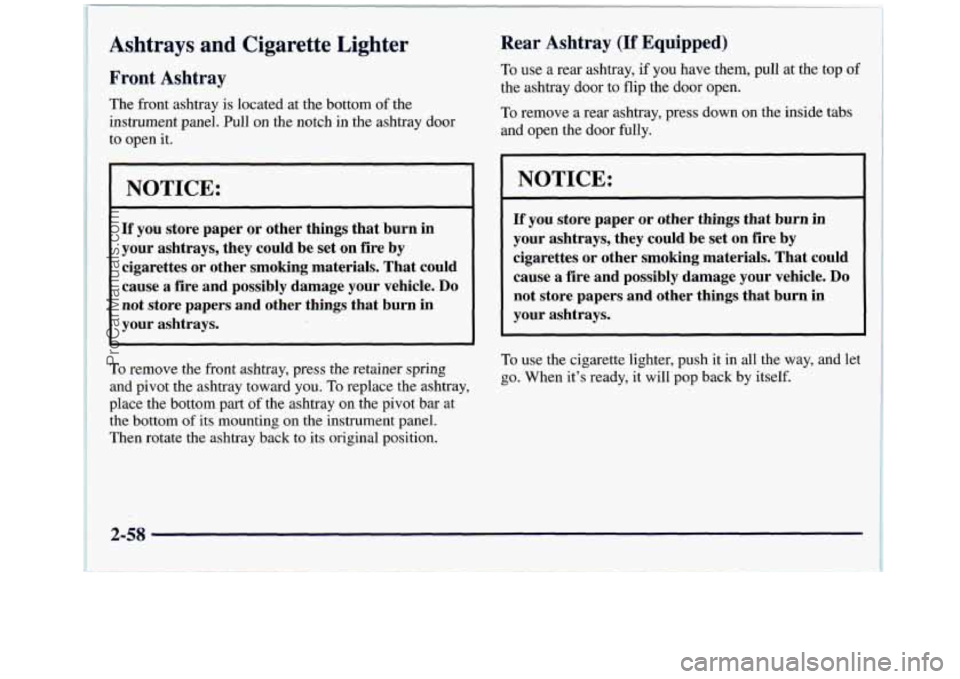
The front ashtray is located at the bottom of the
instrument panel. Pull
on the notch in the ashtray door
to open it.
NOTICE:
If you store paper or other things that burn in
your ashtrays, they could be set on fire by
cigarettes or other smoking materials. That could
cause
a fire and possibly damage your vehicle. Do
not store papers and other things that burn in
your ashtrays.
To remove the front ashtray, press the retainer spring
and pivot the ashtray toward you.
To replace the ashtray,
place the bottom part
of the ashtray on the pivot bar at
the bottom
of its mounting on the instrument panel.
Then rotate the ashtray
back to its original position.
Rear Ashtray (If Equipped)
To use a rear ashtray, if you have them, pull at the top of
the ashtray door to flip the door open.
To remove a rear ashtray, press down on the inside tabs
and open the door fully.
NOTICE:
If you store paper or other things that burn in
your ashtrays, they could be set on fire
by
cigarettes or other smoking materials. That could
cause
a fire and possibly damage your vehicle. Do
not store papers and other things that burn in
your ashtrays.
To use the cigarette lighter, push it in all the way, and let
go. When it's ready, it will pop back by itself.
2-58 !
I
ProCarManuals.com
Page 195 of 452
If your engine ever stops while you’re driving, brake
normally but don’t pump your brakes.
If you do, the
pedal may get harder to push down. If your engine
stops, you will still have some power brake assist. But
you will use it when you brake. Once the power assist is
used up, it may take longer to stop and the brake pedal
will be harder to push.
Anti-Lock Brakes (ABS)
Your vehicle has anti-lock brakes (ABS). ABS is an
advanced electronic braking system that will help
prevent a braking skid.
When you start your engine and begin
to drive away,
your anti-lock brake system will check itself. You may
hear
a momentary motor or clicking noise while this
test is going on. This is normal.
(@!
ANTI -
If there’s a problem with
the anti-lock brake system,
this warning light will stay
on. See “Anti-Lock Brake
System Warning Light”
in
I LOCK I the Index. Here’s how
anti-lock works. Let’s say the road
is wet.
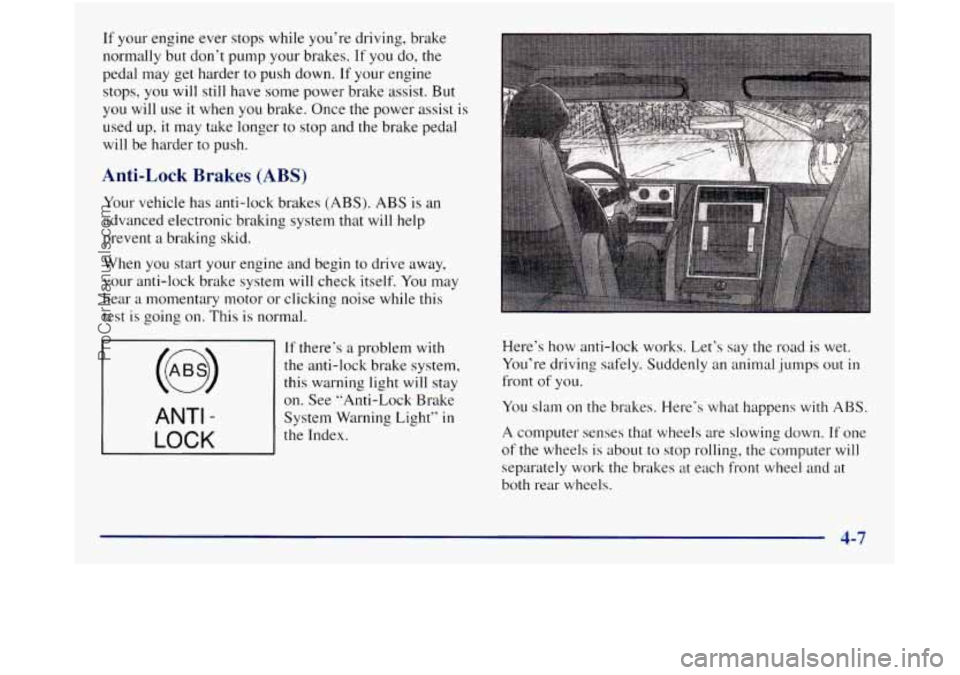
You’re driving safely. Suddenly an animal jumps out
in
front of you.
You slam
on the brakes. Here’s what happens with ABS.
A computer senses that wheels are slowing down. If one
of the wheels is about to stop rolling, the computer will
separately work the brakes at each front wheel and at
both rear wheels.
4-7
ProCarManuals.com
Page 201 of 452
Loss of Control
Let’s review what driving experts say about what
happens when the three control systems (brakes, steering
and acceleration) don’t have enough friction where
the
tires meet the road to do what the driver has asked.
In any emergency, don’t give up. Keep trying to steer and
constantly seek an escape route or area of less danger.
Skidding
In a skid, a driver can lose control of the vehicle. Defensive
drivers avoid most skids by taking reasonable care suited
to
existing conditions, and by not “overdriving” those
conditions. But skids are always possible.
The three types of skids correspond
to your vehicle’s
three control systems. In the braking skid, your wheels
aren’t rolling. In the steering or cornering skid,
too
much speed or steering in a curve causes tires to slip and
lose cornering force. And
in the acceleration skid, too
much throttle causes the driving wheels to spin.
A cornering skid and an acceleration skid are best
handled by easing your foot off the accelerator pedal. If
your vehicle starts
to slide, ease your foot off the
accelerator pedal and quickly steer the way you want the
vehicle
to go. If you start steering quickly enough, your
vehicle may straighten out. Always be ready for
a
second skid if it occurs.
Of course, traction
is reduced when water, snow, ice.
gravel or other material
is on the road. For safety, you’ll
want to slow down and adjust your driving to these
conditions.
It is important to slow down on slippery
surfaces because stopping distance will be longer and
vehicle control more limited.
While driving on a surface
with reduced traction, try
your best to avoid sudden steering, acceleration or
braking (including engine braking
by shifting to a lower
gear). Any sudden changes could cause the tires
to slide.
You may not realize the surface is slippery until your
vehicle is skidding. Learn to recognize warning clues
--
such as enough water, ice or packed snow on the road to
make
a “mirrored surface” -- and slow down when you
have any doubt.
Remember:
Any anti-lock brake system (ABS) helps
avoid only the braking skid.
4-13
ProCarManuals.com
Page 239 of 452
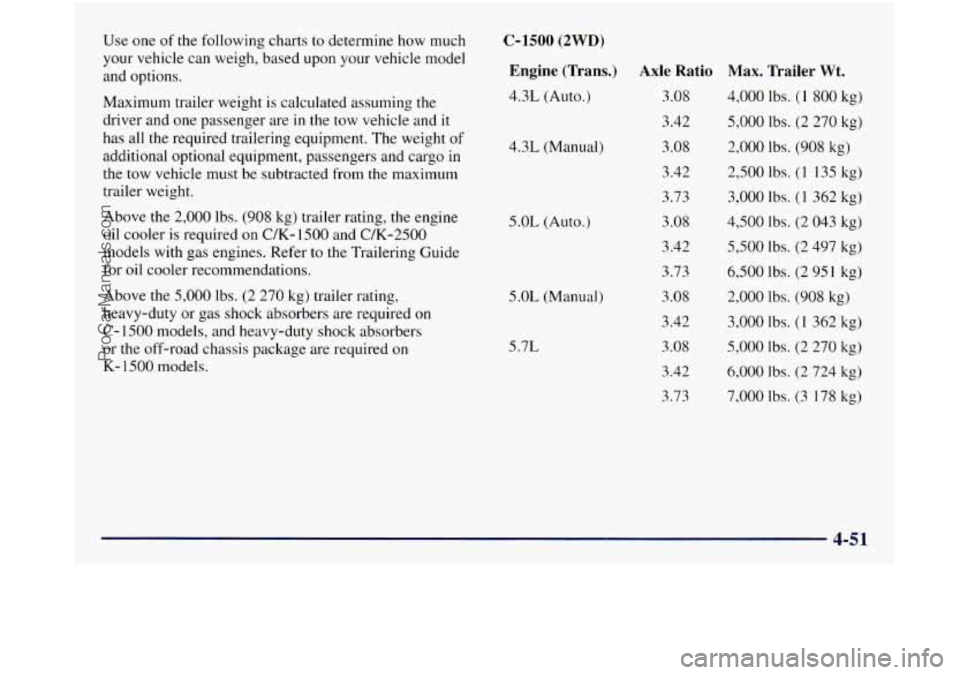
Use one of the following charts to determine how much
your vehicle can weigh, based upon your vehicle model
and options.
Maximum trailer weight is calculated assuming the
driver and one passenger are in the tow vehicle and
it
has all the required trailering equipment. The weight of
additional optional equipment, passengers and cargo in
the tow vehicle must be subtracted from the maximum
trailer weight.
Above the
2,000 lbs. (908 kg) trailer rating, the engine
oil cooler
is required on C/K- 1500 and C/K-2500
models with gas engines. Refer
to the Trailering Guide
for oil cooler recommendations.
Above the
5,000 lbs. (2 270 kg) trailer rating,
heavy-duty or gas shock absorbers are required
on
C- 1500 models, and heavy-duty shock absorbers
or the off-road chassis package are required on
K- 1500 models.
C-1500 (2WD)
Engine (Trans.)
4.3L (Auto.)
4.3L (Manual)
5.0L (Auto.)
5.0L (Manual)
5.x
Axle Ratio 3.08
3.42
3.08
3.42
3.73
3.08
3.42
3.73
3.08
3.42
3.08
3.42
3.73
Max. Trailer Wt.
4,000 lbs. (1 800 kg)
5,000 lbs. (2 270 kg)
2,000 lbs.
(908 kg)
2,500 lbs.
(1 135 kg)
3,000 lbs.
(1 362 kg)
4,500 lbs.
(2 043 kg)
5,500 Ibs. (2 497 kg)
6,500 Ibs. (2 951 kg)
2,000 lbs.
(908 kg)
3,000 Ibs. (1 362 kg)
5,000 lbs. (2 270 kg)
6,000 lbs. (2 724 kg)
7,000 lbs. (3 178 kg)
4-51
ProCarManuals.com
Page 246 of 452
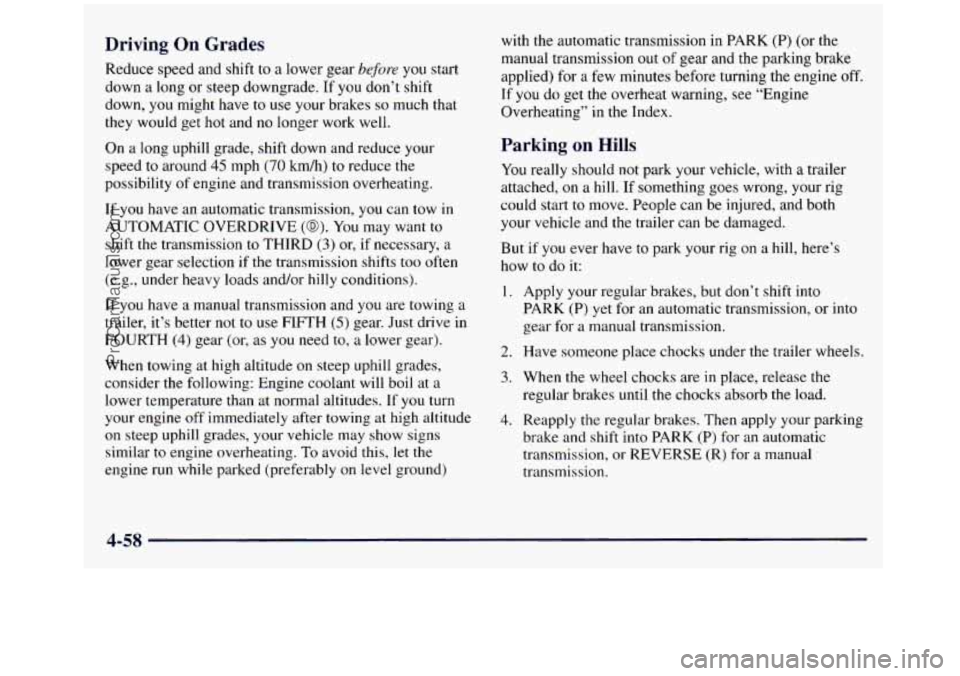
Driving On Grades
Reduce speed and shift to a lower gear before you start
down a long or steep downgrade. If
you don’t shift
down,
you might have to use your brakes so much that
they would
get hot and no longer work well.
On a long uphill grade, shift down and reduce your
speed
to around 45 mph (70 kdh) to reduce the
possibility
of engine and transmission overheating.
If you have an automatic transmission, you can tow in
AUTOMATIC OVERDRIVE
(@). You may want to
shift the transmission
to THIRD (3) or, if necessary, a
lower gear selection
if the transmission shifts too often
(e.g., under heavy loads and/or hilly conditions).
If
you have a manual transmission and you are towing a
trailer, it’s better not to
use FIFTH (5) gear. Just drive in
FOURTH
(4) gear (or, as you need to, a lower gear).
When towing at high altitude
on steep uphill grades,
consider the following: Engine coolant
will boil at a
lower temperature than at normal altitudes. If you turn
your engine off immediately after towing
at high altitude
on steep uphill grades, your vehicle may show signs
similar to engine overheating. To avoid this, let the
engine run while parked (preferably on level ground) with
the automatic transmission in
PARK (P) (or the
manual transmission out of gear and the parking brake
applied) for a few minutes before turning the engine
off.
If you do get the overheat warning, see “Engine
Overheating’’ in
the Index.
Parking on Hills
You really should not park your vehicle, with a trailer
attached, on a
hill. If something goes wrong, your rig
could start to move. People can be injured, and both
your vehicle and the trailer can be damaged.
But
if you ever have to park your rig on a hill, here’s
how to do it:
1.
2.
3.
4.
Apply your regular brakes, but don’t shift into
PARK
(P) yet for an automatic transmission, or into
gear for a manual transmission.
Have someone place chocks under the trailer wheels.
When the wheel chocks are
in place, release the
regular brakes until the chocks absorb the load.
Reapply the regular brakes. Then apply your parking brake and
shift into PARK (P) for an automatic
transmission, or REVERSE (R)
for a manual
transmission.
4-58
ProCarManuals.com
Page 281 of 452
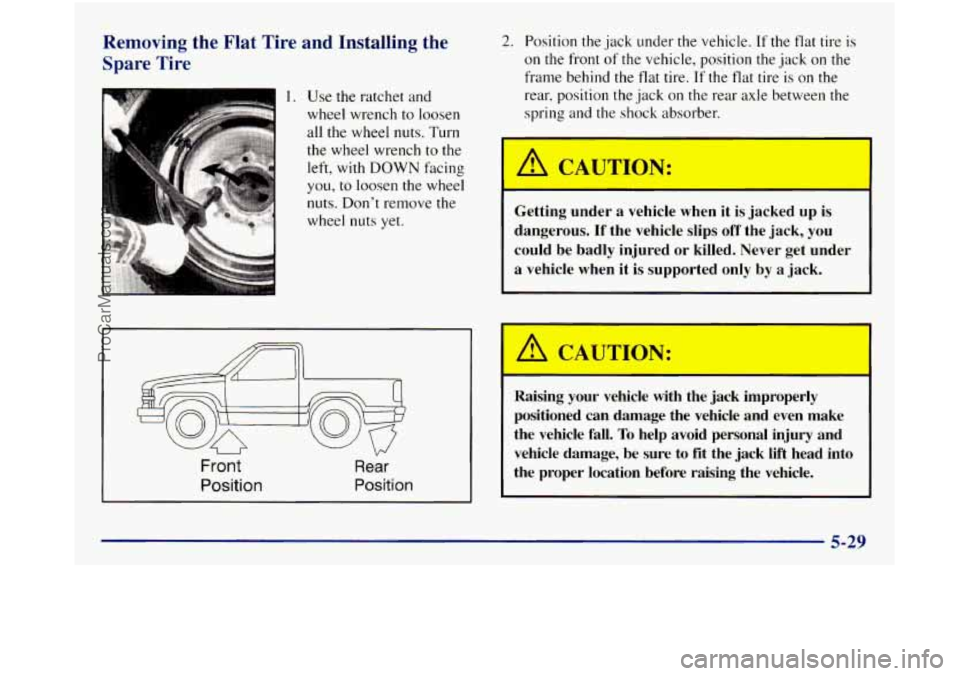
Removing the Flat Tire and Installing the
Spare Tire
1. Use the ratchet and
wheel wrench to loosen
all the wheel nuts. Turn
the wheel wrench to the
left, with
DOWN facing
you,
to loosen the wheel
nuts. Don't remove the
wheel nuts yet.
Front Rear
Position Position
2. Position the jack under the vehicle. If the flat tire is
on the front of the vehicle, position the jack on the
frame behind the flat tire.
If the flat tire is on the
rear, position the jack on the rear axle between the
spring and
the shock absorber.
Getting under a vehicle when it is jacked up
is
dangerous. If the vehicle slips off the jack, you
could be badly injured or killed. Never get under
a vehicle when it is supported only by a jack.
/i CAUTIOL.
-
Raising your vehicle with the jack improperly
positioned can damage the vehicle and even make
the vehicle fall.
To help avoid personal injury and
vehicle damage, be sure to fit the .jack lift head into
the proper location before raising the vehicle.
5 - :
ProCarManuals.com
Page 359 of 452
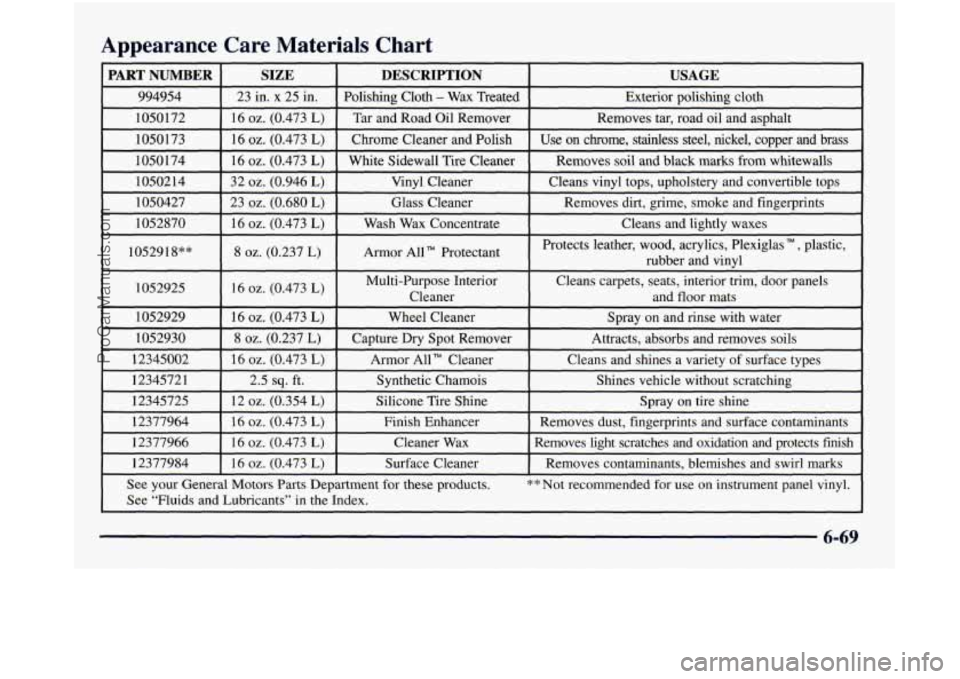
Appearance Care Materials Chart
PART NUMBER SIZE DESCRIPTION USAGE
994954 23 in. x 25 in. Polishing Cloth - Wax Treated
Exterior polishing cloth
1050172 16
oz. (0.473 L) Tar and Road Oil Remover Removes tar, road oil and asphalt
1050173 16
oz. (0.473 L) Chrome Cleaner and Polish Use on chrome, stainless steel, nickel, copper and brass
1050 174 16
oz. (0.473 L) White Sidewall Tire Cleaner Removes soil and black marks from whitewalls
1050214 32
oz. (0.946 L) Vinyl Cleaner Cleans vinyl tops, upholstery and convertible tops
1050427 23
oz. (0.680 L) Glass Cleaner Removes dirt, grime,
smoke and fingerprints
1052870
16 oz. (0.473 L) Wash Wax Concenmace Cleans and lightly waxes ~.
1052918”” 8 oz. (0.237 L) Armor All Protectant Protects
leather, wood, acrylics, Plexiglas TM , plastic,
rubber and vinyl
1052925
[ 16 oz. (0.473 L) I Multi-Purpose Interior Cleans carpets, seats, interior trim, door panels
I Cleaner and floor mats I I
1052929 I 16 oz. (0.473 L) I Wheel Cleaner I Spray on and rinse with water
1052930
8 oz. (0.237 L) Capture Dry Spot Remover
Attracts, absorbs and removes soils
12345002
16 oz. (0.473 L) Armor All” Cleaner Cleans
and shines a variety of surface types
12345721 2.5
sq. ft. Synthetic Chamois
Shines vehicle without scratching
12345725 12
oz. (0.354 L) Silicone Tire Shine Spray
on tire shine
12377964 16
oz. (0.473 L) Finish Enhancer Removes dust, fingerprints andsurface contaminants
12377966 16
oz. (0.473 L) Cleaner Wax Removes light scratches and oxidation and protects fish
12377984
I 16 oz. (0.473 L) I Surface Cleaner I Removes contaminants, blemishes and swirl marks
See your General Motors Parts Department for these products.
** Not recommended for use on instrument panel vinyl.
See “Fluids and Lubricants’’ in the Index.
6-69
ProCarManuals.com