1998 CHEVROLET VENTURE fuses
[x] Cancel search: fusesPage 158 of 474

Entering Programming Mode
To program features, your vehicle must be in the
programming mode. Follow these steps:
1.
2.
3.
4.
5.
The Content Theft-Deterrent system (if equipped)
must be disarmed. See “Content Theft-Deterrent
System” in this section.
Remove the
BCM PRGRM fuse from the instrument
panel fuse block, located to the right of the glove
box. (See “Fuses and Circuit Breakers” in the Index.)
Close the driver’s door.
Turn the ignition switch towards you to
ACCESSORY.
Count the number of chimes you hear. You will
hear two to four chimes depending on the features
your vehicle is equipped with. Refer to the chart
shown previously.
You can now program your choices.
To exit the programming mode, follow the steps
listed under “Exiting Programming Mode” later in
this section.
Delayed Illumination and Exit Lighting
With Delayed Illumination, the interior lamps will stay
on for about
25 seconds after all the doors and the
liftgate are closed.
With Exiting Lighting, the interior lamps will come on
and stay on for about
25 seconds whenever you remove
the key from the ignition.
To customize these features to your preference, see
“Programmable Modes” following.
Programmable Modes
Your vehicle can be programmed to one of the
following modes.
Mode 1: Both Features Off (The interior lamps will
turn on or
off at the same instant that a door is opened
or closed.)
Mode 2: Delayed Illumination Only (The interior lamps
will stay on for about
25 seconds after all the doors and
liftgate are closed, or until you lock the doors.)
Mode 3: Exit Lighting Only (The interior lamps
will come on whenever you remove the key from the
ignition and stay on for about
25 seconds, or until you
lock the doors.)
2-41
ProCarManuals.com
Page 171 of 474

If a bulb is burned out, replace it to help avoid an
accident. If the arrows don’t go
on at all when you
signal a turn, check for burned-out bulbs and check the
fuse (see “Fuses and Circuit Breakers” in the Index).
If you have a trailer towing option with added wiring for
the trailer lamps, the signal indicator will flash at a
normal rate even if a turn signal bulb is burned out.
Check the front and rear turn signal lamps regularly to
make sure they are working.
Turn Signal on Chime
If either turn signal is left on for more than 3/4 mile
(1.2 km), a chime will sound to let the driver know to
turn it off.
If you need
to leave the signal on for more than 3/4 mile
(1.2 km), turn off the signal and then turn it back on.
Headlamp High/Low Beam Changer
To change the headlamps from high to low beam, or low
to high, simply pull the turn signal lever all the way
toward you. Then release it.
When the high beams
are on, this light on the
instrument cluster will
also be
on.
Windshield Wipers
You control the windshield wipers by turning the band
marked WIPER.
For a single wiping cycle, turn the band to MIST. Hold
it there until the wipers start, then let go. The wipers will
stop after one cycle. If you want more cycles, hold the
band
on mist longer.
2-54
ProCarManuals.com
Page 197 of 474

has the pressure gage, Then attach that end of the hose
to the object you wish to inflate. Remove the protective
cap covering the outlet. Attach the other end of the hose
to the outlet. Press the ON switch. The ON switch will
work even with the ignition off.
If the air inflator system does not turn on, the fuse may
be blown
or installed incorrectly. See “Fuses and Circuit
Breakers” in the Index or see your dealer for service.
Your air inflator will automatically shut off after about
10 minutes.
To reset, press the ON switch again.
Don’t run your air inflator for longer than
30 minutes at
one time. If you do, you may damage the system. After
30 minutes, wait at least 10 minutes before restarting the
air inflator.
To turn off the inflator, press OFF and detach the hose,
first from the inflated object, then from the outlet.
Replace the protective cap. Place the inflator kit tools
in the pouch, and store in the glove box.
To replace the cover, line up the tabs at the back of the
cover and put it in place. Push down the tab to secure
the cover.
Accessory Power Outlet
The rear power outlet is located in the rear compartment
on the driver’s side. To remove the cover, pull the tab
on
the cover and pull it off.
The front power outlet
is located next to the ashtray and
lighter. Pull the cover down to
use the power outlet.
2-80
ProCarManuals.com
Page 285 of 474

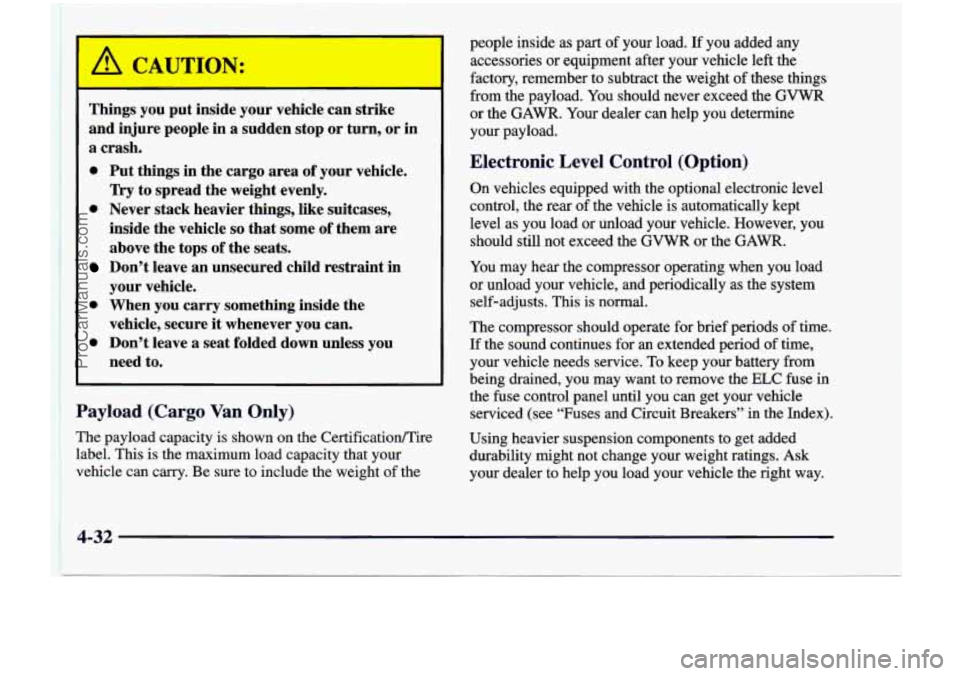
Things you put inside your vehicle can strike
and injure people in a sudden stop or turn, or in
a crash.
0 Put things in the cargo area of your vehicle.
0 Never stack heavier things, like suitcases,
Try to spread the
weight evenly.
inside the vehicle
so that some of them are
above the tops
of the seats.
Don’t leave an unsecured child restraint in
your vehicle.
0 When you carry something inside the
vehicle, secure
it whenever you can.
0 Don’t leave a seat folded down unless you
need to.
Payload (Cargo Van Only)
The payload capacity is shown on the Certificatioflire
label. This is the maximum load capacity that your
vehicle can carry. Be sure to include the weight of the people inside as part
of your load.
If you added any
accessories or equipment after your vehicle left the
factory, remember to subtract the weight
of these things
from the payload. You should never exceed the
GVWR
or the GAWR. Your dealer can help you determine
your payload.
Electronic Level Control (Option)
On vehicles equipped with the optional electronic level
control, the rear of the vehicle is automatically kept
level as you load or unload your vehicle. However, you
should still not exceed the
GVWR or the GAM.
You may hear the compressor operating when you load
or unload your vehicle, and periodically as the system
self-adjusts.
This is normal.
The compressor should operate for brief periods of time.
If the sound continues for an extended period of time,
your vehicle needs service. To keep your battery from
being drained, you may want to remove the ELC fuse in
the fuse control panel until you can get your vehicle
serviced (see “Fuses and Circuit Breakers” in the Index)\
.
Using heavier suspension components to get added
durability might not change your weight ratings. Ask
your dealer to help you load your vehicle the right way.
4-32
ProCarManuals.com
Page 393 of 474

Fuses and Circuit Breakers
The wiring circuits in your vehicle are protected from
short circuits by a combination of fuses, circuit breakers
and fusible thermal links.
Look at the silver-colored band inside the fuse. If
the
band is broken or melted, replace the fuse. Be sure you
replace a bad fuse with a new one of the identical size
and rating.
If you ever have a problem on the road and don’t have
a spare fuse, you can borrow one that has the same
amperage or use one of the spare fuses in the underhood
fuse and relay center. Just pick some feature of your
vehicle that you can get along without
-- like the radio
or cigarette lighter -- and use its fuse, if it is the right
amperage. Replace it as
soon as you can.
There are two fuse blocks in your vehicle: the
instrument panel fuse block and the underhood fuse
and relay center.
Instrument Panel Fuse Block
The instrument panel
fuse block is to the right
of the glove box. Pull the
door open to access the
instrument panel fuse block.
6-58
ProCarManuals.com
Page 394 of 474

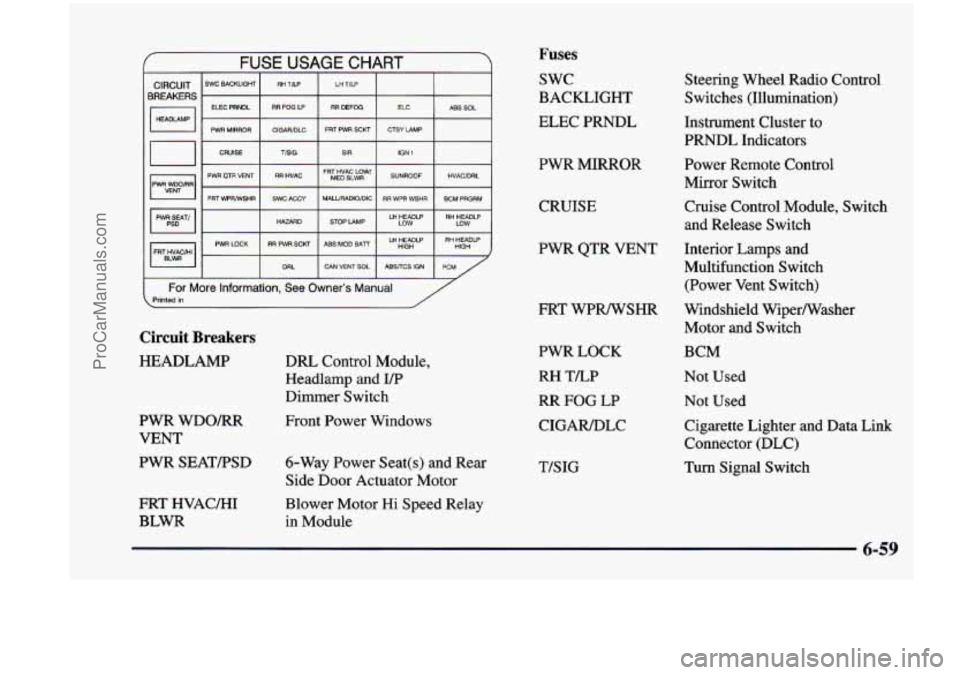
CIRCUIT BREAKERS
FUSE USAGE CHART
SWC BACKLIGHT RH TLP LH TILP
ELEC PRNDL RR
FOG LP RR DEFOG ELC ABS SOL
PWR
MIRROR ClGARiDLC FRT PWR SCU CTSY LAMP
CRUISE TBIG
SIR IGN 1
PWR am VENT RR HVAC MED BLWR SUNROOF HVACIDRL FRT HVAC Low’
FRT WRNSHR SWC ACCY MALURADIO/DIC RR WPR WSHR BCM PRGRM I I I I
HAZARD LAMP LH HEADLP RH HEADLP
LOW LOW
I I I I I
I- I DRL 1 CAN VENTSOL I ABSflCS IGN I PCM /
For More Information, See Owner’s Manual Printed in /
Circuit Breakers
HEADLAMP
PWR
WDOm
VENT
PWR SEATPSD
FRT HVAC/HI
BLWR DRL
Control Module,
Headlamp and
UP
Dimmer Switch
Front Power Windows
6-Way Power Seat(s) and Rear
Side Door Actuator Motor
Blower Motor
Hi Speed Relay
in Module
Fuses
swc
BACKLIGHT
ELEC PRNDL
PWR MIRROR
CRUISE Steering Wheel
Radio Control
Switches (Illumination)
Instrument Cluster to
PRNDL Indicators
Power Remote Control
Mirror Switch
Cruise Control Module, Switch
and Release Switch
PWR QTR VENT Interior Lamps and
Multifunction Switch
(Power Vent Switch)
Motor
and Switch
FRT
WPWSHR Windshield Wiperwasher
PWR LOCK
RH TLP
RR FOG LP
CIGAR/DLC
T/SIG BCM
Not Used
Not Used
Cigarette Lighter and Data Link
Connector
(DLC)
Turn Signal Switch
ProCarManuals.com
Page 395 of 474

Fuses
RR HVAC
SWC ACCY
HAZARD
RR PWR SCKT
DRL
LH TLP
RR DEFOG
FRT PWR SCKT
SIR
FRT HVAC
LOWMED BLWR
MALL/RADIO/DIC Rear Blower Motor,
Rear
Heater-NC
Control,
and Temperature Door
Actuator (Rear)
Steering Wheel Radio
Control Switches
Turn Signal Switch
Rear Electric Accessory
Plug Housing
DRL Control Module
Not Used
Rear Window Defogger Relay
Front Electric Accessory
Plug Housing
Inflatable Restraint
Control Module
Heater-A/C Control
BCM, Driver Information
Display, Radio
and Radio Rear
Speaker Amplifier
Fuses
STOP LAMP
ABS MOD BATT
CAN VENT
SOL
ELC
CTSY LAMP
IGN 1
SUNROOF
Stoplamp Switch to Stoplamps
Electronic Brake Control
ModuleElectronic Brake
Traction Control Module
(EBCMEBTCM)
Evaporative Emissions (EVAP)
Canister Vent Solonoid Valve
Electronic Level Control (ELC)
Air Compressor and ELC
Relay, Trailer Harness
BCM
ALC Sensor, BCM, Electronic
Brake Control Indicator Lamp
Driver Module, Instrument
Panel Cluster, Rear Window
Wipermasher and
Multifunction Switch (Fog Lamp SwitcWTraction Control Switch) and Stoplamp/Torque
Converter Clutch (TCC) Switch
Sunroof Control Module
6-60
ProCarManuals.com
Page 396 of 474

Fuses
RR WPR WSHR Rear Window Wiper Motor,
Rear Window Wipermasher
and Multifunction Switch (Rear
Window Wipermasher Switch)
LH HEADLP LOW Not Used
LH HEADLP HIGH Not Used ABS/TCS IGN Electronic Brake Control ModuleElectronic Brake
Traction Control Module
(EBCMEBTCM)
ABS
SOL
HVACDRL LH and
RH Front Brake
Solenoid Valve
Air Inlet Actuator, DRL Control
Module, Heater-A/C Control,
Temperature Door Actuator (Front) and Rear Window
Defogger Relay
BCM PRGRM Body Control Module (BCM)
RH HEADLP LOW Not Used
RH HEADLP HIGH Not Used
PCM
IGN MAIN Relay and PCM
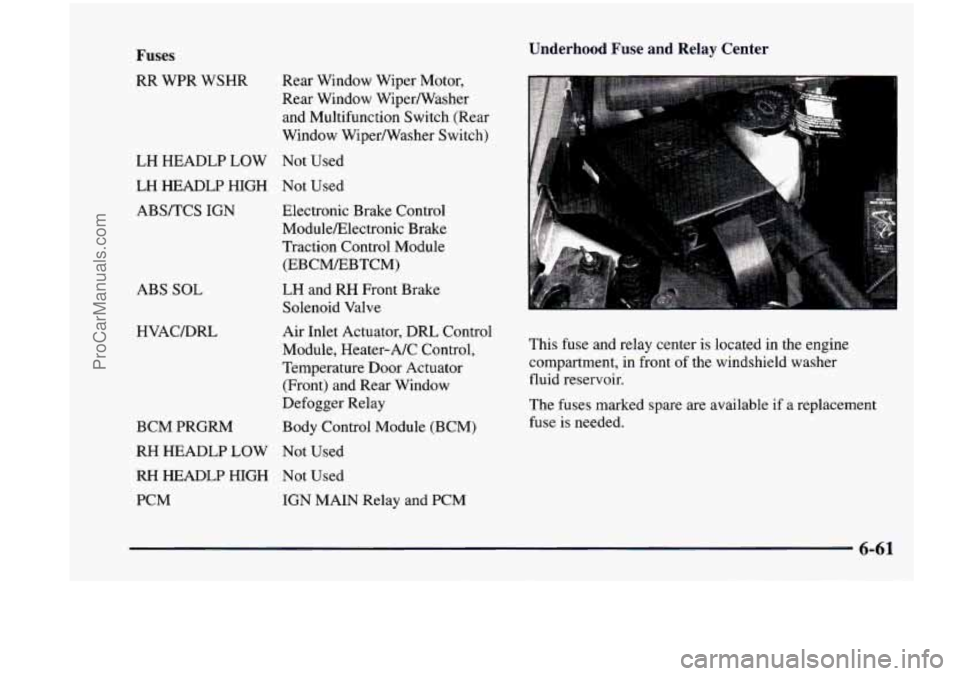
Underhood Fuse and Relay Center
This fuse and relay center is located in the engine
compartment, in front of the windshield washer
fluid reservoir.
The fuses marked spare are available if
a replacement
fuse is needed.
6-61
ProCarManuals.com