1998 CHEVROLET VENTURE lock
[x] Cancel search: lockPage 164 of 474
3. Count the number of chimes you hear. The number
of chimes tells you which mode your vehicle is in.
You can change the mode by pressing the
LOCK
button again.
4. Repeat Step 2 until you hear the number of chimes
that matches the mode you want.
The mode you selected is now set.
You can either exit
the programming mode by following the instructions
later in this section or program the next feature available
on your vehicle.
Content Theft-Deterrent System
With the Content Theft-Deterrent System, if anyone
damages or enters your vehicle while the system is
armed, an alarm will sound and your parking lamps
will flash for two minutes.
To customize this feature
to your preference, see
“Programmable Modes”
following.
Programmable Modes
Your vehicle can be programmed to one of the
following modes.
Mode 1: Damage Detection with Reduced Sensitivity
(If anyone seriously damages your vehicle or opens a
door or the liftgate while your Content Theft-Deterrent
system is armed,
an alarm will sound and your parking
lamps will flash for up to two minutes.)
Mode 2: Damage Detection Off (If anyone opens a door
or the liftgate while your Content Theft-Deterrent
system is armed,
an alarm will sound and your parking
lamps
will flash for up to two minutes.)
Mode 3: Feature Off (Your Content Theft-Deterrent
system is always disarmed.)
Mode 4: Damage Detection with Normal Sensitivity
(If anyone damages or enters your vehicle while your
Content Theft-Deterrent system is armed, an alarm
will sound and your parking lamps will flash for up to
two minutes.)
Vehicles are delivered programmed in Mode
4.
2-47
ProCarManuals.com
Page 165 of 474
To change the mode:
1. Follow the instructions for “Entering Programming
Mode” listed previously.
2. Turn the parking lamps on, then off.
3. Count the number of chimes you hear. The number
of chimes tells you which mode your vehicle is in.
You can change the mode by turning the parking
lamps on, then
off again.
4. Repeat Step 2 until you hear the number of chimes
that matches the mode you want.
The mode you selected is now set. You can either
exit the programming mode by following the
instructions later in this section or program the
next feature available on your vehicle.
Arming and Disarming the I -- -~- A
Theft-Deterrent System
To arm and disarm the Content Theft-Deterrent system,
the system must be turned on by using Modes
1,2 or 4
listed previously in this section under “Content
Theft-Deterrent System.”
-.
With the Arming and Disarming feature, you can
program the vehicle to do the following:
Arm the system when you lock the doors using either
power door lock switch while any door or the liftgate
is open and the key is removed from the ignition.
Arm the system when you lock the doors with your
key or remote keyless entry transmitter and the key
is removed from the ignition.
Disarm the system when you unlock the doors with
your key or remote keyless entry transmitter.
To customize this feature to your preference, see
“Programmable Modes” following.
2-48
ProCarManuals.com
Page 166 of 474
Programmable Modes
Your vehicle can be programmed to one of the
following modes.
Mode 1: Power Door Lock Switch Arming Off
0 The system will arm when you lock the doors with
your key or remote keyless entry transmitter. The
key must be removed from the ignition when you
lock the doors or the Content Theft-Deterrent system
will not
arm.
0 The system will disarm when you unlock the doors
with your key or remote keyless entry transmitter.
Mode 2: Remote Keyless Entry Transmitter
Arrn/Disarm Only
0 The system will arm when you lock the doors with
your remote keyless entry transmitter. The key must
be removed from the ignition when you lock the
doors or the Content Theft-Deterrent system will
not
arm.
0 The system will disarm when you unlock the doors
with your remote keyless entry transmitter.
NOTE: While this mode provides increased security,
it can be a problem if your remote keyless
entry
transmitter is damaged, lost or if it fails to operate for
any reason while the Content Theft-Deterrent system
is armed. The Content Theft-Deterrent system must be
disarmed for the engine to run while in Mode
2; your
key can no longer disarm the system.
Mode 3: Standard Arming and Disarming
The system will arm when you lock the doors
using either power door lock switch while any
door or the liftgate is open and the key is removed
from the ignition.
0 The system will arm when you lock the doors with
your key or remote keyless entry transmitter and the
key is removed from the ignition.
with your key or remote keyless entry transmitter.
0 The system will disarm when you unlock the doors
Vehicles are delivered programmed in Mode
1.
2-49
ProCarManuals.com
Page 167 of 474
To change the mode:
1. Follow the instructions for “Entering Programming
Mode” listed previously.
2. Insert your second key fully into any door key
cylinder and
turn it to the unlock position.
This step is inconvenient, but necessary to prevent
accidental programming
of this feature to Mode 2.
Do not program this feature to Mode 2 without first
reading the special note contained in the description
for that mode. The door key cylinder must remain
in
the unlock position during Steps 2 through 4.
entry transmitter.
3. Press the horn symbol on the remote keyless
4. Count the number of chimes you hear. The number
of chimes tells you which mode your vehicle is
in. You can change the mode by pressing the
horn symbol on the remote keyless entry
transmitter again.
6. Remove your key from the door key cylinder.
The mode you selected is now set. You can either exit
the programming mode by following the instructions
later in this section or program the next feature
available
on your vehicle.
Exiting Programming Mode
To exit programming mode, just turn the key from
ACCESSORY to
OFF and put the BCM PRGRM fuse
back into the instrument panel fuse block.
NOTE: After programming a feature, you can exit the
programming mode at anytime.
Windows
Manual Windows
Use the manual crank to open and close the fiont windows.
5. Repeat Step 3 until you hear the number of chimes
that matches the mode
you want.
2-50
ProCarManuals.com
Page 169 of 474
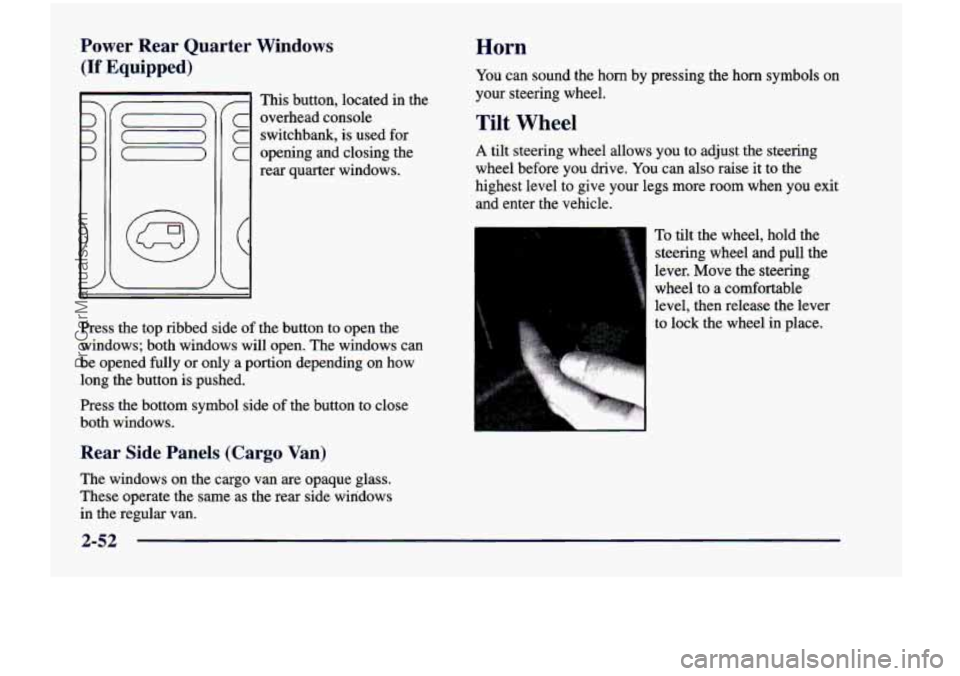
Power Rear Quarter Windows
(If Equipped)
I This button, located in the
c overhead console
C switchbank, is used for
C opening and closing the
rear quarter windows.
Press the top ribbed side of the button to open the
windows; both windows will open. The windows can
be opened fully or only a portion depending on how
long the button is pushed.
Press the bottom symbol side
of the button to close
both windows.
Rear Side Panels (Cargo Van)
The windows on the cargo van are opaque glass.
These operate the same as the rear side windows
in the regular van.
Horn
You can sound the horn by pressing the horn symbols on
your steering wheel.
Tilt Wheel
A tilt steering wheel allows you to adjust the steering
wheel before you drive. You can also raise it to the
highest level to give your legs more room when you exit
and enter the vehicle.
To tilt the wheel, hold the
steering wheel and pull the
lever. Move the steering
wheel to a comfortable
level, then release the lever
to lock the wheel
in place.
2-52
ProCarManuals.com
Page 172 of 474
For a delayed wiping cycle, you can set the wiper speed
for a long
or short delay between wipes. This can be
very useful in light rain or snow. Turn the band to
choose the delay time. The closer to
LOW, the shorter
the delay time.
For steady wiping cycles, at low speed, turn the band
away
from you to the LOW position. For high-speed
wiping, turn the band further to
HIGH. To stop the
wipers, move the band to
OFF.
Remember that darnaged wiper blades may prevent
you from seeing well enough to drive safely. To
avoid damage, be sure to clear ice and snow from the
wiper blades before using them. If they’re frozen to
the windshield, carefully loosen or thaw them. If
your blades do become damaged, get new blades or
blade inserts.
Heavy snow or ice can overload your wipers.
A circuit
breaker will stop them until the motor cools. Clear away
snow or ice to prevent an overload.
Windshield Washer
To wash your windshield, press and hold the windshield
washer paddle. The washers and wipers will operate.
When you release the paddle, the washers will stop, and
the wipers will continue to operate for two cycles, unless
your wipers had already been on. In that case, the wipers
will resume the wiper speed you had selected earlier.
b
I A CAUTION:
In freezing weather, don’t use yc ; washer until
the windshield is
1 warmed. Otherwise the washer
I
fluid can form ice on the windshield, blocking
your vision. I
2-55
ProCarManuals.com
Page 177 of 474
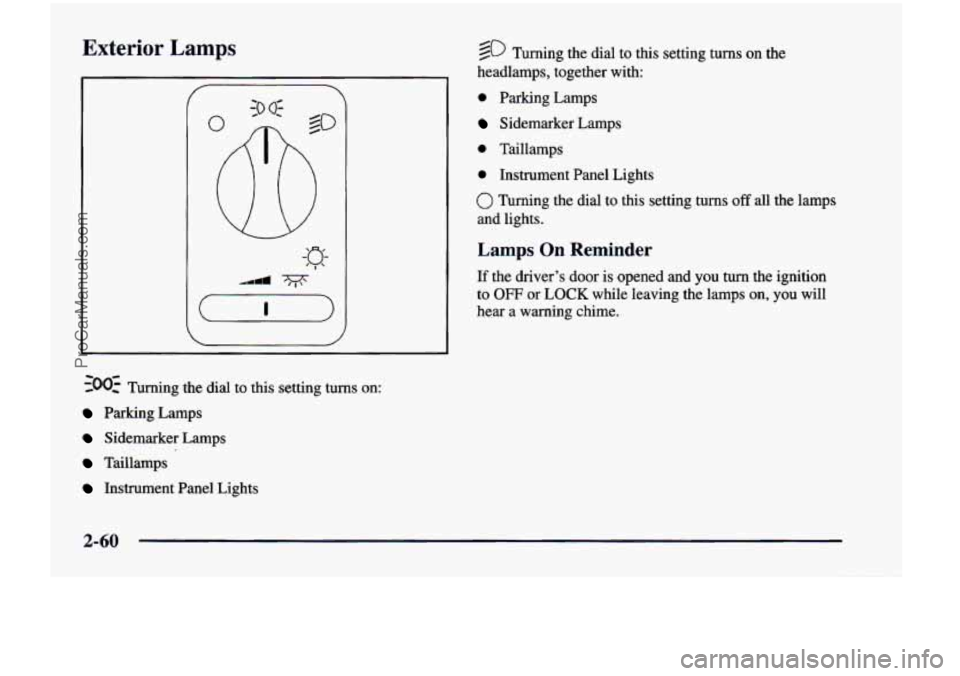
Exterior Lamps
~00~ Turning the dial to this setting turns on:
Parking Lamps
Sidemarker Lamps
Taillamps
Instrument Panel Lights
@ Turning the dial to this setting turns on the
headlamps, together with:
0 Parking Lamps
Sidemarker Lamps
0 Taillamps
0 Instrument Panel Lights
0 Turning the dial to this setting turns off all the lamps
and lights.
Lamps On Reminder
If the driver’s door is opened and you turn the ignition
to
OFF or LOCK while leaving the lamps on, you will
hear a warning chime.
2-60
ProCarManuals.com
Page 178 of 474

Daytime Running Lamps
Daytime Running Lamps (DRL) can make it easier
for others to see the front of your vehicle during the
day. DRL can be helpful in many different driving
conditions, but they can be especially helpful in the
short periods after dawn and before sunset.
A light sensor on top of the instrument panel makes the
DRL work,
so be sure it isn’t covered. The DRL system
will make front parking and turn signal lamps come on
in daylight when:
The ignition is on,
0 the headlamp switch is off and
0 the parking brake is released.
When the DRL are on, only your front parking and turn
signal lamps will be on. Your instrument panel won’t be
lit up.
When it’s dark enough outside, the exterior lamps will
come on automatically. When
it’s bright enough outside,
the exterior lamps will go out and the DRL will turn
on.
Of course, you may still turn on the headlamps any time
you need to.
To idle your vehicle with the DRL or exterior lamps
off, set the parking brake while the ignition is in
OFF
or LOCK. Then start the vehicle. The DRL will stay off
until you release the parking brake.
As with any vehicle, you should turn on the regular
headlamp system when
you need it.
Interior Lamps
Instrument Panel Intensity Control
Turn the control, located below the headlamps switch,
to the right to increase the brightness of the instrument
panel lights, and
to the left to decrease the brightness.
Turn the control all the way to the left to turn them
off.
Interior Lamps Control
Turn the dial all the way to the right to turn on the
interior lamps, if the interior lamps override switch is
off. Turn the dial to
the left to turn the lamps off.
2-61
ProCarManuals.com