1998 CADILLAC SEVILLE clock
[x] Cancel search: clockPage 142 of 378
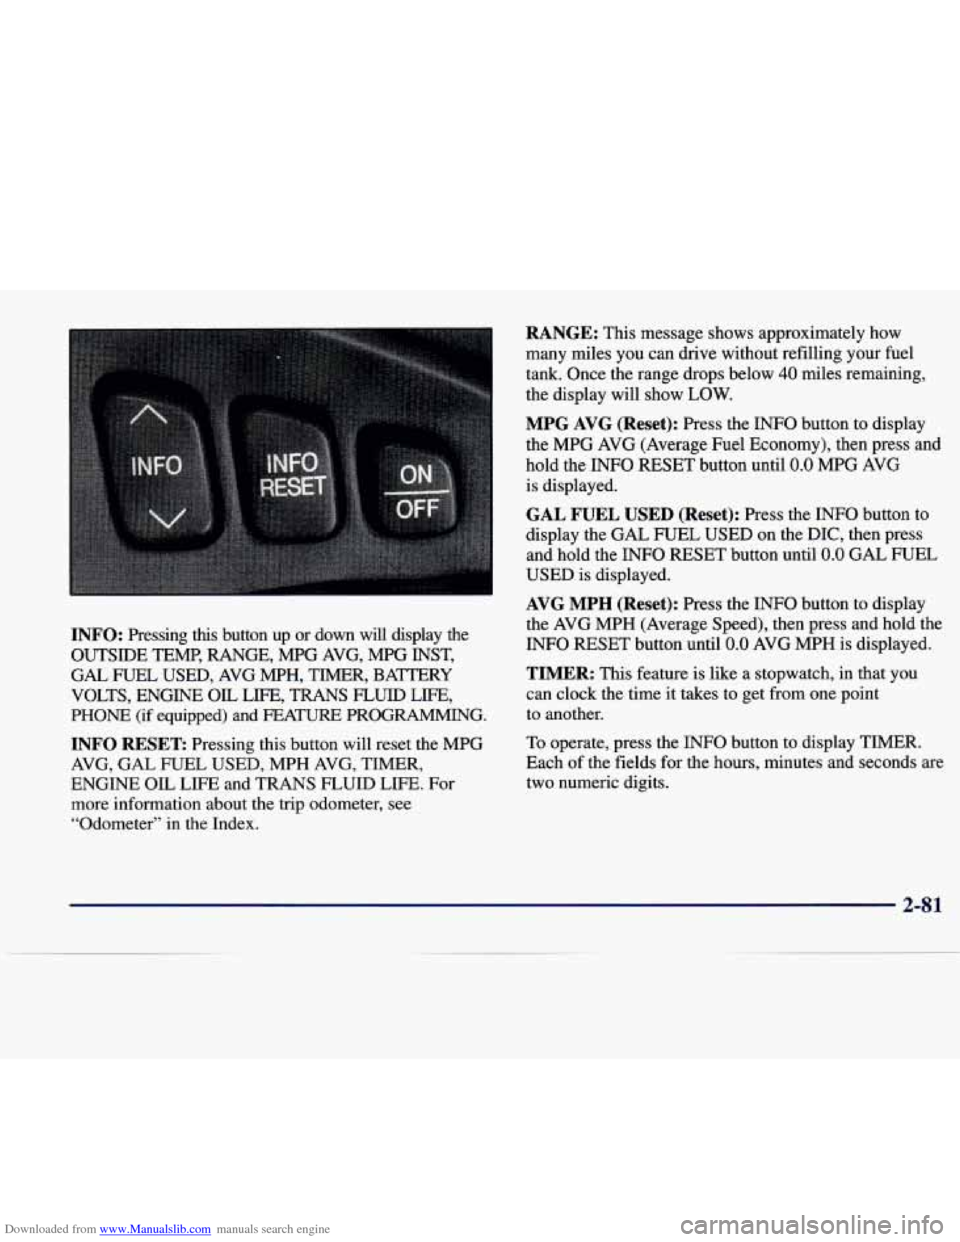
Downloaded from www.Manualslib.com manuals search engine INFO: Pressing this button up or down will display the
OUTSIDE TEMP, RANGE, MPG AVG, MPG INST,
GAL FUEL USED, AVG MPH, TIMER, BAmRY
VOLTS, ENGINE
OIL LIFE, TRANS FLUID LIFE,
PHONE (if equipped) and FEA- PROGRAMMING.
INFO RESET Pressing this button will reset the MPG
AVG, GAL FUEL USED, MPH AVG, TIMER,
ENGINE OIL LIFE and TRANS FLUID LIFE. For
more information about the trip odometer, see
“Odometer”
in the Index.
RANGE: This message shows approximately how
many miles you can drive without refilling your fuel
tank. Once the range drops below
40 miles remaining,
the display will show
LOW.
MPG AVG (Reset): Press the INFO button to display
the MPG AVG (Average Fuel Economy), then press and
hold the INFO RESET button until
0.0 MPG AVG
is displayed.
GAL FUEL USED (Reset): Press the INFO button to
display the GAL FUEL USED on the DIC, then press
and hold the INFO RESET button until
0.0 GAL FUEL
USED is displayed.
AVG MPH (Reset): Press the INFO button to display
the AVG MPH (Average Speed), then press and hold the
INFO RESET button until
0.0 AVG MPH is displayed.
TIMER: This feature is like a stopwatch, in that you
can clock the time it takes to get from one point
to another.
To operate, press the
INFO button to display TIMER.
Each
of the fields for the hours, minutes and seconds are
two numeric digits.
2-8 1
Page 152 of 378
Downloaded from www.Manualslib.com manuals search engine #z= -.
Section 3 Comfort Controls and Audio Systems
In this section, you'll find out how to operate the comfort control and audio systems offered w\
ith your vehicle. Be
sure to read about the particular systems supplied with your vehicle.
3-2
3-2
3-6
3-6
3 -6
3-7
3-8
3- 10
3-
10
3-11
3-1 1
3-11
3-16
3-20
Comfort Controls
Climate Control Panel
Air Conditioning
Heating
Defrosting and Defogging
Rear Window Defogger
Ventilation System
HVAC Steering Wheel Controls
Climate Control Personalization (If Equipped)
Audio Systems
Setting the Clock
AM-FM Stereo with Cassette Tape and
Compact Disc Player
(If Equipped)
AM-FM Stereo with Cassette Tape and
MiniDisc' Player (If Equipped) AM-FM Stereo with Cassette Tape and
Compact Disc Player with Radio Data
Systems (RDS) and Digital Signal Processing
(DSP) (If Equipped)
3-29
3-38
3-39
3-41 3-41
' 3-42
3-42
3-43
3-43 3-44
3
-45
3-45
3-45
AM-FM Stereo with Cassette Tape and
MiniDisc' Player with Radio Data Systems
(RDS) and Digital Signal Processing (DSP)
(If Equipped)
Radio Data Systems
(RDS) Program Type
(PTY) Selections
Console-Mounted
CD Changer (Option)
CD Adapter Kits
Radio Personalization (If Equipped)
Theft-Deterrent Feature Audio Steering Wheel Controls
Understanding Radio Reception
Tips About Your Audio System
Care of Your Cassette Tape Player
Care of
Your Compact Discs
Care of Your Compact Disc Player
Diversity Antenna System
3-1
Page 162 of 378
Downloaded from www.Manualslib.com manuals search engine Audio Systems
Your Cadillac audio system has been designed to
operate easily and give years of listening pleasure.
You will get the most enjoyment out of it if you acquaint
yourself with it first. Find out what your audio system
can do and
how to operate all its controls, to be sure
you’re getting the most out of the advanced engineering
that went into it.
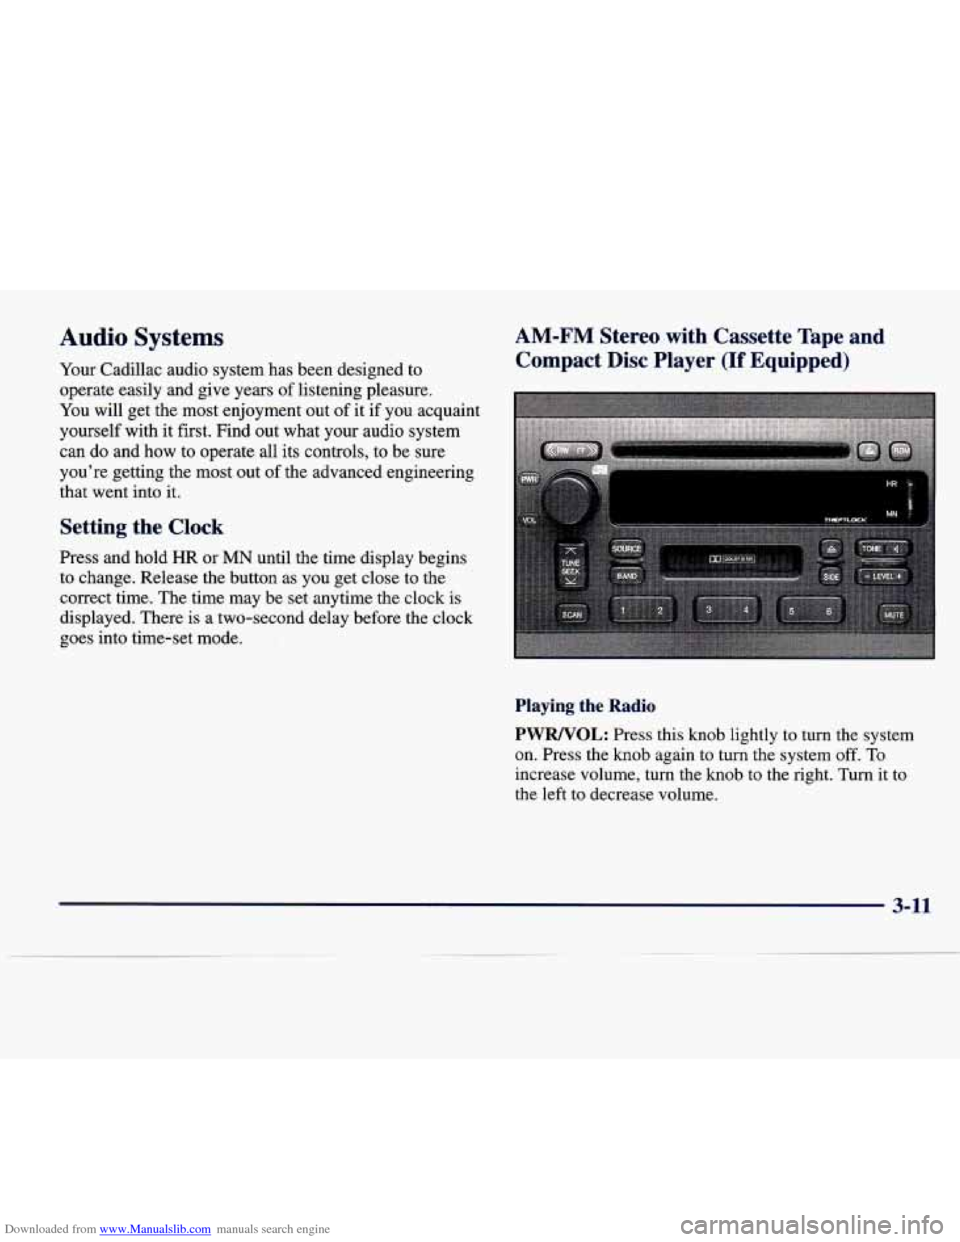
Setting the Clock
Press and hold HR or MN until the time display begins
to change. Release the button as
you get close to the
correct time. The time may be set anytime the clock is
displayed. There is a two-second delay before the clock
goes into time-set mode.
AM-FM Stereo with Cassette Tape and
Compact Disc Player
(If Equipped)
Playing the Radio
PWRNOL: Press this knob lightly to turn the system
on. Press the
knob again to turn the system off. To
increase volume, turn the knob to the right. Turn it to
the left to decrease volume.
3-11
Page 176 of 378
Downloaded from www.Manualslib.com manuals search engine 3. Tune in an RDS station with the PTY you desire.
4. Press and hold one of the six numbered buttons for
more than two seconds until you hear a beep.
Whenever you press that numbered button for less
than two seconds, the
PTY you set will return.
5. Repeat the steps for each pushbutton.
When battery power is removed and later applied,
you
will not have to reset your RDS presets because the
radio remembers them.
HR or MN: Press the RDS SELECT button, followed
by one of these buttons to display the time for the
current station. STATION
TIME IS will be displayed.
If a time has not been sent to the radio,
NO STATION
TIME will be displayed. If you have recently tuned to
the station, you may need to wait a minute before the
time is available to the radio. To set the clock to the
current displayed station time, press and hold
HR or
MN until TIME UPDATED is displayed. There is a
two second delay before the time is updated.
RDS
mode does not have to be on to use this function, but
you must be tuned to an FM RDS station.
ALERT This type of announcement warns of national
or local emergencies.
You will not be able to turn off
alert announcements. Alert announcements will come on even if RDS mode is turned
off. ALERT appears on the
display when an alert announcement plays. The radio
uses TA volume during these announcements. To
increase volume, turn the PWRNOL knob to the right.
Turn it to the left to decrease volume. TA
VOLUME
will appear on the display while the volume is being
adjusted. When an alert announcement comes
on the
tuned radio station or a related network station, you will
hear it, even if the volume is muted or a cassette tape or
compact disc is playing. If the radio tunes to a related
network station for an alert announcement, it will return
to the original station when the announcement is
finished. If the cassette tape or compact disc player is
playing, play will stop for the announcement and resume
when the announcement is finished.
Setting the Tone
TONE: Press and release this button until the desired
tone control (BASS,
TREBLE or MIDRANGE) is
found. The radio keeps separate tone settings for each
band, each preset (except weather band presets) and each source.
LEVEL: After selecting the desired tone control, press
the plus
(+) or minus (-) symbol on this button to select
the desired level.
3-25
Page 185 of 378
Downloaded from www.Manualslib.com manuals search engine HR or MN: Press the RDS SELECT button, followed
by one
of these buttons to display the time for the
current station. STATION TIME
IS will be displayed.
If a time has
not been sent to the radio, NO STATION
TIME will be displayed. If you have recently tuned to
the station, you may need to wait a minute before the
time is available to the radio. To set the clock to the
current displayed station time, press and hold HR or
MN until TIME UPDATED is displayed. There is a
two second delay before the time is updated.
RDS mode
does not have to be on to
use this function, but you must
be tuned to an
FM RDS station.
ALERT This type of announcement warns of national
or local emergencies. You will not be able to
turn off
alert announcements. Alert announcements will come on
even if
RDS mode is turned off. ALERT appears on the
display when an alert announcement plays. The radio
uses TA volume during these announcements. To
increase volume, turn the PWRNOL knob to the right.
Turn it to the left to decrease volume. TA VOLUME
will appear
on the display while the volume is being
adjusted. When an alert announcement comes on the
tuned radio station
or a related network station, you will
hear it, even if the volume
is muted or a cassette tape or
MiniDisc is playing.
If the radio tunes to a related
network station for an alert announcement, it will return
to the original station when the announcement is finished.
If the cassette tape or MiniDisc player is
playing, play will stop
for the announcement and resume
when the announcement is finished.
Setting the Tone
TONE: Press and release this button until the desired tone
control (BASS, TREBLE or
MIDRANGE) is found. The
radio keeps separate tone settings for each band, each
preset (except weather band presets) and
each source.
LEVEL: After selecting the desired tone control, press
the plus
(+) or minus (-) symbol on this button to select
the desired level.
Using DSP Mode
DSP: The Digital Signal Processing (DSP) feature is
used to provide a choice of four different listening
experiences: TALK, FRONT SEAT, AMBIENCE and
SPACIOUS.
DSP can be used while listening to the
radio, the cassette tape player or the MiniDisc player.
Press this button to turn DSP on. Press and release this
button until you reach the desired selection. To turn DSP
off, press and hold this button until DSP OFF appears on
the display. When DSP
OFF is displayed, the system
will provide the best overall Bose performance.
Page 193 of 378
Downloaded from www.Manualslib.com manuals search engine With the radio off and the clock displayed, use FF and
RW to select home or away presets.
To select the away
presets, press and hold FF for five counts until you hear
a beep. The next time the radio comes on, the away
presets will be active. To select the home presets, press
and hold RW for five counts until you hear a beep.
The next time the radio comes on, the home presets
will be active.
When battery power is removed and later applied, you
will not have to reset your home radio presets because
the radio remembers them. However, you will have to
reset
your away radio presets.
Theft-Deterrent Feature
THEFTLOCK@ is designed to discourage theft of your
radio. Your vehicle has
a “built-in” theft-deterrent
feature on each radio that is automatic
-- there is no
programming required. The radio in your vehicle
cannot be used in any other vehicle. When the radio was originally installed in your vehicle at the factory, it
stored the Vehicle Identification Number (VIN). Each
time the ignition
is turned on, the VIN is verified. If the
vehicle’s VIN does not match the VIN stored in the
radio, THEFTLOCK will be activated and the audio system will not play. If the radio is removed from your
vehicle, the original VIN in the radio can be used to
trace the radio back to your vehicle.
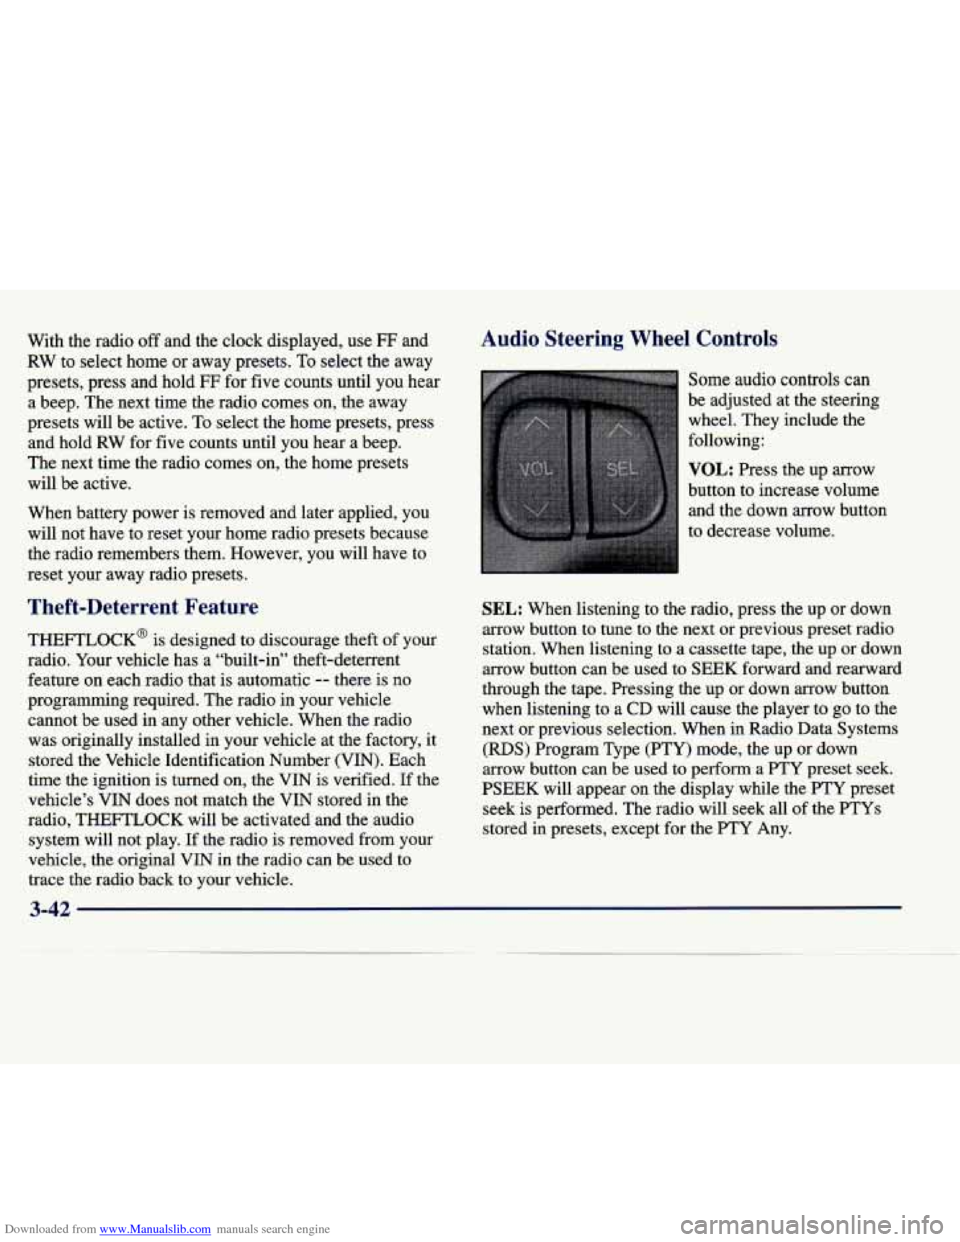
Audio Steering Wheel Controls
Some audio controls can
be adjusted at the steering
wheel. They include the
following:
VOL: Press the up arrow
button to increase volume and the down arrow button
to decrease volume.
SEL: When listening to the radio, press the up or down
arrow button to tune to the next or previous preset radio
station. When listening to a cassette tape, the up or down
arrow button can be used to
SEEK forward and rearward
through the tape. Pressing the up or down arrow button
when listening to
a CD will cause the player to go to the
next or previous selection. When in Radio Data Systems
(RDS) Program Type
(PTY) mode, the up or down
arrow button can be used to perform a
PTY preset seek.
PSEEK will appear on the display while the FTY preset seek is performed. The radio will seek all
of the PTYs
stored in presets, except for the PTY Any.
Page 209 of 378
Downloaded from www.Manualslib.com manuals search engine An emergency like this requires close attention and a
quick decision.
If you are holding the steering wheel at
the recommended
9 and 3 o’clock positions, you can
turn it a full
180 degrees very quickly without removing
either hand. But
you have to act fast, steer quickly, and
just as quickly straighten the wheel once you have
avoided the object.
The fact that such emergency situations are always
possible is a good reason to practice defensive driving
at all times and wear safety belts properly.
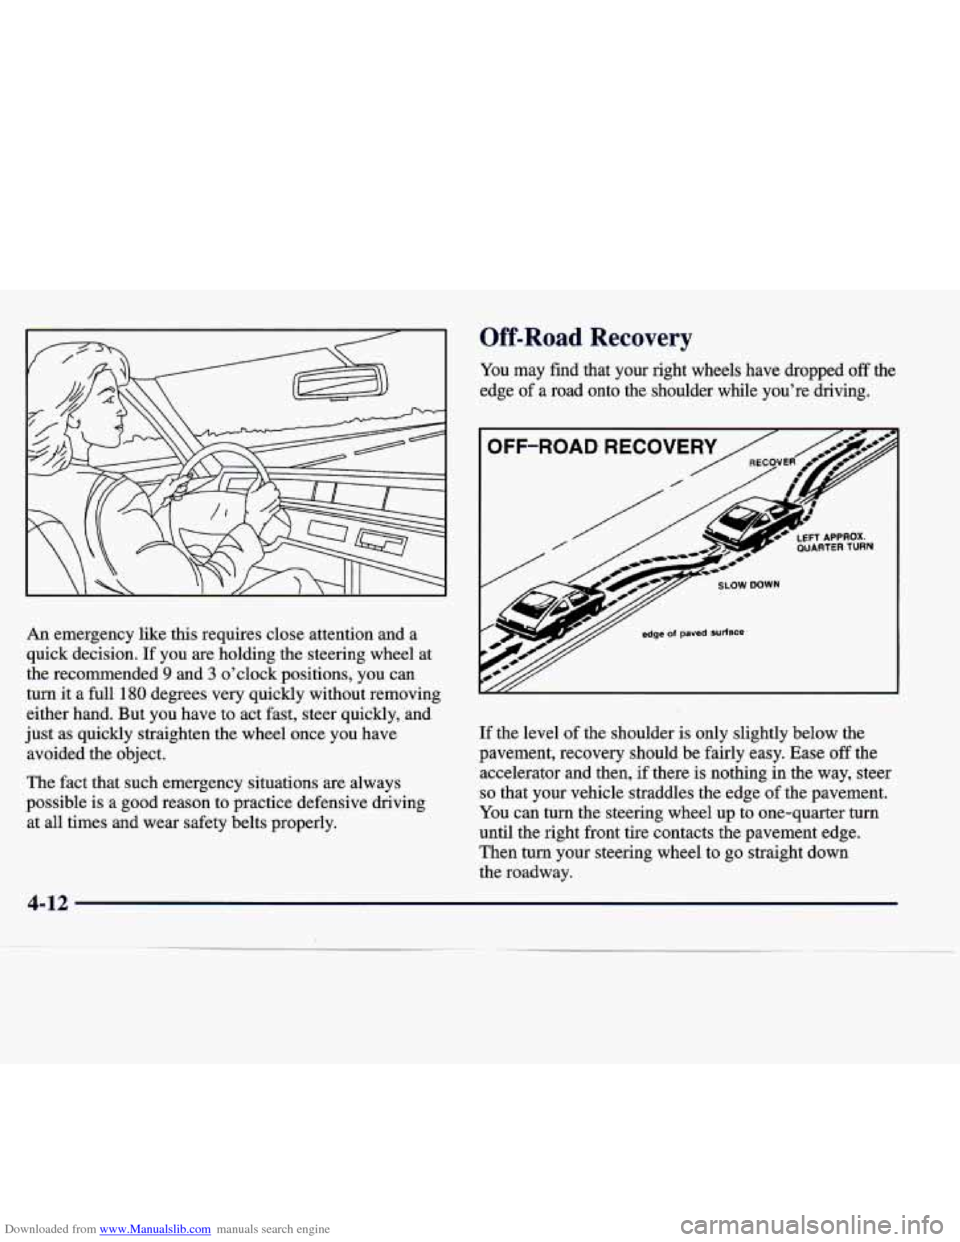
Off-Road Recovery
You may find that your right wheels have dropped off the
edge
of a road onto the shoulder while you’re driving.
If the level of the shoulder is only slightly below the
pavement, recovery should be fairly easy. Ease
off the
accelerator and then, if there is nothing in the way, steer
so that your vehicle straddles the edge of the pavement.
You can turn the steering wheel up to one-quarter turn
until the right front tire contacts the pavement edge.
Then turn your steering wheel
to go straight down
the roadway.
4-12
Page 281 of 378
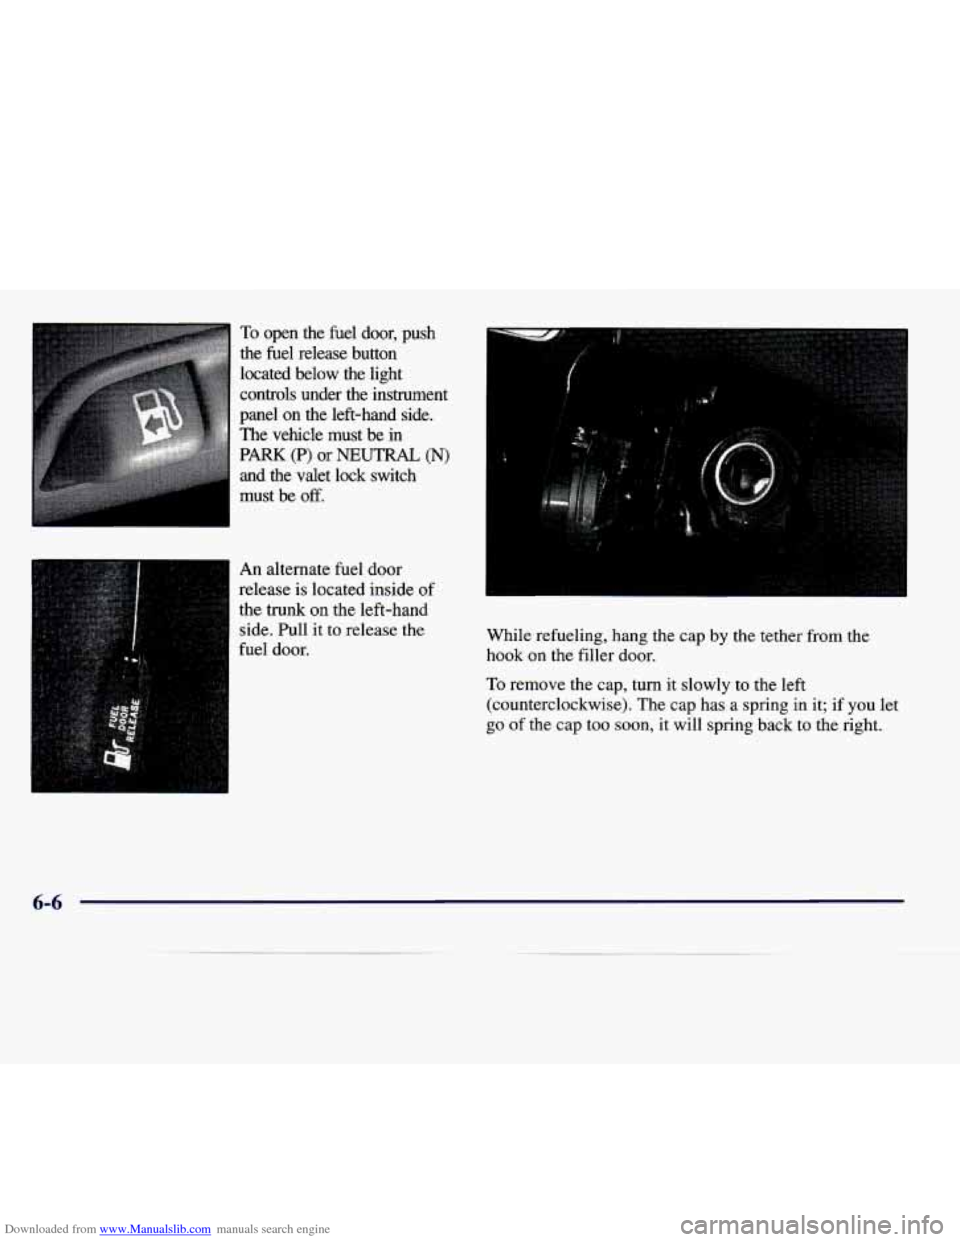
Downloaded from www.Manualslib.com manuals search engine To open the fuel door, push
the fuel release button
located below the light
controls under the instrument
panel on the left-hand side.
The vehicle must be in
PARK (P) or NEUTRAL (N)
and the valet lock switch
must be
off.
An alternate fuel door
release is located inside of
the
trunk on the left-hand
side. Pull it to release the
fuel door.
f
While refueling, hang the cap by the tether from the
hook on
the filler door.
To remove the cap, turn it slowly to the left
(counterclockwise). The cap has a spring in
it; if you let
go of the cap too soon, it will spring back to the right.
6-6