1998 CADILLAC ELDORADO service schedule
[x] Cancel search: service schedulePage 142 of 380

Downloaded from www.Manualslib.com manuals search engine BATTERY NOT CHARGING - 7: This message will
appear
if the battery is not being charged. Have the
electrical system checked by your dealership at your
earliest convenience.
BATTERY VOLTAGE HIGH - 8: This message
shows that the electrical charging system is
overcharging (more than 16 volts). To avoid being
stranded, have the electrical system checked by your
dealership. You
can reduce the charging overload by
using the accessories. Turn on the lamps and radio, set
the climate control on AUTO and the fan speed on
HI,
and turn the rear window defogger on. You can monitor
battery voltage on the Driver Information Center
(DIC)
by pressing the INFO button. The normal range is
11.5 to 15.5 volts when the engine
is running.
BATTERY VOLTAGE LOW - 6: This message will
appear when the electrical system is charging less than
10 volts or if the battery has been drained. If this
message appears immediately after starting,
it is possible
that the generator can still recharge the battery. The
battery should recharge and may take a few hours to do
so. Consider using an auxiliary charger to boost the
battery after returning home or to a final destination.
(Be sure to follow the manufacturer’s instructions
when using a battery charger.)
If this message appears and stays on while driving or
after starting your vehicle, have it checked immediately
to determine the cause of this problem. To help the
generator recharge the battery quickly, you can reduce
the load
on the electrical system by turning off the
accessories. You can monitor battery voltage
on the
Driver Information Center (DIC) by pressing the
INFO
button. The normal range is 11.5 to 15.5 volts.
BRAKE VACUUM PROBLEM -108: The circuit in
the brake booster vacuum has shorted or is loose when
this message appears. Your vehicle may lose power
brakes but you will still have the use
of manual brakes.
The power brakes will not be affected if the problem is
caused by a failed sensor. Have your vehicle serviced
immediately at your dealership.
CHANGE ENGINE OIL - 82: This means that the
life of the engine oil has expired and it should be
changed within
200 miles (322 km). See “Engine Oil”
and “Filter Recommendations” in the Maintenance
Schedule booklet. After an oil change, the Oil Life
Indicator must be reset. See “Oil Life Indicator”
in the
Index
on how to reset it.
CHANGE TRANS FLUID - 47: This message will
appear when it is time to replace the transaxle fluid. See
the Maintenance Schedule booklet for
the proper fluid
and change intervals.
2-72
Page 236 of 380
Downloaded from www.Manualslib.com manuals search engine Parking on Hills Shift into a gear; and
a Be sure the parking brake has released.
You really should not park your vehicle, with a trailer
attached, on
a hill. If something goes wrong, your rig
could start
to move. People can be injured, and both
your vehicle and the trailer can be damaged.
But if you ever
have to park your rig on a hill, here’s
how to
do it:
1. Apply your regular brakes, but do not shift into
PARK (P).
2. Have someone place chocks under the trailer wheels.
3. When the wheel chocks are in place, release the
regular brakes until the chocks absorb the load.
4. Reapply the regular brakes. Then shift into
5. Release the regular brakes.
PARK (P) firmly and apply your parking brake.
When You Are Ready to Leave After
Parking on
a Hill
1. Apply your regular brakes and hold the pedal down
while you:
Start your engine;
2. Let up on the brake pedal.
3. Drive slowly until the trailer is clear of the chocks.
4. Stop and have someone pick up and store the chocks.
Maintenance When Trailer Towing
Your vehicle will need service more often when you’re
pulling a trailer. See the Maintenance Schedule for more
on this. Things that are especially important in trailer
operation are automatic transaxle fluid (don’t overfill),
engine oil, belt, cooling system and brake adjustment.
Each
of these is covered in this manual, and the Index
will help you find them quickly. If you’re trailering, it’s
a good idea to review these sections before you start
your trip.
Check periodically
to see that all hitch nuts and bolts
are tight.
Engine Cooling When Trailer Towing
Your cooling system may temporarily overheat during
severe operating conditions. See “Engine Overheating”
in the Index.
4-38
Page 282 of 380
Downloaded from www.Manualslib.com manuals search engine Service
Your dealer knows your vehicle best and wants you to
be happy with it. We hope you’ll. go to your dealer for
all your service needs. You’ll get genuine GM parrs and
GM-trained and supported service people.
We hope you’ll want to keep your GM vehicle a11 GM.
Genuine GM parts have one of these marks:
Genuine
If you want to do som of your own service work, you’ll
want. to use the proper Cadiilac Service Manual. Zt tells
you much more about how to service your vehicle than
this rnanrral can. To order the proper service manual, see
“Service and Owner Publications” in the Index.
Your vehicle has an air bag system. Before attempring to
do your own service. work. see “Servicing Your Air
Bag-Equipped Vehicle” in the Index.
You should keep a record with ali parts receipts and
list the mileage and the date of any service work wu
perfmm. See “Maintenance Record” in the Mainkmnc.e
Schedule Booklet.
Page 297 of 380
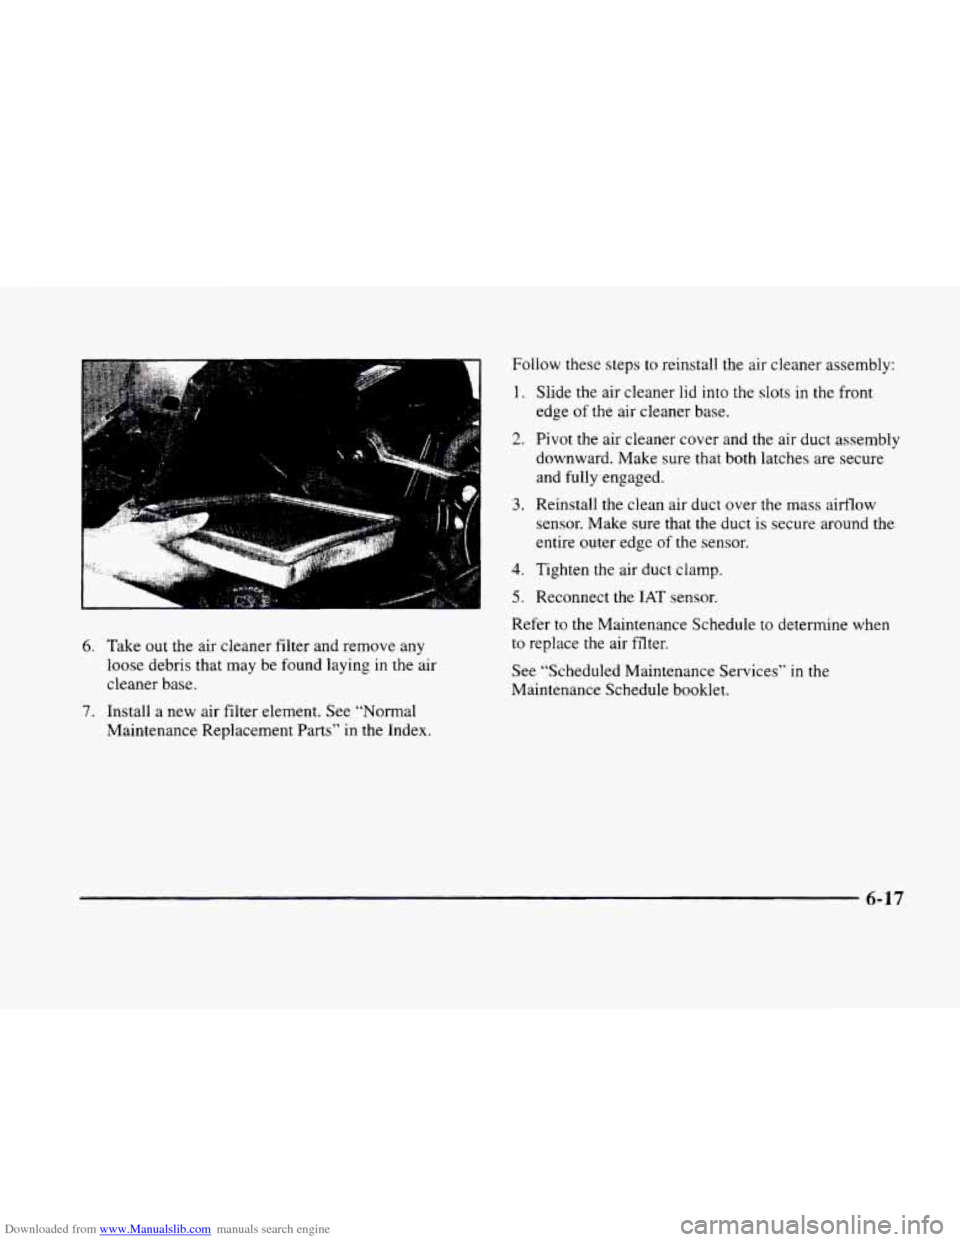
Downloaded from www.Manualslib.com manuals search engine 6. Take out the air cleaner filter and remove any
loose debris that may be found laying in the air
cleaner base.
7. Install a new air filter element. See "Normal
Maintenance Replacement Parts" in
the Index. Follow these
steps
to reinstall the air cleaner assembly:
1.
2.
3.
4.
5.
Slide the air cleaner lid into the slots in the front
edge
of the air cleaner base.
Pivot the air cleaner cover and the air duct assembly
downward. Make sure that both latches are secure
and fully engaged.
Reinstall
the clean air duct over the mass airflow
sensor. Make sure that the duct is secure around
the
entire outer edge of the sensor.
Tighten the air duct clamp.
Reconnect
the IAT sensor.
Refer to the Maintenance Schedule to determine when
to replace
the air filter.
See "Scheduled Maintenance Services" in the
Maintenance Schedule booklet.
6-17
Page 298 of 380
Downloaded from www.Manualslib.com manuals search engine A CAUTION:
Operating the engine with the air cleaner off can
cause you or others to be burned. The air cleaner
not only cleans the air, it stops flame
if the engine
backfires.
If it isn’t there, and the engine
backfires,
you could be burned. Don’t drive with
it
off, and be careful working on the engine with
the air cleaner off.
NOTICE:
If the air cleaner is off, a backfire can cause a
damaging engine fire. And, dirt can easily get
into your engine, which will damage it. Always
have the air cleaner in place when you’re driving.
Automatic Transaxle Fluid
When to Check and Change
A good time to check your automatic transaxle fluid
level is when the engine oil is changed.
Change both the fluid and filter every
50,000 miles
(83 000 km) if the vehicle is mainly driven under one
or more
of these conditions:
0 In heavy city traffic where the outside temperature
0 In hilly or mountainous terrain.
0 When doing frequent trailer towing.
0 Uses such as found in taxi, police or delivery service.
If you do not use your vehicle under any
of these
conditions, the fluid and filter do not require change
until the message
CHANGE TRANS FLUID appears
on the Driver Information Center.
See “Scheduled Maintenance Services” in the
Maintenance Schedule booklet.
regularly
reaches
90” F (32 O C j or higher.
6-18
Page 310 of 380
Downloaded from www.Manualslib.com manuals search engine Brake Wear
Your vehicle has four-wheel disc brakes.
Disc brake pads have built-in wear indicators that
make a high-pitched warning sound when the brake
pads are worn and new pads are needed. The sound
may come and go or be heard all the time your vehicle
is moving (except when you are pushing on the brake
pedal firmly).
I A CAUTION:
The brake wear warning sound means that soon
your brakes won’t work well. That could lead to
an accident, When you hear the brake wear
warning sound, have your vehicle serviced.
NOTICE:
Continuing to drive with worn-out brake pads
could result
in costly brake repair.
Some driving conditions or climates may cause a brake
squeal when the brakes
are first applied or lightly
applied. This does not mean something is wrong with
your brakes.
Properly torqued wheel nuts are necessary
to help
prevent brake pulsation. When tires are rotated,
inspect brake pads for wear and evenly torque wheel
nuts
in the proper sequence to GM specifications.
Brake linings should always be replaced as complete
axle sets.
See “Brake System Inspection”
in Section 7 of the
Maintenance Schedule booklet under Part
C “Periodic
Maintenance Inspections.”
Brake Pedal Travel
See your dealer if the brake pedal does not return to
normal height, or if there is a rapid increase in pedal
travel. This could be a sign of brake trouble.
Brake Adjustment
Every time you apply the brakes, with or without the
vehicle moving, your brakes adjust for wear.
6-30
Page 321 of 380
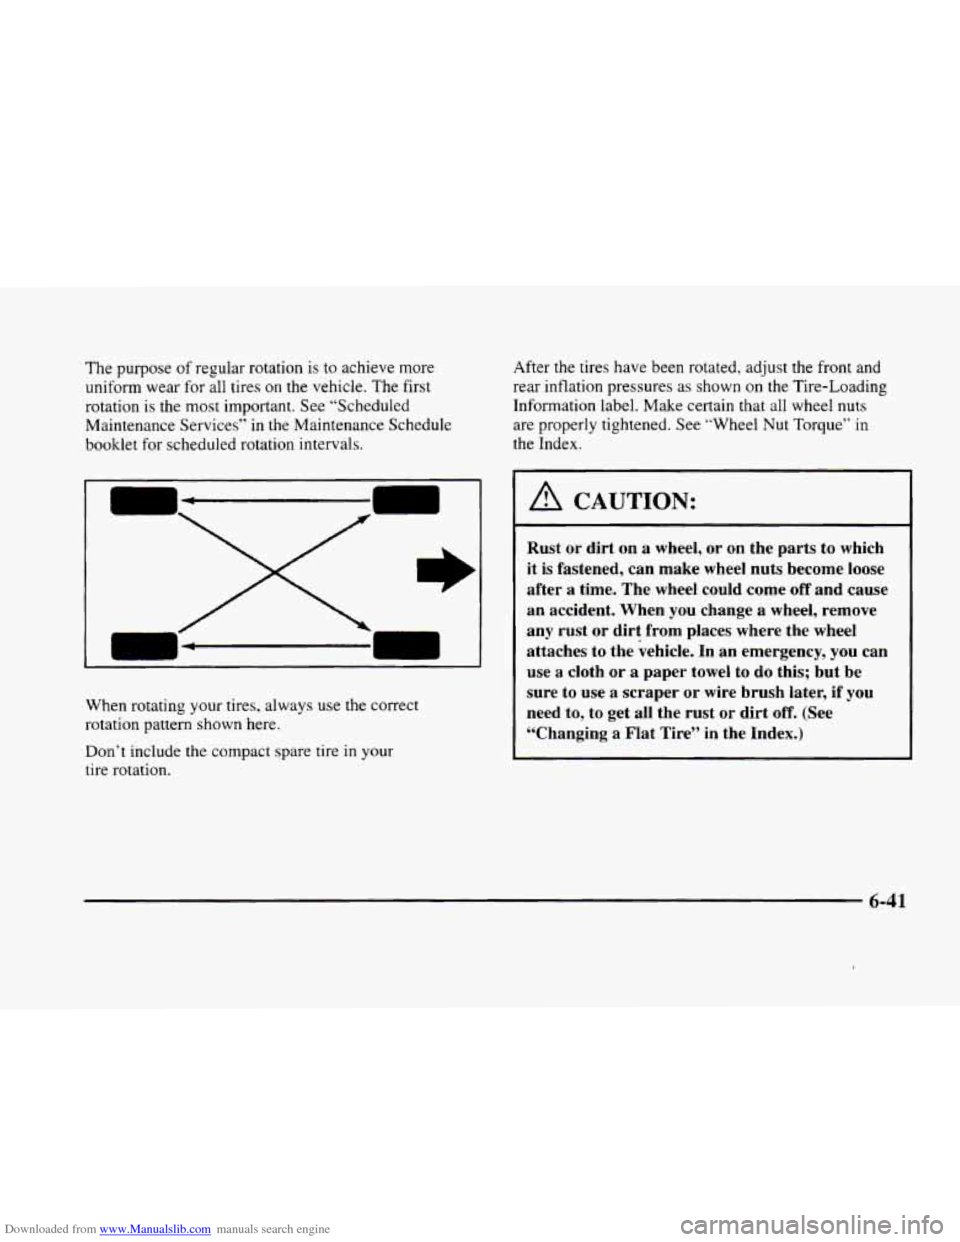
Downloaded from www.Manualslib.com manuals search engine The purpose of regular rotation is to achieve more
uniform wear for all tires
on the vehicle. The first
rotation is
the most important. See “Scheduled
Maintenance Services” in
the Maintenance Schedule
booklet for scheduled rotation intervals.
When rotating your tires, always
use the correct
rotation pattern shown here.
Don’t include the compact spare tire
in your
tire rotation. After the tires have been rotated,
adjust
the front and
rear inflation pressures as shown
on the Tire-Loading
Information label. Make certain that all wheel nuts
are properly tightened. See “Wheel Nut Torque” in
the Index.
I A CAUTION:
Rust or dirt on a wheel, or on the parts to which
it
is fastened, can make wheel nuts become loose
after a time. The wheel could come
off and cause
an accident. When you change
a wheel, remove
any rust or dirt from places where the wheel
attaches to the vehicle.
In an emergency, you can
use a cloth or a paper towel
to do this; but be
sure to use a scraper or wire brush later, if you
need to, to get all the rust or dirt
off. (See
“Changing a Flat Tire” in the Index.)
6-41
Page 324 of 380
Downloaded from www.Manualslib.com manuals search engine Treadwear
The treadwear grade is a comparative rating based on
the wear rate of the tire when tested under controlled
conditions
on a specified government test course.
For example, a tire graded
150 would wear one and a
half (1 1/2) times as well on the government course
as a tire graded 100. The relative performance
of tires
depends upon the actual conditions
of their use,
however, and may depart significantly from the norm
due to variations
in driving habits, service practices
and differences in road characteristics and climate.
Traction -- A, B, C
The traction grades, from highest to lowest, are A, B,
and C, and they represent the tire’s ability to stop
on wet pavement as measured under controlled
conditions
on specified government test surfaces
of asphalt and concrete.
A tire marked C may have
poor traction performance.
Warning: The traction grade assigned to this tire is based
on braking (straight ahead) traction tests and does not
include cornering (turning) traction.
Temperature -- A, B, C
The temperature grades are A (the highest), B, and C,
representing the tire’s resistance to the generation of heat and
its ability to dissipate heat when tested under
controlled conditions on a specified indoor laboratory
test wheel. Sustained high temperature can cause the
material
of the tire to degenerate and reduce tire life, and
excessive temperature can lead
to sudden tire failure.
The grade
C corresponds to a level of performance
which all passenger car tires must meet under the
Federal Motor Vehicle Safety Standard No.
109. Grades
B and A represent higher levels of performance on the
laboratory test wheel than the minimum required by law.
Warning:
The temperature grade for this tire is
established for a tire that is properly inflated and not
overloaded. Excessive speed, underinflation, or
excessive loading, either separately
or in combination,
can cause heat buildup and possible tire failure.
Wheel Alignment and Tire Balance
The wheels on your vehicle were aligned and balanced
carefully at
the factory to give you the longest tire life
and best overall performance.
Scheduled wheel alignment and wheel balancing are not
needed. However, if you notice unusual tire wear or
your vehicle pulling one way or
the other, the alignment
may need to be reset. If
you notice your vehicle
vibrating when driving
on a smooth road, your wheels
may need to be rebalanced.
6-44