1998 BUICK PARK AVENUE ignition
[x] Cancel search: ignitionPage 157 of 426
The DIC can be used $0 program the following personal
choice
features available with your vehicle:
@ Melnosy Seats
Memory Door Locks
Security Feedback
@ Delayed hcking
See ‘‘Personal Choice Features” In the Index.
T’ne DTC is used to program the personal choices of two
drivers. The driver’s are recognized by
DRIVER #I and
DRIVER #2. You will kt the DIC know which driver
you are by using your remote keyless entry transmitter
or
by pressing the appropriate memory seat control
buttorm located on the driver’s door. The remote
transmitter was pre-programmed to belong to
DRIVER # 9 or DRIVER #2.
The last driver number remembered by the DIC will
show on the display each time the UNLOCK button on
the same transmitter is pressed, and the ignition is
turned OE.
When you press UNLOCK en your transmitter, the DIC
will automaticaihy change driver numbers 2nd the
vehicle will recall the persod choice settings that were
last made to correspond to your transmitter.
if you unlock the vehicle using your door key instead sf
your zransmitter, the DIC will not change drivers 2nd
will recall the infomation from the last transmitter use
or the last driver change using the men~ory seat controls.
If this happens and you were not the last driver of the
vehicle, simply
press your correct driver number on the
memory seat controls OH press the UNLOCK button on
your transmitter.
ProCarManuals.com
Page 158 of 426
See the following steps for personab. choice
progrinmrning instructions.
1.
2.
3.
4.
Turn the ignition on and keep the transaxle in
PARK (P).
hfom the DIC which driver you are by pressing the
UNLOCK button on your transmitter or the
appropriate
memory seat control.
Press and hold the ENGMET button for five
seconds. WELCOME TO BUICK OPTION
FEATURE will appear in the display.
T& next display will be your driver number. You are
now in the sclection mode and the DIC is ready to
program your personal choices in memory.
Use the ENG/MET button PO sehect options. Use the
RESET button to save the selection and advance to
the next option.
Each feature that can be personalized will appear in the
display. Once
you have made ;1 selection for a feature,
alae DEC will MOW on to the next pers~nal
choice feature.
If YOU would like to exit the seiection mode without
moving through each
of the personal choice features,
simply press
a different button on the DIC or turn off the
ignition. Whatever personal choices you made will still
be retained, even without passing through each of
the features.
If you happen to move past a seiectiora YOU would like to
make a personal choice for, press UNLOCK on your
transmitter
c)r press the appropriate driver r,umber on the
seat control. This will return you to the beginning of the
option feature programing mode.
The
parakl park assist mirror, which tips the passenger
mirror while the vehick is in REVERSE (W), can be
made
active or inactive through the DIC. %berm
PARALLEL PARK-OFF-ON appears on the display,
use
the ENGMET button t~ toggle the arrow between
OW and ON. When you have made your choice, press
the RESET button to record your selection. For more
idormation on this feature, see “Mirrors” in the Index.
ProCarManuals.com
Page 169 of 426
C: When RECIRC is selected, the system will
limit the mount of outside air entering your vehicle.
This is helpful when you are trying to cool the interior
of the vehicle quickly or limit the mount of outside air
entering your vehicle for some other reason. IIPlECmC
and AUTO may be selected at the same time. The
system
will remain in RECRC until the ignition is
tuned off. me system will return back to the previousBy
selected mode when the car
is wed back on. MCRC
can be selected in dl manual airflow modes except
FRONT defrost. RECRC cannot be selected with the
VENT button.
9 FRON* ms selec~on i~ used to dehst he
windshield by directing the ~OW tow& the widshield.
If FRONT is selected while in the AUTO mode, the fan
speed md the air temperature from the fi~nt defroster
will
vary. If a mmud fan speed setting is selected, the
fan speed will remain at that selection until another fan
speed selection is made or the AUTO mode is selected.
To turn off FRONT', press the AUTO or AW
mow bUttQn.
FRONT defrost will work better if any ice QP snow is
cleared from the hood ad the air inlet area between the
base
of the windshield and the hood.
ProCarManuals.com
Page 174 of 426

"
Your DeBco Electronics audio system has been designed
to operate easily and give years of listeing pleasmi.
You will get the most enjoyment out of it if you acquaint
yourself with it
first. Find out what your Delco
Electronics system can
do and how to operate all its .
controls, to be sure you're getting the most out of the?.. J
advanced engineering that went into it. . .
Setting &he Chock
Press and hold until the correct how appears. Press
and hold MIN until the correct minute appears.
You may set the clock with the ignition off if YOU
press RECALL fist and follow the same procedure
described above.
VOLUME: This hob turns the system on and off anad
controls the volume. To increase volume and turn the
radio
on, turn the knob to the right. Turn it to the left to
decrease volume.
ProCarManuals.com
Page 176 of 426

BASS: Press this knob lightly so it extends. Tun the
knob to increase
or decrease bass.
TREB: Press this knob lightly so it extends. Turn the
knob to increase or decrease treble. If a station is weak
or noisy, you may want to decrease the treble.
Push these hobs back into their stored positions when
you're
not using them.
BAL: Turn the control behind the upper knob to move
the
somi to the left or right speakers. The middle
position balances the sound between
the speakers.
FADE: Turn the control behind the lower knob to move
the
sound to thc front or rear speakers. The middle
position
balmces the sound between the speakers.
7-. . L.. (..,I &F$i 7:.
The longer side with the tape visible should face to the
right.
If the ignition and the radio are on, the tape can be
inserted
and will begin playing. If you hear nothing or
hear
a garbled sound, the tape may not be in squarely.
Press
EJECT to remove the tape and start over.
&Lag 2 *." ::,4~y&~~$~ - ''-.:.:%.A V' L+&
Mile the tape is playing, use the VOLUME, FADE,
BAL, BASS and TBZEB controls just as you do for the
radio. Other controk may have different functions when
a tape
is inserted. The display will show an mow to
show which side of the tape is playing.
If you want to insert a tape when the ignition or radio is
off, first press EJECT or RECALL. Note that the
cassette tape adapter
kits for portable compact disc
players will work in your cassette tape player.
Your tape bias is set automatical2y.
If E and a number appear on the radio display, the tape
won't play because
of an error.
e EdO: The tape is tight and the player can't turn the
tape
hubs. Remove the tape. Hold the tape with the
open end down
and try to turn the right hub to the
left with a pencil. Turn the tape over and repeat. If
the hubs do not turn easily, your tape may be
damaged
and shoutct not be used in the player.
Try a new tape to make sure your player is
working properly.
Ell: The tape is broken. Try a new tape.
ProCarManuals.com
Page 178 of 426
__ . . . ... .,. . .
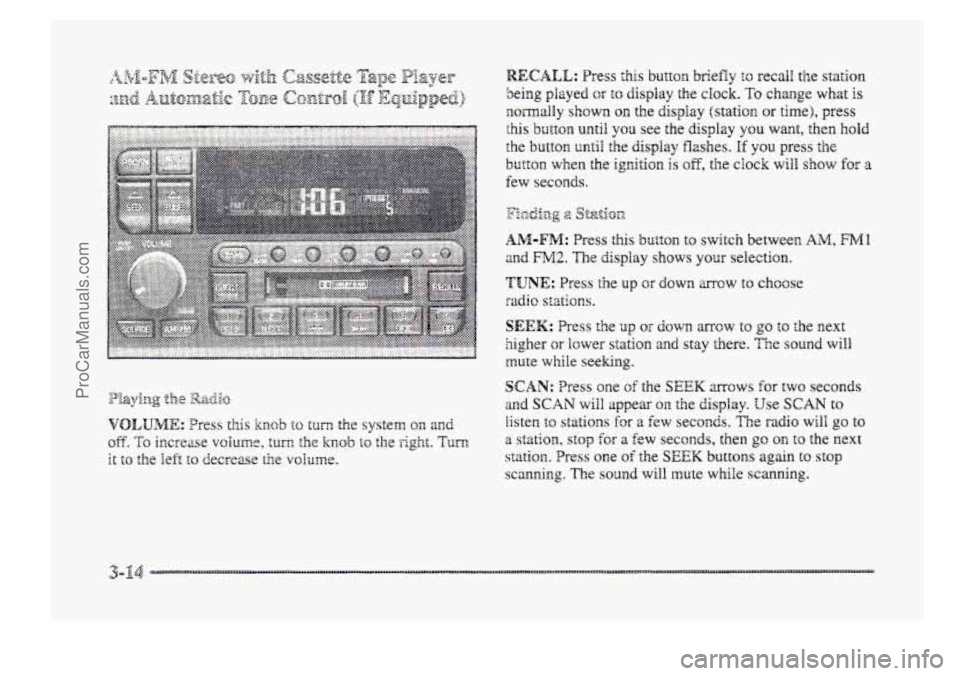
RECALL: Press this button briefly to recall the station
being played or to display the clock. To change whzt is
normally shown on the display (station OH time), press
this button until you see the display you want, then hold
the
button until the display flashes. If you press the
button when the ignition is oE, the clock will show for a
few seconds.
y:..., -2 p&Ij%p -0 2 Sf-&.on
AM-FM: Press this bl~tt~n to switch between AlM, FMl
and FM2. The display shows your selection.
'TUNE: Press the up or down mow to choose
radio stations.
SEEK: Press Lie up or down mcw to go to the next
5igher ar lower station and stay there. The sound will
mute while seeking.
s
SCAN: Tress one of the SEEK arrows for two seconds
and SCAN will appear 011. the display. Use SCAN to
listen to stations for a few seconds. The radio will go to
a station, stop €or a few seconds, then go on to the next
station, Press one of the SEEK buttons again to st~p
scanning, The sound will mute while scanning.
ProCarManuals.com
Page 185 of 426
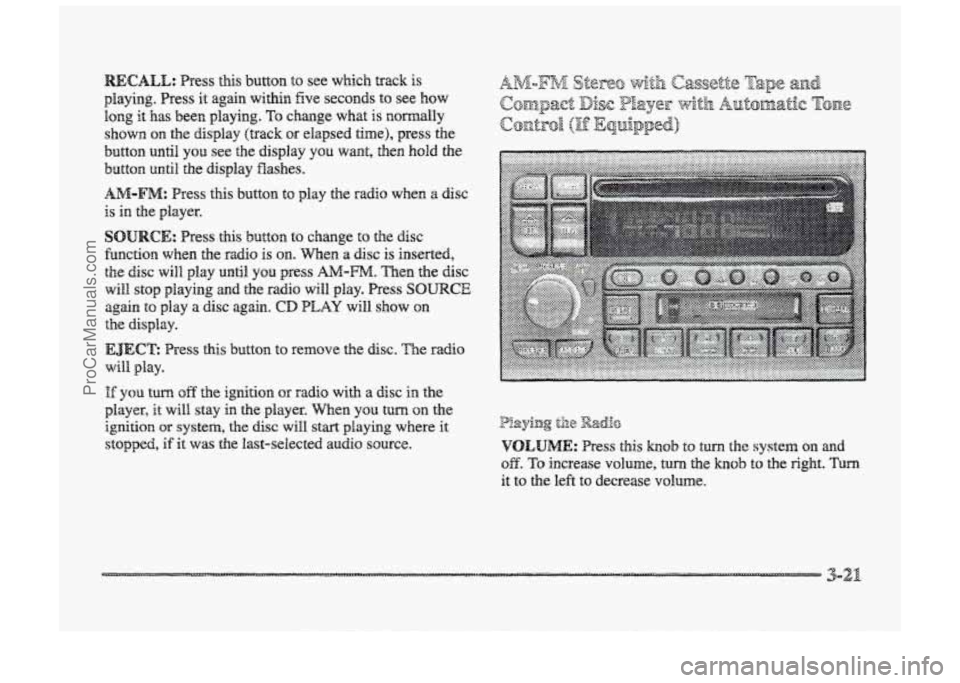
playing. Press it again within five seconds to see how
long it has been playing. TQ change what is normally
shown
on the display (track or elapsed time), press the
button until YOU see the display YOU want, then hold the
button until the display Washes.
AM-FM: Press this button to play the radio when a disc
is in the player.
SOURCE: Press this button to change to the disc
fbnction when he radio is on. When a disc is inserted,
the disc will play until YOU press AA4-m. Then the disc
will stop playing and the radio will play. Press SOURCE
again to play a disc again. CD PLAY will show on
EJECE Press this button to ~~XIIQV~ the disc. The EXI~O
will. play.
the display.
I% you turn off the ignition or radio with a disc in the
player, it will stay in the player. men YOU turn on the
ignition OF system, the disc will start playing where it
stopped, if it was the last-selected audio source.
P!aying til8 Radio
VOLUME: Press this hob to turn the system on md
OB. To increase volume, turn the knob to the right. Turn
it to the left to decrease VO~UIIE.
3-21
ProCarManuals.com
Page 186 of 426
RECALL: Press this button briefly to recal! the statim
being played or to display the clock. To change what Is
EomalEy shown on the display (station or time), press
the RECALL butttorn until yon see the display YSU want.
then hold the RECALL button until the display flashes.
If you press the button when the ignition is off, the ck~k
wiEI show for 8 Eew seconds.
AM-FM: Press this button to switch between AM, FME.
and FM2. The display shows your selection.
TUNE: Press the up OF down mow to choose
sadi~ stations.
SEEK: Press the up or down arrow to go to the next
higher or lower station and stay there. The sound will
mute while seeking.
SCAN: Press one sf the SEEK mows for EWO seconds
and SCAN wiPB appear on the display. Use SCAN to
listen to stations for a few seconds. The radio wiIB go to
2 stzti~n, stop for a few seconds, the^ go on to the next
station. Press one of the SEEK mows again to stop
scanning. Tie sound will mute while scanning.
f . Turn the radio on.
2. Press AIM-FM to select the band.
4. Press TONI2 tc select the set*iing YSU prefer.
5. Press an@ hodd me of the six numbered buttons. The
sound will mute. When it returns, release the button.
Whenever you press that cumbered button, the
station
you set will return and the tone you selected
will be automatically selected for that button.
6. Repeat the steps Ex e3ch pushb~tton.
P SCAN: Press this button BQ Bisten to each of your
preset stations for a fcw seconds. The radio will go to
the first preset station, stop for a €ew seconds, then go
on to the next preset statim. Press P SCAN again to stop
scanning. If a preset station has we& reception, the
radio will not stop at the preset station.
3-22 ....._. -
ProCarManuals.com