1998 BMW CONVERTIBLE spare tire
[x] Cancel search: spare tirePage 26 of 179

At a glanceControls Car care Repairs Technical Data Index
25
BCBC+C/$
BCBC
Tire inflation pressures If the driver's door is open, the infla-
tion pressures are also visible on the
door pillar. Inflation pressures are
indicated in psi (bar) with tires cold
(ambient temperature).
The inflation pressures apply to tires
from BMW-approved manufacturers;
your BMW Retailer will provide you
with this information. Higher pres-
sures may be required for tires from
other manufacturers.a
Periodically check the inflation
pressure Ð also of the spare tire Ð at
least twice each month and before
setting out on an extended trip. Failing
this, incorrect tire pressure may ren-
der the car unstable or cause tire
damage resulting in an accident.cSedan models
BMW
modelTire sizes
Inßation pressures are
indicated in psi (bar)
318i185/65 R 15 88 Q, T M+S
185/65 R 15 88 T 29
(2.0)35
(2.4)36
(2.5)44
(3.0)
205/60 R 15 91 H
225/55 R 15 92 V
225/50 ZR 16
205/60 R 15 91 Q, H M+S
225/50 R 16 92 Q M+S29
(2.2)32
(2.2)32
(2.2)39
(2.7)
328i205/60 R 15 91 H
225/50 ZR 16
205/60 R 15 91 Q, H M+S
225/50 R 16 92 Q M+S29
(2.0)33
(2.3)33
(2.3)41
(2.8)
See next page for additional models
Page 104 of 179

10 3
At a glanceControlsCar careRepairsTechnicalDataIndex
ABS enhances active safety by helping
to prevent the wheels from locking under
braking. When the front wheels slide, the
driver loses steering control over the
vehicle. Traction loss at the rear wheels
can cause the rear end to break into
uncontrolled oversteer.
ABS is designed to meet two essential
requirements during every application:
dto help provide vehicle stability on all
types of road surface (asphalt,
cement, dirt, moisture, snow and ice).
dto help to retain steering and maneu-
vering capability under the same con-
ditions.
However, certain important consider-
ations must be borne in mind in connec-
tion with these requirements:
Not even ABS can suspend the normal
laws of physics. ABS alone can not pre-
vent accidents when the brakes are
applied without an adequate safety
interval between vehicles, when the car
reaches excessive rates of lateral accel-
eration in curves, or if aquaplaning
occurs. Responsibility for these types of
situations remains in the hands (and feet)
of the driver. You should never allow the
added safety of ABS to lull you into a
false sense of security, or mislead you
into taking increased risks that could
affect your own safety and that of others.
Driving with ABSThe yellow ABS warning in the instru-
ment panel goes out as soon as the
engine is started.
The system becomes operative once the
vehicle exceeds a speed of 5 mph
(8 km/h). The ABS is deactivated when-
ever the vehicle's speed drops below
approx. 2 mph (3 km/h). This means that
the wheels can lock in the Þnal phase of
a braking action - a factor of no signiÞ-
cance in actual practice.
The ABS system closed-loop control cir-
cuit cycles in fractions of a second. A
pulsation at the brake pedal indicates to
the driver that ABS is active, that is, that
the car is within its maximum braking
range. In addition, the audible pulsation
that accompanies the control operation
calls your attention to the reduced trac-
tion between tires and road surface
(marginal adhesion), and reminds you
that the vehicle's speed should be
reduced to adapt to road conditions.On road surfaces featuring a loose top
layer on a Þrmer substratum, e.g., on
gravel or snow, the braking distances
with ABS may be longer than with the
wheels locked. However, ABS continues
to provide enhanced vehicle and steer-
ing control under these conditions.
a
To ensure that the system remains
completely operational, never modify the
ABS. Service procedures on ABS are to
be performed by authorized technicians
only.c
ABS may fail to function with maximum
efÞciency when tires of different sizes
are mounted (e.g., winter tires/spare tire;
remount the correct tires at all wheels as
soon as possible).
In the event of a fault, the ABS warning
lamp in the instrument cluster lights up,
refer to page 18. The braking system
then reverts to conventional operation as
on a vehicle without ABS. However,
have the brake system checked by your
BMW Retailer as soon as possible. To
prevent undetected defects and cumu-
lative faults from adversely affecting the
brake system, refer any problems to
your authorized BMW Retailer at the
earliest opportunity.
Antilock Brake System (ABS)
Page 112 of 179

111
At a glanceControlsCar careRepairsTechnicalDataIndex
Information for your safetyThe factory-approved radial tires have
been selected to provide optimum
safety and driving comfort on your vehi-
cle.
In a very real sense, both tire life and
your own safety are riding on correct
tire specifications and inflation pres-
sures.
Incorrect inflation pressures are a fre-
quent cause of tire damage. To a great
extent it also influences the ability of
your BMW to hold the road.a
Check the tire pressures Ð also in
the spare tire Ð at least every two weeks,
and before every extended trip.
Incorrect inflation pressures can also
lead to tire damage and accidents.c
Tire tread - tire damageInspect your tires frequently for tread
wear, signs of damage and for foreign
objects lodged in the tread. Check the
tread depth.
The tread depth should not be less than
0.12 in (3 mm). Otherwise there is an
increased risk of aquaplaning, even at
relatively moderate speeds and with
only small amounts of water on the
road.
We recommend that you always replace
the tires once the tread wears to 0.12 in
(3 mm). Once the tread has worn to
0.063 in (1.6 mm), tread depth indica-
tors appear.a
Never continue driving on a deflat-
ed (flat) tire. A flat tire greatly impairs
steering and braking response, and can
lead to complete loss of control over the
vehicle.
Avoid overloading the vehicle so that the
permitted load on the tires is not ex-
ceeded. This can cause overheating and
gradual internal damage. The ultimate
result can assume the form of a sudden
air loss.Unusual vibrations encountered during
normal vehicle operation can indicate
tire failure or some other vehicle defect,
as can variations in normal vehicle
response, such as a pronounced ten-
dency to pull to the left or right. Should
this occur, you should respond by
immediately reducing your speed and
carefully proceeding to the nearest
BMW Retailer or professional tire cen-
ter, or having the vehicle towed in to
have it and its tires inspected.
Tire damage (up to and including blow-
outs) can endanger the lives of both the
vehicle occupants and other road
users.c
Tire inflation pressures Tire tread
Page 113 of 179

11 2
To maintain good handling and vehicle
response, use only tires of a single
tread configuration from a single manu-
facturer.
a
Do not use retreaded tires, as oth-
erwise driving safety may be impaired.
This is due to the possible variations in
casing structures and, in some cases, to
their extreme age, which can lead to a
decrease in their durability.cTread wear patterns differ at the front
and rear wheels according to the indi-
vidual operating conditions. In the inter-
est of safety and optimal vehicle
response, we advise against rotating
tires from front to rear and vice versa.
When considering the potential eco-
nomic benefits of interaxle tire rotation,
you must decide whether the expense
of having the tires rotated is likely to be
amortized during the anticipated exten-
sion in tire life. We recommend that you
discuss the matter with your BMW
Retailer.
Should you decide in favor of rotating
the tires, it is essential to observe the
following:
Leave the tires on the same side of the
vehicle (include spare in rotation pat-
tern as desired).
Braking response and traction may be
adversely affected.
Rotation should always be carried out
at short intervals, max. 3000 miles
(approx. 5000 km).
Following rotation always correct the
tire inflation pressure.Always replace tires after 10 years,
regardless of use or tread wear.
Spare tires over 6 years old should be
used only in case of emergency. Such a
tire should be replaced by a new tire
immediately, and should not be fitted
together with new tires.
The date on which the tire was manu-
factured is indicated by the code on
the sidewall: DOT ... 327 indicates that
the tire was manufactured in Week 32
of 1997.
Tire replacement Interaxle tire changes
Page 147 of 179

14 6
a
Change tires only on a flat, hard
surface affording good traction. Avoid
jacking the car on a soft or slippery sup-
port surface (snow, ice, loose gravel,
etc.), as it could slide sideways.
Take extra care to ensure that the base
of the jack is positioned on a solid sup-
port surface.
Never use wooden blocks or similar
objects to support the base of the jack,
as the weight of the car could exceed
their support capacity.
Never lie beneath the vehicle or start
the engine while the car is supported by
the jack - risk of fatal injury.
Additional precautions to observe when
changing flat tires:
When pulling over on the roadside to
change a tire, always try to park the car
as far as possible from passing traffic.
Switch on the hazard flashers.
All passengers should be outside the
car and well away from your immediate
working area (e.g., behind the guard-
rail).Turn the steering wheel to the straight-
ahead position, remove the key and
engage the steering lock. Shift into 1st
or reverse (selector lever in Park with
automatic) and engage the parking
brake.
If a warning triangle or portable hazard
warning lamp is available, set it up on
the roadside at an appropriate distance
from the rear of the vehicle. Observe all
safety guidelines and regulations.c
b
To avoid rattling noises, note the
positions of the tools and return them to
their original positions.c
To change the tire you will need
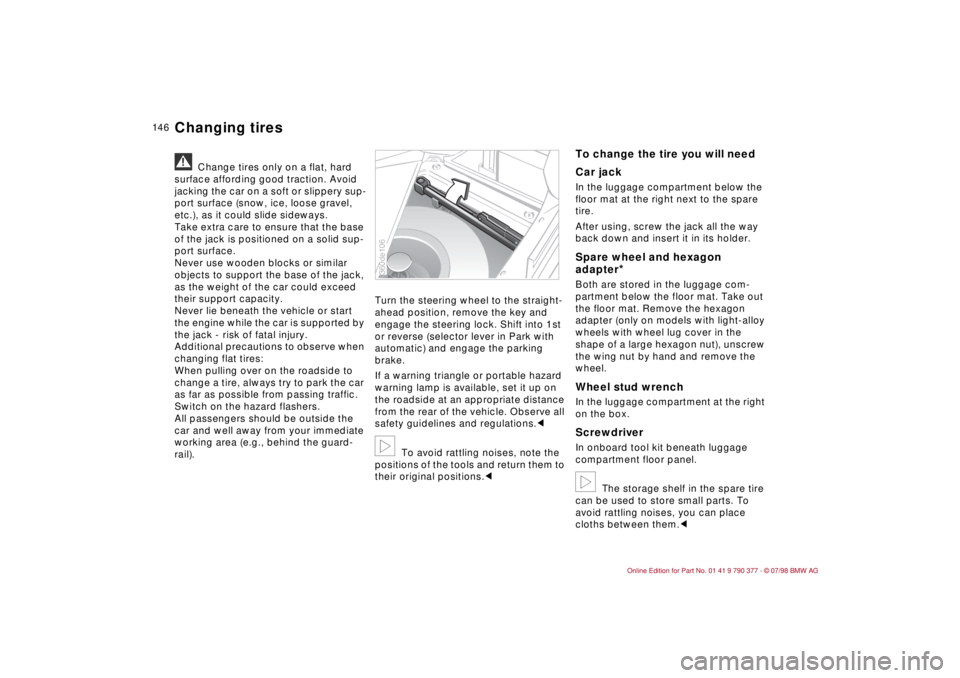
Car jackIn the luggage compartment below the
floor mat at the right next to the spare
tire.
After using, screw the jack all the way
back down and insert it in its holder.Spare wheel and hexagon
adapter
*
Both are stored in the luggage com-
partment below the floor mat. Take out
the floor mat. Remove the hexagon
adapter (only on models with light-alloy
wheels with wheel lug cover in the
shape of a large hexagon nut), unscrew
the wing nut by hand and remove the
wheel.Wheel stud wrench In the luggage compartment at the right
on the box. ScrewdriverIn onboard tool kit beneath luggage
compartment floor panel.b
The storage shelf in the spare tire
can be used to store small parts. To
avoid rattling noises, you can place
cloths between them.c
360de106
Changing tires
Page 149 of 179

14 8
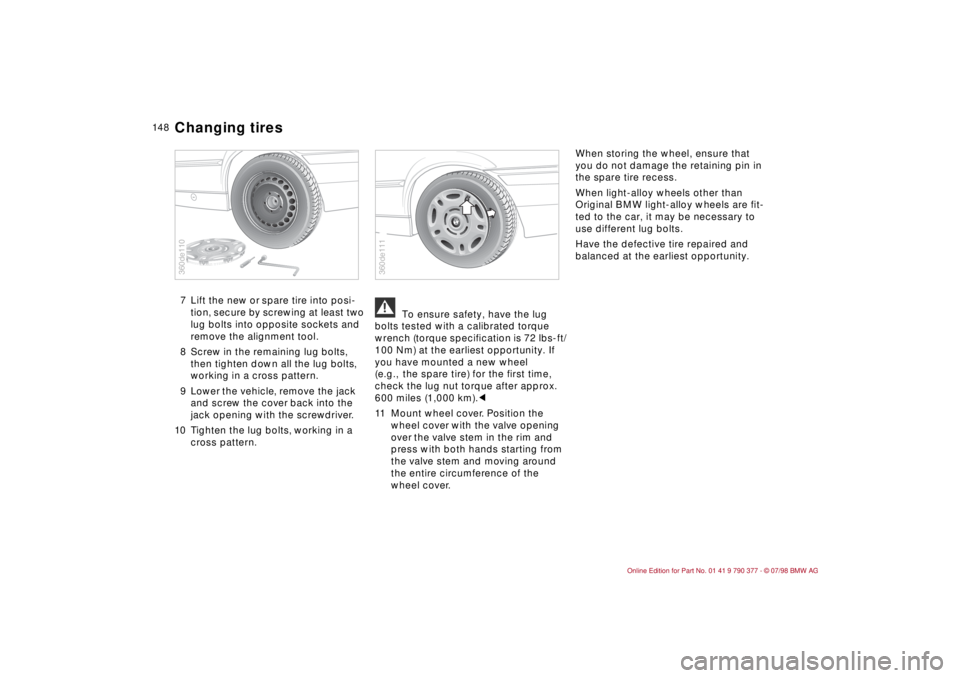
7 Lift the new or spare tire into posi-
tion, secure by screwing at least two
lug bolts into opposite sockets and
remove the alignment tool.
8 Screw in the remaining lug bolts,
then tighten down all the lug bolts,
working in a cross pattern.
9 Lower the vehicle, remove the jack
and screw the cover back into the
jack opening with the screwdriver.
10 Tighten the lug bolts, working in a
cross pattern.
a
To ensure safety, have the lug
bolts tested with a calibrated torque
wrench (torque specification is 72 lbs-ft/
100 Nm) at the earliest opportunity. If
you have mounted a new wheel
(e.g., the spare tire) for the first time,
check the lug nut torque after approx.
600 miles (1,000 km).c
11 Mount wheel cover. Position the
wheel cover with the valve opening
over the valve stem in the rim and
press with both hands starting from
the valve stem and moving around
the entire circumference of the
wheel cover.When storing the wheel, ensure that
you do not damage the retaining pin in
the spare tire recess.
When light-alloy wheels other than
Original BMW light-alloy wheels are fit-
ted to the car, it may be necessary to
use different lug bolts.
Have the defective tire repaired and
balanced at the earliest opportunity.
360de110
BMW
360de111
Changing tires
Page 174 of 179

173
At a glanceControls Car careRepairsTechnicalDataIndex
Note: This index does not correspond to the original manual in all detailscomponents
105
SSAFETY DEFECTS
7
Seat heaters
87
Seat, electric 44
Seat, mechanical
43
Seatback release 45
Seatbelts
47
Seats, adjustment
43
Selector lever, automatic
transmission
58
Service Interval Display
64
Shift programs
59
Side airbag
50
Sliding
106
Sliding/tilt sunroof
36
Close in case of electrical
fault
152
Slippery roads
105
Snow chains
105
Spare key
30
Spare keys 30
Spare tire 112
, 146
Spark plugs
167
Special oils 125
Speed warning activation
threshold 80
Sport seat 44
Start
54
Start the engine
Preheating
54
Starting assistance
153Starting problems
102
Steel wheel
115
Steering
128
Steering lock
54
Steering wheel lock
54
Stopwatch
80
Storage shelves
93
Summer tires
113
Sun visor
46
Switching off the engine
55
Switching off the vehicle 55
Symbols
4
Battery 149
TTachometer
63
Tailgate
33
Taillights 143
Taillights,
Replace bulbs
143
Tank cover
Unlock in case of
electrical fault 152
Technical Data 160
Technical data 160
Telephone
108
Temperature 91
Temperature display
66
Temperature layering 92
Tempomat
62
Thigh support
Ajustment 44
Third brake light
143Through loading system
95
Timer
81
Tire change
146
Tire damages 111
Tire inflation pressure
25
,
111
Tire inscription
113
Tire replacement 112
Tire sizes
115
Tire tread 111
Tool kit
140
Tools
140
Tow starting
154
Towing
154
Towing eyelets
154
Track
161
Trailer load, permissible
163
Trailer nose weight,
permissible
163
Transmission 57
Traveling abroad
102
Tread depth, tires 111
Trip
63
Trip distance recorder
63
Trip odometer
63
Trunk
Capacity
163
Trunk lights,
Replace bulb
145
Turn on
54
Turn signal indicator
60
Turn signal,Replace bulb
142
Turn signals
143
Turning circle 161
Turning radius 161
UUnloaded vehicle weight
163
Unlocking and locking doors
31
Used batteries
150
VVehicle care, interior
133
Vehicle decommissioning
137
Vehicle identification
129
Vehicle identification
number
129
Vehicle immobilization unit
30
Vehicle paintwork
132
Vehicle weight
163
Ventilate at a standstill
81
Ventilation, draft free
92
WWarm feet - cool head
92
Warning
71
Warning Light-On
85
Warning lights
20
Washer fluid
Add
124
Fill up 166
Washer fluid reservoir
Everything from A to Z