Page 11 of 179

Contents
At a glance
Controls and features
Cockpit16
Instrument cluster18
Indicator and warning
lamps20
Hazard warning system22
Hazard warning triangle22
First-aid kit22
Refueling23
Fuel specification23
CARB OBD II interface24
Tire inflation pressures25
Locks and security systems:
Keys30
Electronic immobilizing device35
Doors31
Trunk lid33
Luggage compartment34
Power windows35
Sliding/tilt sunroof36
Convertible top operation37
Adjustments:
Seats43
Steering wheel45
Mirrors46
Passenger safety systems:
Safety belts47
Child restraint system48
Installing child seats49
Airbags50
Child-safety locks52
Rollover protection system Ð
convertible52
Driving:
Steering/ignition lock54
Starting the engine54
Switching off the engine55
Parking brake56
Manual transmission57
Automatic transmission58
Turn signals/high beam60
Wiper/washer system61
Cruise control62
Everything under control:
Odometer63
Tachometer63
Energy control63
Fuel gauge64
Coolant temperature gauge64
Service Interval Display64
Multi-Information Display (MID)66
Outside temperature display
and digital clock68
Check Control71
Check Control with outside
temperature display and
digital clock74
Onboard computer77
Technology for driving comfort
and safety:
Automatic stability control
plus traction (ASC+T)84
Page 16 of 179
15
At a glance
Controls and featuresCare and maintenanceAdvanced technology
Technical data
Owner service procedure
Index
At a glanceControls Car care Repairs Technical Data Index
Cockpit 16
Instrument cluster 18
Indicator and warning lamps 20
Hazard warning system 22
Hazard warning triangle 22
First-aid kit 22
Refueling 23
Fuel specification 23
CARB OBD II interface 24
Tire inflation pressures 25
Page 18 of 179
Controls and features MaintenanceAt a glanceControls Car care Repairs Technical Data Index
17
1 Lamp switch 85
2 Foglamps 86
3 Horn, entire surface
4 Wiper/washer lever 61
5 Rear window defroster 91
6 Hazard warning system 22
7 Automatic cruise control
*
62
8 Adjust steering wheel
*
45
9 Turn signals, high beam headlamps
and headlamp flasher 60
10 Engine hood unlocking device 118
Cockpit
Page 20 of 179
Controls and features MaintenanceAt a glanceControls Car care Repairs Technical Data Index
19
1 Fuel gauge with low-fuel
warning lamp 64
2 Indicator lamp for turn signals 20
3 Speedometer
4 Indicator and warning lamps for
d
Battery charge current 20
d
High beams 20
d
Engine oil pressure 20
5 Tachometer 63
Energy control 63
6 Coolant temperature gauge 64
7 Indicator and warning lamps for
d
Brake pad wear 20
d
Brake system hydraulics 21
d
Parking brake 21
d
Airbag 50
8 Indicator lamp for ASC+T 20
9 Indicator and warning lamps for
d
Automatic transmission
*
20
d
Warning lamp for Check Control
*
71
d
Please fasten seat belts
*
21
d
ABS 20
10 Trip odometer 63
11 Service Interval Display 64
12 Odometer 6313 Indicator lamps for
d
Foglamps
*
20
d
Emissions-related systems
indicator 21
d
Rollover protection system
*
21
14 Trip odometer reset button 63
Instrument cluster
Page 21 of 179

20
Turn signal left/right, green
k
Flashes when the turn signals
are in operation.
Battery charge current, red
v
Goes out after the engine has
started.
If the lamp comes on during
normal vehicle operation:
The battery is no longer being charged.
Indicates a defect in the generator drive
belt or the charging circuit.
a
If the V-belt is defective, do not run
the coolant pump; overheating and
potential engine damage would result.
Contact your BMW Retailer.
c
High beam, blue
l
Lights up when the high beams
are switched on or the head-
lamp flashers are activated.
Engine oil pressure, redw
Goes out after the engine has
started. May come on briefly at
idle when the engine is hot,
but must go out again at higher engine
speed.
If the lamp comes on during normal vehi-
cle operation: stop vehicle and switch off
engine immediately. Check engine oil
level; if necessary, add oil. If oil level is
correct: contact your BMW Retailer.
Foglamps
*, green
t
Lights up whenever you switch
on the foglamps.
Airbags, redp
This lamp turns on for an oper-
ational check when you turn the
ignition key to position 1. If, at
the operation check, it does not go on,
or goes on while driving, have it checked
at your BMW Retailer.
Additional notes: Page 50
Automatic transmission
*, yellow
O
Goes out after the engine has
started.
Additional notes: Page 58
ASC+T (Automatic Stability
Control plus Traction), yellows
Goes out shortly after the igni-
tion is switched on:
System OK.
Additional notes: Page 84
ABS (Antilock Brake System),
yellowo
Goes out after the engine has
started. If the lamp comes on
during normal vehicle opera-
tion: ABS has been deactivated in
response to a system malfunction. Con-
ventional braking force remains unim-
paired.
Additional notes: Page 103
Brake pad wear, yellow#
Lights up when starter is actu-
ated and goes out when the
engine is started.
If the lamp comes on during normal
vehicle operation: replace brake pads
immediately.
a
Use only original BMW-approved
brake pads otherwise the vehicle
authorization is no longer valid.c
Indicator and warning lamps
Page 22 of 179

At a glanceControls Car care Repairs Technical Data Index
21
Brake hydraulics, redn
Goes out after the engine has
started.
If the lamp comes on during
normal vehicle operation: low brake
fluid. Additional notes: Page 128
Parking brake, redm
Goes out after the engine has
started. Comes on when you
engage the parking brake.
Additional notes: Page 56
Emissions-related systemsY
Lamp goes out once engine
starts.
If this indicator lamp lights up
during normal vehicle operation, either
continuously or intermittently, this indi-
cates a fault in one of the emissions-
related electronic circuits. Although the
vehicle remains operational, you should
have the systems checked by a BMW
Retailer at the earliest possible opportu-
nity.
Please fasten safety belts
*, red
q
(With acoustic signal
if the
driverÕs belt is not buckled).
Lights up briefly when the
ignition key is turned, and then goes out
(in some models it goes out after you
fasten safety belts).
BMW Convertible
Rollover Protection System
*,
yellow
;
Goes out shortly after the igni-
tion is switched on:
System OK.
Indicator and warning lamps
Page 23 of 179
22
The button flashes intermittently when
the hazard warning lamps are on.
The button is also illuminated whenever
the vehicle lighting is switched on.The warning triangle can be stored in
the luggage compartment in a storage
shelf at the right for convenient access.
a
Comply with legal requirements
concerning the need to carry a warning
triangle in the car.cOn the right in the luggage compart-
ment, on a shelf.
a
Some of the items in the first-aid
kit are suitable for use for a limited
period only. Therefore you should regu-
larly check the contents and replace
defective articles. These are available in
any pharmacy.
Comply with legal requirements con-
cerning the need to carry a first-aid kit in
the car.c
360de040Hazard warning system Hazard warning triangle*First aid kit*
Page 33 of 179

32
a
Children can lock the doors from
inside. Therefore, you should always
remove the key and take it with you to
ensure that you can unlock the car from
the outside at all times.c
In an accident, the central locking sys-
tem automatically unlocks the doors
and the interior lamps switch on.
Depending on the version, the hazard
warning flashers are also activated.
a
Avoid using the inside lock buttons
to lock the rear doors while driving, as
these doors would then fail to unlock au-
tomatically in the event of an accident.c
Opening doors from the insidePull interior door handle of a front door
twice in succession (the initial pull
unlocks the door, the second opens it).
Central locking system buttonThis button operates the central locking
system when the driverÕs door is
closed. It unlocks the doors and lug-
gage compartment, but does not arm
the alarm system.
The fuel filler door remains unlocked to
allow refueling.
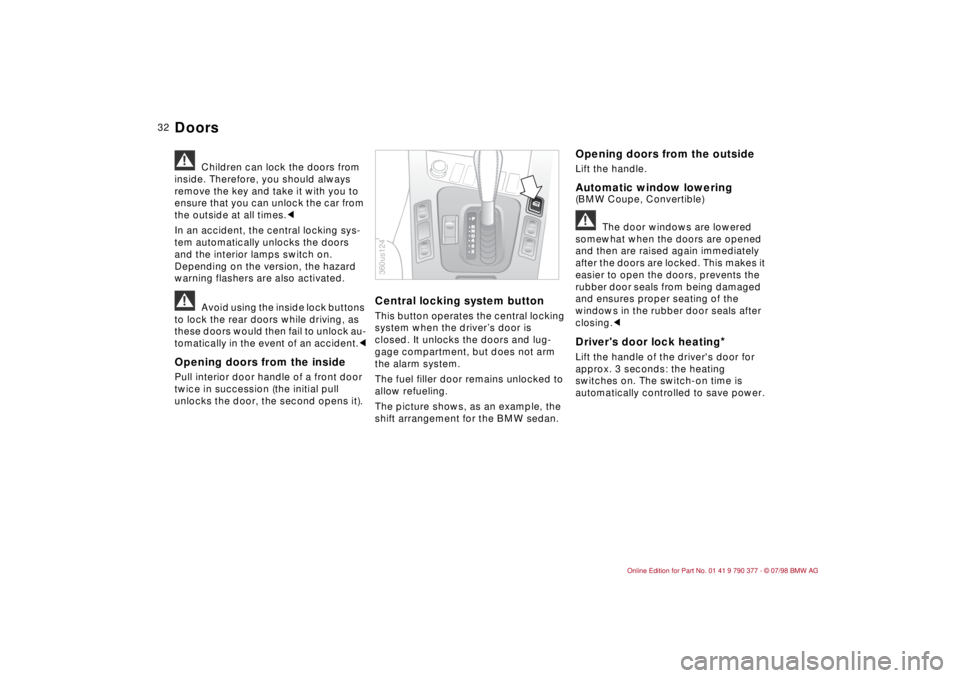
The picture shows, as an example, the
shift arrangement for the BMW sedan.
Opening doors from the outsideLift the handle.Automatic window lowering (BMW Coupe, Convertible)a
The door windows are lowered
somewhat when the doors are opened
and then are raised again immediately
after the doors are locked. This makes it
easier to open the doors, prevents the
rubber door seals from being damaged
and ensures proper seating of the
windows in the rubber door seals after
closing.c
Driver's door lock heating
*
Lift the handle of the driver's door for
approx. 3 seconds: the heating
switches on. The switch-on time is
automatically controlled to save power.
S
360us124
Doors