1997 TOYOTA TACOMA ECU
[x] Cancel search: ECUPage 157 of 221

156Towing in this manner may be done only
on hard-surfaced roads for a short dis-
tance and at low speeds. Also, the
wheels, axles, drive train, steering and brakes must all be in good condition.
CAUTION!
Use extreme caution when towing
vehicles. Avoid sudden starts or
erratic driving maneuvers which
would place excessive stress on the
emergency towing hook and towing
cable or chain. The hook and towing
cable or chain may break and cause
serious injury or damage.
NOTICE
Use only a cable or chain specific- ally intended for use in towing
vehicles. Securely fasten the cableor chain to the towing hook provided.
Before towing, release the parking brake, put the transmission in neutral (manual)
or Nº (automatic) and set the transfer inH2º mode. The key must be in ACCº (en-
gine off) or ONº (engine running).
CAUTION!
If the engine is not running, the
power assist for the brakes and
steering will not work so steering
and braking will be much harder
than usual. �
Before emergency towing, check that
the hook is not broken or damaged and
that the installation bolts are not loose.
� Fasten the towing cable or chain se-curely to the hook.
� Do not jerk the hook. Apply steady and
even force.
� To avoid damaging the hook, do not
pull from the side or at a vertical angle.
Always pull straight ahead.
ÐEmergency towing hook precautions
(four-wheel drive models)
Page 170 of 221

169
Tire surface and wheel nuts Check the tires carefully
for cuts, damage
or excessive wear. See Chapter 7-2 for
additional information. When checking the tires, make sure no nuts are missing,
and check the nuts for looseness. T ighten
them if necessary.
Tire rotation
Rotate the tires every 12000 km (7500
miles). See Chapter 7-2 for additional in- formation.
Fluid leaks Check underneath for leaking fuel, oil, wa-
ter or other fluid after the vehicle has been
parked for a while. If you smell fuel fumes
or notice any leak, have the cause found
and corrected immediately. Doors and engine hood Check that all doors including tailgate op- erate smoothly and all latches lock se-
curely. M ake sure the engine hood secon-
dary latch secures the hood from opening
when the primary latch is released. INSIDE THE VEHICLE Items listed below should be checked
regularly, e.g. while performing peri-
odic services, cleaning the vehicle,etc. Lights Make sure the headlights, stop lights, tail lights, turn signal lights, and other lights are all working. Check headlight aim. Service reminder indicators and
warn-
ing buzzers Check that all service reminder indicators
and warning buzzers function properly. Steering wheel
Be alert for changes in steering condition, such as hard steering or strange noise. Seats Check that all front seat controls such as
seat adjusters, seatback recliner, etc. op- erate smoothly and that all latches lock
securely in any position. Check that the
head restraints move up and down
smoothly and that the locks hold securely
in any latched position. For folding-down
seatback (bench seat), check that the
latches lock securely. Seat belts
Check that the seat belt system such as
buckles, retractors and anchors operate
properly
and smoothly. Make sure the belt
webbing is not cut, frayed, worn or dam-aged. Accelerator pedal Check the pedal for smooth operation and
uneven pedal effort or catching. Clutch pedal Check the pedal for smooth operation. Brake pedal Check the pedal for smooth operation and
that the pedal has the proper clearance. Check the brake booster function. Brakes
At a safe place, check that the brakes do not pull to one side when applied. Parking brake Check that the lever has the proper travel and that, on a safe incline, your vehicle is
held securely with only the parking brake applied.
Page 171 of 221

170Automatic transmission Parkº
mech-
anism
Check the lock release button of the se-
lector lever for proper and smooth opera-
tion. On a safe incline, check that your ve-
hicle is held securely with the selector lever in ºPº position and all brakes re- leased.
IN THE ENGINE COMPARTMENT Items listed below should be checked
from time to time , e.g. each time when
refueling.
Washer fluid
Make sure there is sufficient fluid in the
tank. See Chapter 7-3 for additional infor-
mation.
Engine coolant level Make sure the coolant level is between
the FULLº and LOWº lines on the see-
through reservoir when the engine is cold.
See Chapter 7-2 for additional informa-tion.
Battery electrolyte level Make sure the electrolyte level of all bat-
tery cells is between upper and lower level
lines on the case. Add only distilled water
when replenishing. See Chapter 7-3 for
additional information. Brake fluid level
Make sure the brake fluid level is correct. See Chapter 7-2 for additional informa- tion.
Engine oil level
Check the l
evel on the dipstick with the en-
gine turned off and the vehicle parked on
a level spot. See Chapter 7-2 for addition-
al information. Power steering fluid level Check the level on the dipstick. The level
should be in the HOTº or COLDº range
depending on the fluid temperature. SeeChapter 7-2 for additional information. Exhaust system
If you notice any change in the sound of
the exhaust or smell exhaust fumes, have the cause located and corrected immedi-
ately. (See engine exhaust cautions in
Part 2.) Be on the alert for changes in perfor-
mance, sounds, and visual tip-offs
that in-
dicate service is needed. Some important
clues are as follows: � Engine missing, stumbling, or pinging
� Appreciable loss of power
� Strange engine noises
� A leak under the vehicle (however, wa-
ter dripping from the air conditioning
after use is normal.)
� Change in exhaust sound (This may
indicate a dangerous carbon monox-
ide leak. Drive with the windows open
and have the exhaust system checked
immediately.)
� Flat-looking tire; excessive tire squeal
when cornering; uneven tire wear
� Vehicle pulls to one side when drivingstraight on a level road
� Strange noises related to suspensionmovement
� Loss of brake effectiveness; spongy
feeling brake or clutch pedal; pedal al-
most touches floor; vehicle pulls to one
side when braking
� Engine coolant temperature continual-
ly higher than normal
Does your vehicle need repairing?
Page 195 of 221

194
ADDING DISTILLED WATER (MAINTE-
NANCE TYPE BATTERY ONLY)
1. Remove the vent plugs.
2. Add distilled water to cells needingfluid.
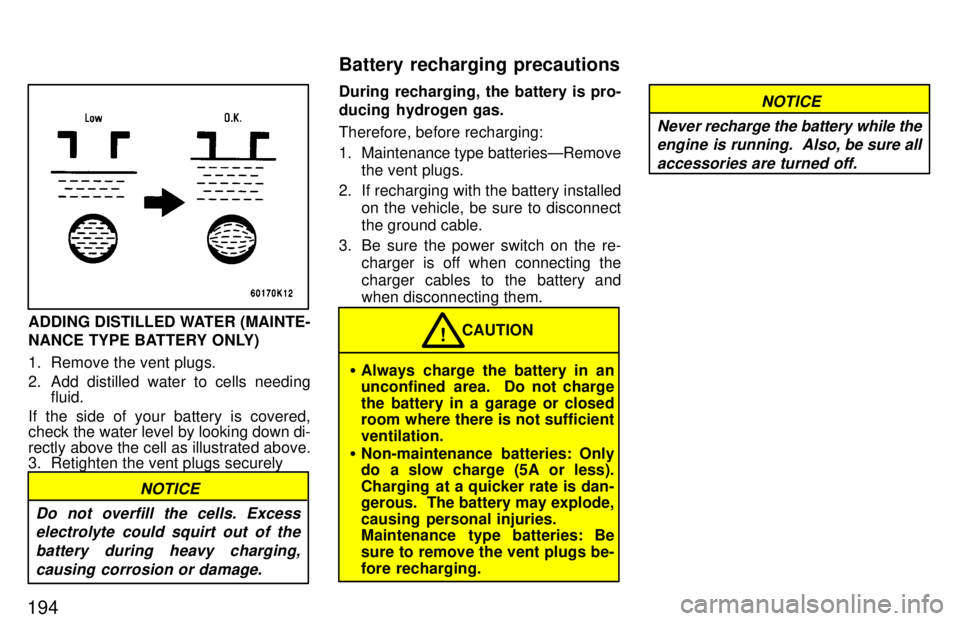
If the side of your battery is covered,
check the water level by looking down di-
rectly above the cell as illustrated above.
3. Retighten the vent plugs securely
NOTICE
Do not overfill the cells. Excess electrolyte could squirt out of the
battery during heavy charging,causing corrosion or damage.
During recharging, the battery is pro-
ducing hydrogen gas. Therefore, before recharging:
1. Maintenance type batteriesÐRemove the vent plugs.
2. If recharging with the battery installed on the vehicle, be sure to disconnect the ground cable.
3. Be sure the power switch on the re- charger is off when connecting the
charger cables to the battery and
when disconnecting them.
�Always charge the battery in an
unconfined area. Do not charge
the battery in a garage or closed
room where there is not sufficient ventilation.
� Non-maintenance batteries: Only
do a slow charge (5A or less).
Charging at a quicker rate is dan-
gerous. The battery may explode,
causing personal injuries.
Maintenance type batteries: Be sure to remove the vent plugs be-fore recharging. CAUTION
!
NOTICE
Never recharge the battery while the
engine is running. Also, be sure all
accessories are turned off.
Battery recharging precautions
Page 213 of 221

212
Engine compartment (Canada)
6. HORN 15 A: Emergency flashers,
horns
7. DOME 15 A: Car audio system, power
antenna, interior light, clock, ignition
switch light, personal ligths, door cour-
tesy lights
8. TAIL 10 A: Tail lights, license plate
lights
9. PANEL 10 A: Emergency flashers,
heater cotnrol system, air conditioning
cooling system, gauges and meters,
clock, car audio system overdrive indi-
cator light, glovebox light, cigarette
lighter, instrument panel lightsInstrument panel
10. A/C 10 A: Air conditionin cooling sys-
tem
11. HEAD (RH) 10 A: Right-hand head-
light
12. HEAD (LH) 10 A: Left-hand headlight
13. HEAD (HI RH) 10 A: Right-hand
headlight (high beam), hi-beam indi-
cator light
14. HEAD (HI LH) 10 A: Left-hand head-
light (high beam)
15. HEAD (LO RH) 10 A: Right-hand
headlight (low beam)
16. HEAD (LO LH) 10 A: Left-hand head-
light (low beam) 17. DRL 7.5 A:
Daytime running light sys-
tem
18. 4WD 15 A: A.D.D. control system,
four-wheel drive control system, rear
differential lock system
19. GAUGE 10 A: Gauges and meters,
back-up lights, cruise control system,
power antenna, power door lock con- trol system, electronically controlled
automatic transmission system, start-
ing system, charging system, heater control system
20. TURN 10 A: Turn signal lights
21. ECU-IG 15 A: Cruise control system,
anti-lock brake system, shift lock sys-tem
22. WIPER 20 A: Windshield wipers and
washer
23. IGN 7.5 A: Discharge warning light,
SRS airbag system
24. RADIO 7.5 A: Car audio system, pow-
er antenna
25. CIG 15 A: Cigarette lighter, clock,
power rear view mirrors, back-up lights, shift lock system
26. ECU-B 15 A: SRS airbag warning
light, daytime running light system, cruise control syste, anti-lock brake system
Page 214 of 221

213
Fuses (type B)
27. HEATER 40 A:
A.Cº fuse
28.AM1 40 A: All components in STAº,
ECU-Bº, POWERº' RADIOº, CIGº,
GAUGEº, TURNº, ECU-IGº, WIP- ERº and 4WDº fuses
29.AM2 30 A: All components in IGNº
fuse
30. POWER 30 A: Power windows, pow-
er door lock control system
Fuses (type C)
31. ABS 60 A: Anti-lock brake system
32. ALT 80 A: All components in ABSº,
AM1º, STAº, ECU-Bº, POWERº,
RADIOº, CIGº, GAUGEº, TURNº,
ECU-IGº, WIPERº, 4WDº, HEAT-
ERº, A/Cº, TAILº, PANELº, STOPº
and ALT-Sº fuse
Page 219 of 221

218Four-wheel drive models
Normal cab models
With 2 or 3 occupants 500 kg (1100 lb.)
Xtra-cab models With 2 or 3 occupants 500 kg (1100 lb.)
With 5 occupants
314 kg (700 lb.) When the truck is used to carry a slide-in
camper, the total cargo load of the truck
consists of the manufacturer's camper
weight figure the weight of installed addi-
tional camper equipment not included in
the manufacturer's camper weight figure,
the weight of camper cargo, and the
weight of passengers in the camper.
The total cargo load should not exceed
the truck's cargo weight rating and the
camper 's center of gravity should fall with-
in the truck's recommended center of
gravity zone when installed.
CAUTION
Be careful-overloading can cause
dangerous braking and handling
problems, and can damage your ve-hicle and its tires.!
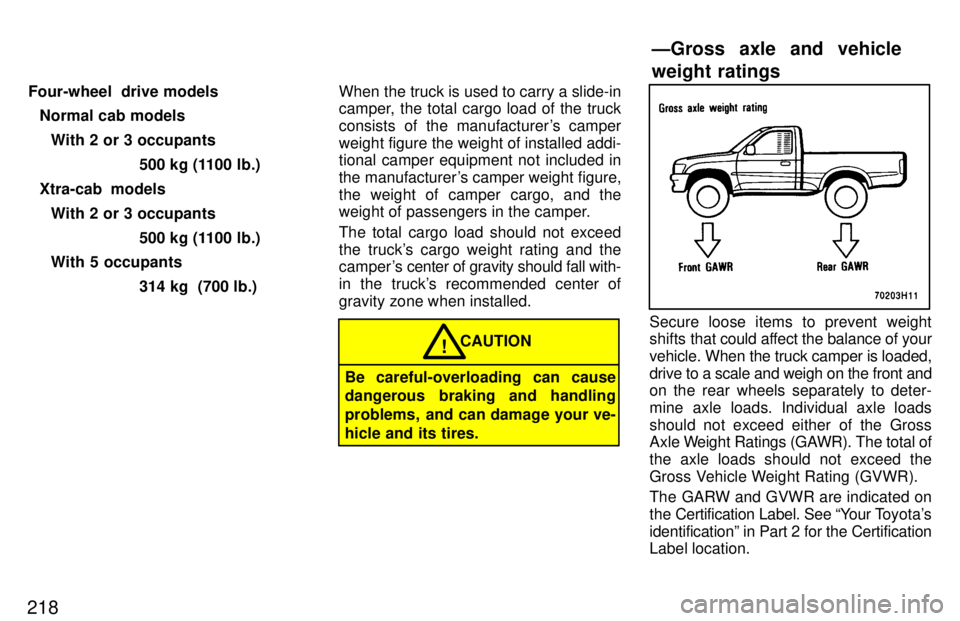
Secure loose items to prevent weight
shifts that could affect the balance of your
vehicle. When the truck camper is loaded, drive to a scale and weigh on the front and
on the rear wheels separately to deter-
mine axle loads. Individual axle loads
should not exceed either of the Gross
Axle Wei ght Ratings (GAWR). The total of
the axle loads should not exceed the
Gross Vehicle Weight Rating (GVWR).
The GARW and GVWR are indicated on
the Certification Label. See Your T oyota's
identificationº in Part 2 for the Certification
Label location. ÐGross axle and vehicle
weight ratings