1997 PONTIAC PONTIAC fuel cap
[x] Cancel search: fuel capPage 96 of 419

FIRST (1): This position gives you even more power,
but lower fuel economy than
SECOND (2). You can use
it on very steep hills, or in deep snow or mud. If the shift
lever
is put in FIRST (1)’ the transaxle won’t shift into
first gear until the vehicle is going slowly enough.
NOTICE:
~~~~~~ ~
If your front wheels can’t rotate, don’t try to
drive. This might happen if you were stuck in
very deep sand or mud or were up against a solid
object. You could damage your transaxle.
Also, if you stop when going uphill, don’t hold
your vehicle there with only the accelerator
pedal. This could overheat and damage the
transaxle. Use
your brakes or shift into PARK (P)
to hold your vehicle in position on a hill.
Shift Lock Release (Console Shift)
If your vehicle’s battery should go dead, there are two override
access slots that will allow you to override
park lock.
The first is located
underneath the steering
column below the lock
cylinder.
To use this slot,
first remove the trim
cap.
Insert a key or screwdriver
into the access slot and
press
the lock cylinder.
You will now be able to remove your key from the
ignition. Be sure
to replace the trim cap after use.
If the car has a column mounted gear shift lever,
you will now also
be able to shift your vehicle out
of PARK (P).
2-22
ProCarManuals.com
Page 97 of 419

For cars with center console mounted gear shift levers,
the second access slot is located on the right hand side
of the console shift panel, next to the shift lever.
Insert a screwdriver into the slot. Pry the cap open using
the screwdriver. Be careful not to damage the cap. Press
down and hold. You will now be able to shift your
vehicle out of PARK (P).
Performance Shifting (If Equipped)
Press the performance shift
button, located on the side
of the console shift knob,
to allow the transaxle
to
shift at higher engine
speeds, increasing
acceleration performance.
If you have a vehicle with the option 3800 Supercharged
engine,
the words “Performance Shift” will glow in the
trip computer when the Performance Shift is in operation.
Downshifts will occur at a lower percentage of
accelerator use while you’re in the performance
shift mode.
Press the button again to return to normal shifting. The
transaxle will then shift at lower engine speeds,
increasing fuel economy.
2-23
ProCarManuals.com
Page 146 of 419

If the Light Is On Steady
You may be able to correct the emission system
malfunction by considering the following:
Did
you recently put fuel into your vehicle?
If
so, reinstall the fuel cap, making sure to fully install
the cap. The diagnostic system can determine if the fuel
cap has been left off or improperly installed.
A loose or
missing fuel cap will allow fuel to evaporate into the
atmosphere. A few driving trips with the cap properly
installed should turn the light off.
Did
you just drive through a deep puddle of water?
If
so, your electrical system may be wet. The condition
will usually be corrected when the electrical system
dries out.
A few driving trips should turn the light off.
Are you low on fuel?
As your engine starts to run out of fuel, your engine may
not run as efficiently as designed since small amounts of
air are sucked into the fuel line causing a misfire. The
system can detect this. Adding fuel should correct this
condition. Make sure to install the fuel cap properly. It
will take a few driving trips to turn the light off. Have you recently changed brands
of fuel?
If
so, be sure to fuel your vehicle with quality fuel (see
“Fuel” in the Index). Poor fuel quality will cause your
engine not
to run as efficiently as designed. You may
notice this as stalling after start-up, stalling when
you put the vehicle into gear, misfiring, hesitation
on acceleration or stumbling
on acceleration. (These
conditions
may go away once the engine is warmed up.)
This will be detected by the system and cause the light
to turn on.
If you experience one or more
of these conditions,
change the fuel brand you use.
It will require at least
one full tank of the proper fuel to turn the light
off.
If none of the above steps have made the light turn off,
have your dealer or qualified service center check the
vehicle. Your dealer has the proper
test equipment and
diagnostic tools to fix any mechanical or electrical
problems that may have developed.
2-72
ProCarManuals.com
Page 151 of 419

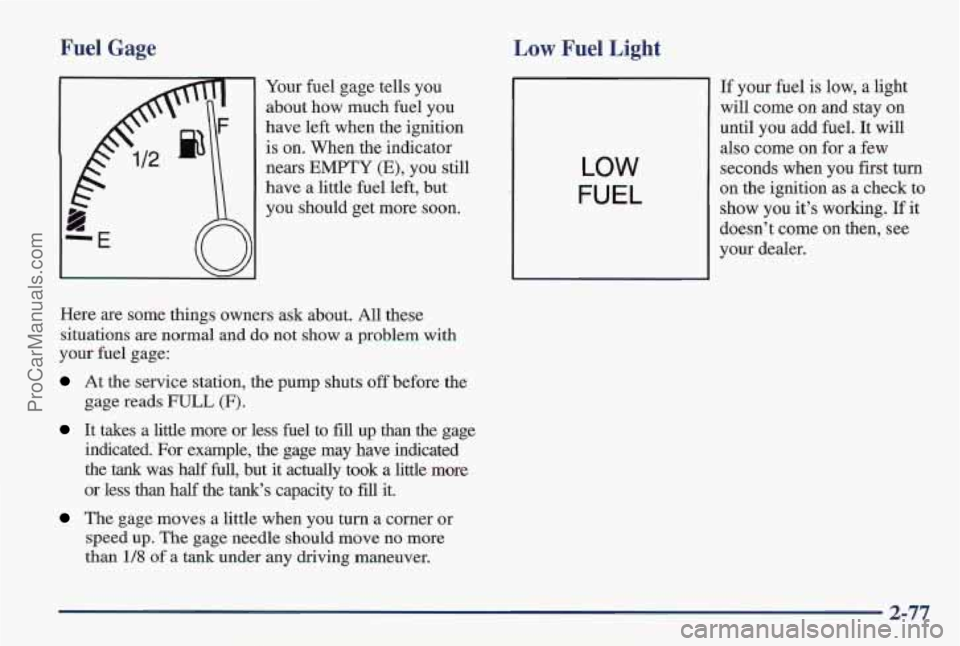
Fuel Gage Low Fuel Light
Your fuel gage tells you
about how much fuel you
have left when the ignition
is on. When the indicator
nears
EMPTY (E), you still
have a little fuel left, but
you should get more soon.
Here are some things owners ask about. All these
situations are normal and do not show a problem with
your fuel gage:
At the service station, the pump shuts off before the
gage reads
FULL (F).
It takes a little more or less fuel to fill up than the gage
indicated. For example, the gage may have indicated
the
tank was half full, but it actually took a little more
or less than half the
tank’s capacity to fill it.
The gage moves a little when you turn a corner or
speed up. The gage needle should move no more
than
1/8 of a tank under any driving maneuver.
LOW
FUEL
If your fuel is low, a light
will come on and stay on
until you add fuel. It will
also come
on for a few
seconds when you first turn
on the ignition as a check to
show you it’s working. If it
doesn’t come on then, see
your dealer.
2-77
ProCarManuals.com
Page 223 of 419

Run your engine only as long as you must. This saves
fuel. When you run the engine, make it
go a little faster
than just idle. That
is, push the accelerator slightly. This
uses less fuel for the heat that you get and it keeps the
battery charged. You will need a well-charged battery
to restart the vehicle, and possibly for signaling later on
with your headlamps. Let the heater run for a while.
Then, shut the engine off and close the window almost
all the way to preserve the heat. Start the engine again
and repeat this only when you feel really uncomfortable
from the cold. But do it as little as possible. Preserve the
fuel as long as
you can. To help keep warm, you can get
out of the vehicle and do some fairly vigorous exercises
every half hour or
so until help comes.
Loading Your Vehicle
/@ OCCUPANTS
VEHICLE CAP. WT.
TIRE-LOADING INFORMATION
FRT. CTR.
RR. TOTAL LBS. KG
~-
MAX. LOADING & GVWR SAME AS VEHICLE
CAPACITY
WEIGHT XXX COLD TIRE
TIRE
SIZE SPEED PRESSURE
RTG PSI/KPa
FRT.
RR.
SPA.
IF TIRES ARE HOT, ADD 4PS1/28KPa
SEE OWNER'S MANUAL FOR ADDITIONAL
INFORMATION
Two labels on your vehicle show how much weight it
may properly
carry. The Tire-Loading Information label
is on the inside of the trunk lid. The label tells you the
proper size, speed rating and recommended inflation
pressures for the tires on your vehicle.
It also gives you
important information about the number of people that
can be in your vehicle and the total weight you can
carry. This weight is called the vehicle capacity weight
and includes the
weight of all occupants, cargo and all
nonfactory-installed options.
ProCarManuals.com
Page 224 of 419

MFD BY GENERAL MOTORS CORP
DATE GVWR GAWR FRT GAWR RR
THIS VEHICLE CONFORMS TO ALL APPLI-
CABLE U.S. FEDERAL MOTOR VEHICLE
SAFETY, BUMPER, AND THEFT PREVENTION
STANDARDS IN EFFECT ON THE DATE OF
MANUFACTURE SHOWN ABOVE.
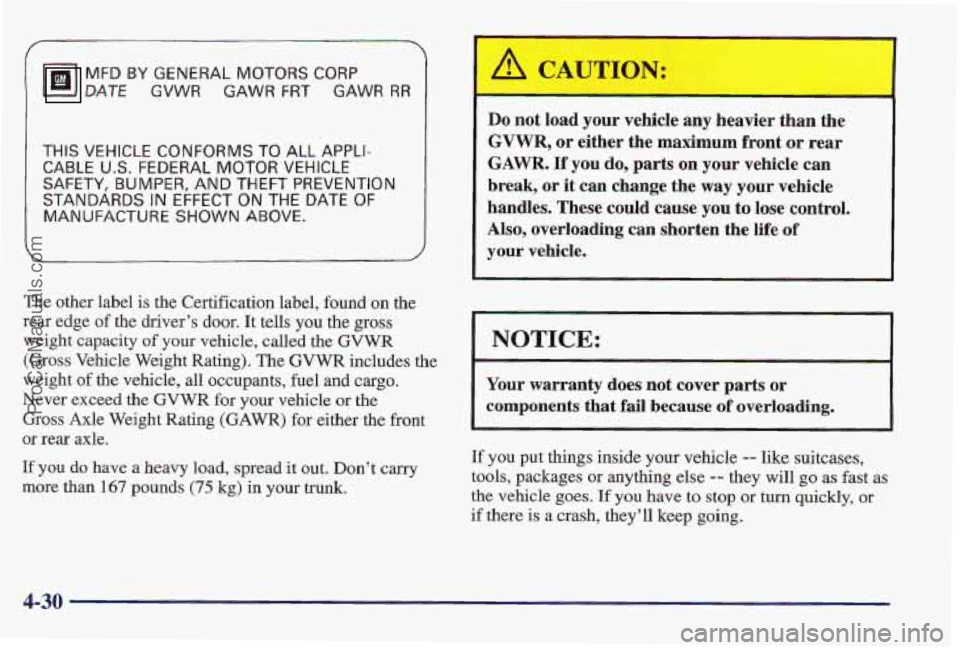
The other label is the Certification label, found on the
rear edge of the driver’s door. It tells you the gross
weight capacity
of your vehicle, called the GVWR
(Gross Vehicle Weight Rating).
The GVWR includes the
weight of the vehicle, all occupants, fuel and cargo.
Never exceed the GVWR for your vehicle or the
Gross Axle Weight Rating
(GAWR) for either the front
or rear axle.
If you do have a heavy load, spread it out. Don’t carry
more than 167 pounds (75 kg) in your trunk.
Do not load your vehicle any heavier than the
GVWR, or either the maximum front or rear
GAWR. If you do, parts on your vehicle can
break, or it can change the way your vehi’cle
handles. These could cause you to lose control.
Also, overloading
can shorten the life of
your vehicle.
NOTICE:
Your warranty does not cover parts or
components that
fail because of overloading.
If you put things inside your vehicle -- like suitcases,
tools, packages or anything else
-= they will go as fast as
the vehicle goes. If you hav’e to stop or turn quickly, or
if there is a crash, they’ll keep going.
4-30
ProCarManuals.com
Page 226 of 419

?‘hat’s me reason for this part. In it are many
Many of these are important
for your safety and that of
your passengers. So please read this section carefully
before you pull a trailer.
NOTICE: time-tested, important trailering tips and safety rules.
Pulling a trailer improperly can damage your
vehicle and result in costly repairs not covered
by
your warranty. To pull a trailer correctly, follow Load-pulling components such as the engine, transaxle,
the advice in this part, and see your Pontiac wheel assemblies and tires are forced to work harder
dealer for important information about towing a against the drag of the added weight. The engine is
trailer with your vehicle. required to sperate at relatively higher speeds and under
greater loads, generating extra heat. What’s more, the
trailer adds considerably to wind resistance, increasing
If You Do Decide To Pull A Trailer
If you do, here are some important points:
Do not tow a trailer if your vehicle is equipped with the pulling requirements.
3800 (L67) supercharged engine.
Your vehicle can tow
a trailer if it is equipped with
proper towing equipment.
To identify what the vehicle
trailering capacity is for your vehicle, you should read
There are many different laws, including speed limit
the information in “Weight of the Trailer” that appears restrictions, having to do with trailering. Make sure
later
in this section. But trailering is different than just your rig will be legal, not only where you live but
driving your vehicle by itself, Trailering means changes also where you’ll be driving.
A good source for this
in handling, durability and fuel economy. Successful, information
can be state or provincial police.
safe trailering takes correct equipment, and it has to be
Consider using a sway control. You can ask a hitch
used Droperly. dealer about
sway controls.
4-32
ProCarManuals.com
Page 271 of 419

Section 6 Service and Appearance Care
Here you will find information about the care of your Pontiac. This section begins with service and fuel information,
and then it shows how to check important fluid and lubricant levels. There
is also technical information about your
vehicle, and a part devoted to its appearance care.
6-2
6-3 6-5
6-5
6-7
6- 14
6-2 1
6-26
6-32
6-33 6-36
6-37
6-37 6-44
6-46
Doing Your Own Service Work
What Kind of Fuel to Use
Using Fuel in Foreign Countries
Where to Put the Fuel and Filling the Tank
Checking
Things Under the Hood
Checking Your Engine Oil
Automatic Transaxle Fluid
Engine Coolant
Where to Fill the Windshield Washer Fluid
Important Brake Information
Information on Your Vehicle’s Battery
Tips on Vehicle Storage
Bulb Replacement Procedures
Windshield Wiper Blade Replacement
How and When to Check Tire Inflation 6-50
6-52
6-55
6-58
6-59
6-61
6-63
6-64
6-65 6-66
6-66
6-72
6-72
6-73
6-73 When
it is Time to Buy New Tires
Wheel Alignment
Cleaning the Inside of Your Vehicle
Care of the Safety Belts and Built-in
Child Restraint
Cleaning the Outside of Your Vehicle
How to Clean Aluminum Wheels
Underbody Maintenance
Recommended Appearance
Care Materials
Your Vehicle Identification Number (VIN)
The Electrical System
Fuses and Circuit Breakers
Replacement Bulb Types for Your Vehicle
Capacities and Specifications
Air Conditioning Specifications
Normal Replacement Parts
ProCarManuals.com