1997 PONTIAC PONTIAC run flat
[x] Cancel search: run flatPage 3 of 419

The 1997 Pontiac Grand Prix Owner’s Manual
1-1
2- 1
3- 1
Seats and Restraint Systems
This section tells you how to use your seats and safety belts\
properly. It also explains the “SRS” system.
Features and Controls
This section explains how to start and operate your Pontiac.
Comfort Controls and Audio Systems
This section tells you how to adjust the ventilation and comfo\
rt controls and how to operate your audio system.
4- 1 Your Driving and the Road
Here you’ll find helpful information and tips about the road\
and how to drive under different conditions.
This section tells what to do
if you have a problem while driving, such as a flat tire or ove\
rheated engine, etc.
5-1 Problems on the Road
6- 1
7-1
Service and Appearance Care
Here the manual tells you how to keep your Pontiac running pr\
operly and looking good.
Maintenance Schedule
This section tells you when to perform vehicle maintenance and \
what fluids and lubricants to use.
8- 1 Customer Assistance Information
This section tells you how to contact Pontiac for assistance and how to get service and owne\
r publications.
It also gives you information on “Reporting Safety Defects” on page
8-10.
Here’s an alphabetical listing of almost every subject in this manual. You can use it to quickly find
something you want to read.
9-1 Index
i
ProCarManuals.com
Page 66 of 419

Securing a Child Restraint in the Right
Front Seat Position
Y
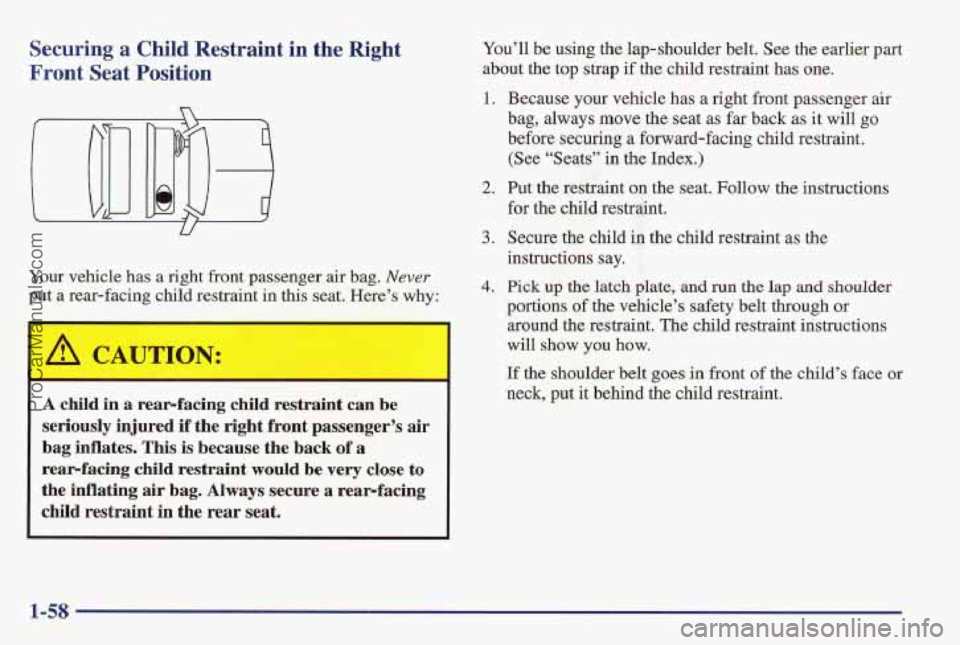
Your vehicle has a right front passenger air bag. Never
put a rear-facing child restraint in this seat. Here’s why:
A child in a rear-facing child restraint can be
seriously injured if the right front passenger’s air
bag inflates. This is because the back
of a
rear-facing child restraint would
be very close to
the inflating air bag. Always secure a rearfacing
child restraint
in the rear seat.
You’ll be using the lap-shoulder belt. See the earlier part
about the top strap if the child restraint has one.
1.. Because your vehicle has a right front passenger air
bag, always move the s’eat as far back as it will go
before securing a forward-facing child restraint.
(See “Seats” in the Index.)
2. Put the restraint on the seat. Follow the instructions
for the child restraint.
3. Secure the child in the child restraint as the
instructions say.
4. Pick up the latch plate, and run the lap and shoulder
portions of the vehicle’s safety belt through or
around the restraint. The child restraint instructions
will
show you how.
If the shoulder belt goes in front of the child’s face or
neck, put it behind the child restraint.
1-58
ProCarManuals.com
Page 132 of 419

Put small loads, like grocery bags, in the net. It can help
keep them
from falling over during sharp turns or quick
starts and stops.
The net isn’t for larger, heavier loads. Store them in the
trunk as
far forward as you can.
You can unhook the net so that it will lie flat when
you’re not using it. You will also need to unhook the net
for taillamp removal.
Ashtrays and Lighter
The center front ashtray is on the instrument panel. To
open it, pull at the bottom of the ashtray until it is fully
open.
To remove the ashtray cup, lift the tabs on the
sides of the ashtray cup and pull out.
Your Grand Prix has one rear ashtray. There
is either one
on the front seat armrest back or one on the back of the
center
console (if you have that option). To open the
ashtray, press the right side and turn it open.
To remove the ashtray for cleaning, press the snuffer as
you lift up the bottom of the ashtray.
NOTICE:
Don’t put papers and other things that burn into
your ashtrays.
If you do, cigarettes or other
smoking materials could set them on fire,
causing damage.
To use the lighter, located inside the center front ashtray,
just push it in all the way and let
go. When it’s ready, it
will pop back by itself.
y. That can make it overheat, damaging the
2-58
ProCarManuals.com
Page 153 of 419

Functions
CHANGE OIL SOON: This light will appear when the
system predicts that the oil’s remaining useful life
is
almost up. The system predicts remaining oil life using
inputs from length of drives, coolant temperature,
engine rpm, and vehicle speed. It alerts you to change
the oil on a schedule consistent with your vehicle’s driving conditions.
To reset your change oil soon system after an oil change,
turn the key to the
ON position, without the engine
running and pump the accelerator
3 times within
5 seconds.
LOW WASHER FLUID: This light will come on when
your ignition is on and the fluid container is low.
CHECK TIRE PRESS: This light alerts you that a tire
is low or flat. See “Check Tire Pressure Light” in
the Index.
TRUNK A JAR: This light alerts you that your trunk is
not fully closed.
DOOR AJAR: If one of your doors is left ajar, a light
will appear next to that door on the vehicle outline.
TRAC SWITCH: If your vehicle has the Trac System
(this is not available with the
3800 Supercharged
engine), you will have
a disable switch on the far right
side of your Driver Information Center.
Your Trac
System is automatically activated when you turn the
ignition on. This switch will activate/deactivate the Trac
System.
If you need to disable the system, such as when
you
are stuck and are rocking your vehicle back and
forth, push this switch. See “Stuck: In Sand, Mud, Ice or
Snow” in the Index.
LOW TRAC: This light will come on when your Trac
System is limiting wheel spin or when your anti-lock
brake system
is active. See “Trac System” or “Low
Traction Light” in the Index.
2-79
ProCarManuals.com
Page 223 of 419

Run your engine only as long as you must. This saves
fuel. When you run the engine, make it
go a little faster
than just idle. That
is, push the accelerator slightly. This
uses less fuel for the heat that you get and it keeps the
battery charged. You will need a well-charged battery
to restart the vehicle, and possibly for signaling later on
with your headlamps. Let the heater run for a while.
Then, shut the engine off and close the window almost
all the way to preserve the heat. Start the engine again
and repeat this only when you feel really uncomfortable
from the cold. But do it as little as possible. Preserve the
fuel as long as
you can. To help keep warm, you can get
out of the vehicle and do some fairly vigorous exercises
every half hour or
so until help comes.
Loading Your Vehicle
/@ OCCUPANTS
VEHICLE CAP. WT.
TIRE-LOADING INFORMATION
FRT. CTR.
RR. TOTAL LBS. KG
~-
MAX. LOADING & GVWR SAME AS VEHICLE
CAPACITY
WEIGHT XXX COLD TIRE
TIRE
SIZE SPEED PRESSURE
RTG PSI/KPa
FRT.
RR.
SPA.
IF TIRES ARE HOT, ADD 4PS1/28KPa
SEE OWNER'S MANUAL FOR ADDITIONAL
INFORMATION
Two labels on your vehicle show how much weight it
may properly
carry. The Tire-Loading Information label
is on the inside of the trunk lid. The label tells you the
proper size, speed rating and recommended inflation
pressures for the tires on your vehicle.
It also gives you
important information about the number of people that
can be in your vehicle and the total weight you can
carry. This weight is called the vehicle capacity weight
and includes the
weight of all occupants, cargo and all
nonfactory-installed options.
ProCarManuals.com
Page 228 of 419

B
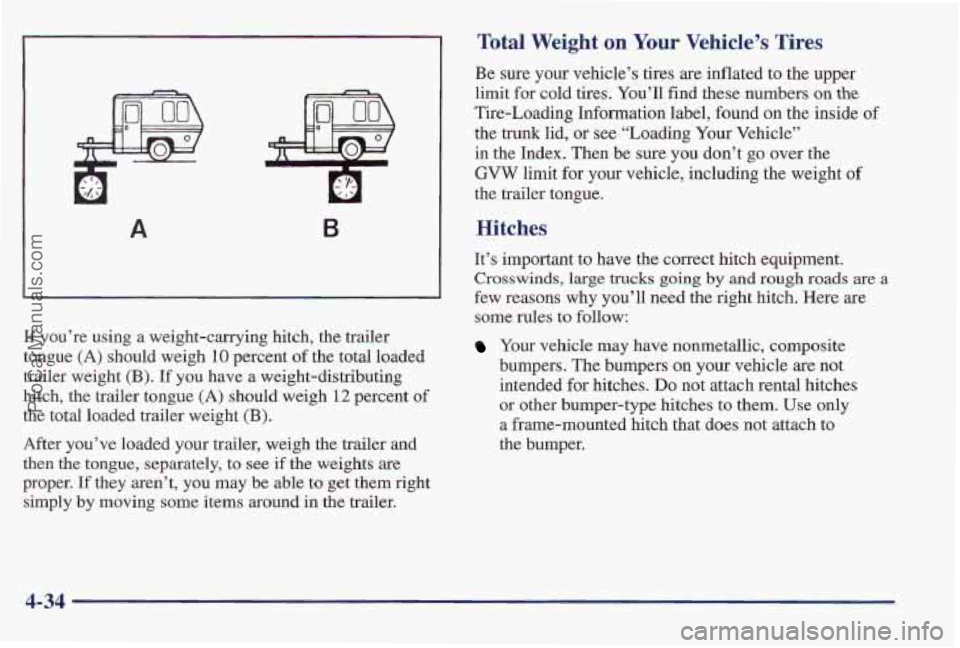
If you’re using a weight-carrying hitch, the trailer
tongue
(A) should weigh 10 percent of the total loaded
trailer weight
(€3). If you have a weight-distributing
hitch, the trailer tongue (A) should weigh
12 percent of
the total loaded trailer weight (E).
After you’ve loaded your trailer, weigh the trailer and
then the tongue, separately, to see if the weights are
proper. If they aren’t, you may be able
to get them right
simply by moving some items around in the trailer.
Total Weight on Your Vehicle’s Tires
Be sure your vehicle’s tires are inflated to the upper
limit for cold tires. You’ll find these numbers
on the
Tire-Loading Information label, found on the inside of
the
trunk lid, or see “Loading Your Vehicle”
in the Index. Then be sure you don’t go over the
‘GVW limit for your vehicle, including the weight of
the trailer tongue,
Hitches
It’s important to have the correct hitch equipment.
‘Crosswinds, large trucks going by and rough roads are a
few reasons why you’ll need the right hitch. Here are
some rules
to follow:
Your vehicle may have nonmetallic, composite
bumpers. The bumpers on your vehicle are not
intended
for bitches. DO not attach rental hitches
or other bumper-type hitches to them. Use only
a frame-mounted hitch that does not attach to
the bumper.
.,, .
4-34
ProCarManuals.com
Page 265 of 419

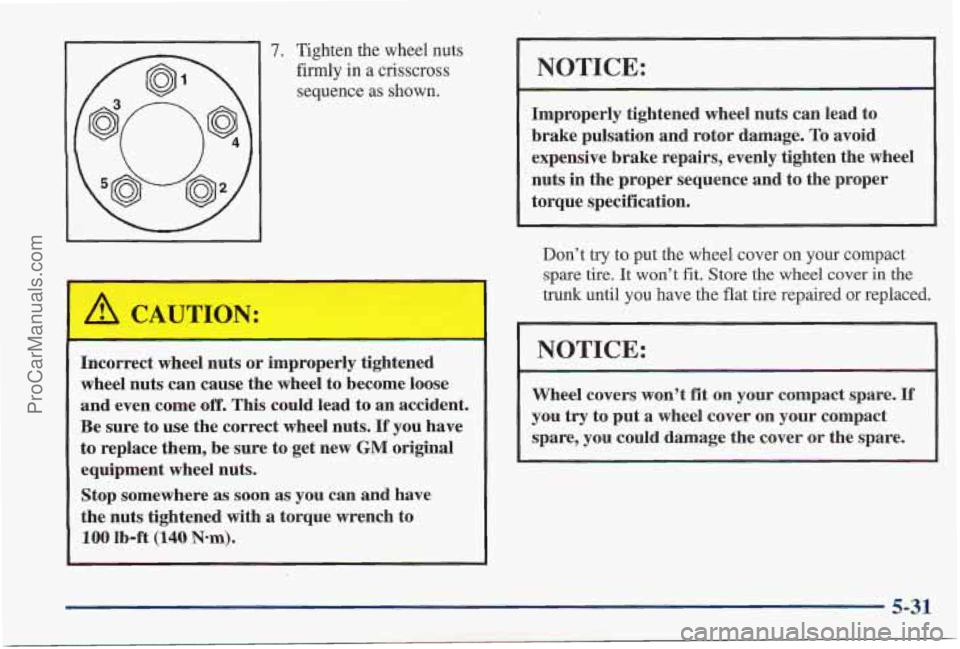
7. Tighten the wheel nuts
firmly in
a crisscross
sequence as shown.
Incorrect wheel nuts or improperly tightened
wheel nuts can cause the wheel to become loose
and even come off. This could lead
to an accident.
Be sure to use the correct wheel nuts.
If you have
to replace them, be sure to get new GM original
equipment wheel nuts.
Stop somewhere as soon as you can and have
the nuts tightened with
a torque wrench to
100 Ib-ft (140 Nom). ’
NOTICE:
Improperly tightened wheel nuts can lead to
brake pulsation and rotor damage.
To avoid
expensive brake repairs, evenly tighten the wheeI
nuts in the proper sequence and to the proper
torque specification.
Don’t try to put the wheel cover on your compact
spare tire.
It won’t fit. Store the wheel cover in the
trunk until you have th’e flat tire repaired or replaced.
NOTICE:
Wheel covers won’t fit on your compact spare. If
you try to put a wheel cover on your compact
spare, you could damage the cover or the spare.
5-31
ProCarManuals.com
Page 266 of 419

Storing the Flat Tire and Tools
Storing a jack, a tire or other equipment in the
passenger compartment
of the vehicle could
cause
injury. In a sudden stop or collision, loose
equipment could strike someone. Store
all these
in the proper place.
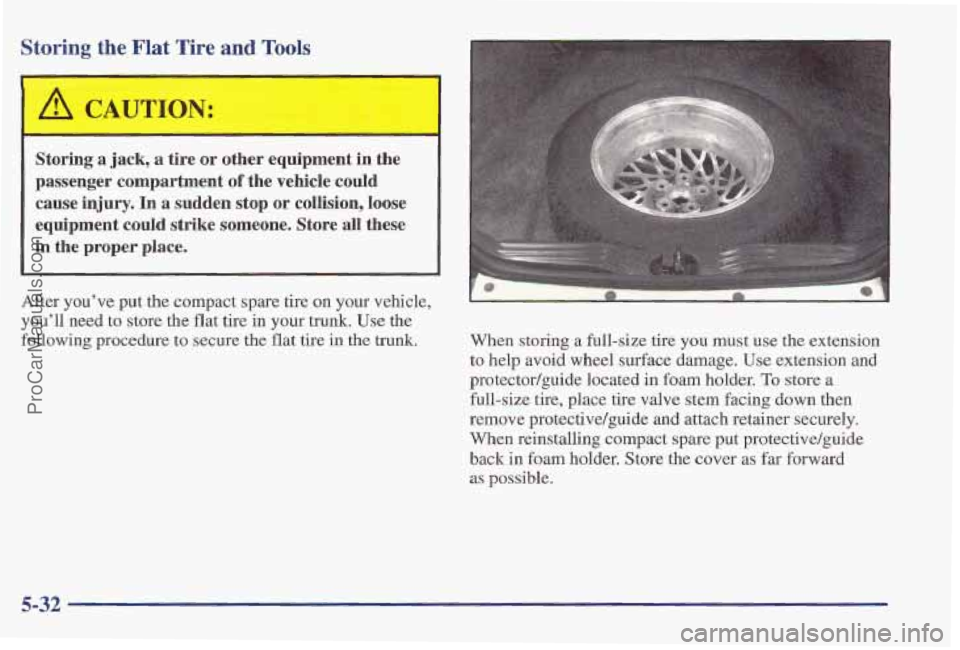
After you’ve put the compact spare tire on your vehicle,
you’ll need to store the flat tire in your trunk. Use the
following procedure
to secure the flat tire in the trunk. When storing a full-size tire you must use the extension
to help avoid wheel surface damage. Use extension and
protector/guide located in foam holder.
To store a
full-size tire, place tire valve stem facing down then
remove protectivelguide and attach retainer securely.
When reinstalling compact spare put protective/guide
back in foam holder. Store the cover
as far forward
as possible.
5-32
ProCarManuals.com