1997 PONTIAC PONTIAC flat tire
[x] Cancel search: flat tirePage 3 of 419

The 1997 Pontiac Grand Prix Owner’s Manual
1-1
2- 1
3- 1
Seats and Restraint Systems
This section tells you how to use your seats and safety belts\
properly. It also explains the “SRS” system.
Features and Controls
This section explains how to start and operate your Pontiac.
Comfort Controls and Audio Systems
This section tells you how to adjust the ventilation and comfo\
rt controls and how to operate your audio system.
4- 1 Your Driving and the Road
Here you’ll find helpful information and tips about the road\
and how to drive under different conditions.
This section tells what to do
if you have a problem while driving, such as a flat tire or ove\
rheated engine, etc.
5-1 Problems on the Road
6- 1
7-1
Service and Appearance Care
Here the manual tells you how to keep your Pontiac running pr\
operly and looking good.
Maintenance Schedule
This section tells you when to perform vehicle maintenance and \
what fluids and lubricants to use.
8- 1 Customer Assistance Information
This section tells you how to contact Pontiac for assistance and how to get service and owne\
r publications.
It also gives you information on “Reporting Safety Defects” on page
8-10.
Here’s an alphabetical listing of almost every subject in this manual. You can use it to quickly find
something you want to read.
9-1 Index
i
ProCarManuals.com
Page 144 of 419

Check Tire Pressure Light
CHECK
TIRE
PRESS
With the check tire pressure
system, after you’ve driven
10 to 20 miles (1 5 to 30 km)
the CHECK TIRE PRESS
light will come on if the
pressure in one tire becomes
at least
10 psi (69 kPa)
higher or lower than the
other three tires.
When
the CHECK TIRE PRESS light comes on, you
should stop
as soon as you can and check all your tires
for damage.
(If a tire is flat, see “If a Tire Goes Flat’’
in the Index.) Also
check the tire pressure in all four
tires
as soon as you can. See ‘‘Inflation - Tire Pressure
in the Index.
The light will stay on until you turn off the ignition or
press the
CALIBRATE TIP9 PRESS button. See
“Check Tire Pressure Syst?
.” in the Index.
If the anti-lock
brake system warning light comes on
with the CHECK
TIRE PRESS light, the check tire
pressure system isn’t working. See your Pontiac dealer
for service.
(Also, see “Anti-Lock Brake System
Warning Light in the Index.)
Mal€unctisn Indicator Lamp
(Service Engine Soon Light)
SERVICE
ENIGINIE SOON
Your Pontiac is equipped
with a computer which
monitors operation
of the
fuel, ignition and emission
control systems.
This system is called
OBD I1 (On-Board
Diagnostics-Second Generation) and is intended to assure
that emissions are at acceptable levels for the life of the
vehicle, helping to produce a cleaner environment. (In
Canada,
OBD I1 is replaced by Enhanced Diagnostics.)
The SERVICE ENGINE SOON light comes on to
indicate that there is
a problem and service is required.
Malfunctions often will be indicated
by the system before
any problem
is apparent. This may prevent more serious
damage to
your vehicle. This system is also designed to
assist your service technician in correctly diagnosing
any malfunction.
2-70
ProCarManuals.com
Page 153 of 419

Functions
CHANGE OIL SOON: This light will appear when the
system predicts that the oil’s remaining useful life
is
almost up. The system predicts remaining oil life using
inputs from length of drives, coolant temperature,
engine rpm, and vehicle speed. It alerts you to change
the oil on a schedule consistent with your vehicle’s driving conditions.
To reset your change oil soon system after an oil change,
turn the key to the
ON position, without the engine
running and pump the accelerator
3 times within
5 seconds.
LOW WASHER FLUID: This light will come on when
your ignition is on and the fluid container is low.
CHECK TIRE PRESS: This light alerts you that a tire
is low or flat. See “Check Tire Pressure Light” in
the Index.
TRUNK A JAR: This light alerts you that your trunk is
not fully closed.
DOOR AJAR: If one of your doors is left ajar, a light
will appear next to that door on the vehicle outline.
TRAC SWITCH: If your vehicle has the Trac System
(this is not available with the
3800 Supercharged
engine), you will have
a disable switch on the far right
side of your Driver Information Center.
Your Trac
System is automatically activated when you turn the
ignition on. This switch will activate/deactivate the Trac
System.
If you need to disable the system, such as when
you
are stuck and are rocking your vehicle back and
forth, push this switch. See “Stuck: In Sand, Mud, Ice or
Snow” in the Index.
LOW TRAC: This light will come on when your Trac
System is limiting wheel spin or when your anti-lock
brake system
is active. See “Trac System” or “Low
Traction Light” in the Index.
2-79
ProCarManuals.com
Page 156 of 419

Control Buttons
The trip computer has three buttons that control
its functions.
ENG/MET: Press this button to change the display from
English to metric units
or metric t’o English.
RESET Press this button for two seconds to reset the
mode displayed.
MODE: Press this button to change the mode
being displayed.
Functions
FUEL USED: Shows the total amount of fuel used
since you last reset this mode. The amount can be
displayed in gallons or liters.
AVG ECON: Shows your average fuel economy since
you last reset this mode.
OIL LIFE: Shows a percentage of the oil’s remaining
useful life. The system predicts remaining
oil life using
inputs from length of drives, coolant temperature,
engine rpm and vehicle speed. Each time
you get an oil
change,
be sure to reset this function so that it will give
you an accurate percentage.
To reset the ail life indicator after the oil has been
changed, press the mode button until the light appears
next to
O’IL LIFE. Press and hold the reset button for
three seconds. The oil life percentage should change
to
100%.
RANGE: Shows how much farther you can travel with
the fuel you have before refueling.
CHECK TIRE PREISS: This light alerts you that a tire
is low or flat, See “Check Tire Pressure Light” in
the Index.
LOW WASHER FLUID: This light will come on when
your ignition is on and the fluid container
is low.
DOOR A JAR: If one of your ‘doors is left ajar, a light
will appear next to that
door on the vehicle outline.
PERFORMANCE SHIFT This light comes on when
you press the performance shift button (located on the
console shift)
to indicate that your vehicle is in
performance shifting mode, See “Performance Shifting”
in the Index.
BOOST GAGE: If you have the supercharged engine,
this gage will show the amount of boost your engine
is receiving.
ProCarManuals.com
Page 216 of 419

Just before you leave the lane, glance quickly over your
shoulder to make sure there isn’t another vehicle in your
“blind” spot.
Once you
are moving on the freeway, make certain you
allow
a reasonable following distance. Expect to move
slightly slower at night.
When you want to leave the freeway, move to the proper
lane well in advance. If you miss your exit, do not,
under any circumstances, stop and back up. Drive
on to
the next exit.
The exit ramp can be curved, sometimes quite sharply.
The exit speed is usually posted.
Reduce your speed according
to your speedometer, not
to your sense
of motion. After driving for any distance
at higher speeds, you may t’end to think you are
going
slower than you actually are.
Before Leaving on a Long Trip
Make sure you’re ready. Try to be well rested. If you
must start when you’re not
fresh -- such as after a day’s
work
-- don’t plan to make too many miles that first part
of the journey. Wear Comfortable clothing and shoes you
can
easily drive in.
Is your vehicle ready for a long trip? If you keep it
serviced and maintained, it’s ready to
go. If it needs
service, have it done before starting out. Of course,
you’ll find experienced and able service experts
in
Pontiac dealerships all across North America. They’ll be
ready and willing to help
if you need it.
Here are some things you can check before a
trip:
0
0
e
0
e
e
Windshield Washer Fluid: Is the reservoir full? Are
all windows clean inside and outside?
Wiper Blades: Are they in good shape?
Fuel, Engine Oil, Other Fluids: Have you checked
all levels?
Lamps: Are they all working? Are the lenses clean?
Tires: They are vitally important to a safe,
trouble-free
trip. Is the tread good enough for
long-distance driving? Are the tires all inflated to the
recommended pressure?
Weather Furecasts: What’s the weather outlook
along your route? Should you delay your trip a short
time to avoid
a major storm system?
Maps: Do you have up-to-date maps?
4-22
ProCarManuals.com
Page 217 of 419

Highway Hypnosis
Is there actually such a condition as “highway hypnosis”?
Or is it just plain falling asleep at the wheel? Call it
highway hypnosis, lack of awareness, or whatever.
There is something about an easy stretch of road with
the same scenery, along with the hum of the tires on the
road, the drone of the engine, and the rush of the wind
against the vehicle that can make you sleepy. Don’t let it
happen to you!
If it does, your vehicle can leave the
road in
less than a second, and you could crash and
be injured.
What can you
do about highway hypnosis? First, be
aware that it can happen.
Then
here are some tips:
Make sure your vehicle is well ventilated, with a
comfortably cool interior.
Keep your eyes moving. Scan the road ahead and to
the sides. Check your rearview
mirrors and your
instruments frequently.
If you get sleepy, pull off the road into a rest, service
or parking area and take a nap, get some exercise, or
both. For safety, treat drowsiness on the highway as
an emergency.
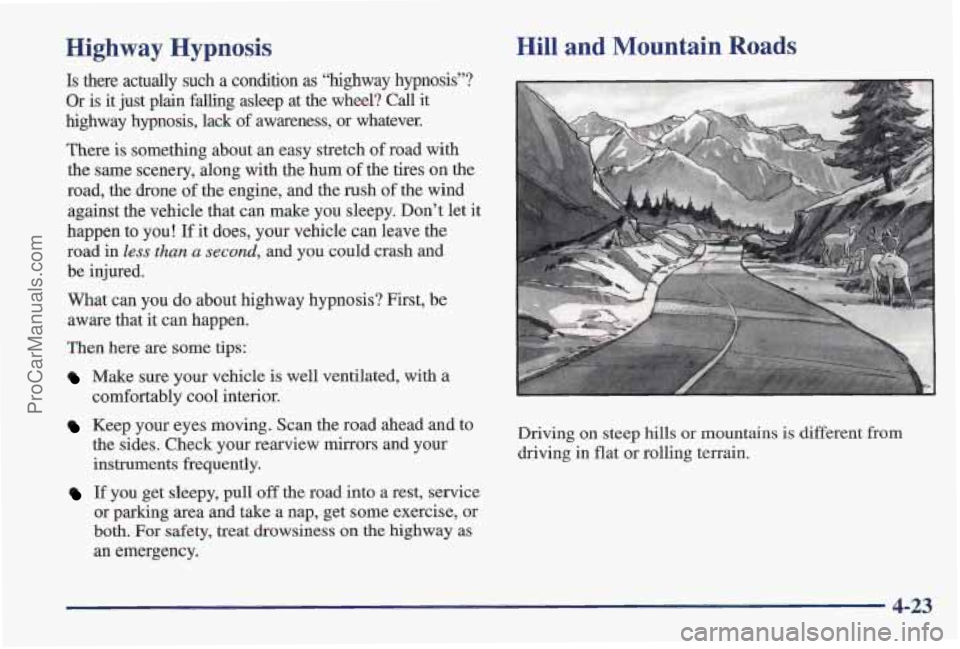
Hill and Mountain Roads
Driving on steep hills or mountains is different from
driving in flat or rolling terrain.
4-23
ProCarManuals.com
Page 223 of 419

Run your engine only as long as you must. This saves
fuel. When you run the engine, make it
go a little faster
than just idle. That
is, push the accelerator slightly. This
uses less fuel for the heat that you get and it keeps the
battery charged. You will need a well-charged battery
to restart the vehicle, and possibly for signaling later on
with your headlamps. Let the heater run for a while.
Then, shut the engine off and close the window almost
all the way to preserve the heat. Start the engine again
and repeat this only when you feel really uncomfortable
from the cold. But do it as little as possible. Preserve the
fuel as long as
you can. To help keep warm, you can get
out of the vehicle and do some fairly vigorous exercises
every half hour or
so until help comes.
Loading Your Vehicle
/@ OCCUPANTS
VEHICLE CAP. WT.
TIRE-LOADING INFORMATION
FRT. CTR.
RR. TOTAL LBS. KG
~-
MAX. LOADING & GVWR SAME AS VEHICLE
CAPACITY
WEIGHT XXX COLD TIRE
TIRE
SIZE SPEED PRESSURE
RTG PSI/KPa
FRT.
RR.
SPA.
IF TIRES ARE HOT, ADD 4PS1/28KPa
SEE OWNER'S MANUAL FOR ADDITIONAL
INFORMATION
Two labels on your vehicle show how much weight it
may properly
carry. The Tire-Loading Information label
is on the inside of the trunk lid. The label tells you the
proper size, speed rating and recommended inflation
pressures for the tires on your vehicle.
It also gives you
important information about the number of people that
can be in your vehicle and the total weight you can
carry. This weight is called the vehicle capacity weight
and includes the
weight of all occupants, cargo and all
nonfactory-installed options.
ProCarManuals.com
Page 228 of 419

B
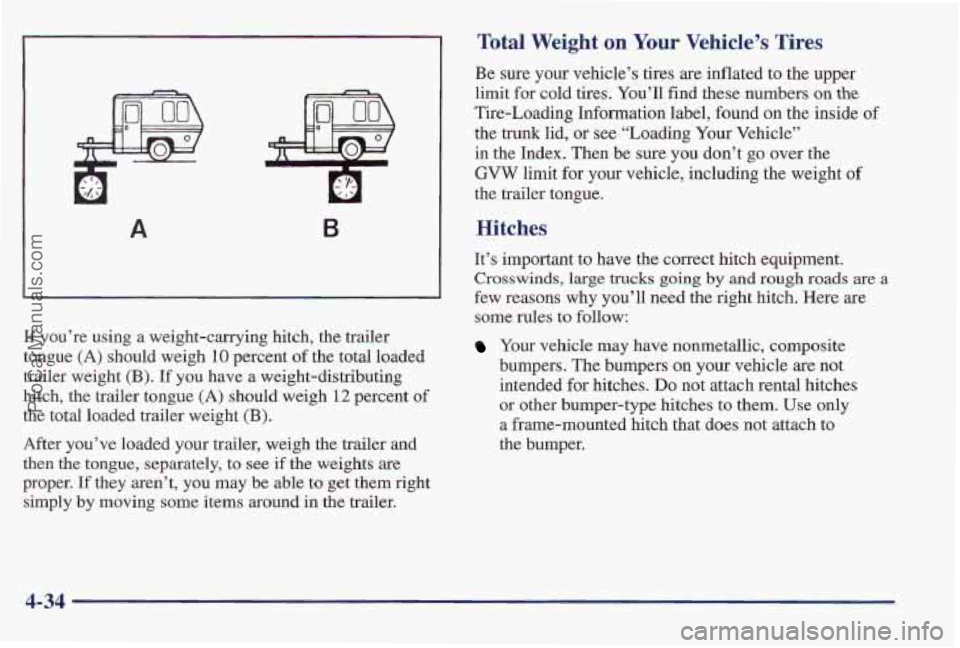
If you’re using a weight-carrying hitch, the trailer
tongue
(A) should weigh 10 percent of the total loaded
trailer weight
(€3). If you have a weight-distributing
hitch, the trailer tongue (A) should weigh
12 percent of
the total loaded trailer weight (E).
After you’ve loaded your trailer, weigh the trailer and
then the tongue, separately, to see if the weights are
proper. If they aren’t, you may be able
to get them right
simply by moving some items around in the trailer.
Total Weight on Your Vehicle’s Tires
Be sure your vehicle’s tires are inflated to the upper
limit for cold tires. You’ll find these numbers
on the
Tire-Loading Information label, found on the inside of
the
trunk lid, or see “Loading Your Vehicle”
in the Index. Then be sure you don’t go over the
‘GVW limit for your vehicle, including the weight of
the trailer tongue,
Hitches
It’s important to have the correct hitch equipment.
‘Crosswinds, large trucks going by and rough roads are a
few reasons why you’ll need the right hitch. Here are
some rules
to follow:
Your vehicle may have nonmetallic, composite
bumpers. The bumpers on your vehicle are not
intended
for bitches. DO not attach rental hitches
or other bumper-type hitches to them. Use only
a frame-mounted hitch that does not attach to
the bumper.
.,, .
4-34
ProCarManuals.com