1997 PONTIAC PONTIAC ECO mode
[x] Cancel search: ECO modePage 163 of 419

0
t' FLOOR: This setting sends most of the air
through the ducts near the floor. The remaining airflow
comes out of the defroster and side window vents.
4' DEFOG: This setting allows half of the air to go
to the
floor ducts and half to the defroster and side
window vents.
w.
DEFROST This setting directs most of the
air through the defroster vent. Some of the air goes
to the floor ducts and the side window vent. The air
conditioning compressor will run automatically in
this setting unless the outside temperature is below
38°F (3.3"C).
Air Conditioning COI - --- -1r Button
Press the A/C button to operate the air conditioning
compressor. The indicator light above the button will
glow when the button is pressed. ,You don't have to press
the button
to run the compressor in MAX or DEFROST
because
it will already be running in these modes.
Air Conditioning
On very hot days, open the windows long enough to let
hot, inside air escape. This reduces the time for the
vehicle
to cool down.
For quick cool-down on very hot days, use
MAX with
the temperature knob all the way in the blue area.
If this
setting is used
for long periods of time, the air in your
vehicle may become too dry.
For normal cooling on hot days, use UPPER with the
temperature knob in the blue area and the
A/C button
pushed in. The system will bring in outside
air and cool it.
On cool, but sunny days, the sun may warm your upper
body, but your lower body may not be warm enough.
You can use BI-LEVEL with the temperature knob in
the middle and the A/C button pushed in. The system
will bring in outside air and direct it to your upper body,
while sending slightly warmed air to your lower body.
You may notice this temperature difference more at
some times than others.
3-3
ProCarManuals.com
Page 165 of 419

Automatic Control Dual Zone Button Light
For the most efficient operation, you should set the
system temperature and press AUTO. The system will
select the best fan speed and airflow settings to keep you
comfortable. The air conditioning compressor will run if
the outside temperature is above
38 OF (3.3 O C). You may
notice a delay of three to four minutes before the fan
comes on.
Driver's Temperature Knob
The left knob sets the temperature for the entire system
when the light on DUAL button isn't lit.
If the light is
lit, the knob sets the temperature for the driver. Turn the
knob toward red (clockwise) to raise the desired cabin
temperature. Turn it toward blue (counterclockwise) to
lower the temperature. The display will show your
selection for a few seconds, then the outside temperature
will show or be displayed.
Passenger's Temperature Knob
The right knob sets the desired cabin temperature for the
passenger and will automatically force the system into a
dual zone operation, lighting the dual zone button light.
Turn the right knob toward red (clockwise) to raise the
temperature. Turn it toward blue (counterclockwise) to
lower the temperature. The
dual zone button light indicates whether the system
is in single zone
or dual zone operation. When there is
no desire for dual zone operation, push the lit dual zone
button to return to single zone operation. The dual zone
button light will
go off.
The system will operate to achieve your comfort set
point as quick as possible. If you set the temperature for
60°F (16°C)
or 90°F (32"C), the fan will go to it's
highest speed, unless you manually select a lower speed.
The system will maintain full cold or full hot operation
at these settings.
Cold Weather Example: (When you start the vehicle in
cold weather, below freezing or after being parked
overnight). If your Driver Set Temperature is 73°F
(23 "C) and you are in Full Automatic mode, the system
will automatically move the temperature doors to full
hot. The blower will start out at a low speed and the
blower speed will increase
as the engine warms up. The
air will be delivered to the floor. As the interior of the
vehicle warms up to your desired comfort point, the
blower will decrease and
the temperature door will
move to a cooler position to maintain your desired
comfort. As the cabin warms
up or the sun load
increases, the system could switch to air delivered
to the windshield and the floor. (Defog mode)
3-5
ProCarManuals.com
Page 169 of 419

Ventilation Tips
Keep the hood and front air inlet free of ice, snow or
any other obstruction, such as leaves. The heater and
defroster will work far better, reducing the chance of
fogging the inside of your windows.
When you enter a vehicle in cold weather, adjust the
mode knob to
FLOOR and the fan to the highest
speed for a few seconds before driving off. This
helps clear the intake ducts of snow and moisture
and reduces the chance
of fogging the inside of
your windows.
Keep the air path under the front seats clear of
objects. This helps air to circulate throughout
your vehicle.
Rear Window Defogger
Your comfort control system has a button to operate
your rear window defogger. The electronic comfort control system has a button marked
REAR. The
system with automatic temperature control has a button
marked
R.DEF.
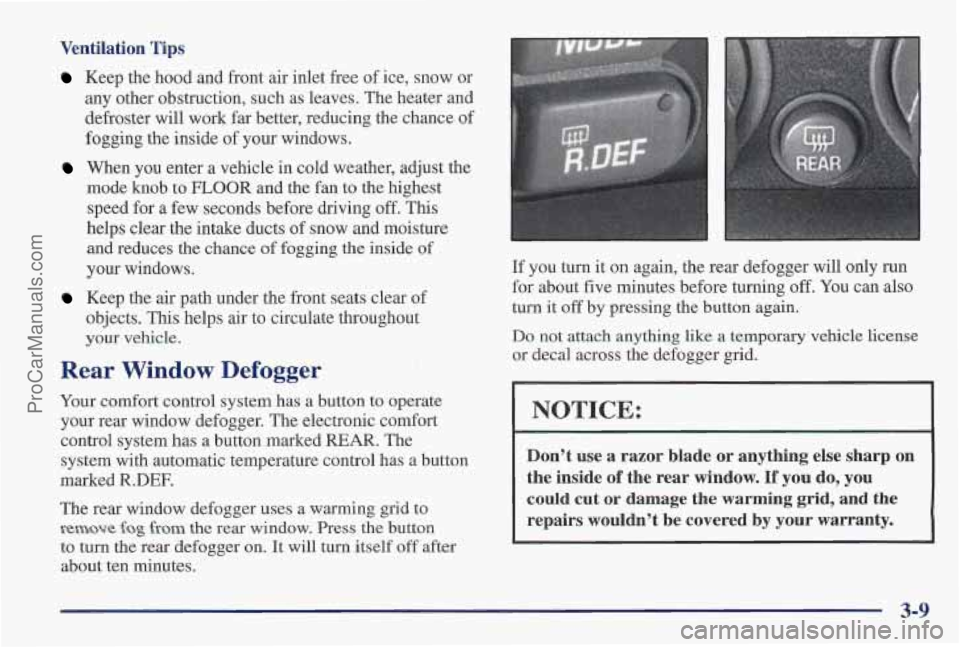
The rear window defogger uses a warming grid to
K~~OW fog from the rear window. Press the button
to turn the rear defogger on. It will turn itself off after
about ten minutes.
If you turn it on again, the rear defogger will only run
for about five minutes before turning off.
You can also
turn it off by pressing the button again.
Do not attach anything like a temporary vehicle license
or decal across the defogger grid.
NOTICE:
Don’t use a razor blade or anything else sharp on
the inside
of the rear window. If you do, you
could cut or damage the warming grid, and the
repairs wouldn’t be covered by
your warranty.
3-9
ProCarManuals.com
Page 170 of 419

Audio Systems
Your Delco@ audio system has been designed to operate
easily and give years of listening pleasure.
You will get
the most enjoyment out
of it if you acquaint yourself
with it first, Find out what your Delco system can do
and how
to operate all its controls, to be sure you’re
getting the most
out of the advanced engineering that
went into it.
Setting the Clock for AM-FM Stereo
Press SET. Within five seconds, press and hold the
SEEK clown arrow until the correct hour appears on the
display. Press and hold the
SEEK up arrow until the
correct minute appears on the display.
Setting the Clock for All Systems Except
AM-FM Stereo
Press and hold HR until the correct hour appears. Press
and hold
MIN until the correct minute appears. There
will be a two-second delay before the clock goes into
time-set mode, and the colon on the display will blink
while in this mode.
AM-FM Stereo
Playing the Radio
VOLUME:
Push this knob to turn the system on and
off. To increase volume, turn the knob clockwise. Turn
it counterclockwise to decrease volume.
RCLPROG: Press this button to recall the station
being played or to display the clock.
3-10
ProCarManuals.com
Page 186 of 419

PROG (3): Press this button to select the next disc in
the magazine. If a
CD cannot be played, its number
will be skipped when selecting discs while using the
PROG button.
RANDOM (4): Press this button to enter the random
play mode.
RDM will appear on the display. While in
this mode, the tracks
on the discs will be played in
random order. If you press PROG or
SEEK while in the
random mode, discs and tracks will be scanned
randomly. Press this button again to turn
off the random
feature and return to normal operation.
REV (5): Press and hold this button to quickly reverse
within a track. As the
CD reverses, elapsed time will be
displayed to help you find the correct passage.
FWD (6): Press and hold this button to quickly advance
within
a track. As the CD advances, elapsed time will be
displayed to help you find the correct passage.
RECALL: Press this button to see what track is
currently playing. Press
RECALL again within five
seconds
to see how long the track has been playing. EL
TM will appear on the display when in elapsed time
mode., When
a new track starts to play, the track number
will also appear. Press
RECALL a third time and the
time of day will be displayed.
SEEK: Press the SEEK down arrow while playing a CD
to go back to the start of the current track if more than
eight seconds have played. If you press it
again, the
changes will go to previous tracks. Press the SEEK up
arrow and
it will go to the next higher track on the disc.
TAPEPLAY. Press this button to play a CD if you
have
a magazine loaded in the changer and the radio is
playing. To return to the radio while a CD is playing,
press AM-FM. You can also press this button to switch
between a cassette tape and CD, if both are loaded.
Theft-Deterrent Feature
THEFTLOCK" is designed to discourage theft of your
radio. It works by using
a secret code to disable all radio
functions whenever battery power is removed.
The THEFTLOCK feature for the radio may be used or
ignored.
If ignored, the system plays normally and the
radio
is not protected by the feature. If THEFTLOCK is
activated, your radio will not operate if stolen.
When
THEFTLOCK is activated, the radio will display
LOC to indicate a locked condition anytime battery
power is removed.
If your battery loses power for any
reason, you must unlock the radio with the secret code
before it will operate.
3-26
ProCarManuals.com
Page 306 of 419

Some driving conditions or climates may cause a brake
squeal when the brakes are first applied or lightly
applied.
This does not mean something is wrong with
your brakes.
Properly torqued wheel
nuts are necessary to help
prevent brake pulsation, When tires are rotated, inspect
brake pads for wear, and evenly torque wheel nuts in
the proper sequence
to GM specifications.
Brake linings should always be replaced as complete
axle sets.
See “Brake System Inspection” in section
7 of this
manual under
Part C “Perodic Maintenance Inspections,”
Brake Pedal Travel
See your dealer if the brake pedal does not return to
normal height,
or if there is a rapid increase in pedal
travel. This could be a sign of brake trouble.
Brake Adjustment
Every time you apply the brakes, with or without the
vehicle moving, your
brakes adjust for wear.
Replacing Brake System Parts
The braking system on a modern vehicle is complex. Its
many parts have to be of top quality and work well
together if the vehicle is to have really good braking.
Vehicles we design and test have top-quality
GM brake
parts in them,
as your Pontiac does when it is new.
When you replace parts of your braking system
-- for
example, when your brake linings wlear down and you
have to have new ones put in
-- be sure you get new
approved
GM replacement parts. If you don’t, your
brakes may no longer work properly. For example,
if
someone puts in brake linings that are wrong for your
vehicle, the balance between your front and rear brakes
can change -- for the worse. The braking performance
you’ve come to expect can change in many other ways
if
someone puts in the wrong replacement brake parts.
Battery
Every new Pontiac has a Delco Freedom@ battery. You
never have
to add water to ‘one of these. When it’s time
for a new battery, we recommend a Delco Freedom
battery. Get one that has
the replacement number shown
on the original battery’s label.
ProCarManuals.com
Page 399 of 419

We will provide the following services for
3 year/36,000 miles (60 000 km), at no expense to you:
Fuel delivery
Keys locked in vehicle
0 Tow to nearest dealership for warranty service
Change a flat tire
Jump starts
Courtesy Transportation -- See Pontiac Courtesy
Transportation section for details
We have quick, easy access
to telephone numbers of the
following additional services depending on vour needs:
Hotels
Glass replacement
Rental vehicle or taxis
Police, fire department or hospitals
In many instances, mechanical failures are covered
under Pontiac’s comprehensive warranty. However,
when other services are utilized, our advisors will
explain any payment obligations you might incur. For
prompt and efficient assistance when calling, please
provide the following information to give the advisor:
Location of vehicle
Telephone number of your location
Vehicle model, year and color
0 Mileage of vehicle
0 Vehicle Identification Number (VIN)
Vehicle license plate number
Pontiac reserves the right to limit services or
reimbursement to an owner or driver when in Pontiac’s
judgement the claims become excessive in frequency
or
type of occurrence.
While we hope that you never have
the occasion to use
our service, it is added security while traveling for you
and your family. Remember, we’re only a phone call
away. Pontiac Roadside Assistance
-- 1 -800-ROADSIDD
or 1-800-762-3743.
8-7
ProCarManuals.com
Page 412 of 419

Lights Lubrication Service. Body ........................ 7-40 Air Bag Readiness ....................... 1-23. 2-65 Lumbar Seat .................................... 1-4
Anti-Lock Brake System Warning
............ 2-67. 4-7
Brake System Warning ......................... 2-66
Charging System
............................. 2-66 Maintenance. Normal Replacement Parts ........... 6-73
Check Tire Pressure ........ 2-70 Maintenance Record 7-46
Engine Coolant Temperature
.................... 2-74 Maintenance Schedule ............................ 7-1 Interior ..................................... 2-40 Introtduction .................................. 7-2
Low Coolant Warning ......................... 2-75 Long TripMighway Definition ................... 7-6
LowFuel ................................... 2-77 Long TripMighway Intervals ..................... 7-6
Low Traction
................................ 2-69 Periodic Maintenance Inspections ................ 7-43
Low Washer Fluid ............................ 2-76
Recommended Fluids and Lubricants ............. 7-44
Oil Warning ................................. 2-73 Scheduled Maintenance Services .................. 7-3
Safety Belt Reminder ...................... 1-9. 2-64 Short TriplCity Definition ....................... 7-5
Service Engine Soon
.......................... 2-70 Short Trip/City Intervals .........................
Trac System Warning .......................... 2-68 Your Vehicle and the Environment ................ 7-2
Trunk
Ajar Warning ........................... 2-76 Maintenance. Underbody ......................... 6-63
Loading Your Vehicle
........................... 4-29 Maintenance When Trailer Towing ................. 4-38
Automatic Door .......................... 2-6. 2-46 Manual Front Seat ............................... 1-2
Door ........................................ 2-4 Mirrors ....................................... 2-53
Ignition Transaxle Check ....................... 7-42 Convex Outside .............................. 2-54
Key Lock Cylinder Service
..................... 7-40 Electrochromic Daymight Rearview .............. 2-53
Locks and Lighting Choices
...................... 2-44 Visor Vanity .................................. 2-59
Low Coolant Warning Light ...................... 2-75 ......................................... 6-4
LOW Fuel Light ................................ 2-77 Mode Buttons. Automatic and Auxiliary Temp Control .. 3-6 LOW Oil Level Light ............................ 2-74 Mode Knob. climate Control System ................ 3-2
LOW Traction Light ............................. 2-69 Mountain Roads ................................ 4-23 Low Washer muid Light ......................... 2-76 Multifunc$iQn Lever ............................. 2-32
............ ............................
LowOilLevel ............................... 2-74 Owner Checks and Services ..................... 7-39
7-5
......................................... ...................... Locks 2-4 Malfunction Indicator Lap 2-70
Cylinders 7-40 Methanol 6-4 ................................... ......................................
PowerDoor .................................. 2-5 Inside DayNight Rearview ..................... 2-53
Pawar Outside
2-54
Trunk ...................................... 2-12 ...............................
Lubricants and Fluids ............................ 7-44
9-6
ProCarManuals.com