1997 OLDSMOBILE BRAVADA fuel pressure
[x] Cancel search: fuel pressurePage 7 of 358

Vehicle Symbols
These are some of the symbols you may find on your vehicle.
For exumple,
thesc bymbols
aIe used on an
original battery:
POSSIBLE A
CAUTION
INJURY
PROTECT EYES BY
SHIELDING
CAUSTIC
ACID COULD
BATTERY
CAUSE
BURNS
AVOID
SPARKS
OR
FLAMES
SPARK
OR ,111,
COULD FLAME
EXPLODE BATTERY DOOR
LOCK
UNLOCK
FASTEN
&
BELTS SEAT
WINDOW
f j
POWER '* __ I
SIGNALS 6 @
TURN
RUNNING
* 0 DAYTIME . .
LAMPS *'*
FOG LAMPS # 0
WINDSHIELD
WIPER
WINDSHIELD DEFROSTER
WINDOW
DEFOGGER
VENTILATING
**
These sylnbols
are used on
warning and
indicator lights:
COOLANT -
TEMP -
CHARGING I-1
BATTERY SYSTEM
BRAKE
(a)
COOLANT a
ENGINE OIL
PRESSURE
Wb
ANTI-LOCK (@)
BRAKES
Here are some
other synbols
you may see:
FUSE
P
LIGHTER
HORN
)tr
SPEAKER
b
FUEL I&
V
ProCarManuals.com
Page 113 of 358

Have you recently changed brands of fuel‘?
If so, be sure to fuel your vehicle with quality fuel (see
“Fuel” in the Index). Poor fuel quality will cause your
engine not
to run as efficiently as designed. You may
notice this as stalling after start-up, stalling when you
put the vehicle into gear, misfiring, hesitation
on
acceleration or stumbling on acceleration. (These
conditions may go away once the engine is warmed up.)
This will
be detected by the system and cause the light
to turn on.
If you experience one or more of these conditions,
change the fuel brand you use.
It will require at least one
full tank of the proper fuel to turn the light off.
If none of the above steps have made the light turn off,
have your retailer or qualified service center check the
vehicle. Your retailer has
the proper test equipment and
diagnostic tools to fix any mechanical
or electrical
problems that may have developed.
Engine Oil Pressure Gage
OIL 0-
The oil pressure gage shows
the engine oil pressure
in
psi (pounds per square inch)
when the engine is running.
Oil pressure may vary with engine speed, outside
temperature and
oil viscosity, but readings above the
low pressure zone indicate the normal operating range.
2-59
ProCarManuals.com
Page 174 of 358

Loading Your Vehicle
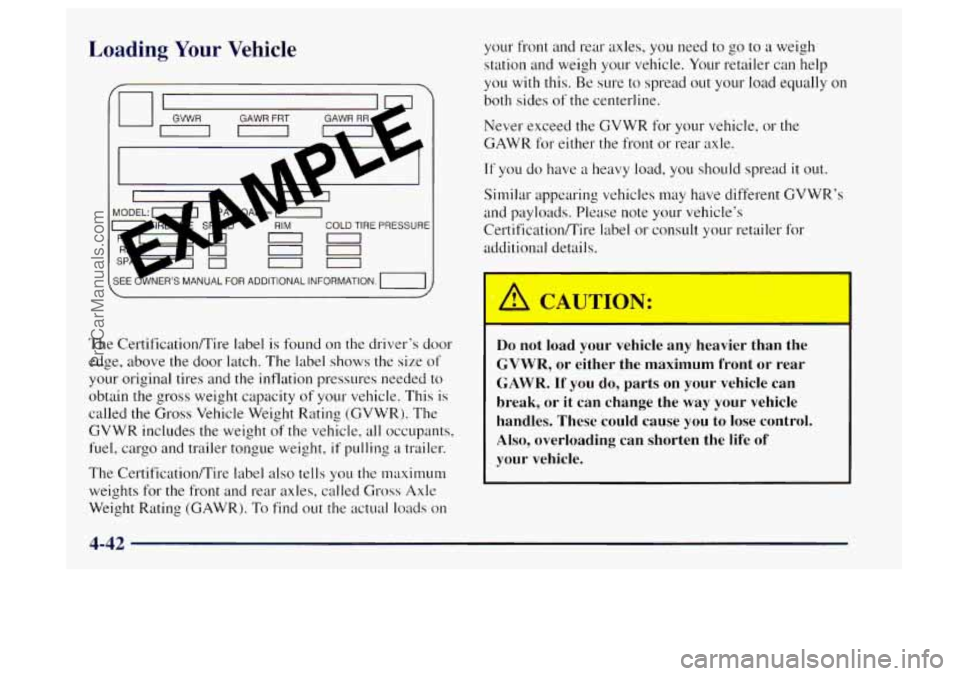
The Certification/Tire label is found on the driver’s door
edge, above the door latch. The label shows the size of
your original tires and the inflation pressures needed to
obtain the gross weight capacity
of your vehicle. This is
called the
Gross Vehicle Weight Rating (GVWR). The
GVWR includes the weight
of the vehicle, all occupants,
fuel, cargo and trailer tongue weight,
if pulling a trailer.
The Certification/Tire label also tells you the maximum
weights
for the front and rear axles, called Gross Axle
Weight Rating (GAWR).
To find out the actual loads on your
front and rear axles, you need to
go to a weigh
station and weigh your vehicle.
Your retailer can help
you
with this. Be sure to spread out your load equally on
both sides
of the centerline.
Never exceed the GVWR for your vehicle,
or the
GAWR for either the front
or rear axle.
If you do have a heavy load, you should spread it out.
Similar appearing vehicles may have different GVWR’s
and payloads. Please note
your vehicle’s
Certificationflire label or consult your retailer
for
additional details.
Do not load your vehicle any heavier than the
GVWR, or either the maximum front or rear
GAWR. If you do, parts on your vehicle can
break, or it can change the
way your vehicle
handles. These could cause you to lose control.
Also, overloading can shorten the life of
your vehicle.
4-42
ProCarManuals.com
Page 229 of 358

*--
Before closing the hood, be sure all the filler caps are on Checking Engine Oil
properly. Then lift the hood to relieve pressure on the
hood prop.
Remove the hood prop from the slot
in the hood and keeping the tip down, and check the level.
return the prop to its retainer. Pull
out the dipstick and clean it with a paper towel or
’ , . . cloth, then push it back in all the way. Remove it again,
--
Then just pull the hood down firmly to close. It will
latch when dropped from
10 to12 inches (25 to 30 cm)
without pressing on the hood.
Engine Oil
It’s a good idea to check your engine oil every time you
get fuel.
In order to get an accurate reading, the oil must
be warm and the vehicle must be
on level ground.
The oil dipstick is a
yellow ring.
Turn off the engine and give
the
oil a few minutes to
drain back into the oil pan.
If you don’t, the oil dipstick
might not show the
actual level.
6-9
ProCarManuals.com
Page 257 of 358

Inflation -- Tire Pressure
The Certificationmire label, which is on the driver’s
door edge, above the door latch, shows the correct
inflation pressures for your tires when they’re cold.
“Cold” means your vehicle has been sitting for at least
three hours or driven no more than
1 mile (1.6 km).
NOTICE:
Don’t let anyone tell you that underinflation or
overinflation is all right. It’s not.
If your tires
don’t have enough
air (underinflation), you can
get the following:
Too much flexing
Too much heat
Tire overloading
Bad wear
Bad handling
0 Bad fuel economy.
NOTICE: (Continued)
I I
NOTICE: (Continued)
i If your tires have too much air (overinflation),
you can get the following:
Unusual wear
Bad handling
Rough ride
Needless damage from road hazards.
When to Check
Check your tires once
a month or more. Also, check the
tire pressure
of the spare tire.
If you have a compact spare tire, it should be at 60 psi
(420 kPa).
How
to Check
Use a
good quality pocket-type gage to check tire
pressure.
You can’t tell if your tires are properly inflated
simply by looking
at them. Radial tires may look
properly inflated even when they‘re underinflated.
Be sure
to put the valve caps back on the valve stems.
They help prevent leaks by keeping out dirt and moisture.
6-37
ProCarManuals.com
Page 280 of 358

Capacities and Specifications
Engine Description ............ “VORTEC” 4300
Type
.................................... V6
VINCode ................................. W
Horsepower
................... 190 at 4,400 rpm
Thermostat Specification
........... 195 “F (9 1 “C)
Spark Plug
Gap .......... 0.045 inches (0.1 I4 cm)
Firing Order
...................... 1-6-5-4-3-2
Wheels and Tires
Wheel Nut Torque ............ 95 lb-ft (130 N-m)
Tire Pressure ...................... Look at the
Certificationnire label. See
“Loading Your Vehicle” in the Index.
Normal Maintenance Replacement Parts
Replacement part numbers listed in this section are
based
on the latest information available at the time of
printing, and are subject to change.
If a part listed in this
manual is not the same as the part used in your vehicle
when
it was built, or if you have any questions, please
contact your retailer.
Oil Filter.
.............................. PFS2
Air Cleaner Filter ...................... A1163C
PCV Valve
.......................... CV746C
Automatic Transmission Filter Kit
...... 24200796
Spark Plugs
.......................... ,41-932
Fuel Filter
............................. GF48 1
Windshield Wiper Blade . . Trico (20 inched50.8 cm)
Backglass Wiper Blade
... Trico (14 inched35.6 cm)
6-60
ProCarManuals.com
Page 321 of 358

Part B: Owner Checks and Services
Listed below are owner checks and services which
should be performed at
the intervals specified to help
ensure the safety, dependability and emission control
performance of your vehicle.
Be sure any necessary repairs are completed at once.
Whenever any fluids or lubricants are added
to your
vehicle, make sure they are the proper ones, as shown in
Part D.
At Each Fuel Fill
Engine Oil Level Check
Check the engine oil level and add the proper oil if
necessary. See “Engine Oil” in the Index for
further details.
Engine Coolant Level Chnnk
Check the engine coolant level and add the proper
coolant mix
if necessary. See “Engine Coolant” in the
Index for further details.
Windshield Washer Fluid Level Check
Check the windshield washer fluid level in the windshield
washer tank and add the proper fluid
if necessary. See
“Windshield Washer Fluid”
in the Index for further details.
At Least Once a Month
Tire Inflation Check
Make sure tires are inflated to the correct pressures.
See “Tires”
in the Index for further details.
Cassette Deck Service
Clean cassette deck. Cleaning should be done every
50 hours of tape play. See “Audio Systems” in the Index
for further details.
ProCarManuals.com
Page 346 of 358

Electrical Equipment. Adding .................... 6-54
Electrical System
............................... 6-54
Engine
........................................ 6-8
Coolant Heater
............................... 2- 14
Coolant Level Check
.......................... 7-39
Coolant Temperature Gage
..................... 2-56
Exhaust
..................................... 2-22
Identification
................................ 6-53
OilLevelCheck
.............................. 7-39
Overheating
................................. 5-12
Running While Parked
......................... 2-23
Specifications
................................ 6-60
Starting
..................................... 2-13
Engineoil
..................................... 6-9
Additives
................................... 6-12
Kind to Use
................................. 6-10
Pressure Gage
................................ 2-59
Used
....................................... 6-13
Whentochange
.............................. 6-12
Exhaust. Engine
................................ 2-22
Express-Down Window
.......................... 2-24
Exterior Metal Parts. Protecting
.................... 6-49
Fabric cleaning
............................... 6-45
FillingYourTank
................................ 6-5
Filter.
Air ..................................... 6-13
Finish Care
.................................... 6-49 Finish
Damage
.................................
Flat Tire. Changing ............................. 5-21
Fluids and Lubricants
....................... 6-61. 7-45
Fog Lamp Switch
............................... 2-33
Foreign Countries. Fuel
........................... 6-4
Front Axle
....................................... 6-18
Reading Lamp Bulb Replacement
................ 6-33
Towing
..................................... 5-10
Turn Signal Lamp Bulb Replacement
............. 6-31
Fuel
.......................................... 6-3
Filling Your Tank
.............................. 6-5
Foreign Countries
.............................. 6-4
Gage
....................................... 2-61
Fuses and Circuit Breakers
....................... 6-55
Flashers.
Hazard Wdrning
......................... 5-2
Storage Area
................................. 2-39
Gages
Engine Coolant Temperature .................... 2-56
Engine Oil Pressure
........................... 2-59
Fuel
....................................... 2-61
Garage Door Opener
............................ 2-44
GasCap
....................................... 6-5
Gear Positions
................................. 2-15
GAWR ....................................... 4-42
ProCarManuals.com