Page 74 of 247

do not stack anything in the cargo
area higher than the seatbacks.
cIt is extremely dangerous to ride in a
cargo area inside of a vehicle. In a
collision, people riding in these ar-
eas are more likely to be seriously
injured or killed.
cDo not allow people to ride in any
area of your vehicle that is not
equipped with seats and seat belts.
cBe sure everyone in your vehicle is
in a seat and using a seat belt
properly.
cBe sure to replace and reposition
floor mats as discussed in ``Floor
mat positioning'' in this section.
cThe three-passenger sliding bench
seat is not intended to be removed
from the vehicle by consumers.
However, if it must be removed, have
a qualified person remove it. That
person should refer to the instruc-
tions in the Service Manual. When
seat is reinstalled, the attaching
bolts must be tightened to the appro-
priate torque specifications. Failureto follow these instructions could
increase the chance and/or severity
of injury in an accident.
Cleaning the seat tracks
The seat tracks for the three-passenger
sliding bench seat should be cleaned peri-
odically with a high-powered vacuum
cleaner. If the seat tracks become dirty it
may reduce the ability to slide the seat. A
wet cleansing agent may be used if neces-
sary, but the seat tracks must be thoroughly
dried.
Use a cloth wrapped around a screwdriver
(or similar object) to clean the seat tracks.
Do not use your fingers to clean debris from
the tracks.
Do not apply any type of lubricant to the
seat tracks.
CAUTION
Never insert fingers into the seat track
rails. The rails may be sharp and could
cause injury.
2-41
ZX
Page 163 of 247

cNever jack up the vehicle more than
necessary.
cNever use blocks on or under the
jack.
cDo not start or run engine while
vehicle is on the jack as it may cause
the vehicle to move.
cDo not allow passengers to stay in
the vehicle while it is on the jack.
cNever run the engine with the wheels
off of the ground. It may cause the
vehicle to move.
Installing wheel
The T-type spare tire is designed for
emergency use. See specific instruc-
tions under the heading ``Wheels and
tires'' in the ``Do-it-yourself operations''
section.
1. Clean any mud or dirt from the surface
between the wheel and hub.
2. Carefully put the wheel on and tighten
the lug nuts finger tight.
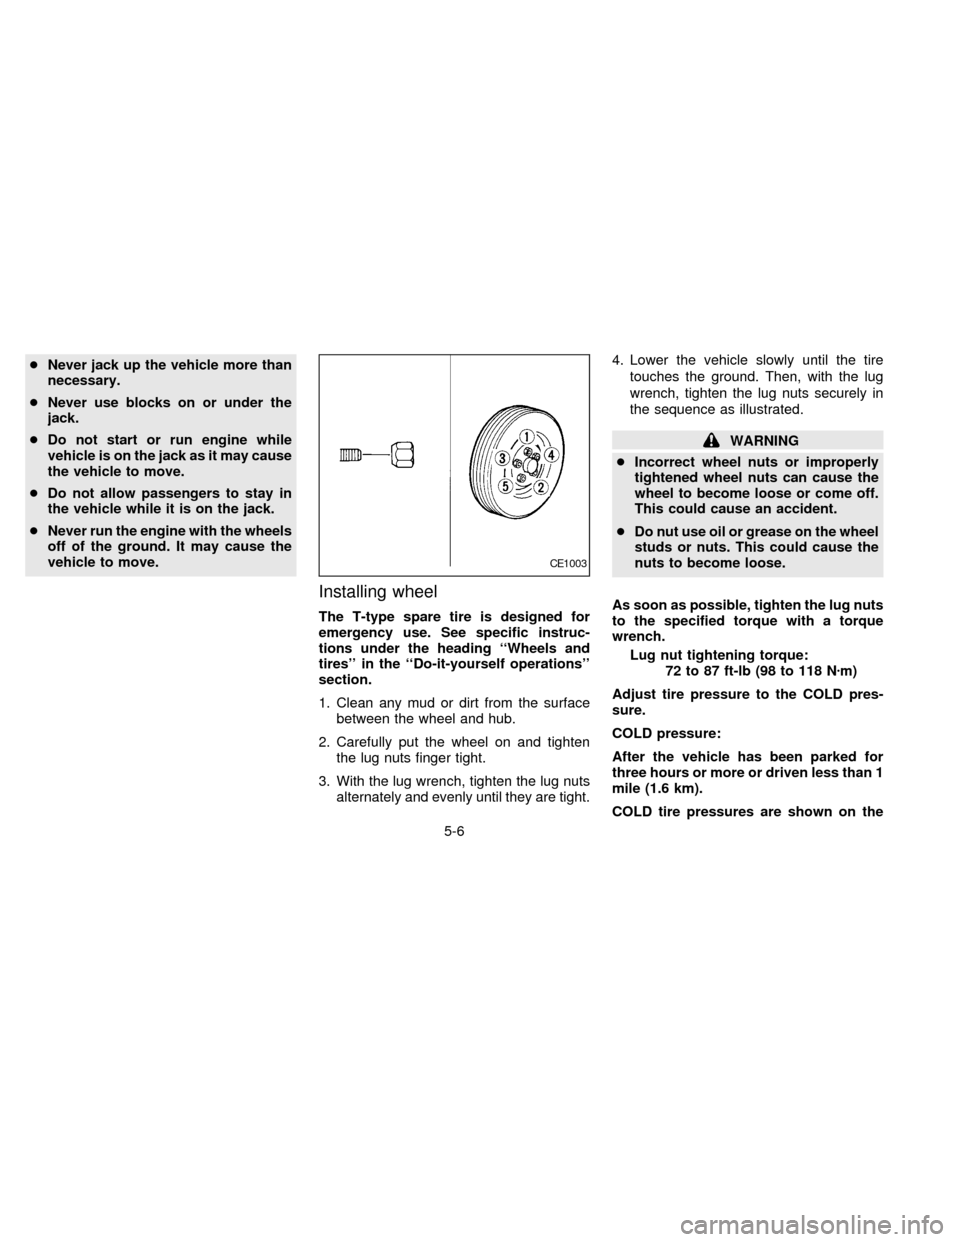
3. With the lug wrench, tighten the lug nuts
alternately and evenly until they are tight.4. Lower the vehicle slowly until the tire
touches the ground. Then, with the lug
wrench, tighten the lug nuts securely in
the sequence as illustrated.
WARNING
cIncorrect wheel nuts or improperly
tightened wheel nuts can cause the
wheel to become loose or come off.
This could cause an accident.
cDo nut use oil or grease on the wheel
studs or nuts. This could cause the
nuts to become loose.
As soon as possible, tighten the lug nuts
to the specified torque with a torque
wrench.
Lug nut tightening torque:
72 to 87 ft-lb (98 to 118 Nzm)
Adjust tire pressure to the COLD pres-
sure.
COLD pressure:
After the vehicle has been parked for
three hours or more or driven less than 1
mile (1.6 km).
COLD tire pressures are shown on the
CE1003
5-6
ZX
Page 184 of 247

Drain plug tightening torque:
22 to 29 ft-lb
(29 to 39 Nzm)
Do not use excessive force.
7. Refill the engine with a recommended oil
and install the cap securely. See the
``Technical and consumer information''
section for refill capacity.
8. Start the engine. Check for leakage
around the drain plug. Correct as re-
quired.
9. Turn the engine off and wait several
minutes. Check the oil level with the
dipstick. Add engine oil if necessary.
CHANGING ENGINE OIL FILTER
1. Park the vehicle on a level surface and
apply the parking brake.
2. Turn the engine off.
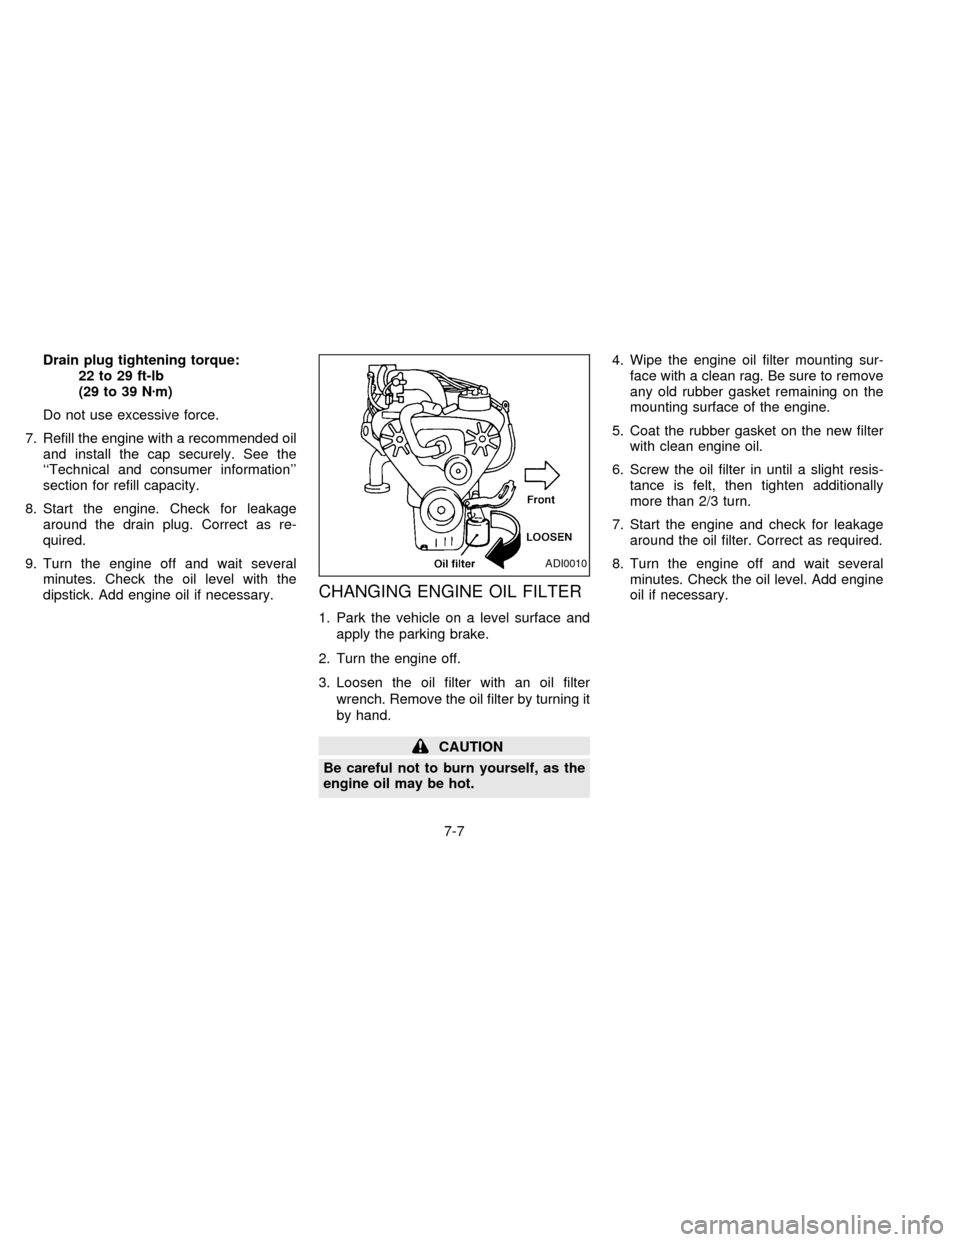
3. Loosen the oil filter with an oil filter
wrench. Remove the oil filter by turning it
by hand.
CAUTION
Be careful not to burn yourself, as the
engine oil may be hot.4. Wipe the engine oil filter mounting sur-
face with a clean rag. Be sure to remove
any old rubber gasket remaining on the
mounting surface of the engine.
5. Coat the rubber gasket on the new filter
with clean engine oil.
6. Screw the oil filter in until a slight resis-
tance is felt, then tighten additionally
more than 2/3 turn.
7. Start the engine and check for leakage
around the oil filter. Correct as required.
8. Turn the engine off and wait several
minutes. Check the oil level. Add engine
oil if necessary.
ADI0010
7-7
ZX
Page 190 of 247

1. Disconnect the spark plug cables from
the spark plugs.
When disconnecting, always hold the boots,
not the cables.
2. Remove the spark plugs with a spark
plug socket. The plug socket has a rub-
ber seal that holds the spark plug so it
does not fall when it is pulled out. Make
sure each spark plug is snugly fitted into
the plug socket.
3. Check the gap on each new spark plug
with a feeler gauge. (The spark plug gap
is shown in the ``Technical and consumerinformation'' section.) Adjust it as re-
quired.
4. Fit the new plugs, one at a time, into the
spark plug socket and install them. Turn
each plug several full turns by hand, then
tighten with a spark plug socket to the
correct torque. Do not overtighten.
Spark plug tightening torque:
14 to 22 ft-lb (20 to 29 Nzm)
5. Holding the boot, re-connect each high
tension cable to its proper spark plug by
pushing it on until you feel a snap.
The filter should not be cleaned and reused.
Replace it according to the maintenance
intervals shown in the ``Maintenance sched-
ule'' section. When replacing the filter, un-
clip the four clamps and remove the filter.
Wipe the inside of the air cleaner housing
and the cover with a damp cloth when
replacing filter.
DI1017MADI0579
AIR CLEANER HOUSING
FILTER
7-13
ZX