1997 NISSAN QUEST coolant temperature
[x] Cancel search: coolant temperaturePage 8 of 247

1Instruments and controls
Meters and gauges ................................................1-3
Speedometer and odometer ..................................1-4
Tachometer ............................................................1-4
Engine coolant temperature gauge........................1-4
Fuel gauge .............................................................1-5
Warning/indicator lights and chimes ......................1-6
Theft warning (if so equipped) .............................1-10
Windshield wiper and washer switch ...................1-11
Rear window wiper and washer switches ............1-12
Rear window defogger switch ..............................1-12
Headlight control switch .......................................1-13
Daytime running light system (for Canada) .........1-13
Autolamp switch (if so equipped) .........................1-13
Turn signal switch .............................................1-14
Cornering light ......................................................1-15
Instrument brightness control ...............................1-15
Hazard warning flasher switch .............................1-15Cigarette lighter (accessory) and ashtray ............1-16
Rear power point ..................................................1-17
Coin tray ...............................................................1-17
Compact disc and audio cassette storage
compartment.........................................................1-18
Cup holder ............................................................1-18
Power window ......................................................1-19
Automatic power window switch ..........................1-20
Sunroof (if so equipped).......................................1-21
Manual rear windows ...........................................1-22
Power rear windows (if so equipped) ..................1-22
Clock.....................................................................1-23
Interior lights .........................................................1-24
Luggage compartment lights ................................1-24
Personal reading light ..........................................1-24
Spotlights ..............................................................1-25
ZX
Page 11 of 247

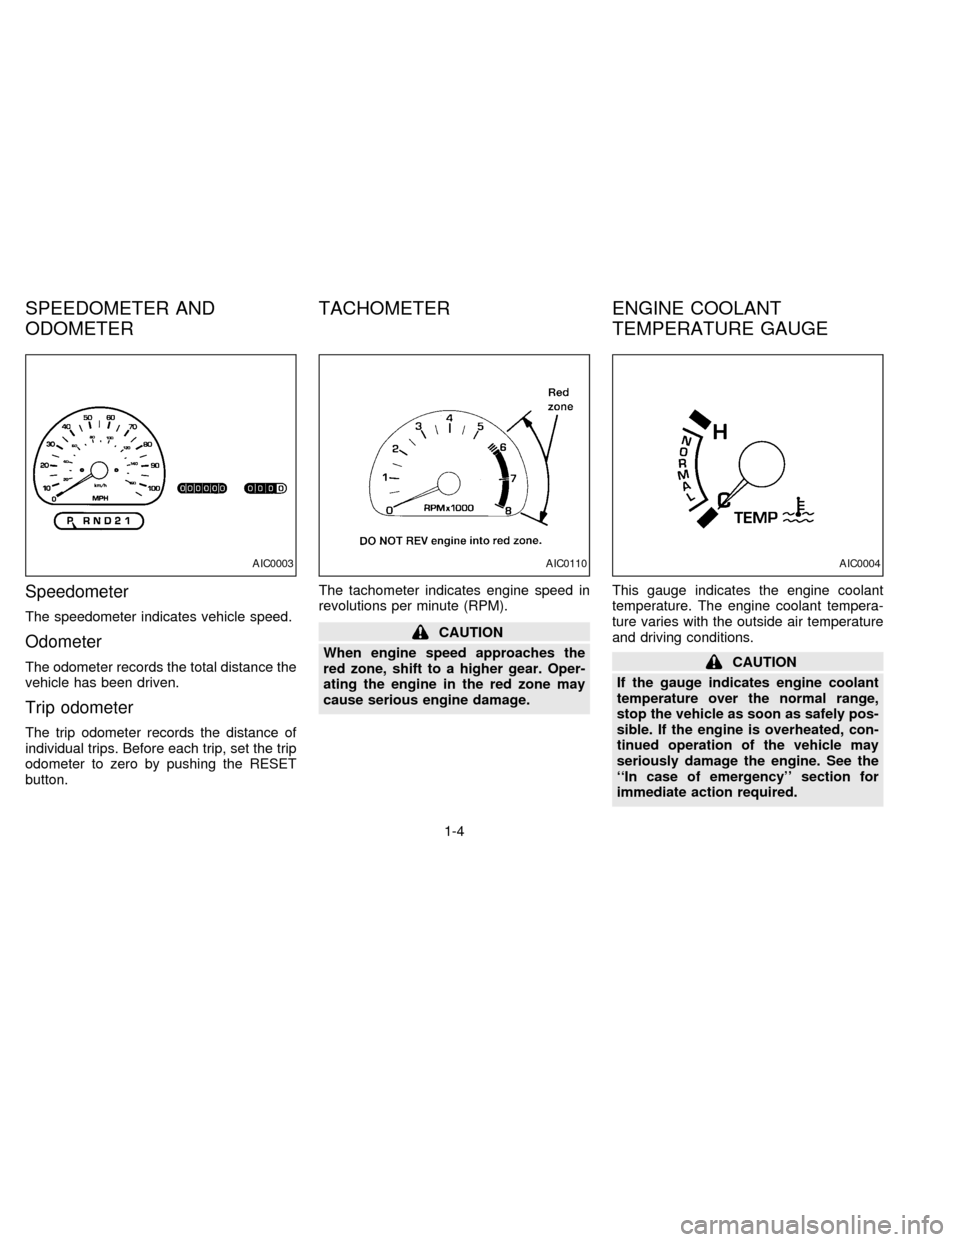
Speedometer
The speedometer indicates vehicle speed.
Odometer
The odometer records the total distance the
vehicle has been driven.
Trip odometer
The trip odometer records the distance of
individual trips. Before each trip, set the trip
odometer to zero by pushing the RESET
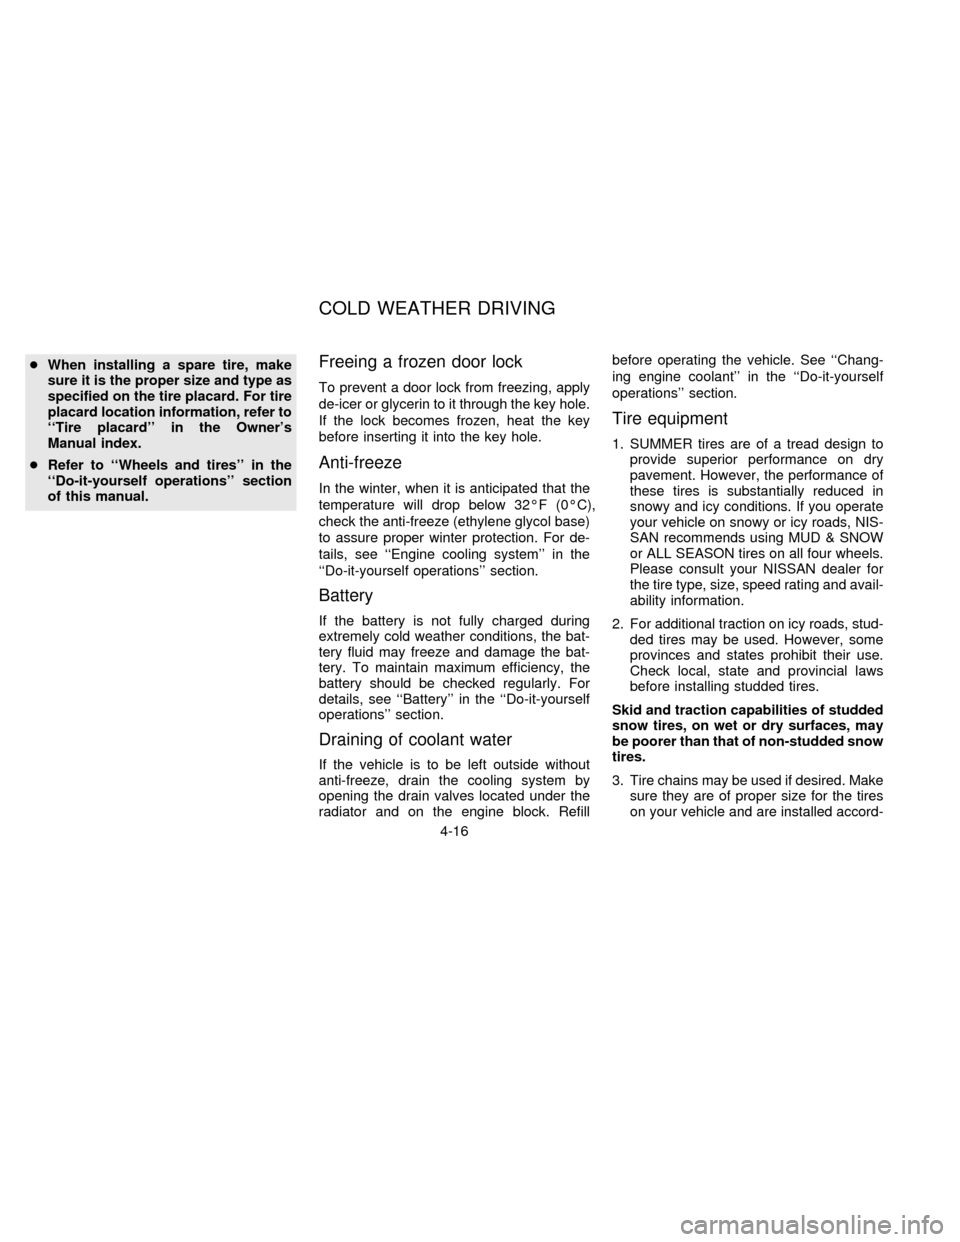
button.The tachometer indicates engine speed in
revolutions per minute (RPM).
CAUTION
When engine speed approaches the
red zone, shift to a higher gear. Oper-
ating the engine in the red zone may
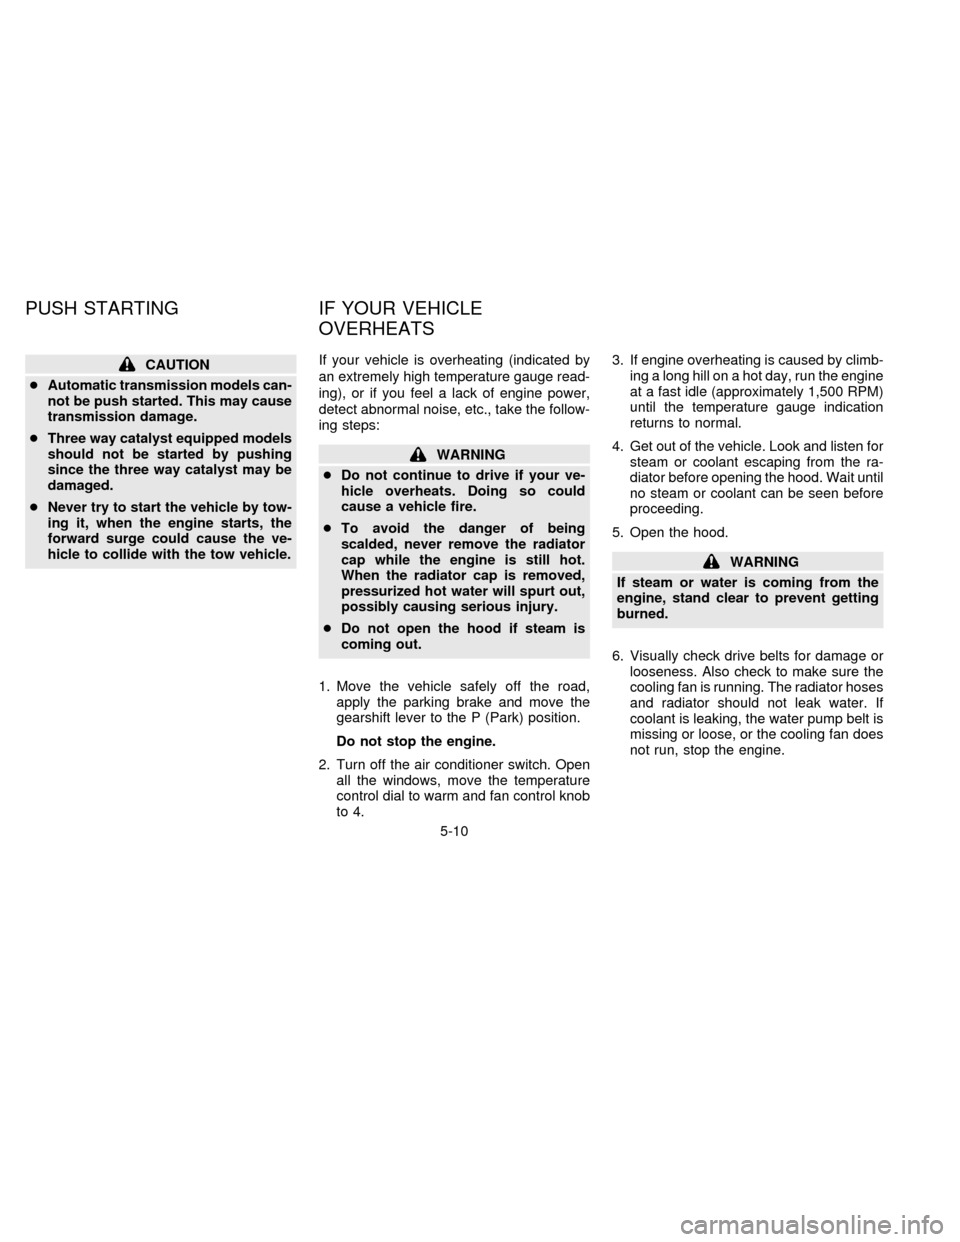
cause serious engine damage.This gauge indicates the engine coolant
temperature. The engine coolant tempera-
ture varies with the outside air temperature
and driving conditions.
CAUTION
If the gauge indicates engine coolant
temperature over the normal range,
stop the vehicle as soon as safely pos-
sible. If the engine is overheated, con-
tinued operation of the vehicle may
seriously damage the engine. See the
``In case of emergency'' section for
immediate action required.
AIC0003AIC0110AIC0004
SPEEDOMETER AND
ODOMETERTACHOMETER ENGINE COOLANT
TEMPERATURE GAUGE
1-4
ZX
Page 119 of 247

1. Push thebutton in.
2. Turn the fan control dial to select speed.
3. Push the air conditioner button. The indi-
cator light comes on.
4. Move the temperature control dial to the
desired position.
cFor quick cooling when the outside tem-
perature is high, push the air recirculation
button on. Be sure to return the air recir-
culation button to the off position for
normal cooling.
cOpening the windows helps to vent heat
buildup when parked in the sun.
Dehumidified heating
This mode is used to heat and dehumidify.
1. Push the air recirculation button to the off
position.
2. Push the
button in.
3. Turn the fan control dial to select speed.
4. Push on the air conditioner button. The
indicator light comes on.
5. Move the temperature control dial to the
desired position.
Dehumidified defogging
This mode is used to defog the windows
and dehumidify.
1. Push the
button in.
2. Turn the fan control dial to the desired
speed.
3. Move the temperature control dial to the
desired position.
When the
button is pushed, the air
conditioner automatically turns on to de-
fog the windshield, (however, the light
does not illuminate unless illuminated in
the previously selected mode) and the
recirculated air mode automatically turns
off.
Operating tips
cKeep windows and sun roof closed while
the air conditioner is in operation.
cAfter parking in the sun, drive for two or
three minutes with the windows open to
vent hot air from the passenger compart-
ment. Then, close the windows. This
allows the air conditioner to cool the
interior more quickly.
cThe air conditioning system should beoperated for about ten minutes at
least once a month. This helps pre-
vent damage to the system due to lack
of lubrication.
cIf the coolant temperature gauge ex-
ceeds the H (hot) position, turn the air
conditioner off. See ``If your vehicle over-
heats'' in the ``In case of emergency''
section for additional information.
3-6
ZX
Page 124 of 247

AUTOMATIC OPERATION
Push the AUTOMATIC button and select
the desired temperature. The selected tem-
perature and AUTO show in the display
window. The EATC heats or cools to
achieve the set temperature.
When in AUTOMATIC and weather condi-
tions require heat, air is sent to the floor.
However, a feature is included in the EATC
to prevent blowing cold air to the floor if the
engine coolant is not warm enough to allow
heating. In three or four minutes the fan
speed gradually increases and airflow
changes to the floor.
If unique conditions exist, such as window
fogging, the five override buttons allow spe-
cific airflow selection. The thumbwheel al-
lows you to adjust the fan speed to suit your
needs.
Temperature selection
TheTEMPbutton on the left
side of the control panel is for temperature
selection. The
side lowers the set
temperature, and theside raises the
set temperature. Press and hold either side
of the button to rapidly change the tempera-
ture setting in one degree increments toeither 65ÉF (18ÉC) or 85ÉF (29ÉC). If you
want continuous maximum cooling, push
the
side of the TEMP button until
60ÉF (16ÉC) shows in the display window.
The EATC cools at maximum and disre-
gards the 60ÉF (16ÉC) setting until a warmer
temperature is selected. If you want con-
tinuous maximum heating, push the
side of the TEMP button until 90ÉF
(32ÉC) shows in the display window. The
EATC provides maximum heat regardless
of the 90ÉF (32ÉC) setting until a cooler
temperature is selected.
Fan speed and thumbwheel
Your EATC automatically adjusts the fan
speed to the existing conditions. To control
the fan speed yourself, use the thumbwheel
located at the extreme right side of the
EATC control panel. Using the thumbwheel
cancels the automatic fan speed control,
and causes a
to appear in the display
window. Rotate the thumbwheel up for HI
speeds and down for LO speeds.
To return to auto fan control, press the
AUTOMATIC button.
AIR CONTROL BUTTONS
Your EATC has five buttons which allow youto make special selections. The buttons are
grouped in the middle of the EATC panel
and allow you to determine airflow location.
Pressing any of the air control buttons
changes airflow location only, and does not
affect the ability of the system to control
temperature or fan speed. Return to fully
automatic operation by pushing the AUTO-
MATIC button.
Push this button for airflow to the floor and
windshield at the same time. Thein-
dicator light comes on, and the display
window shows the set temperature.
Press this button to obtain maximum airflow
to the windshield. Adjust the temperature
setting as required for defrosting. The
indicator light comes on, and the
display window shows the set temperature.
When the outside temperature is about
50ÉF (10ÉC) or above, the air is dehumidi-
fied to prevent window fogging.
Push this button to select airflow through
the instrument panel registers. The
indicator light comes on, and the
display window shows the set temperature.
3-11
ZX
Page 155 of 247

cWhen installing a spare tire, make
sure it is the proper size and type as
specified on the tire placard. For tire
placard location information, refer to
``Tire placard'' in the Owner's
Manual index.
cRefer to ``Wheels and tires'' in the
``Do-it-yourself operations'' section
of this manual.Freeing a frozen door lock
To prevent a door lock from freezing, apply
de-icer or glycerin to it through the key hole.
If the lock becomes frozen, heat the key
before inserting it into the key hole.
Anti-freeze
In the winter, when it is anticipated that the
temperature will drop below 32ÉF (0ÉC),
check the anti-freeze (ethylene glycol base)
to assure proper winter protection. For de-
tails, see ``Engine cooling system'' in the
``Do-it-yourself operations'' section.
Battery
If the battery is not fully charged during
extremely cold weather conditions, the bat-
tery fluid may freeze and damage the bat-
tery. To maintain maximum efficiency, the
battery should be checked regularly. For
details, see ``Battery'' in the ``Do-it-yourself
operations'' section.
Draining of coolant water
If the vehicle is to be left outside without
anti-freeze, drain the cooling system by
opening the drain valves located under the
radiator and on the engine block. Refillbefore operating the vehicle. See ``Chang-
ing engine coolant'' in the ``Do-it-yourself
operations'' section.
Tire equipment
1. SUMMER tires are of a tread design to
provide superior performance on dry
pavement. However, the performance of
these tires is substantially reduced in
snowy and icy conditions. If you operate
your vehicle on snowy or icy roads, NIS-
SAN recommends using MUD & SNOW
or ALL SEASON tires on all four wheels.
Please consult your NISSAN dealer for
the tire type, size, speed rating and avail-
ability information.
2. For additional traction on icy roads, stud-
ded tires may be used. However, some
provinces and states prohibit their use.
Check local, state and provincial laws
before installing studded tires.
Skid and traction capabilities of studded
snow tires, on wet or dry surfaces, may
be poorer than that of non-studded snow
tires.
3. Tire chains may be used if desired. Make
sure they are of proper size for the tires
on your vehicle and are installed accord-
COLD WEATHER DRIVING
4-16
ZX
Page 167 of 247

CAUTION
cAutomatic transmission models can-
not be push started. This may cause
transmission damage.
cThree way catalyst equipped models
should not be started by pushing
since the three way catalyst may be
damaged.
cNever try to start the vehicle by tow-
ing it, when the engine starts, the
forward surge could cause the ve-
hicle to collide with the tow vehicle.If your vehicle is overheating (indicated by
an extremely high temperature gauge read-
ing), or if you feel a lack of engine power,
detect abnormal noise, etc., take the follow-
ing steps:
WARNING
cDo not continue to drive if your ve-
hicle overheats. Doing so could
cause a vehicle fire.
cTo avoid the danger of being
scalded, never remove the radiator
cap while the engine is still hot.
When the radiator cap is removed,
pressurized hot water will spurt out,
possibly causing serious injury.
cDo not open the hood if steam is
coming out.
1. Move the vehicle safely off the road,
apply the parking brake and move the
gearshift lever to the P (Park) position.
Do not stop the engine.
2. Turn off the air conditioner switch. Open
all the windows, move the temperature
control dial to warm and fan control knob
to 4.3. If engine overheating is caused by climb-
ing a long hill on a hot day, run the engine
at a fast idle (approximately 1,500 RPM)
until the temperature gauge indication
returns to normal.
4. Get out of the vehicle. Look and listen for
steam or coolant escaping from the ra-
diator before opening the hood. Wait until
no steam or coolant can be seen before
proceeding.
5. Open the hood.
WARNING
If steam or water is coming from the
engine, stand clear to prevent getting
burned.
6. Visually check drive belts for damage or
looseness. Also check to make sure the
cooling fan is running. The radiator hoses
and radiator should not leak water. If
coolant is leaking, the water pump belt is
missing or loose, or the cooling fan does
not run, stop the engine.
PUSH STARTING IF YOUR VEHICLE
OVERHEATS
5-10
ZX
Page 168 of 247

WARNING
cBe careful not to allow your hands,
hair or clothing to come into contact
with, or to get caught in, the running
fan, belts, or motor fan.
c
The fan motor may start at any time
when the coolant temperature is high.
7. After the engine cools down completely,
check the coolant level in the reservoir
tank with the engine running. Add coolant
to the reservoir tank, if necessary. Have
your vehicle repaired at the nearest
NISSAN dealer.
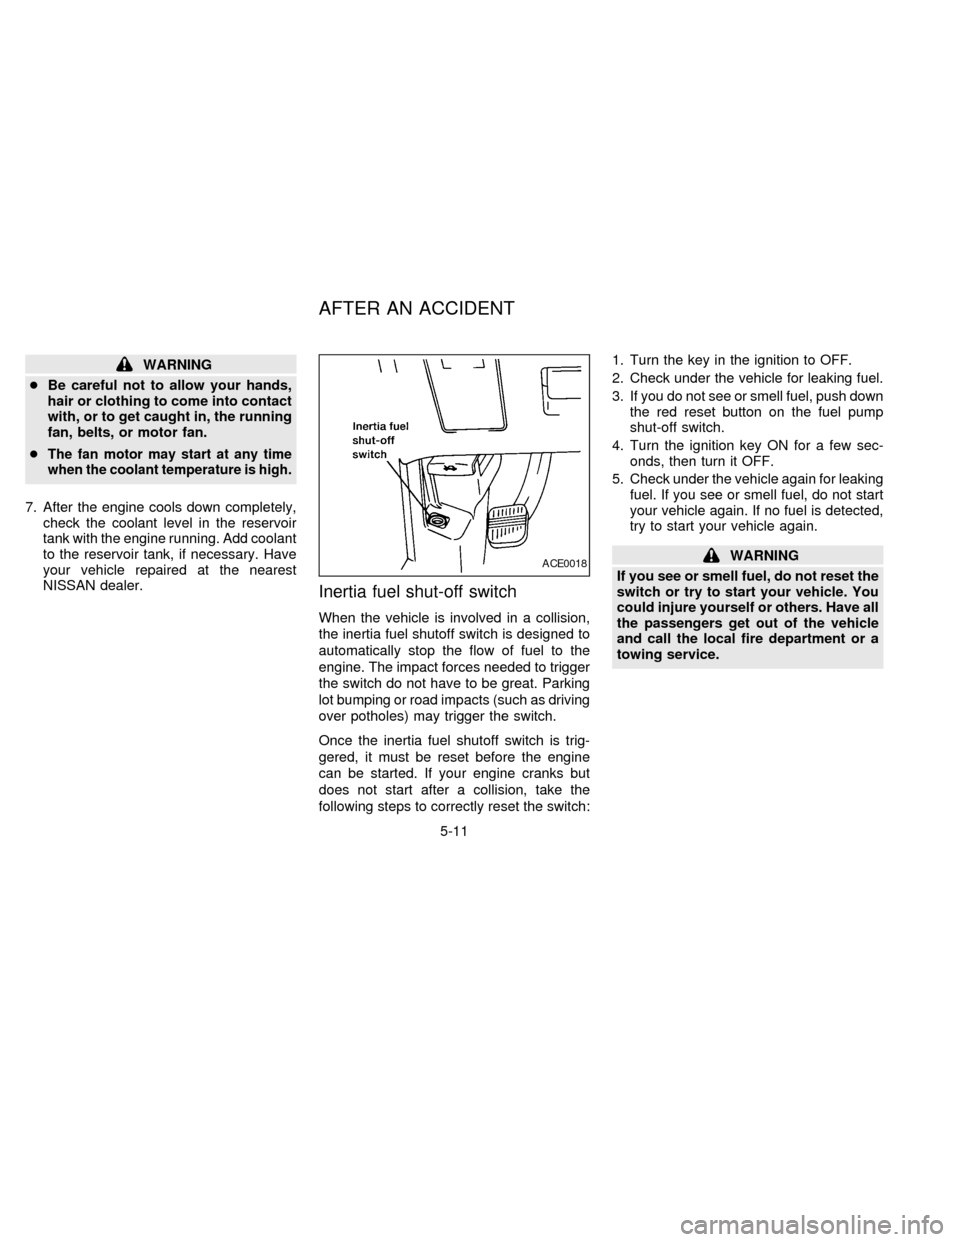
Inertia fuel shut-off switch
When the vehicle is involved in a collision,
the inertia fuel shutoff switch is designed to
automatically stop the flow of fuel to the
engine. The impact forces needed to trigger
the switch do not have to be great. Parking
lot bumping or road impacts (such as driving
over potholes) may trigger the switch.
Once the inertia fuel shutoff switch is trig-
gered, it must be reset before the engine
can be started. If your engine cranks but
does not start after a collision, take the
following steps to correctly reset the switch:1. Turn the key in the ignition to OFF.
2. Check under the vehicle for leaking fuel.
3. If you do not see or smell fuel, push down
the red reset button on the fuel pump
shut-off switch.
4. Turn the ignition key ON for a few sec-
onds, then turn it OFF.
5. Check under the vehicle again for leaking
fuel. If you see or smell fuel, do not start
your vehicle again. If no fuel is detected,
try to start your vehicle again.
WARNING
If you see or smell fuel, do not reset the
switch or try to start your vehicle. You
could injure yourself or others. Have all
the passengers get out of the vehicle
and call the local fire department or a
towing service.ACE0018
AFTER AN ACCIDENT
5-11
ZX
Page 178 of 247

7Do-it-yourself operations
Maintenance precautions .......................................7-2
Engine compartment check locations ....................7-3
Engine cooling system ...........................................7-4
Checking engine coolant level ...............................7-4
Changing engine coolant .......................................7-5
Engine oil ...............................................................7-5
Checking engine oil level .......................................7-5
Changing engine oil ...............................................7-6
Changing engine oil filter .......................................7-7
Automatic transmission fluid (ATF) ........................7-8
Temperature conditions for checking ATF .............7-8
Power steering fluid................................................7-9
Brake fluid ............................................................7-10
Window washer fluid ............................................7-10
Battery ..................................................................7-11
Jump starting ........................................................7-12Drive belts ............................................................7-12
Spark plug replacement .......................................7-12
Air cleaner housing filter ......................................7-13
Wiper blades ........................................................7-14
Parking brake check.............................................7-16
Brake pedal ..........................................................7-16
Brake booster .......................................................7-17
Fuses ....................................................................7-17
Fusible links..........................................................7-18
Light bulbs ............................................................7-19
Headlights ............................................................7-19
Bulb replacement .................................................7-21
Wheels and tires ..................................................7-25
Types of tires........................................................7-26
Tire chains ............................................................7-26
ZX