1997 NISSAN FRONTIER clutch
[x] Cancel search: clutchPage 14 of 204

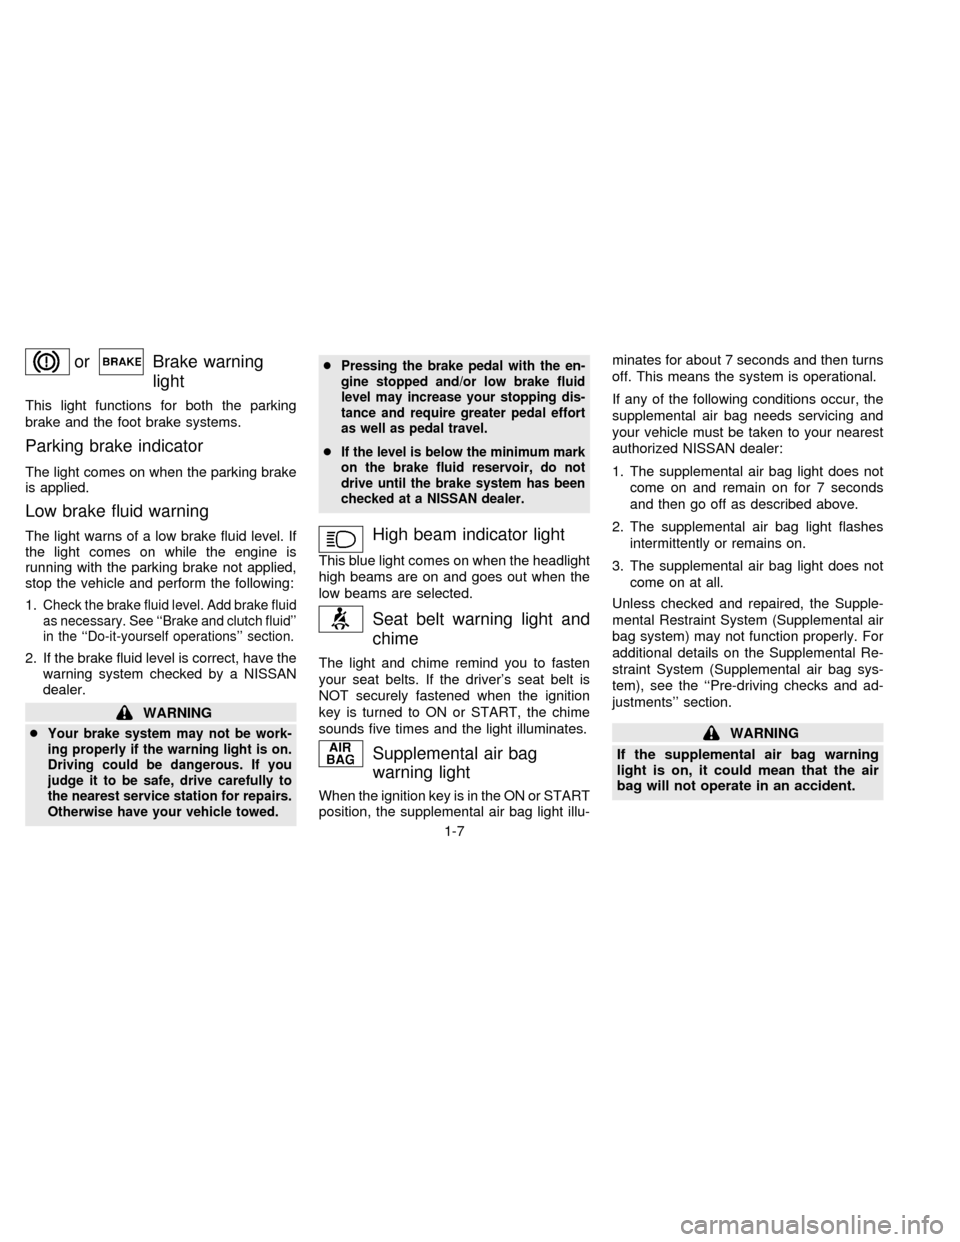
orBrake warning
light
This light functions for both the parking
brake and the foot brake systems.
Parking brake indicator
The light comes on when the parking brake
is applied.
Low brake fluid warning
The light warns of a low brake fluid level. If
the light comes on while the engine is
running with the parking brake not applied,
stop the vehicle and perform the following:
1.
Check the brake fluid level. Add brake fluid
as necessary. See ``Brake and clutch fluid''
in the ``Do-it-yourself operations'' section.
2. If the brake fluid level is correct, have the
warning system checked by a NISSAN
dealer.
WARNING
c
Your brake system may not be work-
ing properly if the warning light is on.
Driving could be dangerous. If you
judge it to be safe, drive carefully to
the nearest service station for repairs.
Otherwise have your vehicle towed.c
Pressing the brake pedal with the en-
gine stopped and/or low brake fluid
level may increase your stopping dis-
tance and require greater pedal effort
as well as pedal travel.
cIf the level is below the minimum mark
on the brake fluid reservoir, do not
drive until the brake system has been
checked at a NISSAN dealer.
High beam indicator light
This blue light comes on when the headlight
high beams are on and goes out when the
low beams are selected.
Seat belt warning light and
chime
The light and chime remind you to fasten
your seat belts. If the driver's seat belt is
NOT securely fastened when the ignition
key is turned to ON or START, the chime
sounds five times and the light illuminates.
Supplemental air bag
warning light
When the ignition key is in the ON or START
position, the supplemental air bag light illu-minates for about 7 seconds and then turns
off. This means the system is operational.
If any of the following conditions occur, the
supplemental air bag needs servicing and
your vehicle must be taken to your nearest
authorized NISSAN dealer:
1. The supplemental air bag light does not
come on and remain on for 7 seconds
and then go off as described above.
2. The supplemental air bag light flashes
intermittently or remains on.
3. The supplemental air bag light does not
come on at all.
Unless checked and repaired, the Supple-
mental Restraint System (Supplemental air
bag system) may not function properly. For
additional details on the Supplemental Re-
straint System (Supplemental air bag sys-
tem), see the ``Pre-driving checks and ad-
justments'' section.
WARNING
If the supplemental air bag warning
light is on, it could mean that the air
bag will not operate in an accident.
1-7
ZX
Page 87 of 204

cMake sure the area around the vehicle is
clear.
cCheck fluid levels such as engine oil,
coolant, brake and clutch fluid, and win-
dow washer fluid as frequently as pos-
sible, at least whenever you refuel.
cCheck that all windows and lights are
clean.
cVisually inspect tires for their appearance
and condition. Also check tires for proper
inflation.
cLock all doors.
cPosition seat and adjust head restraints.
cAdjust inside and outside mirrors.
cFasten seat belts and ask all passengers
to do likewise.
cCheck the operation of warning lights
when key is turned to the ON (3) position.The automatic transmission in your vehicle
is electronically controlled by a microcom-
puter to produce maximum power and
smooth operation.
The recommended operating procedures
for this transmission are shown on the fol-
lowing pages. Follow these procedures for
maximum vehicle performance and driving
enjoyment.
If your vehicle is equipped with 4-wheel
drive, see ``
Transfer case shifting pro-
cedures for 4-wheel drive vehicles'' later in
this section.
Starting the vehicle
cAfter starting the engine, fully depress
the foot brake pedal and push the shift
lever button before shifting the selector
lever to the R, D, 2 or 1 position. Be sure
the vehicle is fully stopped before at-
tempting to shift the selector lever.
cKeep the foot brake pedal depressed and
push the shift lever button to shift into a
driving gear.
c
Release the parking brake and foot brake,
then gradually start the vehicle in motion.
This automatic transmission is designedso the foot brake pedal MUST be depressed
before shifting from P to any drive position
while the ignition switch is ON.
The shift lever cannot be moved out of P
and into any of the other gear positions if
the ignition key is turned to LOCK or if
the key is removed.
When the battery charge is low, the shift
lever can be moved if the ignition switch
is in the ACC position.
WARNING
cDo not depress the accelerator pedal
while shifting from P or N to R, D, 2
or 1. Always depress the brake pedal
until shifting is completed. Failure to
do so could cause you to lose con-
trol and have an accident.
cCold engine idle speed is high, so
use caution when shifting into a for-
ward or reverse gear before the en-
gine has warmed up.
cNever shift to P or R while the ve-
hicle is moving. This could cause an
accident.
BEFORE STARTING THE
ENGINEDRIVING WITH AUTOMATIC
TRANSMISSION (if so
equipped)
4-6
ZX
Page 90 of 204

uncomfortable shift shocks as the trans-
mission repeatedly shifts between 3rd
and overdrive. In this case, set the over-
drive switch in the OFF
position. The
indicator light in the instrument panel
comes on at this time.
When driving conditions change, reset the
overdrive switch in the ONposition.
Remember not to drive at high speeds for
extended periods of time with the overdrive
switch set in the OFF
position. This
reduces fuel economy.
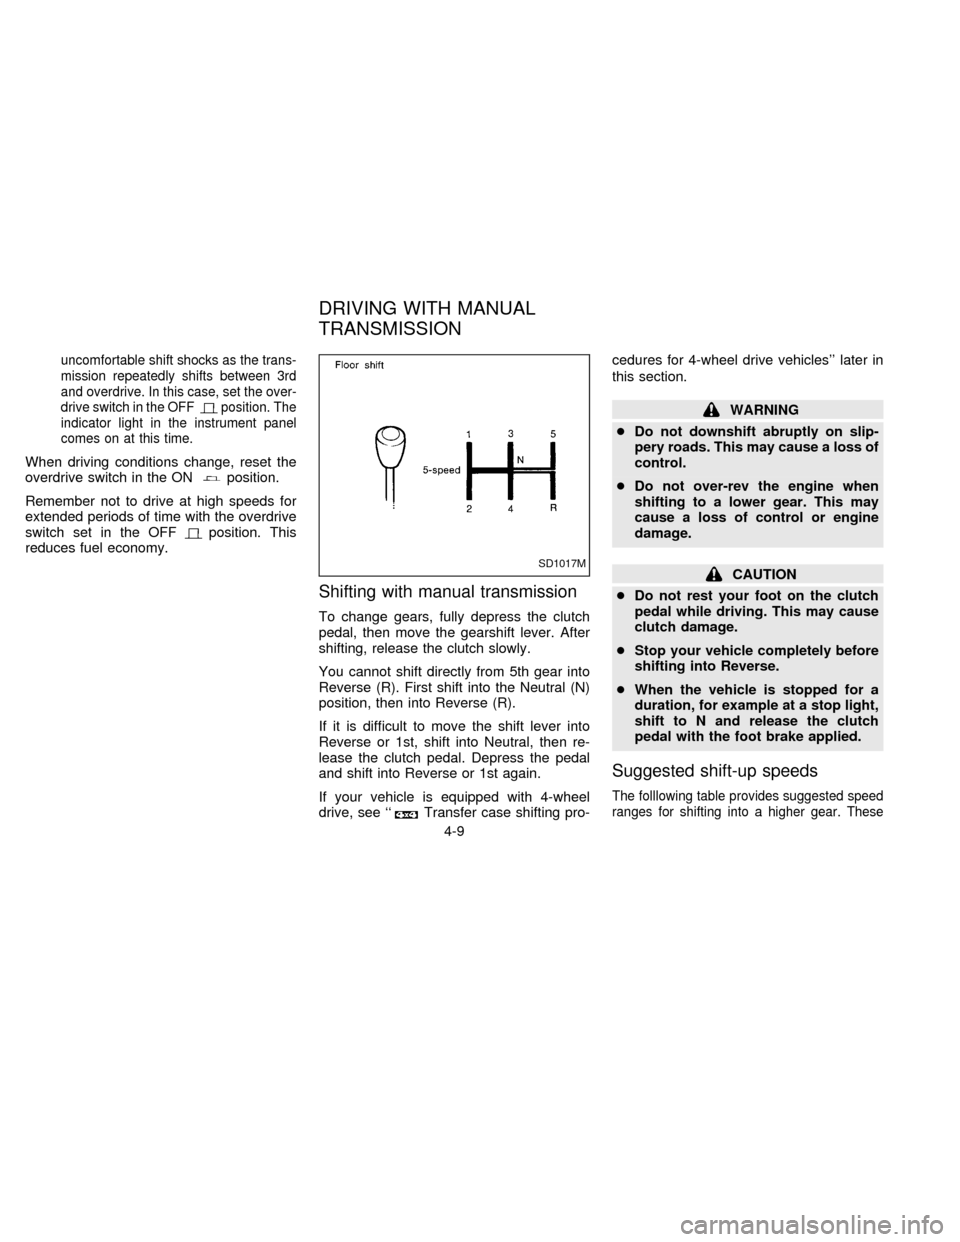
Shifting with manual transmission
To change gears, fully depress the clutch
pedal, then move the gearshift lever. After
shifting, release the clutch slowly.
You cannot shift directly from 5th gear into
Reverse (R). First shift into the Neutral (N)
position, then into Reverse (R).
If it is difficult to move the shift lever into
Reverse or 1st, shift into Neutral, then re-
lease the clutch pedal. Depress the pedal
and shift into Reverse or 1st again.
If your vehicle is equipped with 4-wheel
drive, see ``
Transfer case shifting pro-cedures for 4-wheel drive vehicles'' later in
this section.
WARNING
cDo not downshift abruptly on slip-
pery roads. This may cause a loss of
control.
cDo not over-rev the engine when
shifting to a lower gear. This may
cause a loss of control or engine
damage.
CAUTION
cDo not rest your foot on the clutch
pedal while driving. This may cause
clutch damage.
cStop your vehicle completely before
shifting into Reverse.
cWhen the vehicle is stopped for a
duration, for example at a stop light,
shift to N and release the clutch
pedal with the foot brake applied.
Suggested shift-up speeds
The folllowing table provides suggested speed
ranges for shifting into a higher gear. These
SD1017M
DRIVING WITH MANUAL
TRANSMISSION
4-9
ZX
Page 91 of 204

suggestions relate to fuel economy and vehicle
performance. Actual shift ranges should be
adjusted for specific road conditions, weather
conditions and individual driving habits.
c2-wheel drive models and 4-wheel drive
models (2H and 4H position):
Shift from MPH (km/h)
1st to 2nd 15 (24)
2nd to 3rd 25 (40)
3rd to 4th 40 (64)
4th to 5th 45 (72)
c4-wheel drive model (4L position):
Shift from MPH (km/h)
1st to 2nd 8 (13)
2nd to 3rd 12 (19)
3rd to 4th 20 (32)
4th to 5th 22 (35)
Suggested maximum speed in each
gear
Downshift to a lower gear if the engine is not
running smoothly, or if you need to accelerate.
Do not exceed the maximum suggested
speed (shown below) in any gear. For level
road driving, use the highest gear sug-
gested for that speed. Always observe
posted speed limits, and drive according tothe road conditions, which will ensure safe
operation.
Allowable maximum speed in each gear:
2-wheel drive models MPH (km/h)
1st 30 (48)
2nd 55 (88)
3rd 80 (129)
4th & 5th þ (þ)
4-wheel drive models MPH (km/h)
2H/4H position
1st 25 (40)
2nd 43 (69)
3rd 68 (109)
4th & 5th þ (þ)
4L position
1st 12 (19)
2nd 22 (35)
3rd 30 (48)
4th & 5th þ (þ)1. Apply the parking brake.
2.Automatic transmission:
Move the selector lever to P (Park) or N
(Neutral). P is preferred.
The shift lever cannot be moved out of
P and into any of the other gear posi-
tions if the ignition key is turned to
OFF or if the key is removed from the
switch.
The starter is designed not to operate
if the selector lever is in one of the
driving positions.
Manual transmission:
Move the gearshift lever to N (Neutral),
and depress the clutch pedal to the floor
while starting the engine.
The starter is designed not to operate
unless the clutch pedal is depressed.
3.With your foot off the accelerator
pedal,turn the ignition key to START.
Release the key when the engine starts.
If the engine starts, but fails to run, repeat
the above procedure.
c
If the engine is very hard to start in
extremely cold or hot weather, depress
STARTING THE ENGINE
4-10
ZX
Page 93 of 204

The cruise control allows driving at a fixed
speed between 30 and 90 MPH (48 and 145
km/h) without keeping your foot on the
accelerator pedal.
To turn on the cruise control,push the
main switch on. The CRUISE CONT indica-
tor light comes on.
To set at cruising speed,accelerate your
vehicle to the desired speed, push the
COAST/SET switch and release it. The
CRUISE light in the instrument panel comes
on. Take your foot off the accelerator pedal.
Your vehicle maintains the set speed.To pass another vehicle,depress the ac-
celerator pedal. When you release the
pedal, the vehicle returns to the previously
set speed.
cThe vehicle may not maintain the set
speed when going up or down steep hills.
If this happens, drive without the cruise
control.
To cancel the preset speed,use one of
the following three methods:
a) Push the CANCEL button; the CRUISE
light goes out.b) Tap the brake pedal; the CRUISE light
goes out.
c)
Turn the main switch off. Both the CRUISE
CONT and CRUISE lights go out.
The cruise control is automatically can-
celled and the CRUISE light goes out if:
cyou depress the brake pedal while push-
ing the ACCEL set switch.
cthe vehicle slows down more than 8 MPH
(13 km/h) below the set speed.
cyou depress the clutch pedal (manual
transmission), or move the shift lever to
the N position (automatic transmission).
To reset at a faster cruising speed,use
one of the following three methods:
a) Depress the accelerator pedal. When the
vehicle attains the desired speed, push
and release the COAST/SET switch.
b) Push and hold the ACCEL set switch.
When the vehicle attains the speed you
desire, release the switch.
c) Push, then quickly release the ACCEL
set switch. Each time you do this, the set
speed increases by about 1 MPH (1.6
km/h).
ASD0703
CRUISE CONTROL
4-12
ZX
Page 94 of 204

To reset at a slower cruising speed,use
one of the following three methods:
a) Lightly tap the brake pedal. When the
vehicle attains the desired speed, push
the COAST/SET switch and release it.
b) Push and hold the COAST/SET switch.
Release the switch when the vehicle
slows down to the desired speed.
c) Push, then quickly release the
COAST/SET switch. Each time you do
this, the set speed decreases by about 1
MPH (1.6 km/h).
To resume the preset speed,push and
release the RESUME switch. The vehicle
returns to the last set cruising speed when
the vehicle speed is over 30 MPH (48 km/h).
Precautions
cThe cruise indicator light may blink when
the cruise control main switch is turned
ON while pushing the RESUME/ACCEL,
COAST/SET, or CANCEL switch. To
properly set the cruise control system,
perform the preceding steps in the order
indicated.
cIf the cruise control system malfunctions,
it cancels automatically. The CRUISEindicator in the instrument cluster then
blinks to warn the driver.
cIf the cruise indicator blinks, turn the
cruise control main switch off and have
the system checked by your NISSAN
dealer.
WARNING
Don't use the cruise control when driv-
ing under the following conditions:
cit is not possible to keep the vehicle
at a set speed.
cin heavy traffic or in traffic that var-
ies in speed.
con winding or hilly roads.
con slippery roads (rain, snow, ice,
etc.).
cin very windy areas.
Doing so could cause a loss of vehicle
control and result in an accident.
CAUTION
On manual transmission models, do
not shift into neutral without depress-
ing the clutch pedal when the cruise
control is on. Should this occur, de-
press the clutch pedal and turn the
main switch off immediately. Failure to
do so may cause engine damage.
4-13
ZX
Page 99 of 204

TO SHIFT
TRANSFER CASE:SHIFT PROCEDURE FOR AUTO-LOCK FREE-RUNNING HUBS
From 2H to 4HMove the transfer lever to 4H at speeds below 25 MPH (40 km/h). It is not necessary to depress the clutch pedal. Perform
this operation when driving straight.
From 4H to 2HMove the transfer lever to 2H. This can be done at any speed, and it is not necessary to depress the clutch pedal. Per-
form this operation when driving straight.
NOTE:
For 2-wheel drive operation, set the free-running hubs in the disengaged position. AUTO-LOCK hubs will not disen-
gage until the vehicle is moved about 3 feet (1 m) in the opposite direction of travel:
cWhen driving forward, stop and move 3 feet (1 m) in reverse.
cWhen backing up, stop and move 3 feet (1 m) forward, then move the vehicle about 3 feet (1 m) in reverse.
This will allow for better fuel economy, quieter ride and less component wear.
From 4H to 4L or 4L to
4H1. Stop the vehicle.
2. Depress the clutch pedal.
3. Depress the transfer lever and move it to the desired 4L or 4H position.
From 2H to 4L1. Stop the vehicle.
2. Depress the clutch pedal.
3. Depress the transfer lever and move it to 4L. Change gears quickly and smoothly.
From 4L to 2H1. Stop the vehicle.
2. Depress the clutch pedal.
3. Depress the transfer lever and move it to 2H.
NOTE:
Follow the NOTE shown in shifting from 4H to 2H.
4-18
ZX
Page 101 of 204

TO SHIFT TRANSFER
CASE:SHIFT PROCEDURE FOR MANUAL-LOCK FREE-RUNNING HUBS
From 2H to 4H1. Stop the vehicle.
2. Set free-running hubs in the LOCK position.
3. Move the transfer lever to 4H. It is not necessary to depress the clutch pedal.
From 4H to 2HMove the transfer lever to 2H. This can be done at any speed, and it is not necessary to depress the clutch pedal. Per-
form this operation when driving straight.
NOTE:
For 2-wheel drive operation, set the free-running hubs in the FREE position. This will allow for better fuel economy,
quieter ride and less component wear.
From 4H to 4L or 4L to
4H1. Stop the vehicle.
2. Depress the clutch pedal.
3. Depress the transfer lever and move it to the desired 4L or 4H position.
From 2H to 4L1. Stop the vehicle.
2. Set free-running hubs in the LOCK position.
3. Depress the clutch pedal.
4. Depress the transfer lever and move it to 4L. Change gears quickly and smoothly.
From 4L to 2H1. Stop the vehicle.
2. Depress the clutch pedal.
3. Depress the transfer lever and move it to 2H.
NOTE:
Follow the NOTE shown in shifting from 4H to 2H.
4-20
ZX