1997 NISSAN ALTIMA ECU
[x] Cancel search: ECUPage 13 of 203
broken, or missing, or if the light remains on,
see your NISSAN dealer immediately.
CAUTION
Do not continue driving if the belt is
loose, broken or missing.
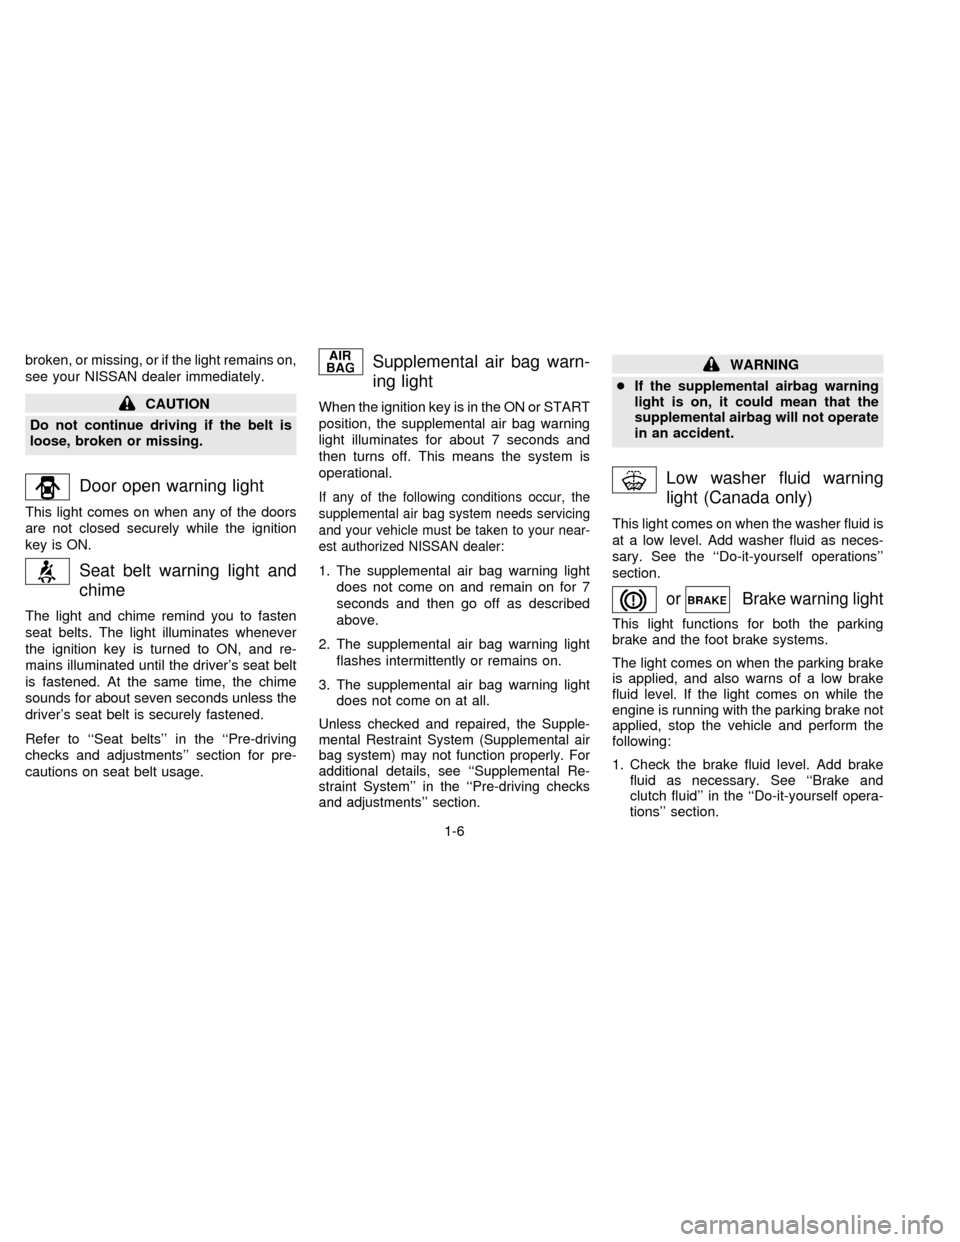
Door open warning light
This light comes on when any of the doors
are not closed securely while the ignition
key is ON.
Seat belt warning light and
chime
The light and chime remind you to fasten
seat belts. The light illuminates whenever
the ignition key is turned to ON, and re-
mains illuminated until the driver's seat belt
is fastened. At the same time, the chime
sounds for about seven seconds unless the
driver's seat belt is securely fastened.
Refer to ``Seat belts'' in the ``Pre-driving
checks and adjustments'' section for pre-
cautions on seat belt usage.
Supplemental air bag warn-
ing light
When the ignition key is in the ON or START
position, the supplemental air bag warning
light illuminates for about 7 seconds and
then turns off. This means the system is
operational.
If any of the following conditions occur, the
supplemental air bag system needs servicing
and your vehicle must be taken to your near-
est authorized NISSAN dealer:
1. The supplemental air bag warning light
does not come on and remain on for 7
seconds and then go off as described
above.
2. The supplemental air bag warning light
flashes intermittently or remains on.
3. The supplemental air bag warning light
does not come on at all.
Unless checked and repaired, the Supple-
mental Restraint System (Supplemental air
bag system) may not function properly. For
additional details, see ``Supplemental Re-
straint System'' in the ``Pre-driving checks
and adjustments'' section.
WARNING
cIf the supplemental airbag warning
light is on, it could mean that the
supplemental airbag will not operate
in an accident.
Low washer fluid warning
light (Canada only)
This light comes on when the washer fluid is
at a low level. Add washer fluid as neces-
sary. See the ``Do-it-yourself operations''
section.
orBrake warning light
This light functions for both the parking
brake and the foot brake systems.
The light comes on when the parking brake
is applied, and also warns of a low brake
fluid level. If the light comes on while the
engine is running with the parking brake not
applied, stop the vehicle and perform the
following:
1. Check the brake fluid level. Add brake
fluid as necessary. See ``Brake and
clutch fluid'' in the ``Do-it-yourself opera-
tions'' section.
1-6
ZX
Page 16 of 203

The theft warning system provides visual
and audio alarm signals if parts of the
vehicle are disturbed.
How to activate the theft warning
system
1. Close all windows.
2. Remove the key from the ignition switch.
3. Close and lock all doors, hood and trunk
lid. Lock all doors by pressing the
button on the multi-remote controller. At
this time, the hazard indicators flash
twice to indicate all doors are locked.The system can be activated even if the
windows are open.
4.
Confirm that the SECURITY indicator light
comes on. The SECURITY light glows for
about 30 seconds and then begins to flash
once every three seconds. The system is
now activated. If, during this 30-second
time period, the door is unlocked by the
key or the multi-remote controller, or the
ignition key is turned to ACC or ON, the
system will not activate.
If the key is turned slowly when locking
the door, the system may not activate.
Furthermore, if the key is turned exces-
sively to the unlock position, the system
may be deactivated when the key is re-
moved. If the indicator light fails to glow
for 30 seconds, unlock the door once
and lock it again.
Even when the driver and/or passengers
are in the vehicle, the system will acti-
vate with all doors, hood and trunk lid
locked and ignition key off. Turn the
ignition key to ACC or ON to turn the
system off.
Theft warning system operation
The theft warning system emits the follow-
ing alarm:
cThe headlights blink and the horn sounds
intermittently. In addition, the starter mo-
tor does not operate.
cThe alarm automatically turns off after 2
to 3 minutes. However, the alarm reacti-
vates if the vehicle is tampered with
again. The alarm can be shut off by
unlocking a door or trunk lid with the key,
or by pressing the
button on the
multi-remote controller.
The alarm is activated by:
copening the door or trunk lid without
using the key (even if the door is un-
locked by releasing the door inside lock
switch) or opening the trunk lid by oper-
ating the opener lever.
copening the hood.
cpushing in or pulling out the key cylinder
on the door or trunk lid.
How to stop the alarm
The alarm stops only by unlocking a door or
the trunk lid with the key, or by pressing
IC0005
THEFT WARNING
(If so equipped)
1-9
ZX
Page 35 of 203

The interior light can be turned off without
waiting 30 seconds by inserting the key into
the ignition or locking the doors with the
multi-remote controller or pushing the
interior light button to OFF.
Using the panic alarm
If you are near your vehicle and feel threat-
ened, you may activate the alarm to call
attention as follows:
1. Push the
button on the remote con-
troller forlonger than 1.5 seconds.
2. The theft warning alarm and headlights
will stay on for 30 seconds.
3. The panic alarm stops when:
cit has run for 30 seconds, or
cthe
or thebutton is pressed, or
cthe
button is pushed for longer than
1.5 seconds on the multi-remote control-
ler.
Replace the battery in the multi-remote con-
troller as follows:
1. Open the lid using a coin.
2. Replace the battery with a new one.
Insert the battery as illustrated above.Recommended battery: Sanyo CR2025
or equivalent.
3. Close the lid securely.
4. Press the
button, then thebutton
two or three times to check the multi-
remote controller operation.
APD0535
BATTERY REPLACEMENT
2-6
ZX
Page 38 of 203
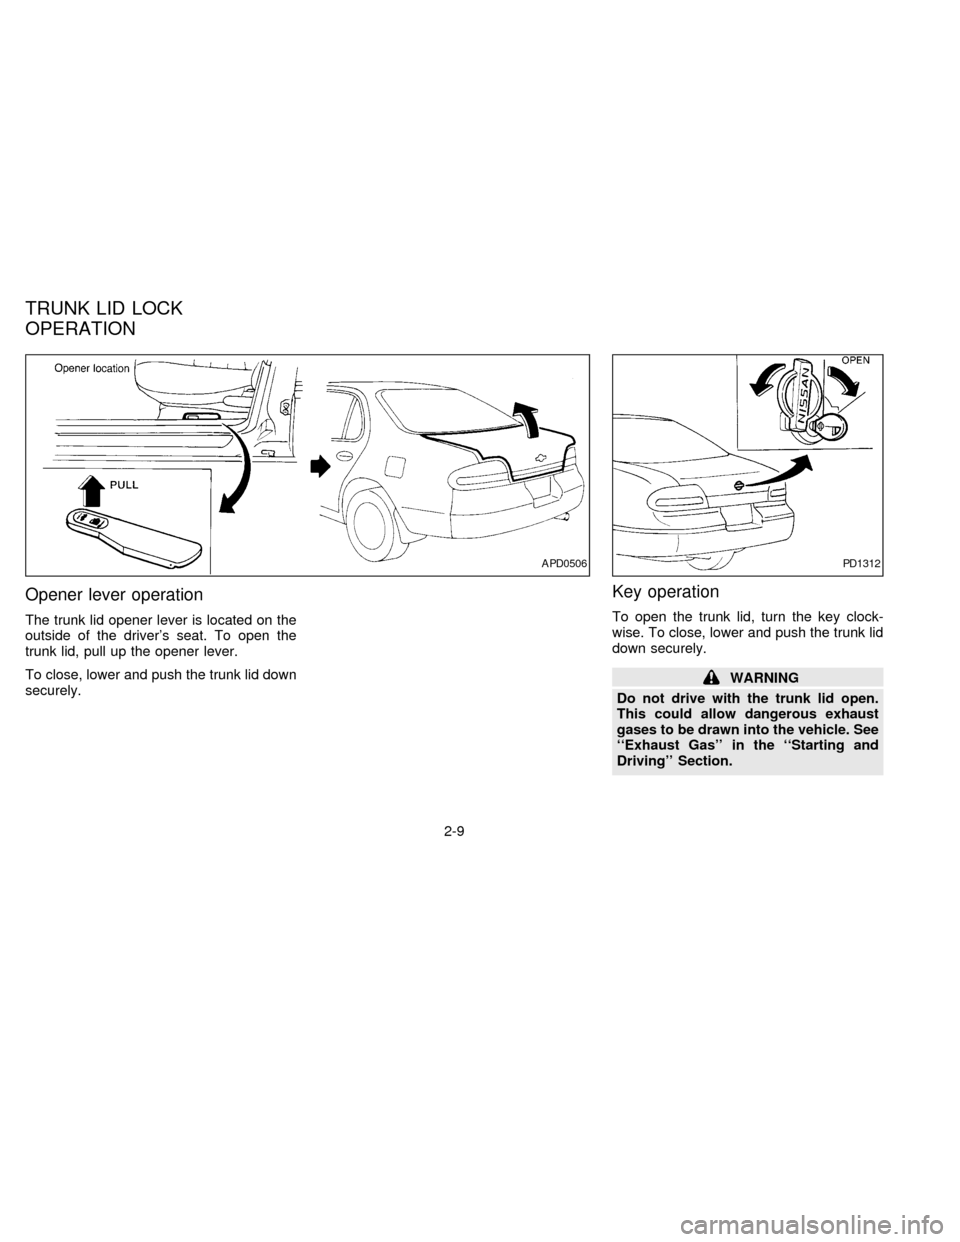
Opener lever operation
The trunk lid opener lever is located on the
outside of the driver's seat. To open the
trunk lid, pull up the opener lever.
To close, lower and push the trunk lid down
securely.
Key operation
To open the trunk lid, turn the key clock-
wise. To close, lower and push the trunk lid
down securely.
WARNING
Do not drive with the trunk lid open.
This could allow dangerous exhaust
gases to be drawn into the vehicle. See
``Exhaust Gas'' in the ``Starting and
Driving'' Section.
APD0506PD1312
TRUNK LID LOCK
OPERATION
2-9
ZX
Page 39 of 203

OPENER CANCEL LEVER FOR
TRUNK LID
When this lever is in the cancel position, the
trunk lid cannot be opened with the trunk lid
opener lever. It can be opened only with the
key.
Opener lever operation
The fuel filler lid opener lever is located on
the outside of the driver's seat. To open the
fuel filler lid, push the opener lever down. To
lock, close the fuel filler lid securely.
APD0111APD0525
FUEL FILLER LID LOCK
OPERATION
2-10
ZX
Page 41 of 203
SEAT ADJUSTMENT
WARNING
cDo not adjust the driver's seat while
driving. The seat may move sud-
denly and could cause loss of con-
trol of the vehicle.
cAfter adjustment, gently rock in the
seat to make sure it is securely
locked.
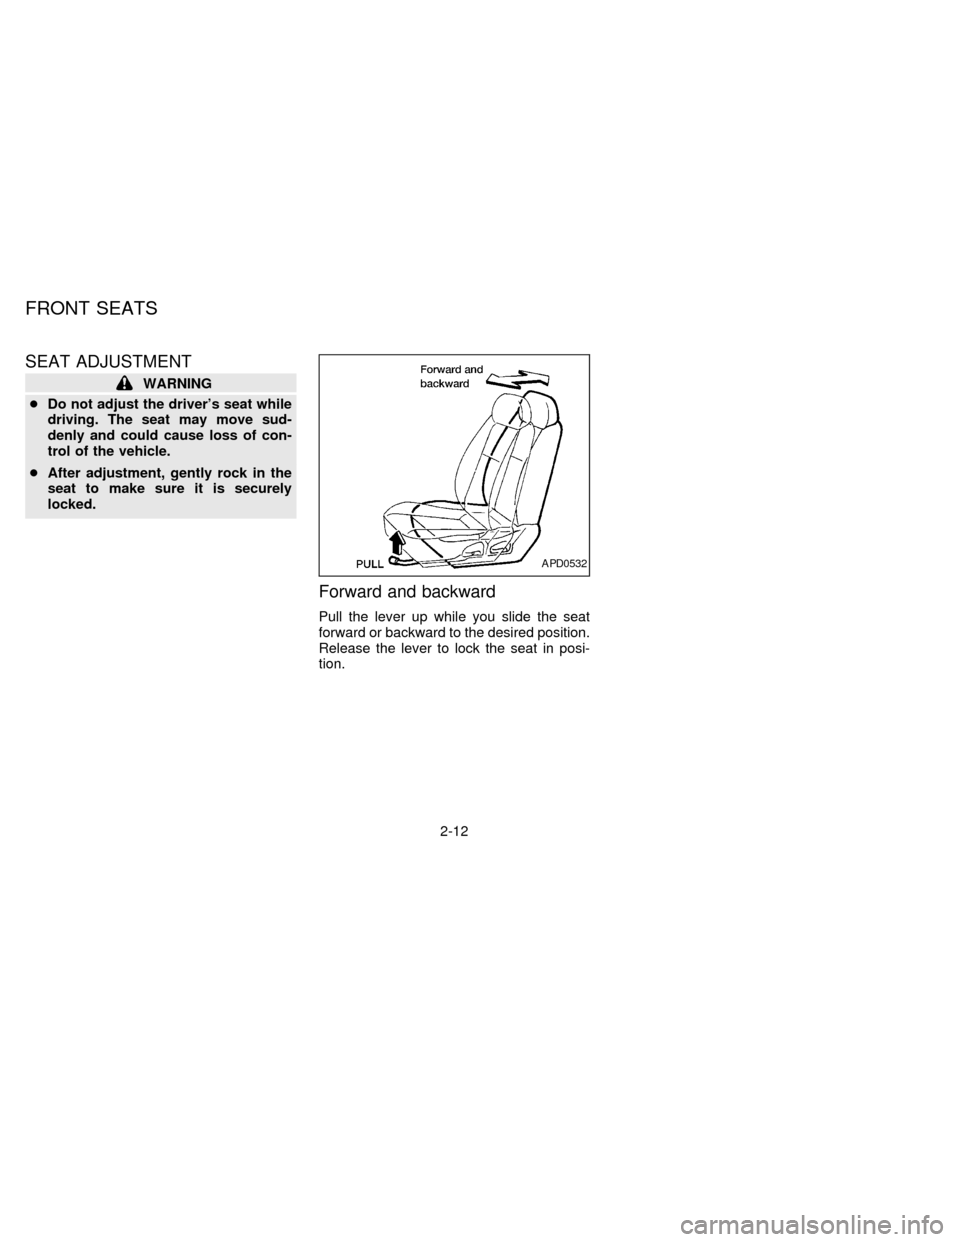
Forward and backward
Pull the lever up while you slide the seat
forward or backward to the desired position.
Release the lever to lock the seat in posi-
tion.
APD0532
FRONT SEATS
2-12
ZX
Page 57 of 203
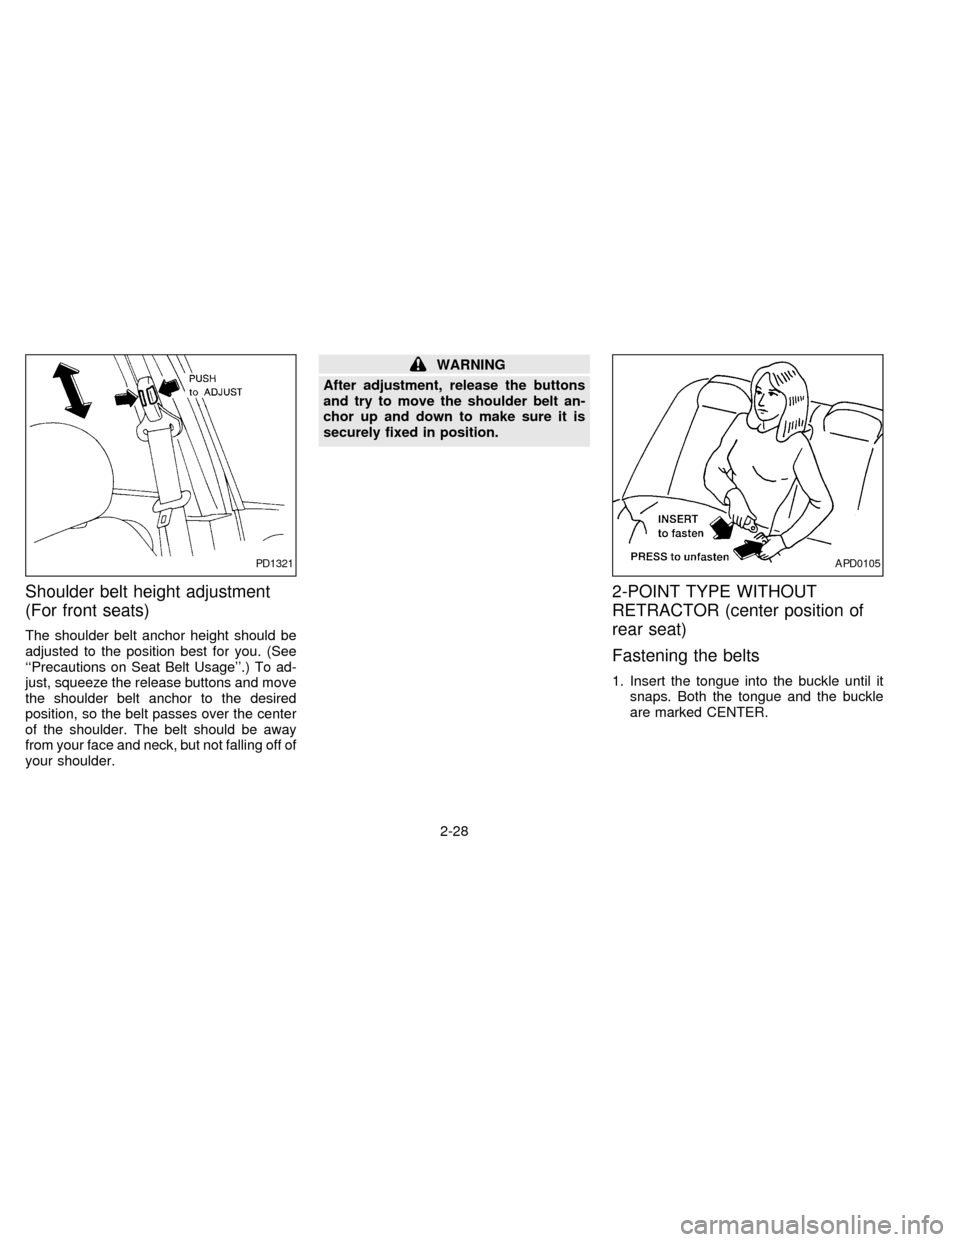
Shoulder belt height adjustment
(For front seats)
The shoulder belt anchor height should be
adjusted to the position best for you. (See
``Precautions on Seat Belt Usage''.) To ad-
just, squeeze the release buttons and move
the shoulder belt anchor to the desired
position, so the belt passes over the center
of the shoulder. The belt should be away
from your face and neck, but not falling off of
your shoulder.
WARNING
After adjustment, release the buttons
and try to move the shoulder belt an-
chor up and down to make sure it is
securely fixed in position.
2-POINT TYPE WITHOUT
RETRACTOR (center position of
rear seat)
Fastening the belts
1. Insert the tongue into the buckle until it
snaps. Both the tongue and the buckle
are marked CENTER.
PD1321APD0105
2-28
ZX
Page 60 of 203
Child restraints specially designed for infants
and small children are offered by several
manufacturers. When selecting any child re-
straint, keep the following points in mind:
1) Choose only a restraint with a label cer-
tifying that it complies with Federal Motor
Vehicle Safety Standard 213 or Cana-
dian Motor Vehicle Safety Standard 213.
2) Check the child restraint in your vehicle
to be sure it is compatible with the vehi-
cle's seat and seat belt system. Choose
a child restraint that meets the guidelines
of the Society of Automotive Engineers
recommended practice J1819 for child
restraint installation.
3) If the child restraint is compatible with
your vehicle, place your child in the child
restraint and check the various adjust-
ments to be sure the child restraint is
compatible with your child. Always follow
all recommended procedures.
All U.S. states and provinces of Canada
require that infants and small children be
restrained in approved child restraints at
all times while the vehicle is being
operated.
WARNING
cNever install a rear-facing child re-
straint in the front seat. An inflating
air bag could seriously injure or kill
your child. A rear-facing child re-
straint must only be used in the rear
seat. See ``Installation on front pas-
senger seat'' for details.
cImproper use of a child restraint can
result in increased injuries for both
the infant or child and other occu-
pants in the vehicle.
cFollow all of the child restraint manu-
facturer's instructions for installa-
tion and use. When purchasing a
child restraint, be sure to select one
which will fit your child and vehicle.
It may not be possible to properly
install some types of child restraints
in your vehicle.
cIf the child restraint is not anchored
properly, the risk of a child being
injured in a collision or a sudden
stop greatly increases.
cAdjustable seatbacks should be po-
sitioned to fit the child restraint, but
as upright as possible.cAfter attaching the child restraint,
test it before you place the child in it.
Tilt it from side to side. Try to tug it
forward and check to see if the belt
holds the restraint in place. If the
restraint is not secure, tighten the
belt as necessary, or put the restraint
in another seat and test it again.
cFor a front-facing child restraint, if
the seat position where it is installed
has a 3-point type lap/shoulder belt,
check to make sure the shoulder belt
does not go in front of the child's
face or neck. If it does, put the shoul-
der belt behind the child restraint.
c
When your child restraint is not in
use, keep it secured with a seat belt to
prevent it from being thrown around
in case of a sudden stop or accident.
CAUTION
cRemember that a child restraint left
in a closed vehicle can become very
hot. Check the seating surface and
buckles before placing your child in
the child restraint.
2-31
ZX