1997 NISSAN ALTIMA high beam
[x] Cancel search: high beamPage 12 of 203
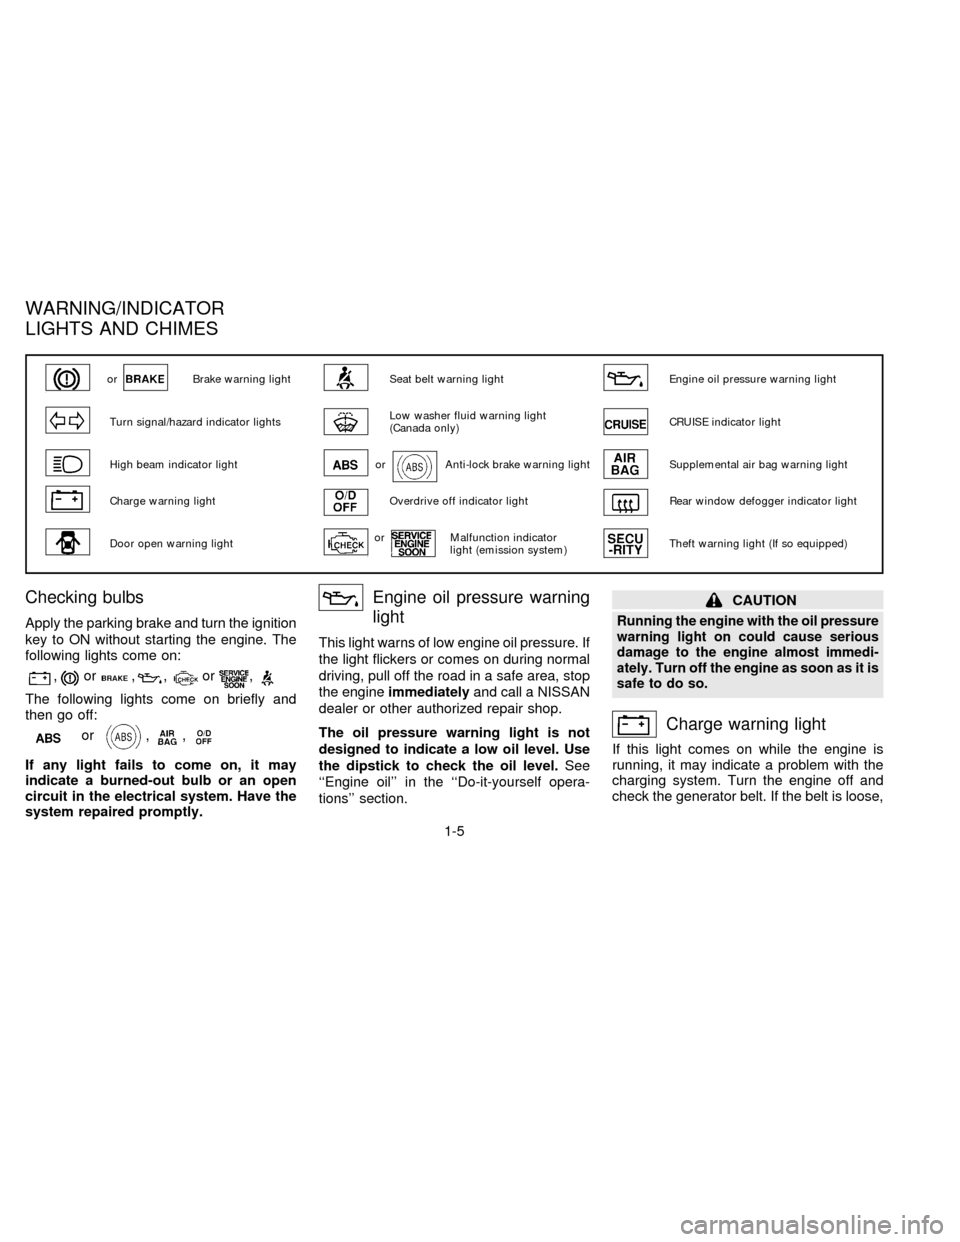
Checking bulbs
Apply the parking brake and turn the ignition
key to ON without starting the engine. The
following lights come on:
,or,,or,
The following lights come on briefly and
then go off:
or,,
If any light fails to come on, it may
indicate a burned-out bulb or an open
circuit in the electrical system. Have the
system repaired promptly.
Engine oil pressure warning
light
This light warns of low engine oil pressure. If
the light flickers or comes on during normal
driving, pull off the road in a safe area, stop
the engineimmediatelyand call a NISSAN
dealer or other authorized repair shop.
The oil pressure warning light is not
designed to indicate a low oil level. Use
the dipstick to check the oil level.See
``Engine oil'' in the ``Do-it-yourself opera-
tions'' section.
CAUTION
Running the engine with the oil pressure
warning light on could cause serious
damage to the engine almost immedi-
ately. Turn off the engine as soon as it is
safe to do so.
Charge warning light
If this light comes on while the engine is
running, it may indicate a problem with the
charging system. Turn the engine off and
check the generator belt. If the belt is loose,
orBrake warning lightSeat belt warning lightEngine oil pressure warning light
Turn signal/hazard indicator lightsLow washer fluid warning light
(Canada only)CRUISE indicator light
High beam indicator lightorAnti-lock brake warning lightSupplemental air bag warning light
Charge warning lightOverdrive off indicator lightRear window defogger indicator light
Door open warning lightorMalfunction indicator
light (emission system)Theft warning light (If so equipped)
WARNING/INDICATOR
LIGHTS AND CHIMES
1-5
ZX
Page 14 of 203
2. If the brake fluid level is correct, have the
warning system checked by your NIS-
SAN dealer.
WARNING
cYour brake system may not be work-
ing properly if the warning light is
on. Driving could be dangerous. If
you judge it to be safe, drive care-
fully to the nearest service station
for repairs. Otherwise, have your ve-
hicle towed.
cPressing the brake pedal with the
engine stopped and/or low brake
fluid level may increase your stop-
ping distance and braking will re-
quire greater pedal effort as well as
greater pedal travel.
cIf the brake fluid level is below the
minimum mark on the brake fluid
reservoir, do not drive until the brake
system has been checked at a NIS-
SAN dealer.
Brake pad wear warning
The disc brake pads have audible wear
warnings. When a brake pad requires re-
placement, it makes a high pitched scrapingsound when the vehicle is in motion,
whether or not the brake pedal is de-
pressed. Have the brakes checked as soon
as possible if the warning sound is heard.
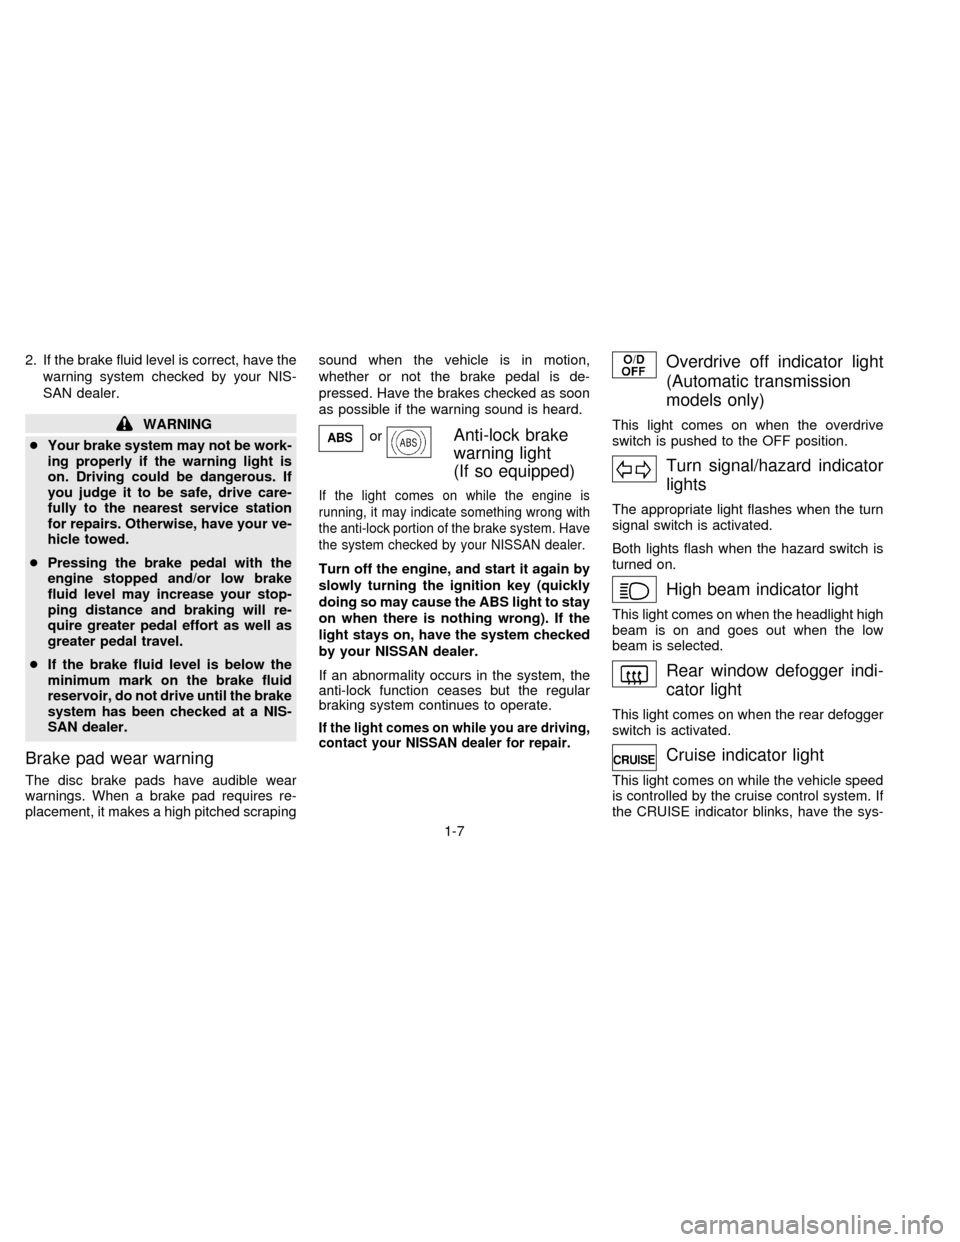
orAnti-lock brake
warning light
(If so equipped)
If the light comes on while the engine is
running, it may indicate something wrong with
the anti-lock portion of the brake system. Have
the system checked by your NISSAN dealer.
Turn off the engine, and start it again by
slowly turning the ignition key (quickly
doing so may cause the ABS light to stay
on when there is nothing wrong). If the
light stays on, have the system checked
by your NISSAN dealer.
If an abnormality occurs in the system, the
anti-lock function ceases but the regular
braking system continues to operate.
If the light comes on while you are driving,
contact your NISSAN dealer for repair.
Overdrive off indicator light
(Automatic transmission
models only)
This light comes on when the overdrive
switch is pushed to the OFF position.
Turn signal/hazard indicator
lights
The appropriate light flashes when the turn
signal switch is activated.
Both lights flash when the hazard switch is
turned on.
High beam indicator light
This light comes on when the headlight high
beam is on and goes out when the low
beam is selected.
Rear window defogger indi-
cator light
This light comes on when the rear defogger
switch is activated.
Cruise indicator light
This light comes on while the vehicle speed
is controlled by the cruise control system. If
the CRUISE indicator blinks, have the sys-
1-7
ZX
Page 19 of 203

Lighting
Turn the switch to theposition: The
front clearance, side marker, tail, license
plate and instrument panel lights come on.
Turn the switch to the
position:The headlights come on and all the other
lights remain on.
To select the high beam function, push the
lever forward. The high beam lights come
on and the indicator light illuminates. Pull it
back to select the low beam.
AIC0505
HEADLIGHT AND TURN
SIGNAL SWITCH
1-12
ZX
Page 20 of 203
DAYTIME RUNNING LIGHT SYS-
TEM (for Canada)
The headlights automatically illuminate at a
reduced intensity when the engine is started
with the parking brake released. The day-
time running lights operate with the head-
light switch in the ``OFF'' position or in the
``
'' position. Turn the headlight switch
to the ``
'' position for full illumination
when driving at night.
If the parking brake is applied before the
engine is started, the daytime running lights
do not illuminate. The daytime running lights
illuminate once the parking brake is re-
leased. The daytime running lights will re-
main on until the ignition switch is turned off.
WARNING
When the daytime running light system
is active, tail lights on your vehicle are
not on. It is necessary at dusk to turn
on your headlights. Failure to do so
could cause an accident injuring your-
self and others.
Passing signal
Pulling and releasing the lever flashes the
headlight high beams on and off.
Turn signal
Move the lever up or down to signal the
turning direction. When the turn is com-
pleted, the turn signals cancel automati-
cally.
Lane change signal
To signal a lane change, move the lever up
or down to the point where the indicator light
begins to flash, but the lever does not latch.
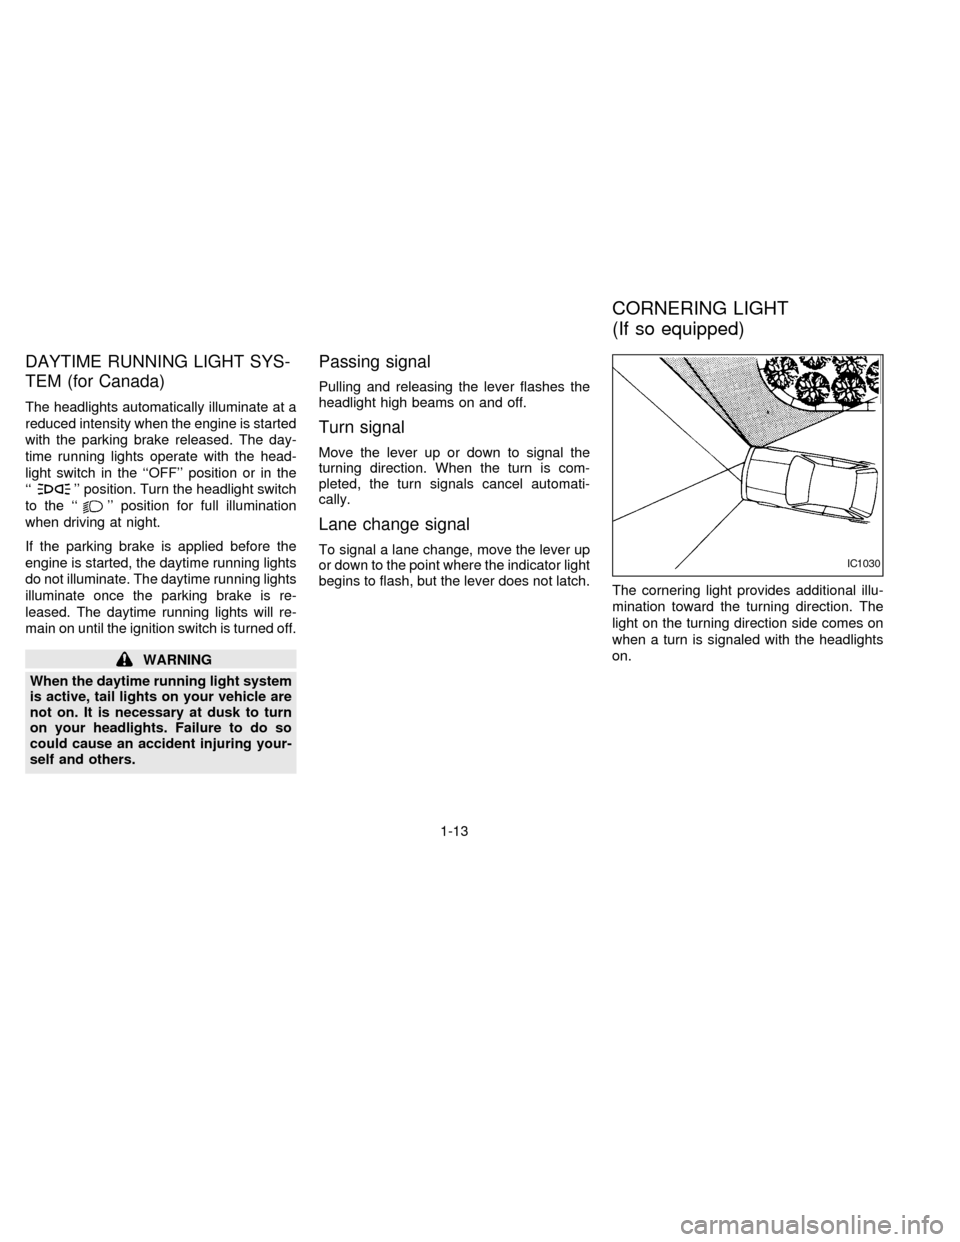
The cornering light provides additional illu-
mination toward the turning direction. The
light on the turning direction side comes on
when a turn is signaled with the headlights
on.IC1030
CORNERING LIGHT
(If so equipped)
1-13
ZX
Page 21 of 203
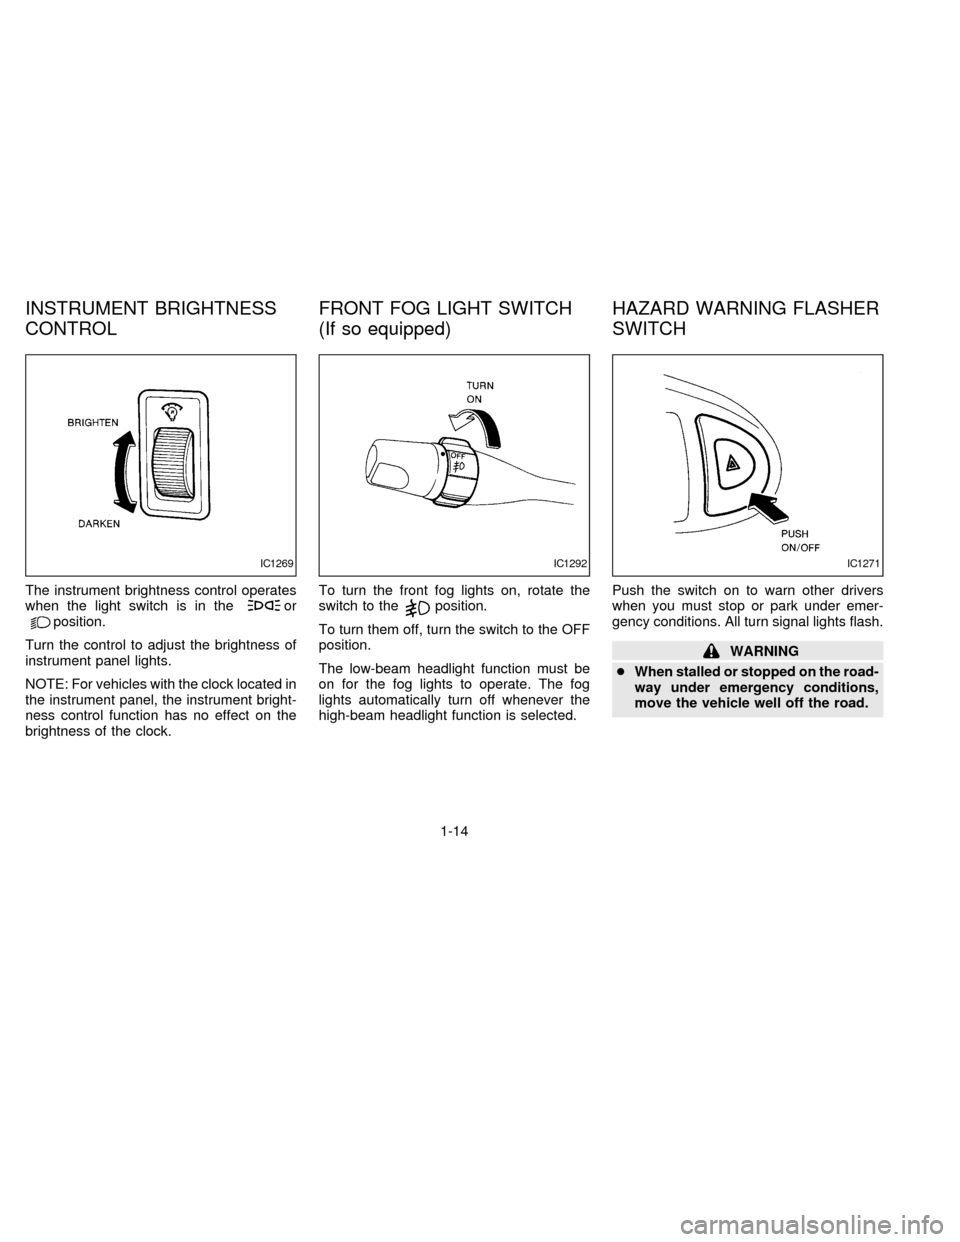
The instrument brightness control operates
when the light switch is in theorposition.
Turn the control to adjust the brightness of
instrument panel lights.
NOTE: For vehicles with the clock located in
the instrument panel, the instrument bright-
ness control function has no effect on the
brightness of the clock.To turn the front fog lights on, rotate the
switch to theposition.
To turn them off, turn the switch to the OFF
position.
The low-beam headlight function must be
on for the fog lights to operate. The fog
lights automatically turn off whenever the
high-beam headlight function is selected.Push the switch on to warn other drivers
when you must stop or park under emer-
gency conditions. All turn signal lights flash.
WARNING
cWhen stalled or stopped on the road-
way under emergency conditions,
move the vehicle well off the road.
IC1269IC1292IC1271
INSTRUMENT BRIGHTNESS
CONTROLFRONT FOG LIGHT SWITCH
(If so equipped)HAZARD WARNING FLASHER
SWITCH
1-14
ZX
Page 152 of 203
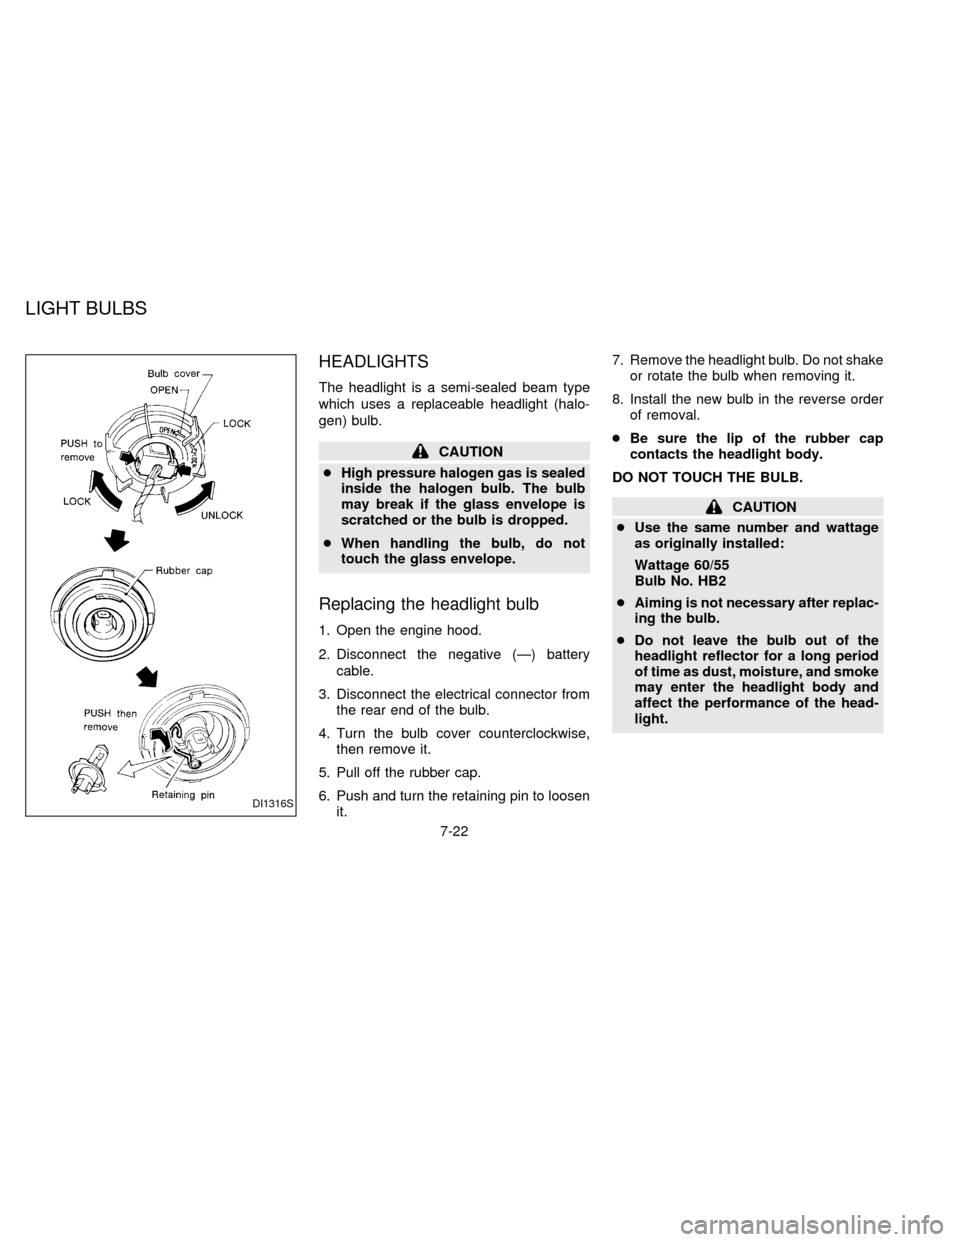
HEADLIGHTS
The headlight is a semi-sealed beam type
which uses a replaceable headlight (halo-
gen) bulb.
CAUTION
cHigh pressure halogen gas is sealed
inside the halogen bulb. The bulb
may break if the glass envelope is
scratched or the bulb is dropped.
cWhen handling the bulb, do not
touch the glass envelope.
Replacing the headlight bulb
1. Open the engine hood.
2. Disconnect the negative (Ð) battery
cable.
3. Disconnect the electrical connector from
the rear end of the bulb.
4. Turn the bulb cover counterclockwise,
then remove it.
5. Pull off the rubber cap.
6. Push and turn the retaining pin to loosen
it.7. Remove the headlight bulb. Do not shake
or rotate the bulb when removing it.
8. Install the new bulb in the reverse order
of removal.
cBe sure the lip of the rubber cap
contacts the headlight body.
DO NOT TOUCH THE BULB.
CAUTION
cUse the same number and wattage
as originally installed:
Wattage 60/55
Bulb No. HB2
cAiming is not necessary after replac-
ing the bulb.
cDo not leave the bulb out of the
headlight reflector for a long period
of time as dust, moisture, and smoke
may enter the headlight body and
affect the performance of the head-
light.
DI1316S
LIGHT BULBS
7-22
ZX
Page 155 of 203
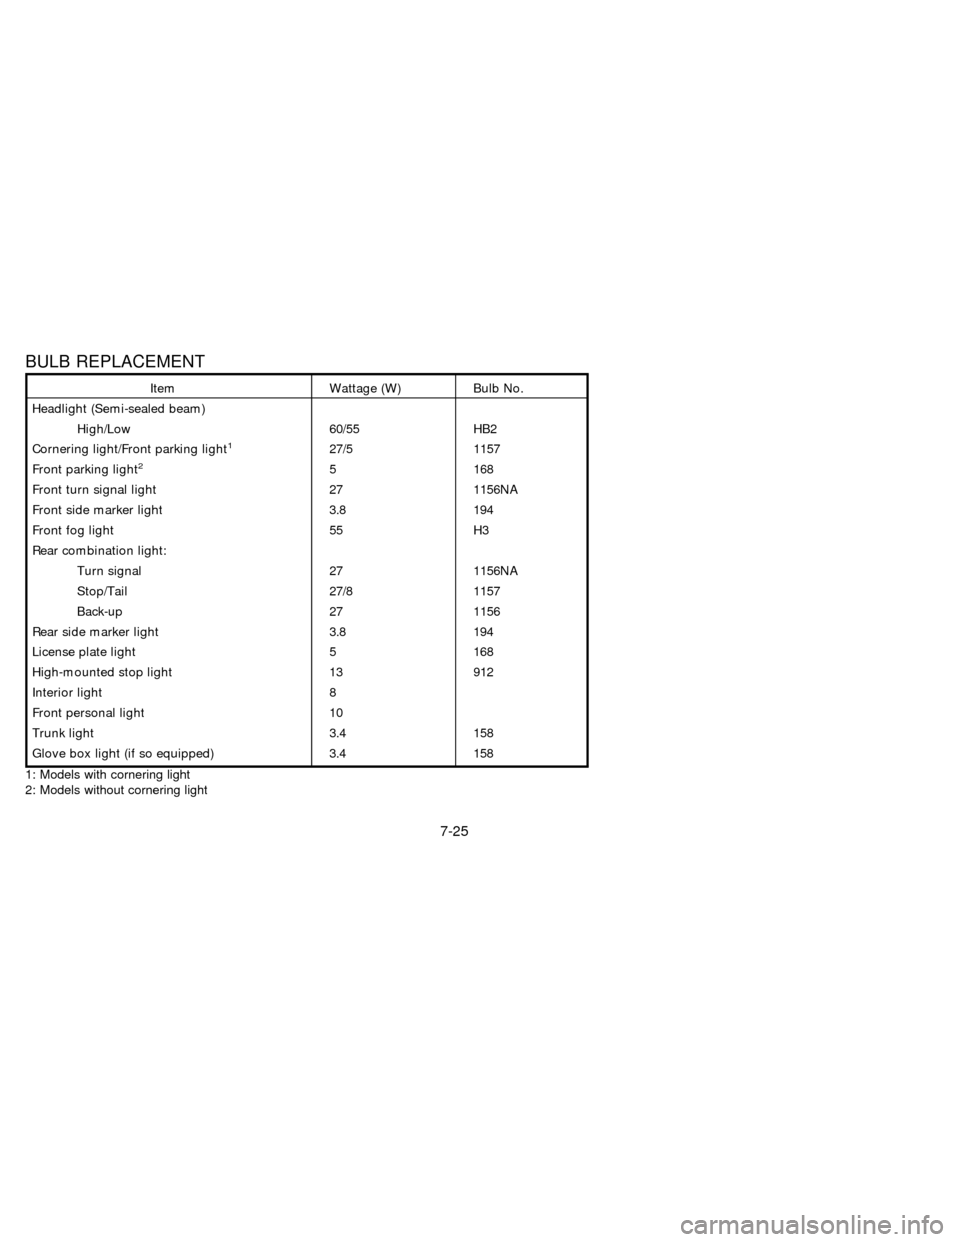
BULB REPLACEMENT
Item Wattage (W) Bulb No.
Headlight (Semi-sealed beam)
High/Low 60/55 HB2
Cornering light/Front parking light
127/5 1157
Front parking light25 168
Front turn signal light 27 1156NA
Front side marker light 3.8 194
Front fog light 55 H3
Rear combination light:
Turn signal 27 1156NA
Stop/Tail 27/8 1157
Back-up 27 1156
Rear side marker light 3.8 194
License plate light 5 168
High-mounted stop light 13 912
Interior light 8
Front personal light 10
Trunk light 3.4 158
Glove box light (if so equipped) 3.4 158
1: Models with cornering light
2: Models without cornering light
7-25
ZX