Page 183 of 4133
133 Interior equipment
Te ch n ica l
data Instruments
and controlsOperationDrivingInstrument
cluster displayPractical hints Car care Index Hooks
Four hooks, located on the rear compartment trim
panels can be used to secure light weight items
(maximum permissible weight per hook: 9 lbs. [4 kg]).Partiti on net (Optional)
Use of the partition net is a particularly important safety
factor when the vehicle is loaded higher than the top of
the seat backrests with smaller objects.
The partition net can be installed behind the backrests
of the front or rear seats.
Note:
Passenger use of seats behind installed partition net is
restricted because of the footwell being taken up by the
net.
Page 185 of 4133
135 Interior equipment
Te ch n ica l
data Instruments
and controlsOperationDrivingInstrument
cluster displayPractical hints Car care Index Installation behind rear seats
1. Insert tie down hooks (2) in rings (3) behind the
rear seats.
2. Pull on loose ends of tie downs until net is tight.Removal:
1. Lift tensioner (4) upward to a horizontal position to
release tensioning of the strap.
2. Disengage tie down hooks (2) from rings (3).
3. Remove partition net from holders (1) and close the
covers.
Storage:
1. Roll up and close partition net.
2. Store partition net behind rear seat bench.
Caution!
While the partition net will help protect you from
smaller objects, it cannot prevent the movement of
large, heavier objects into the passenger area in an
accident. Such items must be properly secured using
the cargo tie-down rings in the cargo area floor, see
page 132.
Page 186 of 4133
136 Interior equipment
Te ch n ica l
data Instruments
and controlsOperationDrivingInstrument
cluster displayPractical hints Car care Index
Loading instructions
The total load weight including vehicle occupants and
luggage / cargo should not exceed the vehicle capacity
weight indicated on the certification label which can be
found on the left door pillar.
The handling characteristics of a fully loaded vehicle
depend greatly on the load distribution. It is therefore
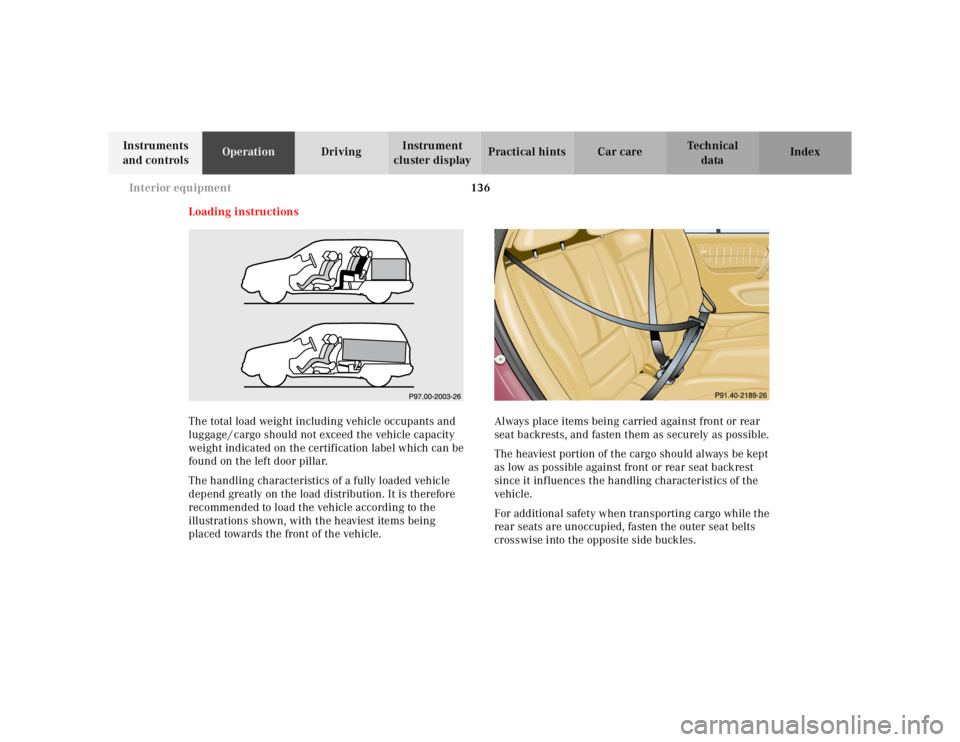
recommended to load the vehicle according to the
illustrations shown, with the heaviest items being
placed towards the front of the vehicle.Always place items being carried against front or rear
seat backrests, and fasten them as securely as possible.
The heaviest portion of the cargo should always be kept
as low as possible against front or rear seat backrest
since it influences the handling characteristics of the
vehicle.
For additional safety when transporting cargo while the
rear seats are unoccupied, fasten the outer seat belts
crosswise into the opposite side buckles.
Page 187 of 4133
137 Interior equipment
Te ch n ica l
data Instruments
and controlsOperationDrivingInstrument
cluster displayPractical hints Car care Index Notes:
The trunk is the preferred place to carry objects. The
enlarged cargo area should only be used for items which
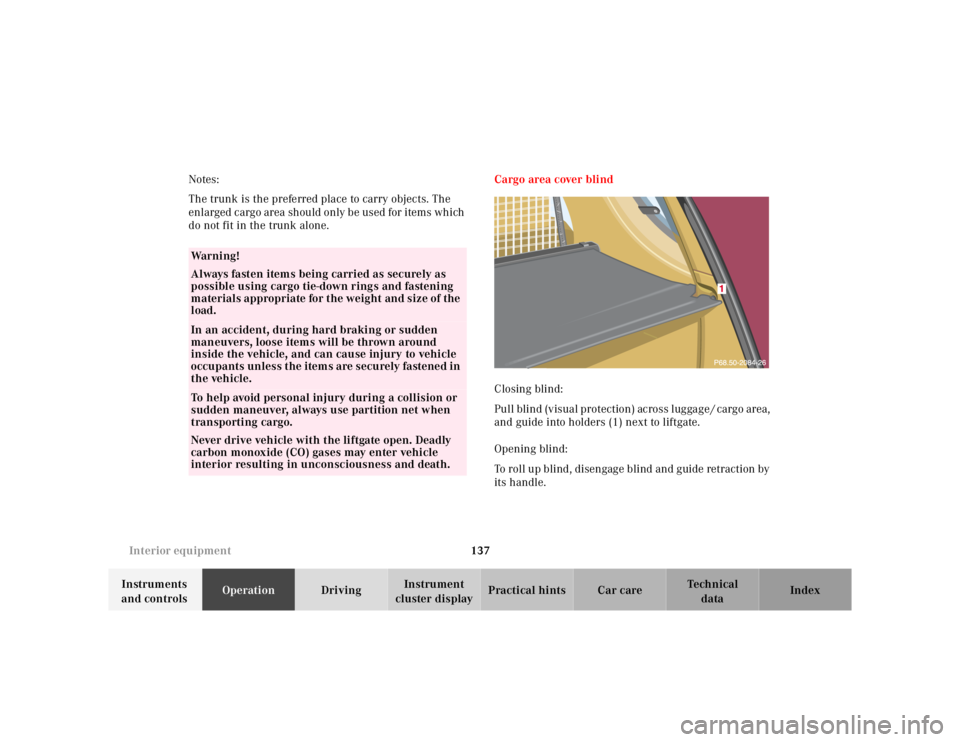
do not fit in the trunk alone.Cargo area cover blind
Closing blind:
Pull blind (visual protection) across luggage / cargo area,
and guide into holders (1) next to liftgate.
Opening blind:
To roll up blind, disengage blind and guide retraction by
its handle.
Wa r n i n g !
Always fasten items being carried as securely as
possible using cargo tie-down rings and fastening
materials appropriate for the weight and size of the
load.In an accident, during hard braking or sudden
maneuvers, loose items will be thrown around
inside the vehicle, and can cause injury to vehicle
occupants unless the items are securely fastened in
the vehicle.To help avoid personal injury during a collision or
sudden maneuver, always use partition net when
transporting cargo.
Never drive vehicle with the liftgate open. Deadly
carbon monoxide (CO) gases may enter vehicle
interior resulting in unconsciousness and death.
Page 218 of 4133
168 Automatic transmission
Te ch n ica l
data Instruments
and controlsOperationDrivingInstrument
cluster displayPractical hints Car care Index
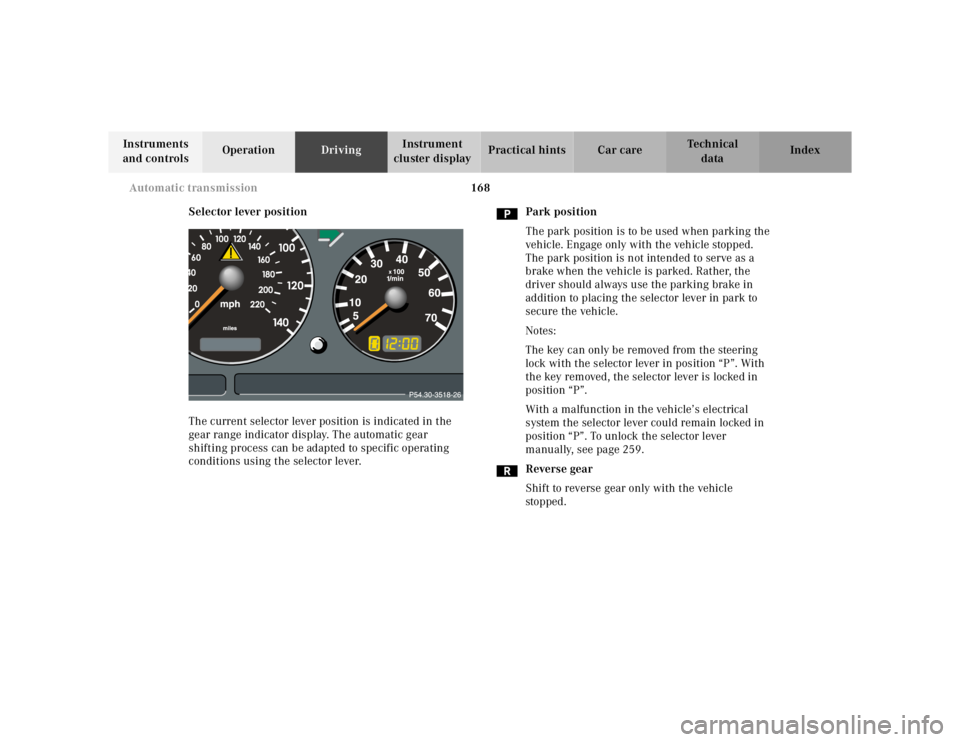
Selector lever position
The current selector lever position is indicated in the
gear range indicator display. The automatic gear
shifting process can be adapted to specific operating
conditions using the selector lever.Park position
The park position is to be used when parking the
vehicle. Engage only with the vehicle stopped.
The park position is not intended to serve as a
brake when the vehicle is parked. Rather, the
driver should always use the parking brake in
addition to placing the selector lever in park to
secure the vehicle.
Notes:
The key can only be removed from the steering
lock with the selector lever in position “P”. With
the key removed, the selector lever is locked in
position “P”.
With a malfunction in the vehicle’s electrical
system the selector lever could remain locked in
position “P”. To unlock the selector lever
manually, see page 259.
Reverse gear
Shift to reverse gear only with the vehicle
sto p ped .
Page 232 of 4133
182 Driving instructions
Te ch n ica l
data Instruments
and controlsOperationDrivingInstrument
cluster displayPractical hints Car care Index
Passenger compartment
Block heater (Canada only)
The engine is equipped with a block heater.
The electrical cable may be installed at your authorized
Mercedes-Benz Light Truck Center.Traveling abroad
Abroad, there is a widely-spread Mercedes-Benz service
network at your disposal. If you plan to travel into areas
which are not listed in the index of your Mercedes-Benz
Light Truck Center directory, you should request
pertinent information from your authorized
Mercedes-Benz Light Truck Center.
Wa r n i n g !
Always fasten items being carried as securely as
possible.In an accident, during hard braking or sudden
maneuvers, loose items will be thrown around
inside the vehicle, and cause injury to vehicle
occupants unless the items are securely fastened in
the vehicle.The trunk is the preferred place to carry objects.
Page 233 of 4133
183 Driving instructions
Te ch n ica l
data Instruments
and controlsOperationDrivingInstrument
cluster displayPractical hints Car care Index Off-Road driving
Familiarize yourself with the vehicle characteristics and
gear changing before you attempt any difficult terrain
off-road driving. We recommend that you start out with
easy off-road travel.
Please read this chapter carefully before you begin
off-road travel.
Special driving features are available for specific kinds
of operation:
•LOW RANGE mode, see page 209
•LOW RANGE - ABS, see page 202
•LOW RANGE - 4-ETS+, see page 204
•LOW RANGE - ESP, see page 208
Engage the LOW RANGE mode before driving under
off-road conditions. For switching LOW RANGE mode on
and off see page 209.
Fasten items being carried as securely as possible, see
page 136.
We recommend to keep doors, liftgate, windows, and
roof closed whenever driving in off-road mode.Important!
Adjust vehicle speed to condition of terrain. The more
uneven, rutty and steeper the terrain, the lower the
speed should be.
Watch out for obstacles, such as rocks, holes,
tree-stumps, ruts.
Be especially careful when driving in unknown
territory. Eventually get out of the vehicle and scout the
path you intend to take.
Continuous and speedy driving in sandy soil overcomes
the vehicle rolling resistance, and helps to prevent the
vehicle from sinking into the ground.
Do not initiate jumps with the vehicle. It interrupts the
forward momentum of the vehicle.
Sand, dirt, mud and other material having friction
property, can cause exceptional wear and tear as well as
failure of the brakes.
In this case the brakes may be less effective or even fail
when you most need them. Always clean and check the
brakes following each off-road trip.
Page 244 of 4133
194 Driving instructions
Te ch n ica l
data Instruments
and controlsOperationDrivingInstrument
cluster displayPractical hints Car care Index
Tow in g a t r ai le r
There are many different laws, including speed limit
restrictions, having to do with trailer towing. Make sure
t ha t your rig will be lega l, not only for w here you reside,
but also for where you will be driving. A good source for
this information can be the police or local authorities.
Before you start driving with the trailer, check the
trailer hitch, break-away switch, safety chains, electrical
connections, lighting and tires. Also adjust the mirrors
to permit unobstructed view beyond rear of trailer.
If the trailer has electric brakes, start your vehicle and
trailer moving slowly, and then apply only the trailer
brake controller by hand to be sure the brakes are
working properly.
When towing a trailer, check occasionally to be sure that
the load is secure, and that lighting and trailer brakes
(if so equipped) are functioning properly.
Always secure items in the trailer to prevent load shifts
while driving.
Take into consideration that when towing a trailer, the
handling characteristics are different and less stable
from those when operating the vehicle without a trailer.
It is important to avoid sudden maneuvers.The vehicle and trailer combination is heavier, and
therefore is limited in acceleration and climbing ability,
and requires longer stopping distances. It is more prone
to reacting to side wind gusts, and requires more
sensitive steering input.
In order to gain skill and an understanding of the
vehicle’s behavior, you should practice turning,
stopping and backing up in an area which is free from
traffic.
If possible, do not brake abruptly, but rather engage the
brake slightly at first to permit the trailer to activate its
brake. Then increase the braking force.
Caution!
If the trailer should begin to sway, reduce the vehicle’s
speed and use the brake controller by hand to straighten
out the vehicle and trailer. In no case should you
attempt to straighten out the tow vehicle and trailer by
increasing the speed or oversteering and stepping on
the brakes.
If the transmission hunts between gears on inclines,
manually shift to a lower gear (select “4”, “3”, “2”
or “1”). A lower gear and reduction of speed reduces the
chance of engine overloading and / or overheating.