Page 1744 of 4133
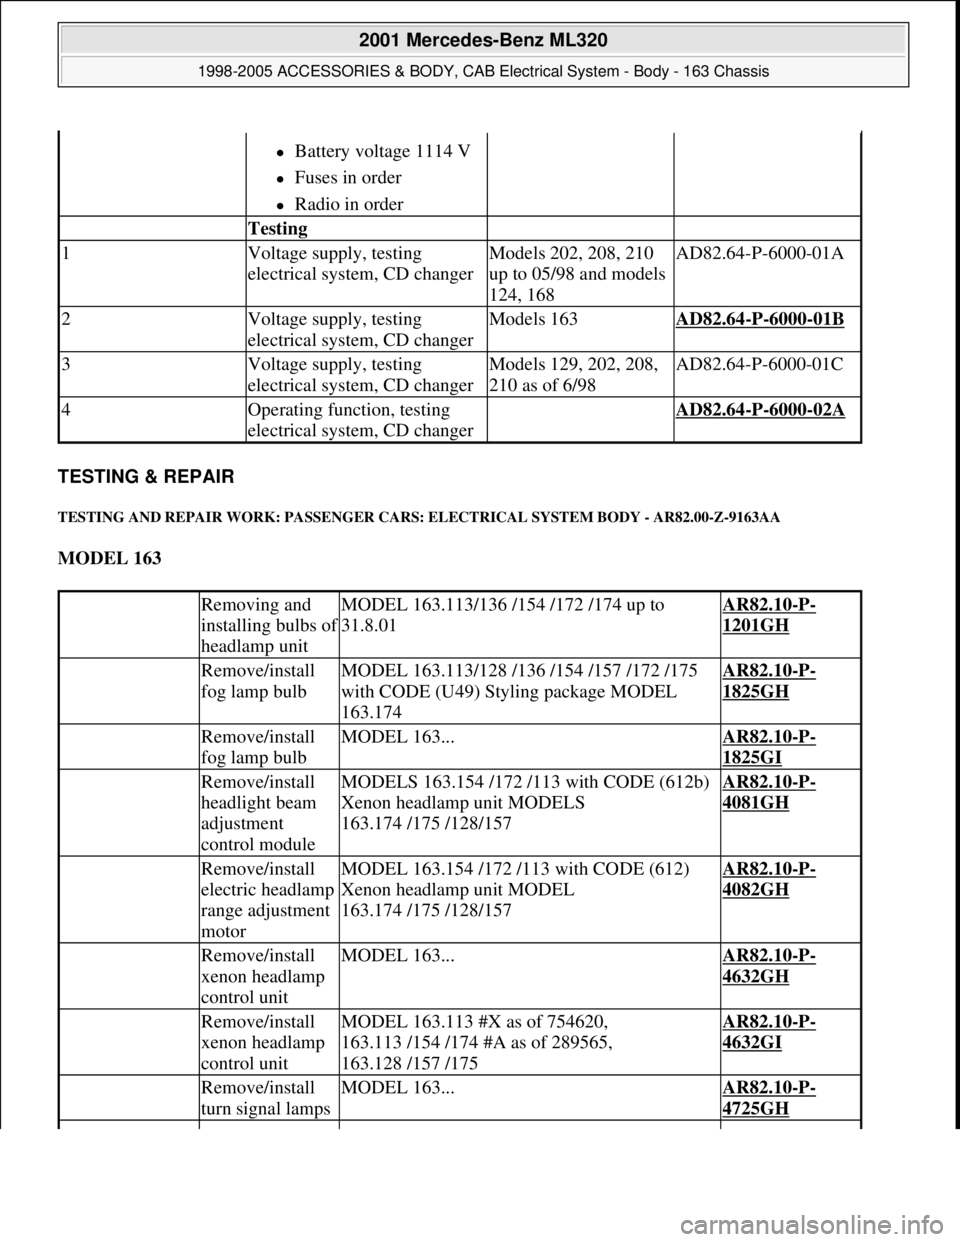
TESTING & REPAIR
TESTING AND REPAIR WORK: PASSENGER CARS: ELECTRICAL SYSTEM BODY - AR82.00-Z-9163AA
MODEL 163
Battery voltage 1114 V
Fuses in order
Radio in order
Testing
1Voltage supply, testing
electrical system, CD changerModels 202, 208, 210
up to 05/98 and models
124, 168AD82.64-P-6000-01A
2Voltage supply, testing
electrical system, CD changerModels 163AD82.64-P-6000-01B
3Voltage supply, testing
electrical system, CD changerModels 129, 202, 208,
210 as of 6/98AD82.64-P-6000-01C
4Operating function, testing
electrical system, CD changer AD82.64-P-6000-02A
Removing and
installing bulbs o
f
headlamp unit
MODEL 163.113/136 /154 /172 /174 up to
31.8.01AR82.10-P-
1201GH
Remove/install
fog lamp bulbMODEL 163.113/128 /136 /154 /157 /172 /175
with CODE (U49) Styling package MODEL
163.174AR82.10-P-
1825GH
Remove/install
fog lamp bulbMODEL 163...AR82.10-P-
1825GI
Remove/install
headlight beam
adjustment
control moduleMODELS 163.154 /172 /113 with CODE (612b)
Xenon headlamp unit MODELS
163.174 /175 /128/157AR82.10-P-
4081GH
Remove/install
electric headlamp
range adjustment
motorMODEL 163.154 /172 /113 with CODE (612)
Xenon headlamp unit MODEL
163.174 /175 /128/157AR82.10-P-
4082GH
Remove/install
xenon headlamp
control unitMODEL 163...AR82.10-P-
4632GH
Remove/install
xenon headlamp
control unitMODEL 163.113 #X as of 754620,
163.113 /154 /174 #A as of 289565,
163.128 /157 /175AR82.10-P-
4632GI
Remove/install
turn signal lampsMODEL 163...AR82.10-P-
4725GH
2001 Mercedes-Benz ML320
1998-2005 ACCESSORIES & BODY, CAB Electrical System - Body - 163 Chassis
me
Saturday, October 02, 2010 3:30:08 PMPage 249 © 2006 Mitchell Repair Information Company, LLC.
Page 1750 of 4133
Fig. 155: Identifying Longitudinal Wedge (115 589 03 59 00)
REMOVE/INSTALL FOG LA MP BULB - AR82.10-P-1825GI
MODELS 163.113 #A as of 289565, 163.113 #X as of 754620, 163.154 #A as of 289565, 163.154 #X as of
754620, 163.128/157/175
Fig. 156: Identifying Fog Lamp Bulb Components
REMOVE/INSTALL HEADLIGHT BEAM ADJUSTMENT CONTROL MODULE - AR82.10-P-4081GH
order
Remove/install
1Remove fog lamp (1) AR82.10-P-5103GI
2Remove bulb with plug
(2)Do not hold the bulb with
bare fingers, as fingerprints
bake and leave behind
opaqueness on the bulb. Use
a soft, lint-free cloth.
To unlock, rotate
counterclockwise.
The bulb and plug are
one unit.
3Install in the reverse
order
2001 Mercedes-Benz ML320
1998-2005 ACCESSORIES & BODY, CAB Electr ical System - Body - 163 Chassis
me
Saturday, October 02, 2010 3:30:08 PMPage 255 © 2006 Mitchell Repair Information Company, LLC.
Page 1751 of 4133
MODELS 163.154 /172 /113 with CODE (612b) Xenon headlamp unit
MODELS 163.174/175/128/157
Fig. 157: Identifying Headlight Beam Adjustment Control Module
Remove/Install
1Remove cover below
instrument panel (left) AR68.10-P-1500GH
2Disconnect connector
from headlamp range
adjustment control module
(N71)
3Unscrew headlamp range
adjustment control module
from mount of extended
activity module (EAM) 2 nuts.
4Remove headlamp range
adjustment control module
(N71)
5Install in the reverse order
6Adjust headlamp into zero
position using STAR
DIAGNOSIS
2001 Mercedes-Benz ML320
1998-2005 ACCESSORIES & BODY, CAB Electrical System - Body - 163 Chassis
me
Saturday, October 02, 2010 3:30:08 PMPage 256 © 2006 Mitchell Repair Information Company, LLC.
Page 1752 of 4133
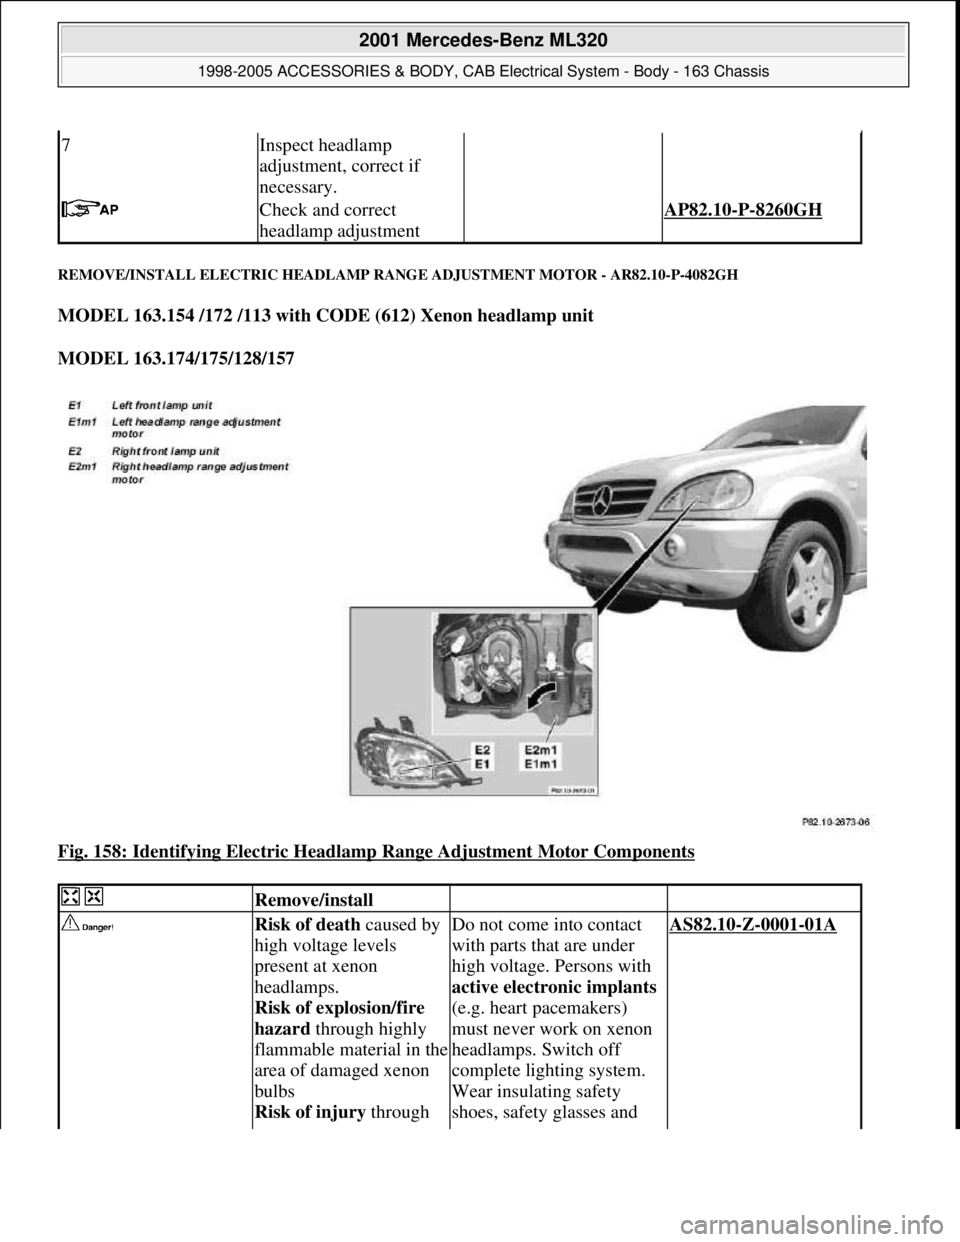
REMOVE/INSTALL ELECTRIC HEADLAMP RANGE ADJUSTMENT MOTOR - AR82.10-P-4082GH
MODEL 163.154 /172 /113 with CODE (612) Xenon headlamp unit
MODEL 163.174/175/128/157
Fig. 158: Identifying Electric Headlamp Range Adjustment Motor Components
7Inspect headlamp
adjustment, correct if
necessary.
Check and correct
headlamp adjustment AP82.10-P-8260GH
Remove/install
Risk of death caused by
high voltage levels
present at xenon
headlamps.
Risk of explosion/fire
hazard through highly
flammable material in the
area of damaged xenon
bulbs
Risk of injury through Do not come into contact
with parts that are under
high voltage. Persons with
active electronic implants
(e.g. heart pacemakers)
must never work on xenon
headlamps. Switch off
complete lighting system.
Wear insulating safety
shoes, safety glasses and AS82.10-Z-0001-01A
2001 Mercedes-Benz ML320
1998-2005 ACCESSORIES & BODY, CAB Electrical System - Body - 163 Chassis
me
Saturday, October 02, 2010 3:30:09 PMPage 257 © 2006 Mitchell Repair Information Company, LLC.
Page 1753 of 4133
REMOVE/INSTALL XENON HEADLAMP CONTROL UNIT - AR82.10-P-4632GH
MODEL 163.113 #X up to 754619, 163.113 /154 #A up to 289564, 163.172 with CODE (612) Xenon
UV light, hot
components on xenon
headlamps and glass
splinters when xenon
bulbs burst
Risk of poisoning
through inhalation of
mercury vapor and
swallowing of or skin
contact with toxic salts
and mercury compoundsprotective gloves. Remove
highly inflammable
materials from the hazard
area. Ensure that the
workplace is sufficiently
ventilated.
1Remove left front lamp
unit (E1) or right front
lamp unit (E2) AR82.10-P-4730GH
2Remove cover from rear
of lamp unit
3Turn left headlamp range
adjustment motor
(E1m1) or right
headlamp range
adjustment motor
(E2m1) to right and
remove from left front
lamp unit (E1) or right
front lamp unit (E2) Left side: 1/4 clockwise
rotation. Right side: 1/4
counterclockwise rotation.
4Unhook adjusting
support and remove left
headlamp range
adjustment motor
(E1m1) or right
headlamp range
adjustment (E2m1)
5Install in the reverse
order
6Set headlamps to zero
position using STAR
DIAGNOSIS
7Inspect headlamp
adjustment, correct if
necessary.
Check and correct
headlamp adjustment AP82.10-P-8260GH
2001 Mercedes-Benz ML320
1998-2005 ACCESSORIES & BODY, CAB Electrical System - Body - 163 Chassis
me
Saturday, October 02, 2010 3:30:09 PMPage 258 © 2006 Mitchell Repair Information Company, LLC.
Page 1754 of 4133
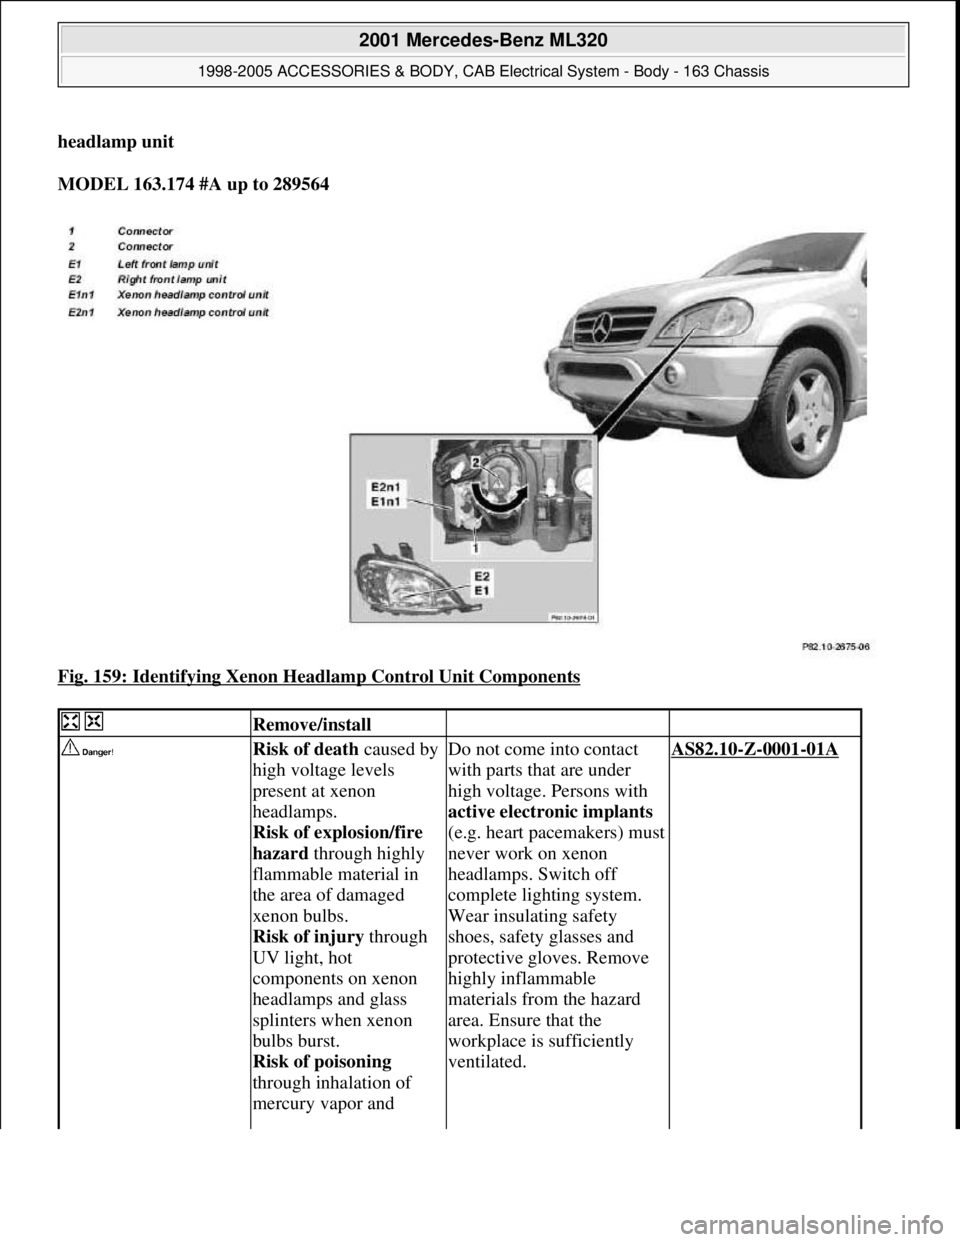
headlamp unit
MODEL 163.174 #A up to 289564
Fig. 159: Identifying Xenon Headlamp Control Unit Components
Remove/install
Risk of death caused by
high voltage levels
present at xenon
headlamps.
Risk of explosion/fire
hazard through highly
flammable material in
the area of damaged
xenon bulbs.
Risk of injury through
UV light, hot
components on xenon
headlamps and glass
splinters when xenon
bulbs burst.
Risk of poisoning
through inhalation of
mercury vapor and Do not come into contact
with parts that are under
high voltage. Persons with
active electronic implants
(e.g. heart pacemakers) must
never work on xenon
headlamps. Switch off
complete lighting system.
Wear insulating safety
shoes, safety glasses and
protective gloves. Remove
highly inflammable
materials from the hazard
area. Ensure that the
workplace is sufficiently
ventilated.AS82.10-Z-0001-01A
2001 Mercedes-Benz ML320
1998-2005 ACCESSORIES & BODY, CAB Electrical System - Body - 163 Chassis
me
Saturday, October 02, 2010 3:30:09 PMPage 259 © 2006 Mitchell Repair Information Company, LLC.
Page 1756 of 4133
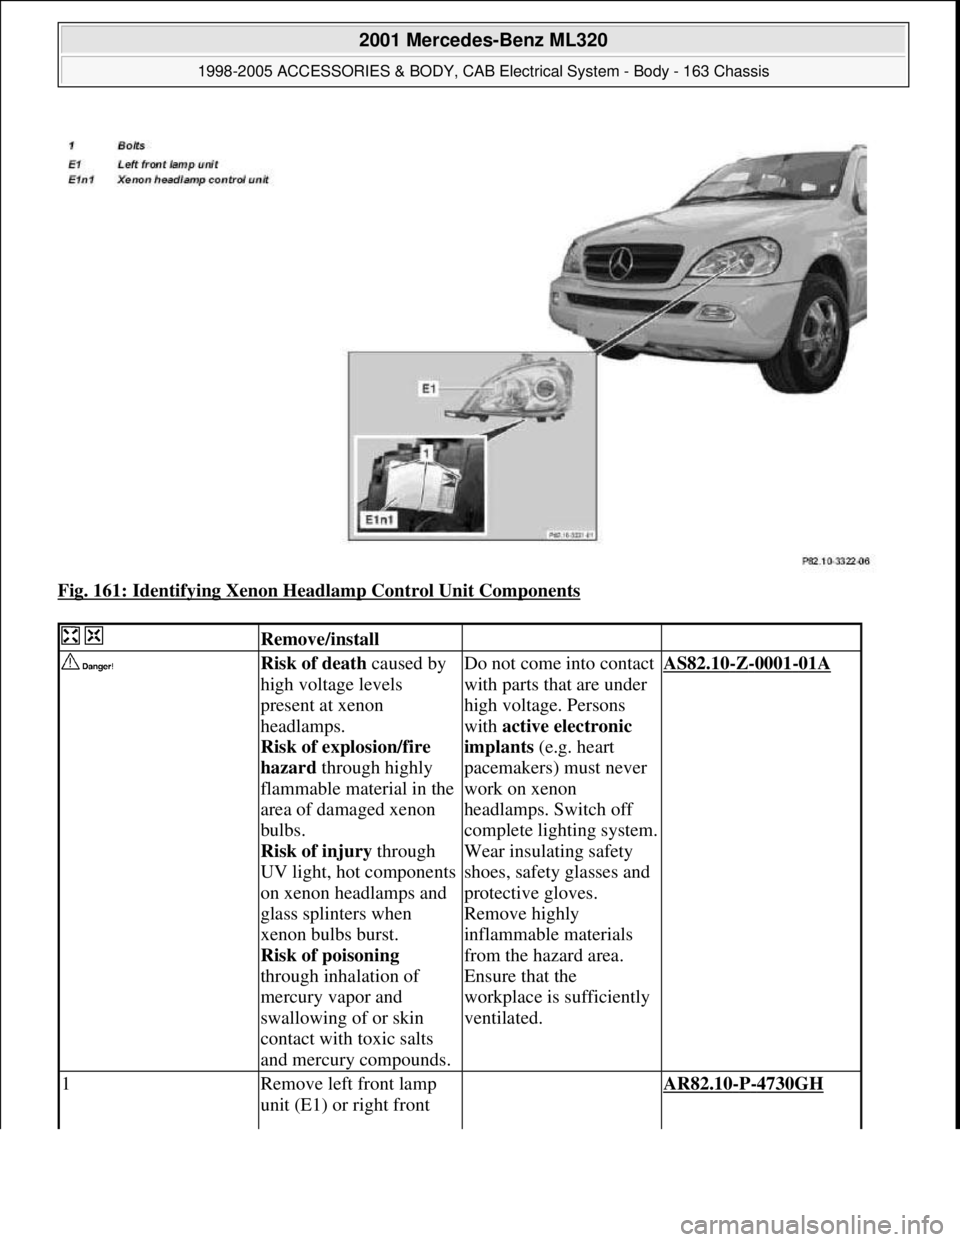
Fig. 161: Identifying Xenon Headlamp Control Unit Components
Remove/install
Risk of death caused by
high voltage levels
present at xenon
headlamps.
Risk of explosion/fire
hazard through highly
flammable material in the
area of damaged xenon
bulbs.
Risk of injury through
UV light, hot components
on xenon headlamps and
glass splinters when
xenon bulbs burst.
Risk of poisoning
through inhalation of
mercury vapor and
swallowing of or skin
contact with toxic salts
and mercury compounds.Do not come into contact
with parts that are under
high voltage. Persons
with active electronic
implants (e.g. heart
pacemakers) must never
work on xenon
headlamps. Switch off
complete lighting system.
Wear insulating safety
shoes, safety glasses and
protective gloves.
Remove highly
inflammable materials
from the hazard area.
Ensure that the
workplace is sufficiently
ventilated.AS82.10-Z-0001-01A
1Remove left front lamp
unit (E1) or right front AR82.10-P-4730GH
2001 Mercedes-Benz ML320
1998-2005 ACCESSORIES & BODY, CAB Electrical System - Body - 163 Chassis
me
Saturday, October 02, 2010 3:30:09 PMPage 261 © 2006 Mitchell Repair Information Company, LLC.
Page 1769 of 4133
REMOVE/INSTALL FRONT OVERHEAD CONTROL PANEL - AR82.20-P-1100GH
MODEL 163.113 /128 /136 /154 /157 /172 /174 /175
Fig. 175: Identifying Front Overhead Control Panel Components
without Parktronic system (PTS), code 220a
up to vehicle identification number
A346574: ?
Changing dome lamp in the rearAR82.20-P-0113-
01GH
Changing dome
lamp in the rear BT82.20-P-0001-
03GH
Remove/install
1Remove garage door
opener flap (1) from
overhead control panel (2)
2Unclip cover (3) on the
sliding/tilting roof switch
(S13/2) 4 clips.
3Unclip glass covers (4)
from interior lights
4Unscrew screws (5)
2001 Mercedes-Benz ML320
1998-2005 ACCESSORIES & BODY, CAB Electrical System - Body - 163 Chassis
me
Saturday, October 02, 2010 3:30:09 PMPage 274 © 2006 Mitchell Repair Information Company, LLC.