Page 172 of 315

167
Whenever you start your vehicle, release the key as
soon as the engine starts. Excessive cranking could
damage the starter.
After you start the engine, let it idle for a few
seconds. Keep your foot on the brake pedal and put
the gearshift lever in gear. Release the parking
brake. Slowly release the brake pedal and drive
away in the normal manner.
NOTE:Your vehicle has an interlock that prevents
you from shifting out of P (Park) unless your foot is
on the brake pedal.
If the engine does not start after two attempts:
1. Turn the ignition key to the OFF position.
2. Press the accelerator all the way to the floor
and hold it.
3. Turn the ignition key to the START position.4. Release the ignition key when the engine starts.
5. Release the accelerator gradually as the engine
speeds up.
If the engine still does not start, the fuel pump
shut-off switch may have been activated. For
directions on how to reset the switch seeFuel
Pump Shut-Off Switchin the index.
A computer system controls the engine's idle speed.
When you start your vehicle, the engine's idle
speed normally runs higher than when it is warmed
up. These faster engine speeds will make your
vehicle move slightly faster than its normal idle
speed. It should, however, slow down after a short
time. If it does not, have the idle speed checked.
If the engine idle speed does not slow down
automatically, do not allow your vehicle to idle for
more than 10 minutes. Have the vehicle checked.
File:08fnto8.ex
Update:Wed Jun 19 15:04:46 1996
Page 176 of 315

171
DrivingBrakesApplying the BrakesYour vehicle has anti-lock disc brakes on all four
wheels. They adjust automatically as the brake pads
wear down.
When you press down hard on the brake pedal, the
wheels will not lock and slide. The Anti-Lock Brake
System (ABS) automatically starts releasing and
reapplying the brakes at each wheel independently
whenever your wheels start to lock. When this
happens, you will feel the brake pedal pulsate. This
is an indication that the ABS is working correctly
and is normal.
Do not drive with your foot resting on the brake
pedal; you will wear out the linings and increase
your vehicle's stopping distance. Brake rotor damage
may also eventually occur.NOTE:If you are driving down a long or steep hill,
shift to a lower gear and do not apply your brakes
continuously. If you apply your brakes continuously,
they may overheat and become less effective.
Occasional brake squeal during light to moderate
stops does not affect the function of the brake
system and is normal. However, if the squeal
becomes louder or more frequent, have your brakes
inspected by your dealer or a qualified service
technician.
Ford Motor Company has not found any
detrimental effects of popular mobile radio
transmitting equipment installed on vehicles with
the anti-lock brake system, if the equipment is
installed according to the manufacturer's
instructions. However, if mobile radio transmitting
equipment is installed in your vehicle and, if either
the anti-lock brake system cycles or the ANTI-LOCK
File:09fngf8.ex
Update:Wed Jun 19 10:45:23 1996
Page 177 of 315
172
lightcome son at an ytim eothe rtha nrigh tafter
WARNING
Alway sse tth eparkin gbrak efull yand
Page 179 of 315

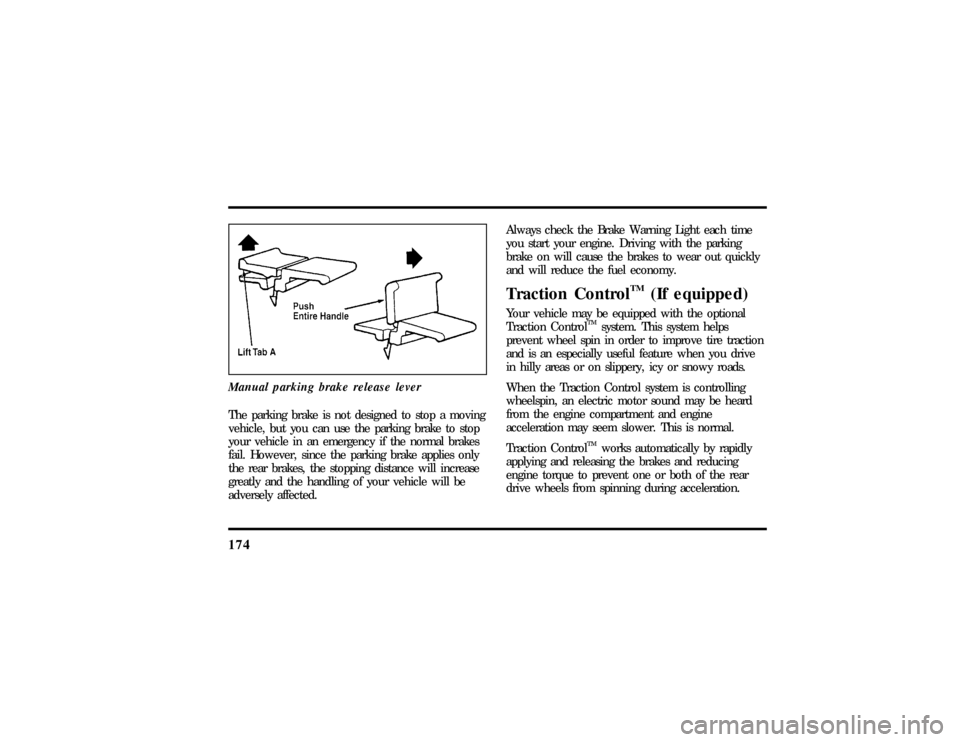
174Manual parking brake release leverThe parking brake is not designed to stop a moving
vehicle, but you can use the parking brake to stop
your vehicle in an emergency if the normal brakes
fail. However, since the parking brake applies only
the rear brakes, the stopping distance will increase
greatly and the handling of your vehicle will be
adversely affected.Always check the Brake Warning Light each time
you start your engine. Driving with the parking
brake on will cause the brakes to wear out quickly
and will reduce the fuel economy.
Traction Control
TM
(If equipped)
Your vehicle may be equipped with the optional
Traction Control
TM
system. This system helps
prevent wheel spin in order to improve tire traction
and is an especially useful feature when you drive
in hilly areas or on slippery, icy or snowy roads.
When the Traction Control system is controlling
wheelspin, an electric motor sound may be heard
from the engine compartment and engine
acceleration may seem slower. This is normal.
Traction Control
TM
works automatically by rapidly
applying and releasing the brakes and reducing
engine torque to prevent one or both of the rear
drive wheels from spinning during acceleration.
File:09fngf8.ex
Update:Wed Jun 19 10:45:23 1996
Page 185 of 315

180R (Reverse)With the gearshift in the R (Reverse) position, the
vehicle will move backward. You should always
come to a complete stop before shifting into or out
of R (Reverse).N (Neutral)With the gearshift in the N (Neutral) position, the
vehicle can be started and is free to roll. Hold the
brake pedal down while in this position.DrivingYour vehicle's gearshift is console-mounted on the
floor. The Transmission Control Switch (TCS) is
located on the gearshift handle. The Transmission
Control Indicator Light is located on the instrument
panel. You can put the gearshift lever in any of the
several positions.The O/D OFF light is off (not illuminated) during
normal vehicle operation. This allows the
transmission to upshift and downshift from 1st
through 4th gears. When the TCS is pressed, the
Transmission Control Indicator Light will illuminate
(O/D OFF) on the instrument panel. When this
O/D OFF is illuminated, the transmission will
upshift and downshift from 1st through 3rd gears.
If O/D OFF light does not come ªONº when TCS
is depressed or if the light flashes when you are
driving, have your vehicle serviced at the first
opportunity. If this condition persists, damage could
occur to the transmission.
To return the transmission to normal operation (1st
through 4th gear) depress the TCS again. This
switch may be used to cancel overdrive any time
the vehicle is being driven. Each time your vehicle
is started, the overdrive system will automatically be
in the normal overdrive mode and the light will not
be illuminated.
File:09fngf8.ex
Update:Wed Jun 19 10:45:23 1996
Page 218 of 315
213
After the vehicle is started, let it idle for a while to
let the engine ªrelearnº its idle conditions. Drive it
around for a while with all electrical accessories
turned off to let the battery recharge. Driveability
may be deteriorated slightly until all drive modes
are ªrelearned.ºYou may need to use a battery
charger to fully recharge the battery.
If you need to replace your battery, seeBatteryin
theMaintenance and Carechapter.
Towing Your VehicleIf you need to have your vehicle towed, contact a
professional towing service or, if you are a member,
your roadside assistance center. Typical towing
options include wheel lift towing or flat bed towing.
Front towing
File:10fner8.ex
Update:Thu Jun 20 14:27:22 1996
Page 220 of 315

215
Maintenance and CareService Made EasyFord has two goals for servicing your vehicle.
1. When we can, we design parts that do not
need to be serviced.
2. We want to make servicing your vehicle as
easy as possible. To help you:q
We highlight do-it-yourself items in yellow in
the engine compartment so that you can find
them easily.
q
When possible, we design parts that can be
replaced without tools.
q
We give you a Maintenance Schedule that
makes tracking routine service for your vehicle
easy. The maintenance schedule is located in
theMaintenance Schedulebooklet.This chapter tells you about the basic parts that you
need to check and service regularly.
If your vehicle needs professional servicing, your
dealership can provide the parts and service
required. Check yourWarranty Information Booklet
to find out which parts and services are covered.
Also see theCustomer Assistancechapter of this
Owner Guide.
Ford Motor Company recommends that the Owner
Maintenance Checks listed in theMaintenance
Schedulebooklet be performed for the proper
operation of your vehicle. In addition to the
conditions listed in theOwner Maintenance
Checklist, be alert for any unusual noise, vibration,
or other indication that your vehicle may need
service. If you do notice something unusual, see
that your vehicle is serviced promptly.
File:11fnmc8.ex
Update:Thu Jun 20 14:28:32 1996
Page 228 of 315

223
Checking and Adding Engine OilSince the proper amount of engine oil is important
for safe engine operation, check the oil using the
dipstick each time you put fuel in your vehicle.
Remember the engine must be off, the oil must be
warm and the vehicle must be parked on level
ground.
Checking the engine oil level:
1. Turn the engine off after it has warmed up and
allow a few minutes for the engine oil to drain
back into the oil pan.
2. Set the parking brake, making sure the gearshift
is securely latched in P (Park).
3. Open the hood. Protect yourself from engine
heat.
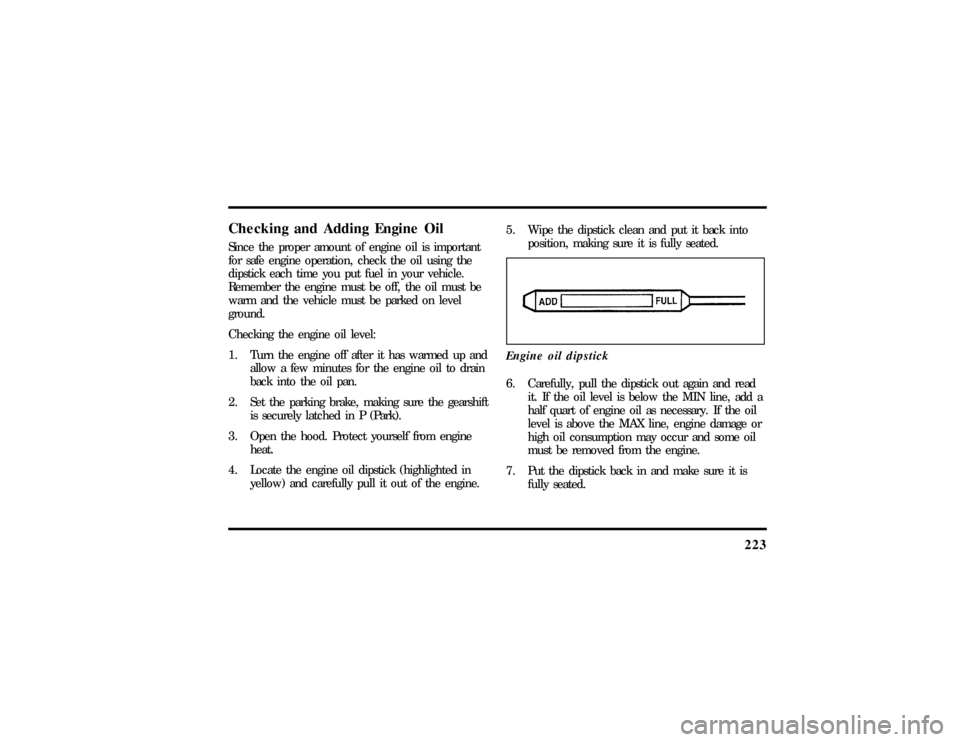
4. Locate the engine oil dipstick (highlighted in
yellow) and carefully pull it out of the engine.5. Wipe the dipstick clean and put it back into
position, making sure it is fully seated.
Engine oil dipstick
6. Carefully, pull the dipstick out again and read
it. If the oil level is below the MIN line, add a
half quart of engine oil as necessary. If the oil
level is above the MAX line, engine damage or
high oil consumption may occur and some oil
must be removed from the engine.
7. Put the dipstick back in and make sure it is
fully seated.
File:11fnmc8.ex
Update:Thu Jun 20 14:28:32 1996