Page 104 of 321

100The Electronic Compass
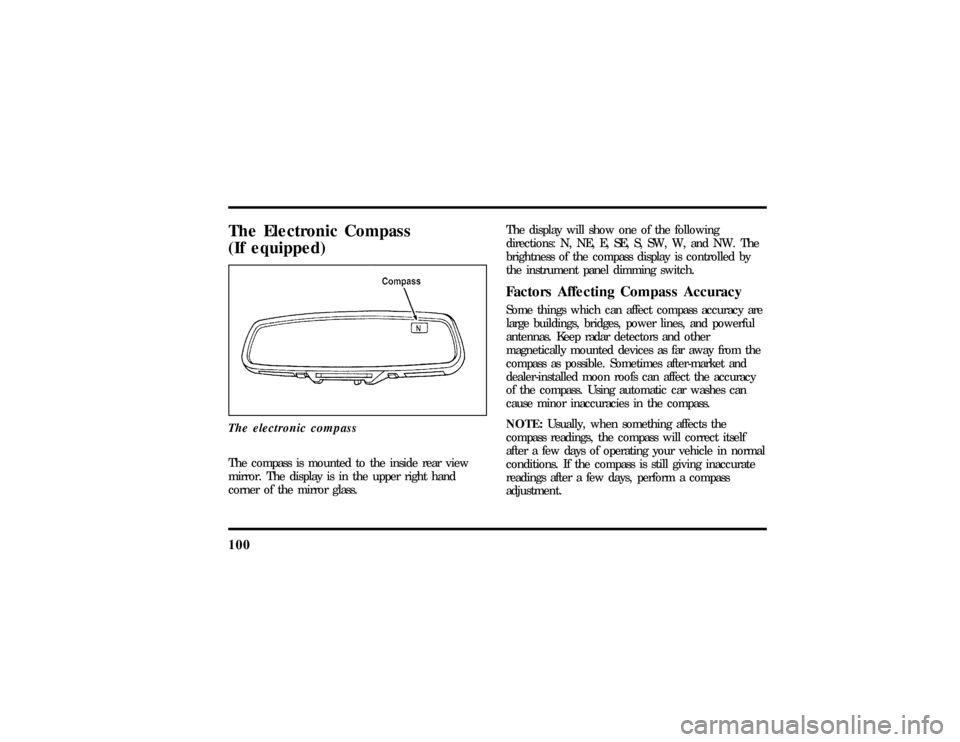
(If equipped)The electronic compassThe compass is mounted to the inside rear view
mirror. The display is in the upper right hand
corner of the mirror glass.The display will show one of the following
directions: N, NE, E, SE, S, SW, W, and NW. The
brightness of the compass display is controlled by
the instrument panel dimming switch.
Factors Affecting Compass AccuracySome things which can affect compass accuracy are
large buildings, bridges, power lines, and powerful
antennas. Keep radar detectors and other
magnetically mounted devices as far away from the
compass as possible. Sometimes after-market and
dealer-installed moon roofs can affect the accuracy
of the compass. Using automatic car washes can
cause minor inaccuracies in the compass.
NOTE:Usually, when something affects the
compass readings, the compass will correct itself
after a few days of operating your vehicle in normal
conditions. If the compass is still giving inaccurate
readings after a few days, perform a compass
adjustment.
File:05fncfc.ex
Update:Fri Sep 6 14:53:57 1996
Page 105 of 321
101
Compass-Calibration1. For optimum calibration, switch off all
non-essential electrical accessories (rear window
defrost, heater/air conditioning, map lamps,
wipers, etc.) and ensure all doors are shut.
2. Drive to an open, level area away from large
metallic objects or structures.
3. Insert an appropriate diameter rod (paper clip)
into the left switch access hole underneath the
compass module and press gently for 1-2
seconds until ªCALº and a direction appear on
the display.
4. Release the button and drive in a circle until
ªCALº disappears from the display (approx. 2-3
circles).
Compass-Zone Adjustment1. The zone setting is factory pre-set to Zone 8.
Refer to the Zone Map in this manual to verify
the correct compass zone setting for your
geographical location.
File:05fncfc.ex
Update:Fri Sep 6 14:53:57 1996
Page 106 of 321
102
2. Insert an appropriate diameter rod (paper clip)
into the right switch access hole underneath
the compass module and gently press the right
button for 1-2 seconds until ªZONEº and the
current zone setting appear in the display.
3. Release the right button.
4. Pressing the right button repeatedly will cycle
through all possible zone settings. Stop cycling
when the correct zone setting for your location
appears.
5. Releasing the button for 2 seconds will exit the
zone entry mode.
File:05fncfc.ex
Update:Fri Sep 6 14:53:57 1996
Page 111 of 321

107
The Ride/Steering menu is located in the Message
Center. The RIDE display allows you to adjust the
suspension feel to FIRM, NORMAL, or PLUSH.
Pressing the Ride/Steering menu switch again brings
the STEERING display. This allows you to adjust
steering effort to LOW, NORMAL, or HIGH.
For more information on ride/steering options, see
Road Calibrated Suspensionlater in this chapter.
Personality Memory also allows you to customize
settings from the Feature menu located in the
Message Center. The Feature menu contains five (5)
features that you can enable or disable. The features
are listed in the order they appear in the Feature
menu.
q
EXPRESS WINDOW - for one tap down
operation of the driver's window.
q
AUTO DOOR LOCKS - automatically locks all
doors when the driver shifts out of PARK, all
doors are closed, and the vehicle speed is at
least three mph (five km/h).
q
HORN CHIRP - sounds an audible ªchirpº
when you press the LOCK button on the
remote entry transmitter to verify that the doors
have been locked and the vehicle's anti-theft
system has been armed (if equipped).
q
SEAT ACCESS - moves the driver's seat back
two (2) inches or to the end of the seat track
when the vehicle is turned off and the ignition
key is removed. Upon the driver entering the
vehicle and closing the door, the seat will move
forward to its previous position.
File:05fncfc.ex
Update:Fri Sep 6 14:53:57 1996
Page 113 of 321

109
NOTE:Please note that even though the driver's
Personality Memory may be recalled using remote
or keyless entry, the seats and mirrors will not
move to the driver's set positions until the driver's
door is opened.Memory SwitchesPressing either the Memory 1 or Memory 2 switch
on the driver's door will also recall the Personality
Memory settings as selected, providing your vehicle
is in P (Park) or N (Neutral).Auto SaveAny change made by the driver to one of the above
Personality Memory settings will be updated and
saved automatically. The display, SAVED TO
DRIVER 1 or SAVED TO DRIVER 2, will appear on
the Message Center for five (5) seconds as a
confirmation of the update to Personality Memory.
If a radio preset is changed the radio display will
also show SAVED.If the driver does not use the remote entry
transmitter, or keyless entry keypad to unlock the
doors upon entering or does not press the Memory
1 or Memory 2 switch, then any change to one of
the Personality Memory settings (except radio
presets) will not be automatically saved. Instead the
driver will be prompted by the Message Center
whether to save the settings to Driver 1 or Driver
2.
Pressing the SELECT switch will toggle between 1,
2 or no choice. If DRIVER 1 or DRIVER 2 is
selected, the display, SAVED TO DRIVER 1 or
SAVED TO DRIVER 2, will appear on the Message
Center to confirm the change has been
automatically saved with the Personality Memory. If
no choice is made by the driver, then the change
will not be automatically saved and there is no
effect on the Personality Memory.
Once this screen has been displayed, the driver will
not be asked again for the remainder of the drive.
File:05fncfc.ex
Update:Fri Sep 6 14:53:57 1996
Page 114 of 321

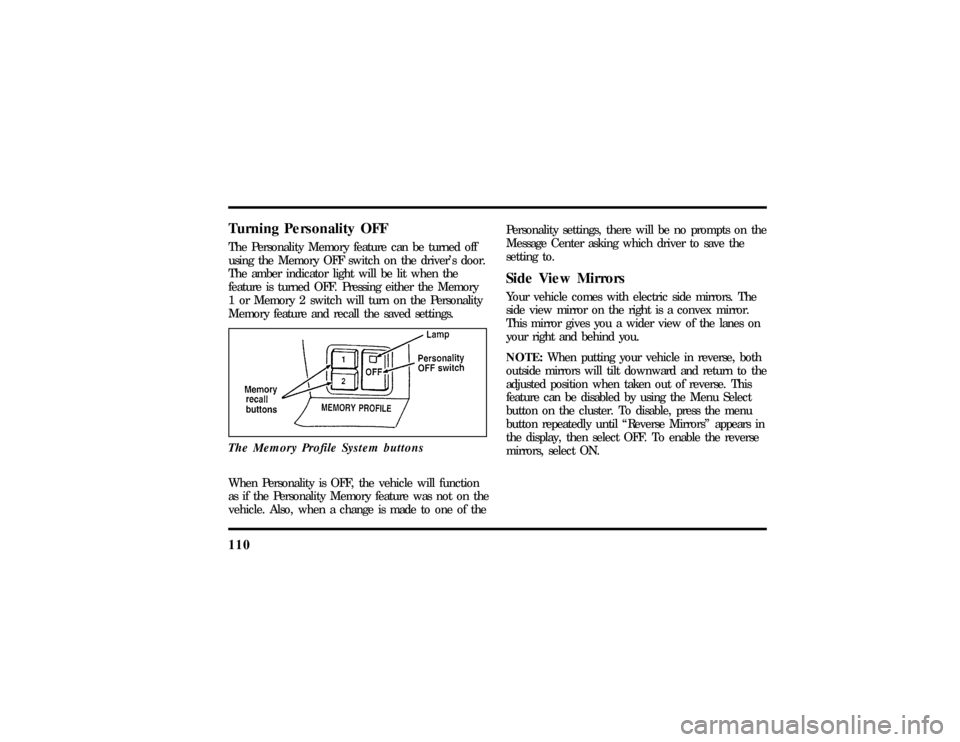
110Turning Personality OFFThe Personality Memory feature can be turned off
using the Memory OFF switch on the driver's door.
The amber indicator light will be lit when the
feature is turned OFF. Pressing either the Memory
1 or Memory 2 switch will turn on the Personality
Memory feature and recall the saved settings.
The Memory Profile System buttonsWhen Personality is OFF, the vehicle will function
as if the Personality Memory feature was not on the
vehicle. Also, when a change is made to one of thePersonality settings, there will be no prompts on the
Message Center asking which driver to save the
setting to.
Side View MirrorsYour vehicle comes with electric side mirrors. The
side view mirror on the right is a convex mirror.
This mirror gives you a wider view of the lanes on
your right and behind you.
NOTE:When putting your vehicle in reverse, both
outside mirrors will tilt downward and return to the
adjusted position when taken out of reverse. This
feature can be disabled by using the Menu Select
button on the cluster. To disable, press the menu
button repeatedly until ªReverse Mirrorsº appears in
the display, then select OFF. To enable the reverse
mirrors, select ON.
File:05fncfc.ex
Update:Fri Sep 6 14:53:57 1996
Page 227 of 321
226Engine Oil RecommendationsWe recommend using Motorcraft oil or an
equivalent oil meeting Ford Specification
WSS-M2C153-F and displaying the American
Petroleum Institute CERTIFICATION MARK on the
front of the container.
The API Certification Mark
Neveruse:q
ªNon-Detergentº oils
q
Oils labeled API SA, SB, SC, SD, SE, SF or SG
q
Additional engine oil additives, oil treatments or
engine treatments
Engine oils with anSAE 5W-30viscosity are
PREFERREDfor your vehicle. They provide the
best engine performance, fuel economy and engine
protection for all climates down to-15ÊF (-25ÊC).
Synthetic engine oils which are CERTIFIED and of
the preferred viscosity may be used in your engine.
The engine oil and oil filter must still be changed
according to the maintenance schedule.
File:11fnmcc.ex
Update:Fri Sep 6 08:51:16 1996