1997 HONDA ODYSSEY warning
[x] Cancel search: warningPage 3 of 241
A Few Words About Safety
Your safety, and the safety of others, is very important. And operating this
vehicle safely is an important responsibility.
To help you make informed decisions about safety, we have
provided operating procedures and other information on labels and in
this manual. This information alerts
you to potential hazards that could hurt you or others.
Of course, it is not practical or
possible to warn you about all the
hazards associated with operating or maintaining your vehicle. You must
use your own good judgement. You will find important safety information in a variety of forms, including: Safety Labels — on the vehicle.
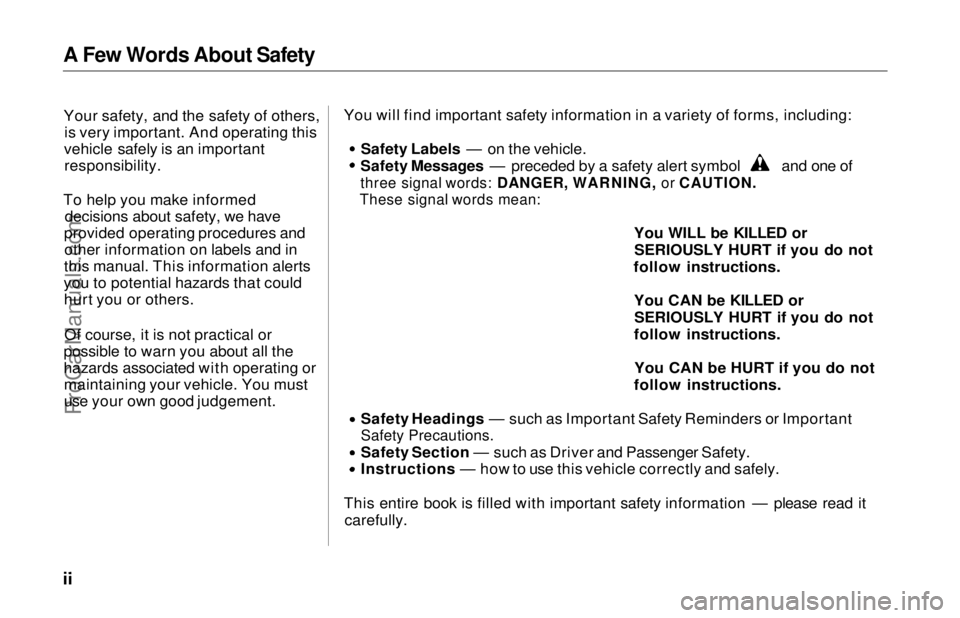
Safety Messages — preceded by a safety alert symbol and one of
three signal words: DANGER, WARNING, or CAUTION.
These signal words mean:
You WILL be KILLED orSERIOUSLY HURT if you do not
follow instructions.
You CAN be KILLED orSERIOUSLY HURT if you do not
follow instructions.
You CAN be HURT if you do not
follow instructions. Safety Headings — such as Important Safety Reminders or Important
Safety Precautions.
Safety Section — such as Driver and Passenger Safety.
Instructions — how to use this vehicle correctly and safely.
This entire book is filled with important safety information — please read it carefully.ProCarManuals.comMain Menu s t
Page 32 of 241
Instruments and Controls
This section gives information about the controls and displays thatcontribute to the daily operation of
your Honda. All the essential controls are within easy reach.
Control Locations............................ 32
Indicator Lights................................ 33 Gauges.............................................. 37
Speedometer................................ 37
Trip Meter.................................... 37
Odometer...................................... 37
Temperature Gauge.................... 38 Fuel Gauge................................... 38
Maintenance Required Indicator.................................... 38
Controls Near the Steering
Wheel........................................ 39
Headlights.................................... 40
Daytime Running Lights............. 40
Instrument Panel Brightness..... 41
Turn Signals................................. 41
Windshield Wipers...................... 42
Windshield Washers................... 43 Rear Window Wiper and Washer......................................
43
Hazard Warning...........................
43
Rear Window Defogger.............. 44
Steering Wheel Adjustment....... 44
Steering Wheel Controls ................ 46 Cruise Control.............................. 46
Keys and Locks................................ 49
Keys...............................................49
Ignition Switch............................. 49
Power Door Locks....................... 50
Remote Transmitter....................
51
Childproof Door
Locks............... 52
Tailgate......................................... 52 Glove Box..................................... 53
Seats.................................................. 54
Passenger Seating....................... 54
Seat Adjustments......................... 54
Driver's Seat Power Height Adjustment............................... 55
Head Restraints........................... 56
Third Seat Access........................ 56
Removing the Second Seats
in the Six-Passenger Model.... 57
Folding the Second Seats in the Seven-PassengerModel.................................... 58
Reclining the Second Seat.......... 59
Folding the Third Seat in All Models............................ 60
Power Windows............................... 62
Sunroof.............................................. 63
Mirrors.............................................. 64
Adjusting the Power Mirrors..... 64
Parking Brake.................................. 65
Digital Clock..................................... 66
Beverage Holder.............................. 66
Dashboard Compartment............... 68
Center Pocket.................................. 68
Vanity Mirror................................... 68
Cigarette Lighter............................. 69
Ashtrays............................................ 69
Interior Lights.................................. 70
Ceiling Lights............................... 70
Spotlights...................................... 70
Tailgate Light............................... 71
Courtesy Lights........................... 71
Instruments and ControlsProCarManuals.comMain Menu s t
Page 36 of 241
Indicator Lights
U.S.
Anti-lock Brake System
(ABS) Indicator
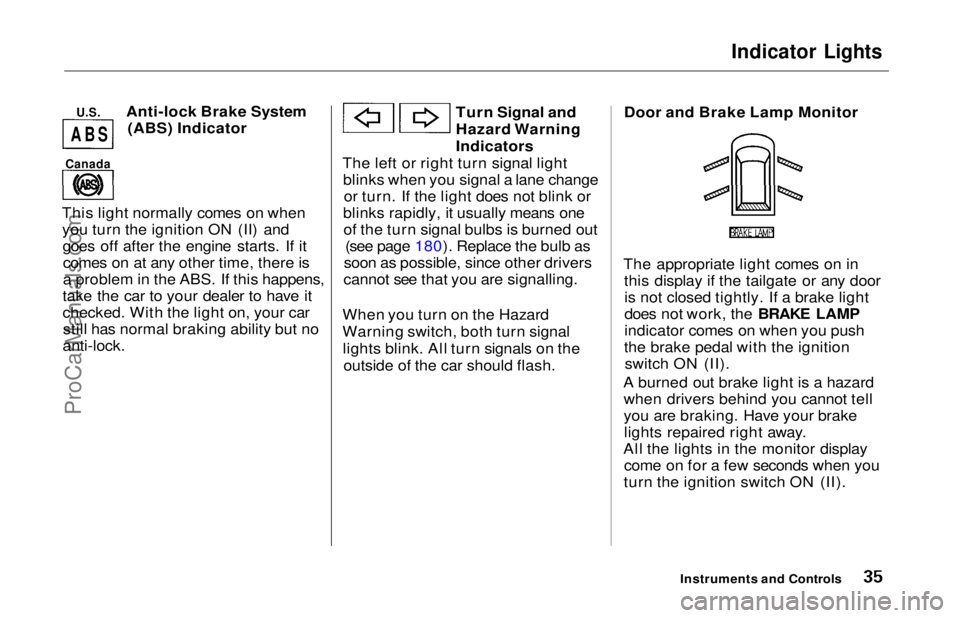
This light normally comes on when you turn the ignition ON (II) andgoes off after the engine starts. If itcomes on at any other time, there is
a problem in the ABS. If this happens,
take the car to your dealer to have it
checked. With the light on, your car still has normal braking ability but no
anti-lock.
Turn Signal and
Hazard Warning
Indicators
The left or right turn signal light blinks when you signal a lane changeor turn. If the light does not blink or
blinks rapidly, it usually means one of the turn signal bulbs is burned out (see page 180). Replace the bulb as
soon as possible, since other drivers
cannot see that you are signalling.
When you turn on the Hazard
Warning switch, both turn signal lights blink. All turn signals on the outside of the car should flash. Door and Brake Lamp Monitor
The appropriate light comes on in this display if the tailgate or any dooris not closed tightly. If a brake light
does not work, the BRAKE LAMP
indicator comes on when you push
the brake pedal with the ignition switch ON (II).
A burned out brake light is a hazard when drivers behind you cannot tell
you are braking. Have your brakelights repaired right away.
All the lights in the monitor display come on for a few seconds when you
turn the ignition switch ON (II).
Instruments and Controls
Canada
A
B SProCarManuals.comMain Menu Table of Contents s t
Page 40 of 241
Controls Near the Steering Wheel
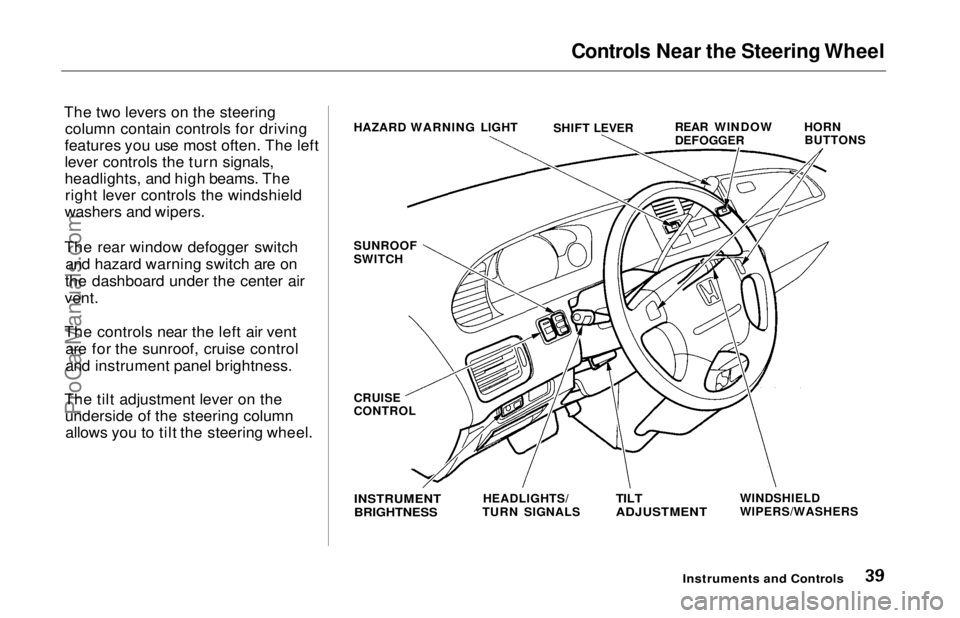
The two levers on the steering column contain controls for driving
features you use most often. The left
lever controls the turn signals,
headlights, and high beams. The right lever controls the windshield
washers and wipers.
The rear window defogger switch and hazard warning switch are on
the dashboard under the center air
vent.
The controls near the left air vent are for the sunroof, cruise control
and instrument panel brightness.
The tilt adjustment lever on the underside of the steering columnallows you to tilt the steering wheel. HAZARD WARNING LIGHT
REAR WINDOW
DEFOGGER
SUNROOF
SWITCH
CRUISE
CONTROL HORN
BUTTONS
INSTRUMENT
BRIGHTNESS
HEADLIGHTS/
TURN SIGNALS
TILT
ADJUSTMENT
WINDSHIELD
WIPERS/WASHERS
Instruments and Controls
SHIFT LEVERProCarManuals.comMain Menu Table of Contents s t
Page 44 of 241
Controls Near the Steering Wheel
Windshield Washers
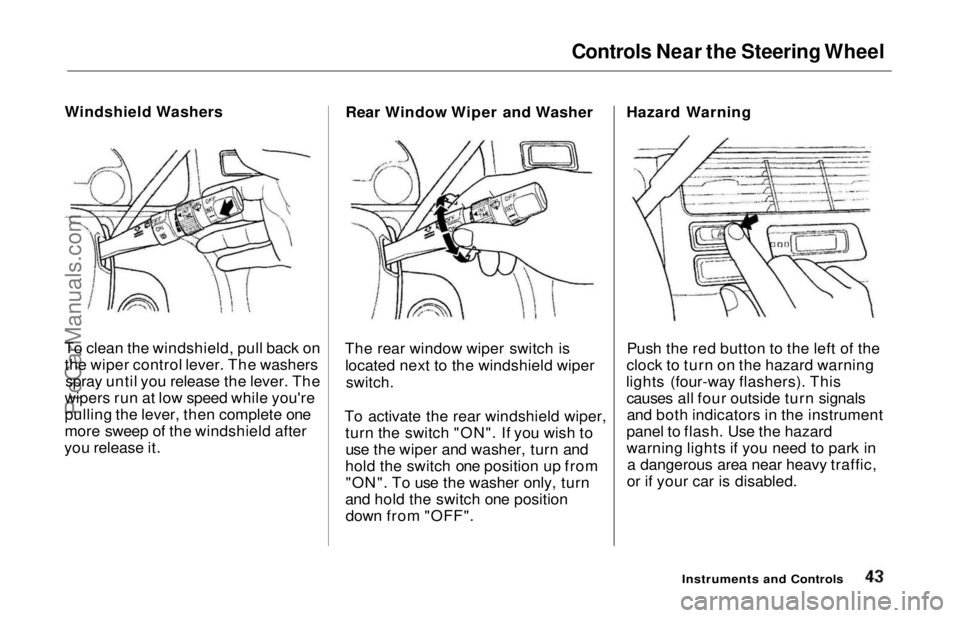
To clean the windshield, pull back on the wiper control lever. The washers spray until you release the lever. The
wipers run at low speed while you're
pulling the lever, then complete one
more sweep of the windshield after
you release it. Rear Window Wiper and Washer
The rear window wiper switch is located next to the windshield wiper
switch.
To activate the rear windshield wiper, turn the switch "ON". If you wish touse the wiper and washer, turn and
hold the switch one position up from "ON". To use the washer only, turn
and hold the switch one position down from "OFF". Hazard Warning
Push the red button to the left of the
clock to turn on the hazard warning
lights (four-way flashers). This causes all four outside turn signalsand both indicators in the instrument
panel to flash. Use the hazard
warning lights if you need to park in a dangerous area near heavy traffic,
or if your car is disabled.
Instruments and ControlsProCarManuals.comMain Menu Table of Contents s t
Page 46 of 241
Controls Near the Steering Wheel
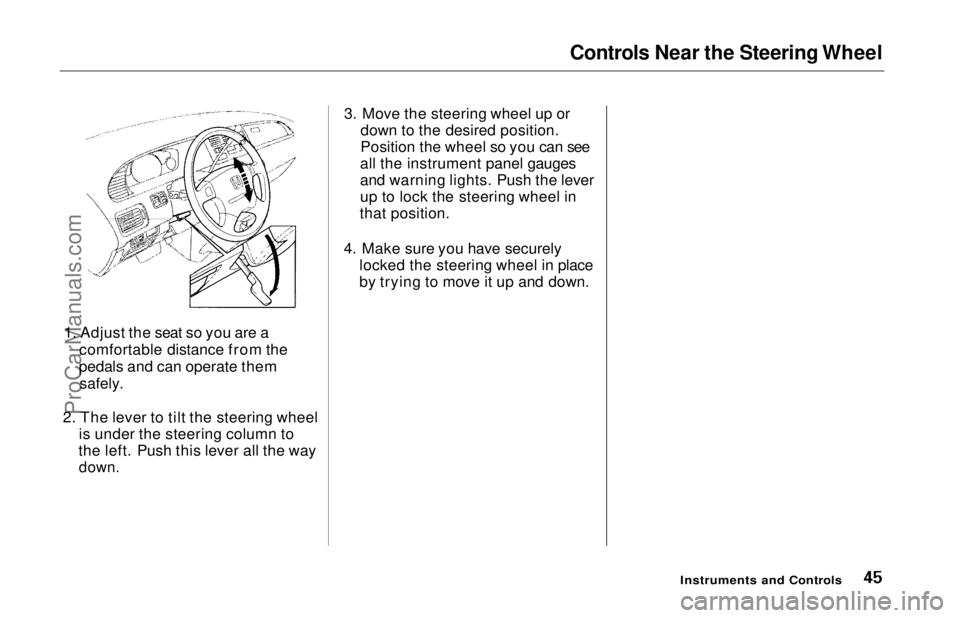
1. Adjust the seat so you are a comfortable distance from the
pedals and can operate them safely.
2. The lever to tilt the steering wheel is under the steering column to
the left. Push this lever all the way
down.
3. Move the steering wheel up or
down to the desired position.
Position the wheel so you can see
all the instrument panel gauges
and warning lights. Push the lever
up to lock the steering wheel in
that position.
4. Make sure you have securely locked the steering wheel in place
by trying to move it up and down.
Instruments and ControlsProCarManuals.comMain Menu Table of Contents s t
Page 129 of 241
Driving in Bad Weather
Visibility — Being able to see clearly in all directions and being
visible to other drivers are important in all weather conditions. This is
more difficult in bad weather. To be seen more clearly during daylight
hours, turn on your headlights.
Inspect your windshield wipers and
washers frequently. Keep the wind- shield washer reservoir full of the
proper fluid. Have the windshield
wiper blades replaced if they start to streak the windshield or leave parts
unwiped. Use the defrosters and air conditioning to keep the windows
from fogging up on the inside (see
page 79).
Traction — Check your tires
frequently for wear and properpressure. Both are important in
preventing "hydroplaning" (loss of
traction on a wet surface). In the
winter, mount snow tires on all four wheels for the best handling.
Watch road conditions carefully, they can change from moment tomoment. Wet leaves can be as slip-
pery as ice. "Clear" roads can have patches of ice. Driving conditions
can be very hazardous when the
outside temperature is near freezing.
The road surface can become covered with areas of water puddles
mixed with areas of ice, so your
traction can change without warning.
Be careful when downshifting. If
traction is low, you can lock up the drive wheels for a moment and cause
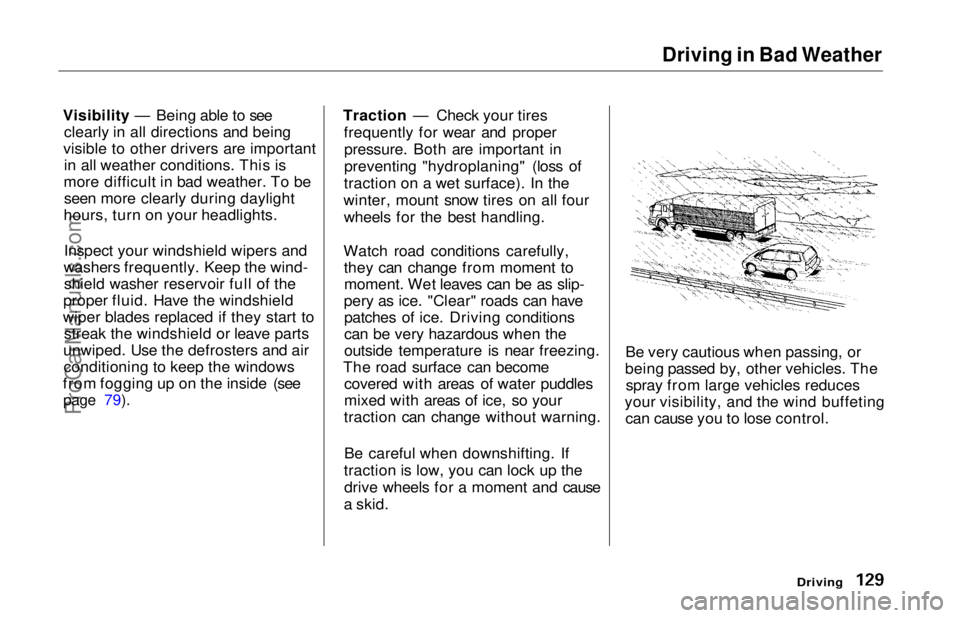
a skid. Be very cautious when passing, or
being passed by, other vehicles. The spray from large vehicles reduces
your visibility, and the wind buffeting can cause you to lose control.
DrivingProCarManuals.comMain Menu Table of Contents s t
Page 193 of 241
Changing a Flat Tire
If you have a flat tire while driving, stop in a safe place to change it.
Stopping in traffic or on the shoulder
of a busy road is dangerous. Drive
slowly along the shoulder until you
get to an exit or an area to stop that
is far away from the traffic lanes.
1. Park the car on firm, level groundaway from traffic. Turn on the
hazard warning lights and turn the ignition to LOCK (0).
2. Put the transmission in Park. Set the parking brake. Have all of thepassengers get out of the car while
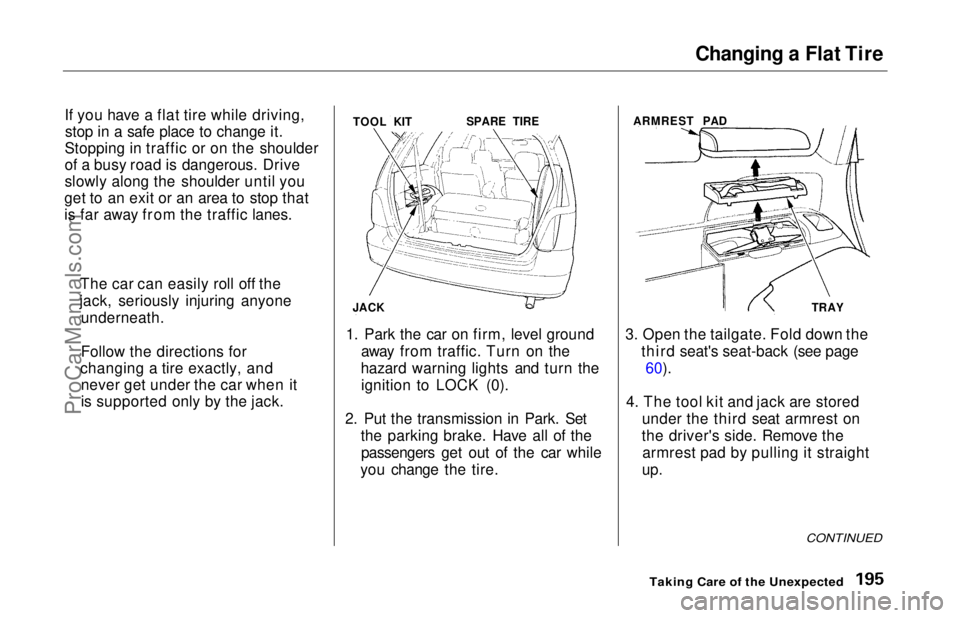
you change the tire. 3. Open the tailgate. Fold down the
third seat's seat-back (see page60).
4. The tool kit and jack are stored under the third seat armrest on
the driver's side. Remove the armrest pad by pulling it straight
up.
CONTINUED
Taking Care of the Unexpected
The car can easily roll off the
jack, seriously injuring anyone underneath.
Follow the directions for
changing a tire exactly, and never get under the car when it
is supported only by the jack. TOOL KIT
JACK SPARE TIRE
ARMREST PAD
TRAYProCarManuals.comMain Menu Table of Contents s t