1997 HONDA ODYSSEY change wheel
[x] Cancel search: change wheelPage 29 of 241

Alcohol and Drugs
Driving a car requires your full at-
tention and alertness. Traffic condi-
tions change rapidly. You must be able to react just as rapidly. Alcohol
or drugs directly affect your alert-
ness and ability to react. Even pre-
scription and non-prescription medi-
cines can have this effect.
There are laws that deal with drunken driving. These laws define
how much alcohol it takes in your system to be legally "drunk." How-
ever, your judgment and reaction
time get worse with every drink — even the first one. The safest thing you can do is never
drink and drive. This can be done if
you plan ahead. If you know you are
going to be drinking, make plans to
ride with a friend who will not be drinking.
What if you find that you've been drinking and cannot get a ride from a
friend? Find alternative transpor-
tation. Call a taxi. Take a bus. Many communities have transportation
services devoted to shuttling people
who have been drinking. If you have no choice but to drive,
stop drinking and give yourself lots
of time to sober up. Time is the only
thing that can make you sober.
Things like coffee or a cold shower don't speed up the process.
If you see friends trying to get
behind the wheel after drinking, stop
them. Drive them yourself or arrange other transportation. If you
think you are interfering, remember
that your interference will keep them
from sharing the road with you.
Driver and Passenger SafetyProCarManuals.comMain Menu Table of Contents s t
Page 41 of 241
Controls Near the Steering Wheel
Headlights
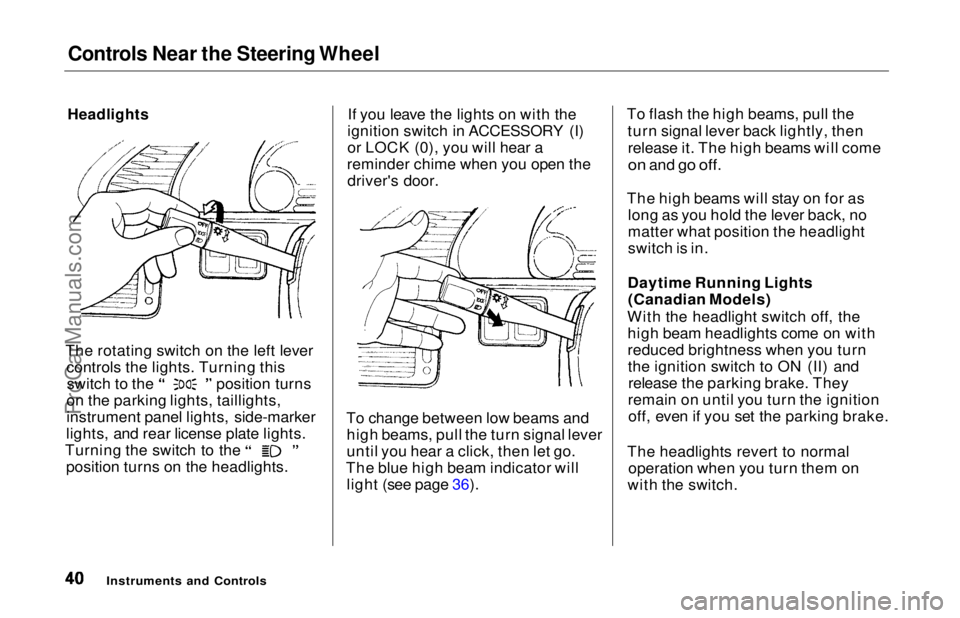
The rotating switch on the left lever controls the lights. Turning this switch to the position turns
on the parking lights, taillights,
instrument panel lights, side-marker
lights, and rear license plate lights. Turning the switch to the
position turns on the headlights. If you leave the lights on with the
ignition switch in ACCESSORY (I)
or LOCK (0), you will hear a
reminder chime when you open the driver's door.
To change between low beams and high beams, pull the turn signal lever
until you hear a click, then let go.
The blue high beam indicator will light (see page 36). To flash the high beams, pull the
turn signal lever back lightly, thenrelease it. The high beams will come
on
and
go off.
The high beams will stay on for as long as you hold the lever back, no
matter what position the headlight
switch is in.
Daytime Running Lights (Canadian Models)
With the headlight switch off, the high beam headlights come on with
reduced brightness when you turnthe ignition switch to ON (II) andrelease the parking brake. They
remain on until you turn the ignition off, even if you set the parking brake.
The headlights revert to normal operation when you turn them on
with the switch.
Instruments and ControlsProCarManuals.comMain Menu Table of Contents s t
Page 42 of 241
Controls Near the Steering Wheel
Instrument Panel Brightness
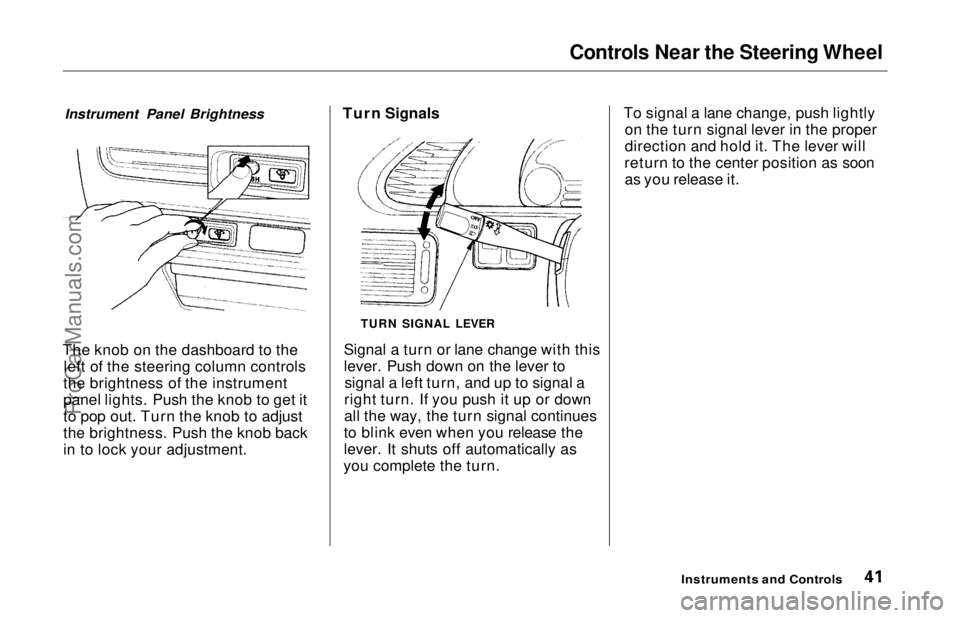
The knob on the dashboard to the left of the steering column controls
the brightness of the instrument
panel lights. Push the knob to get it
to pop out. Turn the knob to adjust
the brightness. Push the knob back
in to lock your adjustment. Turn Signals
Signal a turn or lane change with this
lever. Push down on the lever tosignal a left turn, and up to signal a
right turn. If you push it up or down
all the way, the turn signal continues
to blink even when you release the
lever. It shuts off automatically as
you complete the turn. To signal a lane change, push lightly
on the turn signal lever in the proper
direction and hold it. The lever will
return to the center position as soon as you release it.
Instruments and Controls
TURN SIGNAL LEVERProCarManuals.comMain Menu Table of Contents s t
Page 127 of 241
The Braking System
Important Safety Reminders
ABS does not reduce the time or distance it takes to stop the car, it
only helps with steering control
during braking. You should always
maintain a safe following distance
from other vehicles.
ABS will not prevent a skid that results from changing direction
abruptly, such as trying to take a
corner too fast or making a sudden
lane change. Always drive at a safe,
prudent speed for the road and
weather conditions.
ABS cannot prevent a loss of stability. Always steer moderately
when you are braking hard. Severe or sharp steering wheel movement
can still cause your vehicle to veer
into oncoming traffic or off the road. A vehicle with ABS may require a
longer distance to stop on loose or
uneven surfaces, such as gravel orsnow, than a vehicle without anti-
lock. Slow down and allow a greater distance between vehicles under
those conditions.
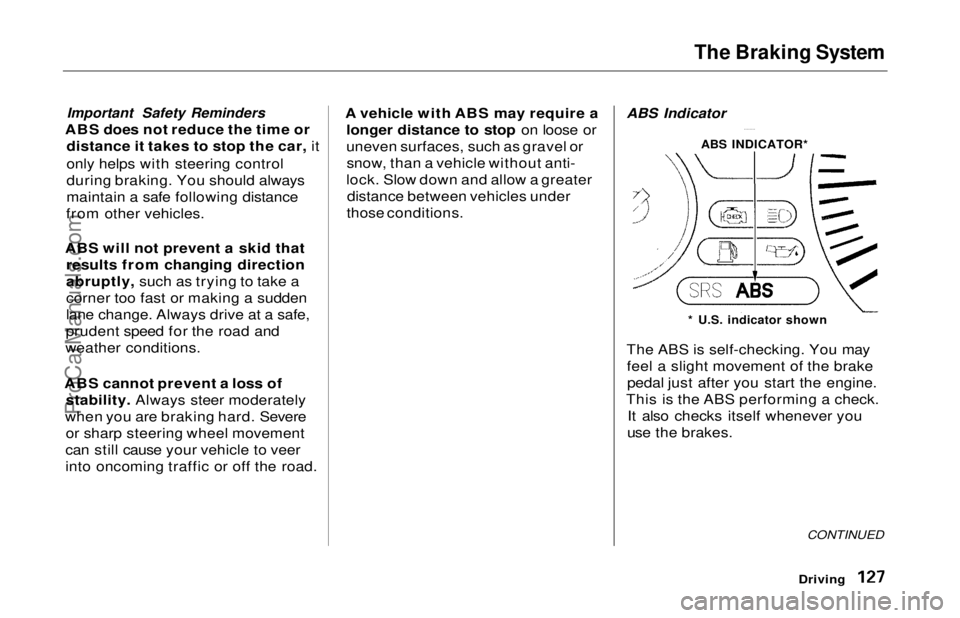
ABS Indicator
The ABS is self-checking. You may
feel a slight movement of the brakepedal just after you start the engine.
This is the ABS performing a check. It also checks itself whenever you
use the brakes.
Driving
ABS INDICATOR*
* U.S. indicator shown
CONTINUEDProCarManuals.comMain Menu Table of Contents s t
Page 128 of 241
The Braking System, Driving in Bad Weather
If anything goes wrong, the ABS
indicator on the instrument panel
comes on (see page 35). This means
the anti-lock function of the braking
system has shut down. The brakes
still work like a conventional system
without anti-lock, providing normal stopping ability. You should have the
dealer inspect your vehicle as soon
as possible if this light stays on after
you start the engine, or comes on while driving. Driving in Bad Weather
Rain, fog, and snow conditions re-
quire a different driving technique
because of reduced traction and
visibility. Keep your car well- maintained and exercise greater
caution when you need to drive in
bad weather. The cruise controlshould not be used in these condi-
tions. Driving Technique — Always drive
slower than you would in dry
weather. It takes your car longer to react, even in conditions that may
seem just barely damp. Apply
smooth, even pressure to all the
controls. Abrupt steering wheel
movements or sudden, hard appli-
cation of the brakes can cause loss of
control in wet weather. Be extra
cautious for the first few miles (kilometers) of driving while you
adjust to the change in driving
conditions. This is especially true in snow. A person can forget some
snow-driving techniques during the
summer months. Practice is needed
to relearn those skills.
Exercise extra caution when driving
in rain after a long dry spell. After
months of dry weather, the first
rains bring oil to the surface of the
roadway, making it slippery.
DrivingProCarManuals.comMain Menu Table of Contents s t
Page 129 of 241
Driving in Bad Weather
Visibility — Being able to see clearly in all directions and being
visible to other drivers are important in all weather conditions. This is
more difficult in bad weather. To be seen more clearly during daylight
hours, turn on your headlights.
Inspect your windshield wipers and
washers frequently. Keep the wind- shield washer reservoir full of the
proper fluid. Have the windshield
wiper blades replaced if they start to streak the windshield or leave parts
unwiped. Use the defrosters and air conditioning to keep the windows
from fogging up on the inside (see
page 79).
Traction — Check your tires
frequently for wear and properpressure. Both are important in
preventing "hydroplaning" (loss of
traction on a wet surface). In the
winter, mount snow tires on all four wheels for the best handling.
Watch road conditions carefully, they can change from moment tomoment. Wet leaves can be as slip-
pery as ice. "Clear" roads can have patches of ice. Driving conditions
can be very hazardous when the
outside temperature is near freezing.
The road surface can become covered with areas of water puddles
mixed with areas of ice, so your
traction can change without warning.
Be careful when downshifting. If
traction is low, you can lock up the drive wheels for a moment and cause
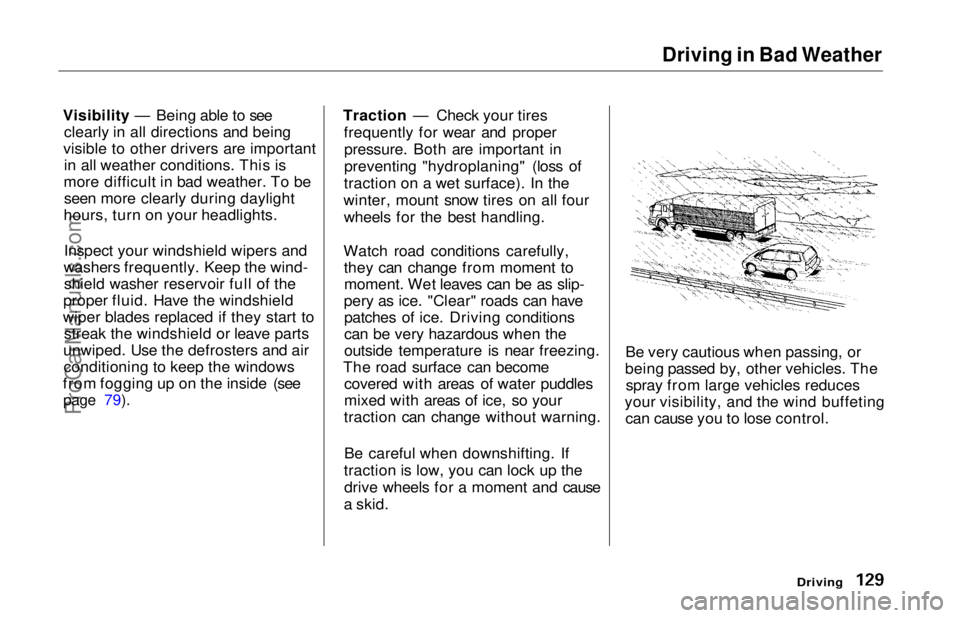
a skid. Be very cautious when passing, or
being passed by, other vehicles. The spray from large vehicles reduces
your visibility, and the wind buffeting can cause you to lose control.
DrivingProCarManuals.comMain Menu Table of Contents s t
Page 183 of 241

Storing Your Car
If you need to park your car for an
extended period (more than one
month), there are several things you should do to prepare it for storage.
Proper preparation helps prevent deterioration and makes it easier to
get your car back on the road. If
possible, store your car indoors.
Fill the fuel tank.Change the engine oil and filter (see page 150).
Wash and dry the exterior completely.
Clean the interior. Make sure the
carpeting, floor mats, etc. are
completely dry.
Leave the parking brake off. Put
the transmission in Park. Block the rear wheels.
If the car is to be stored for a
longer period, it should be supported on jackstands so the
tires are off the ground.
Leave one window open slightly (if
the car is being stored indoors).
Disconnect the battery.
Support the front and rear wiper
blade arms with a folded towel or
rag so they do not touch the
windshield.
To minimize sticking, apply a silicone spray lubricant to all door
and trunk seals. Also, apply a car
body wax to the painted surfaces
that mate with the door and trunk
seals.
Cover the car with a "breathable"
car cover, one made from a porous
material such as cotton.
Nonporous materials, such as
plastic sheeting, trap moisture,
which can damage the paint.
If possible, run the engine for a
while periodically (preferably once a month).
If you store your car for 12 months
or longer, have your Honda dealer
perform the inspections called for in the 24 months/30,000 miles (48,000
km) maintenance schedule (Normal Conditions) as soon as you take it
out of storage (see page 142). The
replacements called for in the maintenance schedule are not
needed unless the car has actually
reached that time or mileage.
MaintenanceProCarManuals.comMain Menu Table of Contents s t
Page 234 of 241
Index
Break-in, New Car......................... 108
Brightness Control, Instruments... 41
Brights, Headlights......................... 40
Bulb Replacement Back-up Lights........................... 181
Brake Lights............................... 181
Ceiling Light............................... 183
Front Parking Lights................. 180
Front Side Marker Lights......... 180
Headlights.................................. 179
License Plate Lights.................. 182
Specifications............................. 221
Turn Signal Lights..................... 180
Bulbs, Halogen............................... 179
Cables, Jump Starting With.......... 203
Capacities Chart............................. 220
Carbon Monoxide Hazard.............. 29
Cargo, Loading............................... 116
Cassette Player
Care............................................. 101
Operation................................ 87, 99
CAUTION, Explanation of............... ii
CD Player ................................. 90, 102 Center Pocket.................................. 68
Certification Label......................... 218
Chains............................................. 176
Change Oil
How to......................................... 150
When to....................................... 142
Changing a Flat Tire..................... 195
Changing Engine Coolant............. 154
Charging System Indicator.... 34, 207
Checking Automatic Transmission
Fluid........................................ 157
Battery Condition...................... 164
Brake Fluid................................. 158
Drive Belts.................................. 170
Engine Coolant........................... 113
Engine Oil................................... 112
Fuses........................................... 211
Power Steering Fluid................. 159
Checklist, Before Driving............. 118
Child Safety...................................... 20
Childproof Door Locks................... 52
Cigarette Lighter............................. 69
Cleaner, Air.................................... 160
Cleaning
Aluminum Wheels..................... 187 Carpeting.................................... 188
Exterior....................................... 186
Fabric.......................................... 188
Interior........................................ 188
Seat Belts.................................... 189
Vinyl............................................ 188
Window....................................... 189
CLEAN Light................................. 101
Clock, Setting the ............................ 66
CO in the Exhaust......................... 225
Cold Weather, Starting in............. 119
Compact Spare............................... 194
Consumer Information*................ 230
Controls, Instruments and.............. 33
Coolant
Adding.........................................152
Checking..................................... 113
Proper Solution.......................... 152
Temperature Gauge.................... 38
Corrosion Protection..................... 190
Crankcase Emission Control
System......................................... 225
Cruise Control Operation............... 46
Customer Relations Office........... 231ProCarManuals.comMain Menu s t