1997 HONDA ODYSSEY key
[x] Cancel search: keyPage 32 of 241

Instruments and Controls
This section gives information about the controls and displays thatcontribute to the daily operation of
your Honda. All the essential controls are within easy reach.
Control Locations............................ 32
Indicator Lights................................ 33 Gauges.............................................. 37
Speedometer................................ 37
Trip Meter.................................... 37
Odometer...................................... 37
Temperature Gauge.................... 38 Fuel Gauge................................... 38
Maintenance Required Indicator.................................... 38
Controls Near the Steering
Wheel........................................ 39
Headlights.................................... 40
Daytime Running Lights............. 40
Instrument Panel Brightness..... 41
Turn Signals................................. 41
Windshield Wipers...................... 42
Windshield Washers................... 43 Rear Window Wiper and Washer......................................
43
Hazard Warning...........................
43
Rear Window Defogger.............. 44
Steering Wheel Adjustment....... 44
Steering Wheel Controls ................ 46 Cruise Control.............................. 46
Keys and Locks................................ 49
Keys...............................................49
Ignition Switch............................. 49
Power Door Locks....................... 50
Remote Transmitter....................
51
Childproof Door
Locks............... 52
Tailgate......................................... 52 Glove Box..................................... 53
Seats.................................................. 54
Passenger Seating....................... 54
Seat Adjustments......................... 54
Driver's Seat Power Height Adjustment............................... 55
Head Restraints........................... 56
Third Seat Access........................ 56
Removing the Second Seats
in the Six-Passenger Model.... 57
Folding the Second Seats in the Seven-PassengerModel.................................... 58
Reclining the Second Seat.......... 59
Folding the Third Seat in All Models............................ 60
Power Windows............................... 62
Sunroof.............................................. 63
Mirrors.............................................. 64
Adjusting the Power Mirrors..... 64
Parking Brake.................................. 65
Digital Clock..................................... 66
Beverage Holder.............................. 66
Dashboard Compartment............... 68
Center Pocket.................................. 68
Vanity Mirror................................... 68
Cigarette Lighter............................. 69
Ashtrays............................................ 69
Interior Lights.................................. 70
Ceiling Lights............................... 70
Spotlights...................................... 70
Tailgate Light............................... 71
Courtesy Lights........................... 71
Instruments and ControlsProCarManuals.comMain Menu s t
Page 39 of 241
Gauges
Temperature Gauge
This shows the temperature of the engine's coolant. During normal
operation, the pointer should rise
from the bottom white mark to about the middle white mark. In severedriving conditions, such as very hot
weather or a long period of uphill driving, the pointer may rise to the
upper white mark. If it reaches the
red (Hot) mark, pull safely to the side of the road. Turn to page 204 for
instructions and precautions on checking the engine's cooling
system.
Fuel Gauge
This shows how much fuel you have. It is most accurate when the car is on
level ground. It may show slightly
more or less than the actual amount
when you are driving on curvy or hilly roads. The gauge stays at the same fuel
level reading after you turn off the
ignition. When you add fuel, the
gauge slowly changes to the new
reading after you turn the ignition
back ON (II).
Maintenance Required Indicator
This indicator reminds you that it is
nearing 7,500 miles (12,000 km)
since the last scheduled maintenance.
Refer to the Maintenance Schedules
for Normal and Severe Driving Conditions on pages 142 —143.
When the distance driven since the last scheduled maintenance nears
7,500 miles (12,000 km), the
indicator will turn yellow. If you
exceed 7,500 miles (12,000 km), the
indicator will turn red.
SLOT
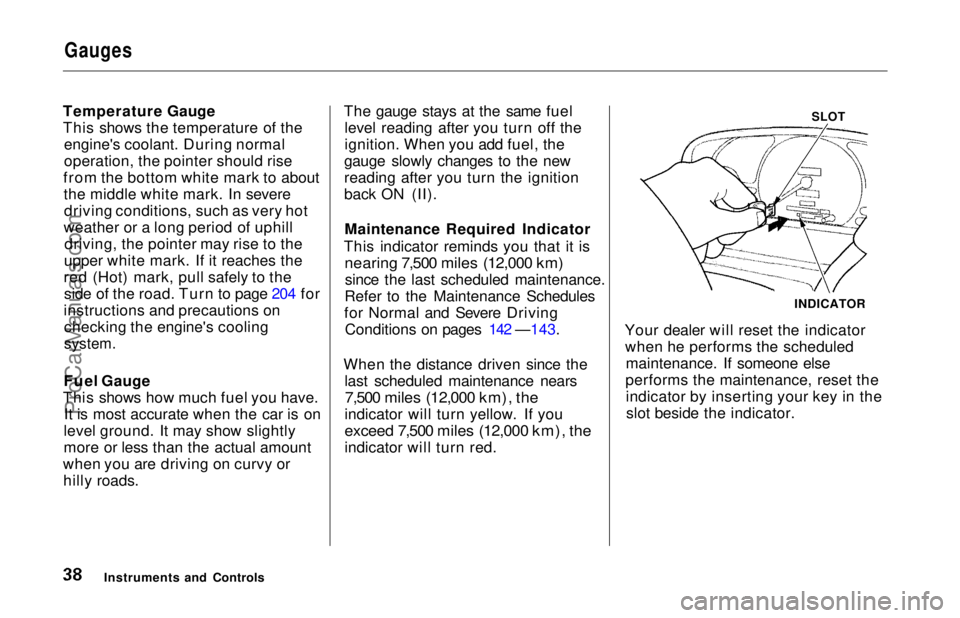
Your dealer will reset the indicator when he performs the scheduled maintenance. If someone else
performs the maintenance, reset the indicator by inserting your key in theslot beside the indicator.
Instruments and Controls INDICATORProCarManuals.comMain Menu Table of Contents s t
Page 50 of 241
Keys and Locks
Keys KEY
NUMBER
PLATE MASTER
KEY
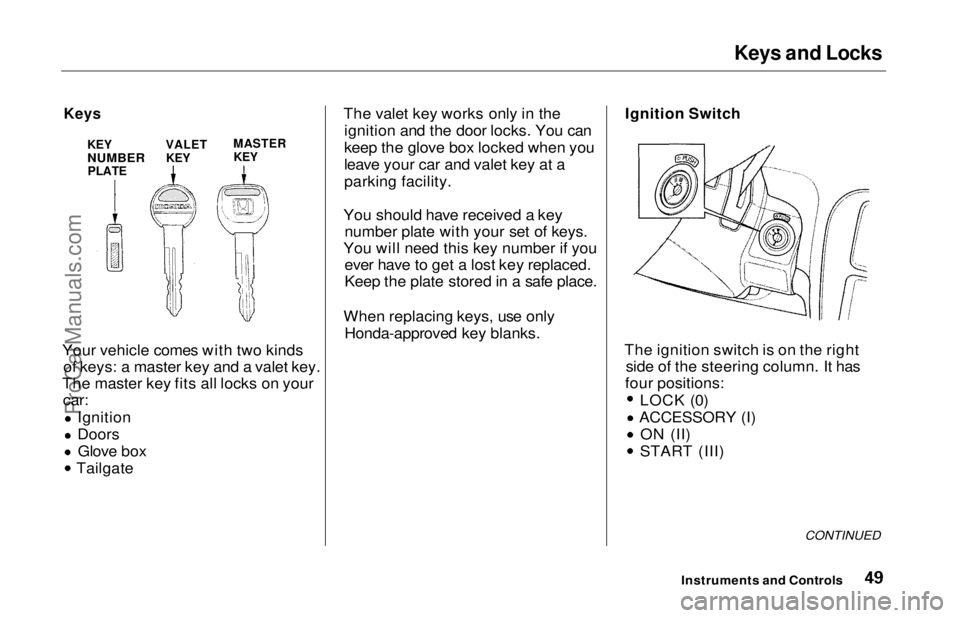
Your vehicle comes with two kinds of keys: a master key and a valet key.
The master key fits all locks on your car: Ignition
Doors
Glove box
Tailgate The valet key works only in the
ignition and the door locks. You can
keep the glove box locked when you
leave your car and valet key at a
parking facility.
You should have received a key number plate with your set of keys.
You will need this key number if you ever have to get a lost key replaced.
Keep the plate stored in a safe place.
When replacing keys, use only Honda-approved key blanks.
Ignition Switch
The ignition switch is on the right side of the steering column. It has
four positions: LOCK (0)
ACCESSORY (I)
ON (II)
START (III)
CONTINUED
Instruments and Controls
VALET
KEYProCarManuals.comMain Menu Table of Contents s t
Page 51 of 241
Keys and Locks
LOCK (0) — You can insert or
remove the key only in this position.
When you turn the key from LOCK to ACCESSORY, you may have to
turn the steering wheel to release
the anti-theft lock. To switch from
ACCESSORY to LOCK, you must push the key in slightly as you turn it.
The shift lever must also be in Park.
The anti-theft lock will lock the steering column when you remove
the key.
ACCESSORY (I) — In this position, you can operate the audio systemand the cigarette lighter.
ON (II) — This is the normal key
position when driving. All features and accessories on the car are usable.
Several of the lights on the instru-
ment panel come on as a test when
you turn the ignition switch from
ACCESSORY to ON (see page 33). START (III) — Use this position
only to start the engine. The switch
returns to ON (II) when you let go of
the key.
You will hear a reminder beeper if you leave the key in the ignition switch in the LOCK (0) or
ACCESSORY (I) position and open the driver's door. Remove the key to
turn off the beeper. Power Door Locks
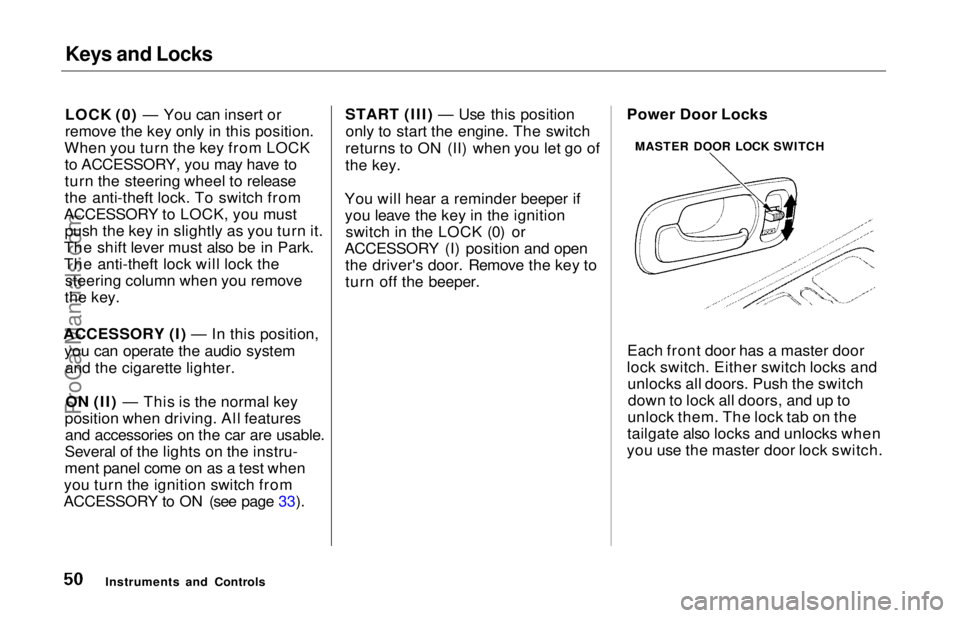
Each front door has a master door
lock switch. Either switch locks and unlocks all doors. Push the switchdown to lock all doors, and up to
unlock them. The lock tab on the
tailgate also locks and unlocks when
you use the master door lock switch.
Instruments and Controls MASTER DOOR LOCK SWITCHProCarManuals.comMain Menu Table of Contents s t
Page 52 of 241
Keys and Locks
LOCK TAB
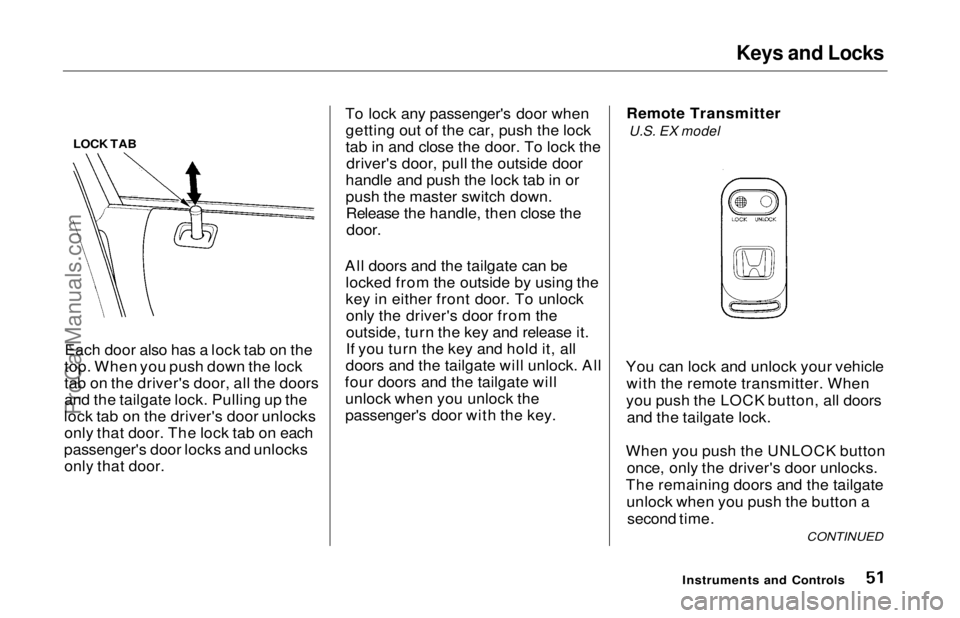
Each door also has a lock tab on the
top. When you push down the lock
tab on the driver's door, all the doors
and the tailgate lock. Pulling up the
lock tab on the driver's door unlocks only that door. The lock tab on each
passenger's door locks and unlocks only that door. To lock any passenger's door when
getting out of the car, push the lock
tab in and close the door. To lock the driver's door, pull the outside door
handle and push the lock tab in or
push the master switch down. Release the handle, then close the
door.
All doors and the tailgate can be locked from the outside by using the
key in either front door. To unlockonly the driver's door from the
outside, turn the key and release it.
If you turn the key and hold it, all
doors and the tailgate will unlock. All
four doors and the tailgate will unlock when you unlock the
passenger's door with the key. Remote Transmitter
U.S. EX model
You can lock and unlock your vehicle with the remote transmitter. When
you push the LOCK button, all doors and the tailgate lock.
When you push the UNLOCK button once, only the driver's door unlocks.
The remaining doors and the tailgate unlock when you push the button asecond time.
Instruments and Controls
CONTINUEDProCarManuals.comMain Menu Table of Contents s t
Page 53 of 241
Keys and Locks
If you use the unlock feature on the
remote transmitter, and a door or the
tailgate is not opened within 20 seconds, all doors and the tailgate
will automatically lock. The remote transmitter will not work if the key isin the ignition.
As required by the FCC: This device complies with Part 15 of the
FCC rules. Operation is subject to the
following two conditions: (1) This device may not cause harmful interference, and (2) this device must accept any
interference received, including interference that may cause undesired operation.
Changes or modifications not expressly
approved by the party responsible for compliance could void the user's
authority to operate the equipment.
Childproof Door Locks
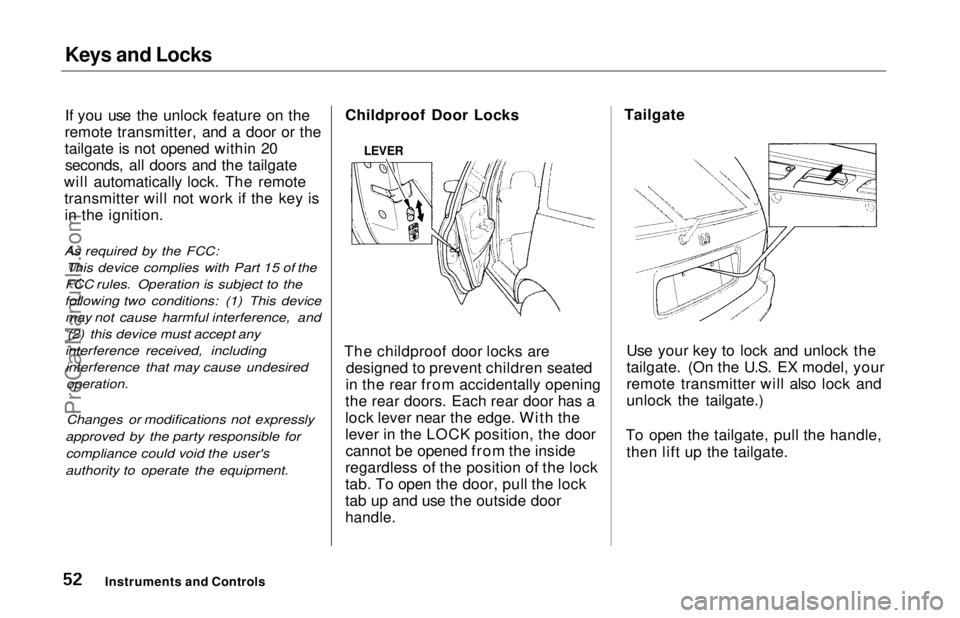
The childproof door locks are designed to prevent children seated
in the rear from accidentally opening
the rear doors. Each rear door has a
lock lever near the edge. With the
lever in the LOCK position, the door cannot be opened from the inside
regardless of the position of the lock
tab. To open the door, pull the lock
tab up and use the outside door
handle.
Tailgate
Use your key to lock and unlock the
tailgate. (On the U.S. EX model, your
remote transmitter will also lock and
unlock the tailgate.)
To open the tailgate, pull the handle, then lift up the tailgate.
Instruments and Controls
LEVERProCarManuals.comMain Menu Table of Contents s t
Page 54 of 241
Keys and Locks
Glove Box
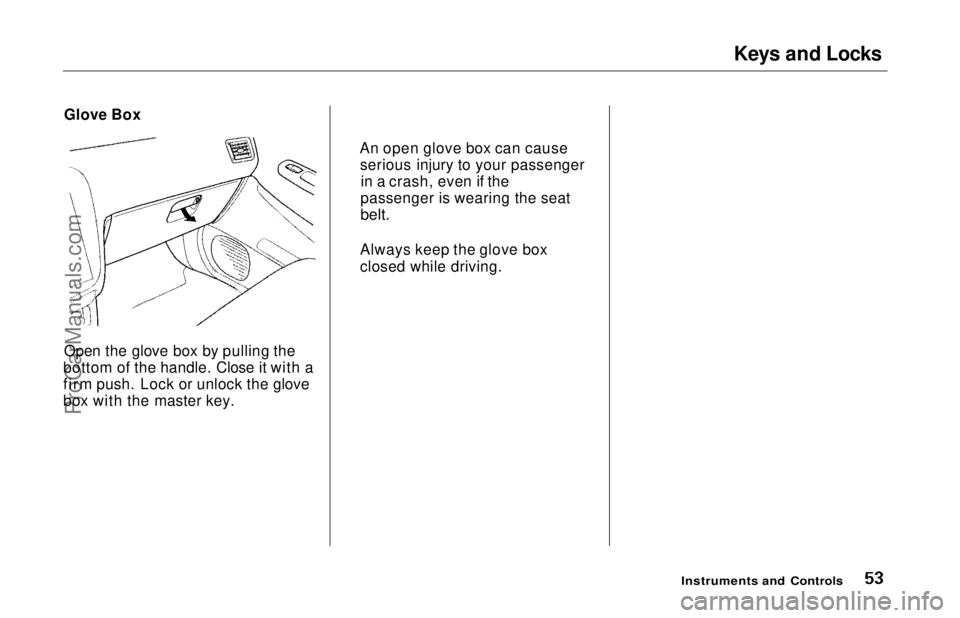
Open the glove box by pulling the
bottom of the handle. Close it with a
firm push. Lock or unlock the glove
box with the master key.
Instruments and Controls
An open glove box can cause
serious injury to your passenger in a crash, even if the
passenger is wearing the seat
belt.
Always keep the glove box
closed while driving.ProCarManuals.comMain Menu Table of Contents s t
Page 119 of 241

Starting the Engine
1. Apply the parking brake.
2. In cold weather, turn off all electrical accessories to reduce
the drain on the battery.
3. Make sure the shift lever is in Park. Press on the brake pedal.
4. Without touching the accelerator pedal, turn the ignition key to theSTART (III) position. If the engine
does not start right away, do not
hold the key in START (III) for
more than 15 seconds at a time.
Pause for at least 10 seconds
before trying again.
5. If the engine does not start within 15 seconds, or starts but stalls
right away, repeat step 4 with the accelerator pedal pressed half-way
down. If the engine starts, release
pressure on the accelerator pedal so the engine does not race. 6. If the engine still does not start,
press the accelerator pedal all the
way down and hold it there while starting in order to clear flooding.
As before, keep the ignition key in the START (III) position for no
more than 15 seconds. Return tostep 5 if the engine does not start.
If it starts, lift your foot off the
accelerator pedal so the engine does not race.
Starting in Cold Weather at High
Altitude (Above 8,000 feet/ 2,400 meters)
An engine is harder to start in cold weather. The thinner air found athigh altitude above 8,000 feet (2,400
meters) adds to the problem.Use the following procedure:
1. Turn off all electrical accessories to reduce the drain on the battery. 2. Push the accelerator pedal half-
way to the floor and hold it there
while starting the engine. Do not hold the ignition key in START (III) for more than 15 seconds.
When the engine starts, release the accelerator pedal gradually as
the engine speeds up and smooths
out.
3. If the engine fails to start in step 2, push the accelerator pedal to the
floor and hold it there while you try to start the engine for no more
than 15 seconds. If the engine does not start, return to step 2.
DrivingProCarManuals.comMain Menu Table of Contents s t