Page 64 of 241
Power Windows, Sunroof
The MAIN switch controls power to the passengers' windows. With thisswitch off, the passengers' windows
cannot be raised or lowered. The
MAIN switch does not affect the driver's window. Keep the MAIN
switch off when you have children in
the car so they do not injure them- selves by operating the windows
unintentionally. Sunroof
On some models
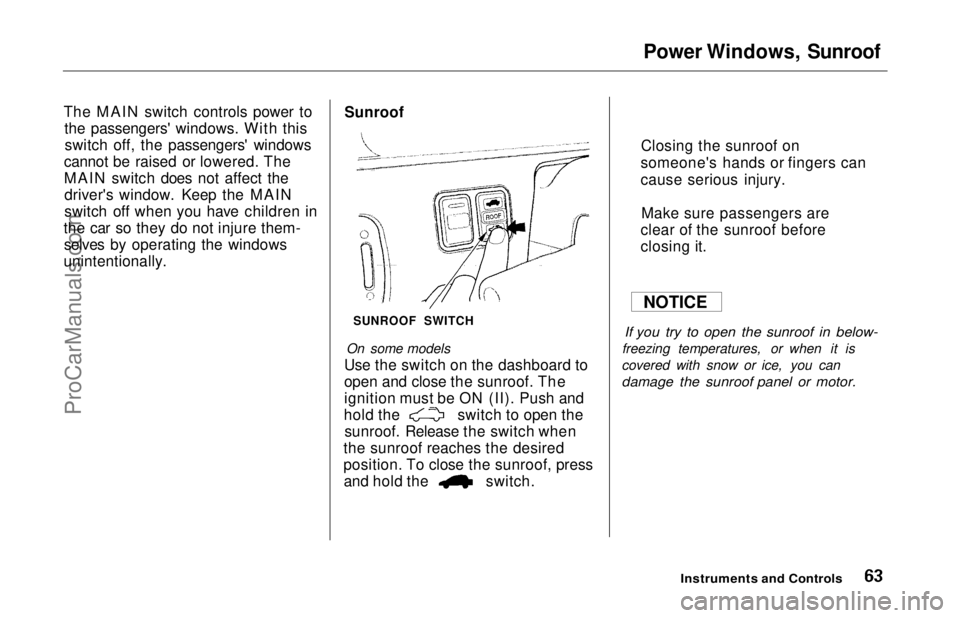
Use the switch on the dashboard to
open and close the sunroof. The
ignition must be ON (II). Push and hold the switch to open the
sunroof. Release the switch when
the sunroof reaches the desired
position. To close the sunroof, press and hold the switch.
If you try to open the sunroof in below-
freezing temperatures, or when it is
covered with snow or ice, you can
damage the sunroof panel or motor.
Instruments and Controls
NOTICE
SUNROOF SWITCH Closing the sunroof on
someone's hands or fingers can
cause serious injury.
Make sure passengers are
clear of the sunroof before
closing it.
ProCarManuals.comMain Menu Table of Contents s t
Page 66 of 241
Parking Brake
To apply the parking brake, pull the lever up fully. To release it, pull upslightly, push the button, and lower
the lever. The parking brake light on the instrument panel should go out
when the parking brake is fully released (see page 34). If you try todrive the car without releasing the
parking brake, the ABS indicator may come on, and the ABS may not
work properly.
Driving the car with the parking brake
applied can damage the rear brakes
and axles.
Instruments and Controls
PARKING BRAKE LEVER
NOTICEProCarManuals.comMain Menu Table of Contents s t
Page 68 of 241
Beverage Holder
The beverage holder for the second seat passengers is located in the
armrest on each rear door.
The third seat also has a beverage holder in each side panel. Use the beverage holder only when
the car is parked. If you place cups in
the holder while driving, the liquid
may spill when you go over bumps or
around corners.
Liquid can also spill from the holders
by the second seat when you close
the rear doors. A spilled liquid that is
very hot can scald you or your
passengers.
Spilled liquids can also damage the
upholstery, carpeting, and electrical
components in the interior.
Instruments and ControlsProCarManuals.comMain Menu Table of Contents s t
Page 69 of 241
Dashboard Compartment, Center Pocket, Vanity Mirror
Dashboard Compartment
Open the dashboard compartment
by squeezing the handle. Close it
with a firm push. Center Pocket
Open the center pocket by pulling
the handle. Close it with a firm push.
The light in the pocket comes on when the instrument panel lights are
on.
Vanity Mirror
To use the vanity mirror, pull down
either sun visor and swing down the
cover.
The passenger's vanity mirror is lighted. The light beside the mirror
comes on only when the light switch
is turned on.
On U.S. models
The driver's vanity mirror is also lighted.
Instruments and ControlsProCarManuals.comMain Menu Table of Contents s t
Page 86 of 241
Audio System
Adjusting the Sound
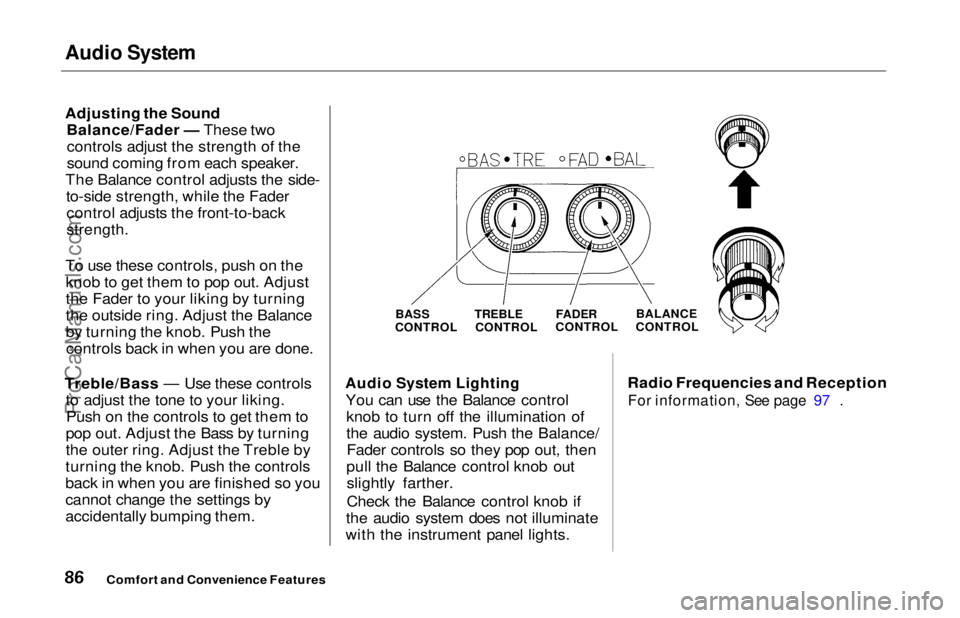
Balance/Fader — These twocontrols adjust the strength of the
sound coming from each speaker.
The Balance control adjusts the side- to-side strength, while the Fadercontrol adjusts the front-to-back
strength.
To use these controls, push on the knob to get them to pop out. Adjust
the Fader to your liking by turning
the outside ring. Adjust the Balance
by turning the knob. Push thecontrols back in when you are done.
Treble/Bass — Use these controls to adjust the tone to your liking.Push on the controls to get them to
pop out. Adjust the Bass by turning
the outer ring. Adjust the Treble by
turning the knob. Push the controls
back in when you are finished so you
cannot change the settings by
accidentally bumping them.
Audio System Lighting
You can use the Balance control knob to turn off the illumination of
the audio system. Push the Balance/Fader controls so they pop out, then
pull the Balance control knob out slightly farther.
Check the Balance control knob if
the audio system does not illuminate
with the instrument panel lights. Radio Frequencies and Reception
For information, See page 97 .
Comfort and Convenience Features
BASS
CONTROL TREBLE
CONTROL
FADER
CONTROL
BALANCE
CONTROLProCarManuals.comMain Menu Table of Contents s t
Page 108 of 241
Break-in Period, Gasoline
Break-in Period
Help assure your car's future
reliability and performance by paying
extra attention to how you drive
during the first 600 miles (1,000 km).
During this period:
Avoid full-throttle starts and rapidacceleration.
Avoid hard braking. New brakes need to be broken-in by moderate
use for the first 200 miles (300
km).
You should follow these same re-
commendations with an overhauled
or exchanged engine, or when the
brakes are relined.
Gasoline
Your Honda is designed to operate on unleaded gasoline with a pump
octane number of 86 or higher. Use
of a lower octane gasoline can cause
a persistent, heavy metallic rapping
noise in the engine that can lead to
mechanical damage.
We recommend gasolines containing detergent additives that help prevent
fuel system and engine deposits.
Using gasoline containing lead willdamage your car's emission controls.
This contributes to air pollution.
In Canada, some gasolines containan octane-enhancing additive called
MMT. If you use such gasolines,
your emission control system performance may deteriorate and
the Malfunction Indicator Lamp on
your instrument panel may turn on. If this happens, contact your
authorized Honda dealer for service. Oxygenated Fuels
Some conventional gasolines are
being blended with alcohol or an ether compound. These gasolines
are collectively referred to as oxygenated fuels. To meet clean air
standards, some areas of the United
States and Canada use oxygenated
fuels to help reduce emissions.
If you use an oxygenated fuel, besure it is unleaded and meets the
minimum octane rating requirement.
Before using an oxygenated fuel, try
to confirm the fuel's contents. Some
states/provinces require this
information to be posted on the
pump.
Before DrivingProCarManuals.comMain Menu Table of Contents s t
Page 118 of 241
Preparing to Drive
You should do the following checks and adjustments every day before
you drive your car.
1. Make sure all windows, mirrors, and outside lights are clean and
unobstructed. Remove frost, snow,or ice.
2. Check that the hood and tailgate are fully closed.
3. Visually check the tires. If a tire looks low, use a gauge to check its
pressure.
4. Check that any items you may be carrying with you inside are stored
properly or fastened down securely. 5. Check the adjustment of the seat
(see page 54).
6. Check the adjustment of the inside and outside mirrors (see
page 64).
7. Check the adjustment of the steering wheel (see page 44).
8. Make sure the doors are securely
closed and locked.
9. Fasten your seat belt. Check that your passengers have fastenedtheir seat belts (see page 7). 10.Turn the ignition ON (II). Check
the indicator lights in the instru-
ment panel.
11. Start the engine (see page 119).
12. Check the gauges and indicator lights in the instrument panel (seepage 33).
DrivingProCarManuals.comMain Menu Table of Contents s t
Page 120 of 241
Automatic Transmission
Your Honda's transmission has fourforward speeds, and is electronically controlled for smoother shifting. It
also has a "lock-up" torque converter
for better fuel economy. You may
feel what seems like another shift
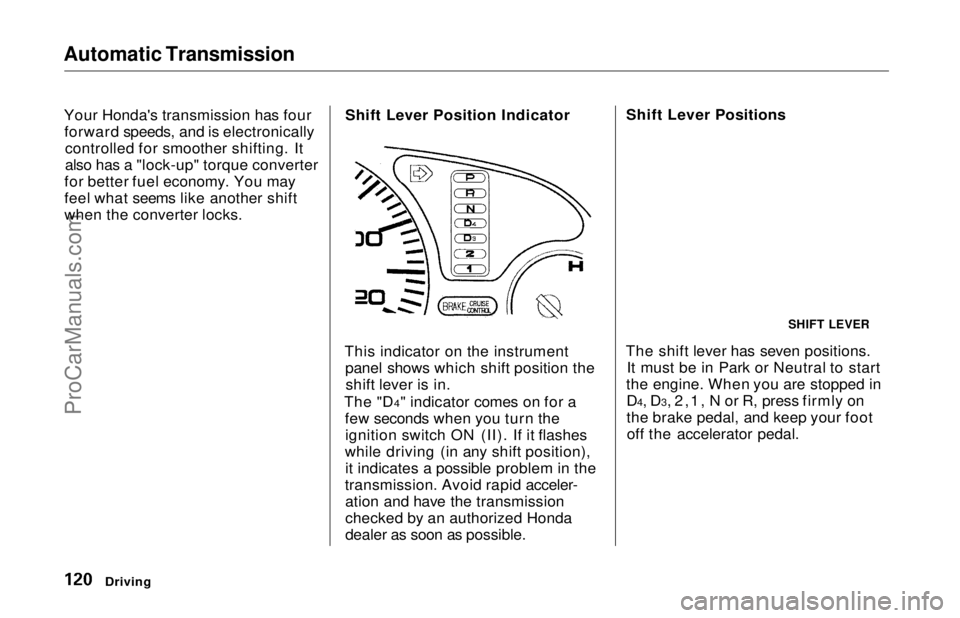
when the converter locks. Shift Lever Position Indicator
This indicator on the instrument panel shows which shift position theshift lever is in.
The "D4" indicator comes on for a few seconds when you turn theignition switch ON (II). If it flashes
while driving (in any shift position), it indicates a possible problem in the
transmission. Avoid rapid acceler- ation and have the transmission
checked by an authorized Honda
dealer as soon as possible. Shift Lever Positions
The shift lever has seven positions. It must be in Park or Neutral to start
the engine. When you are stopped in D4, D3, 2,1, N or R, press firmly on
the brake pedal, and keep your footoff the accelerator pedal.
Driving
SHIFT LEVERProCarManuals.comMain Menu Table of Contents s t