Page 115 of 358

Downloaded from www.Manualslib.com manuals search engine Have you recently changed brands of fuel?
If
so, be sure to fuel your vehicle with quality fuel (see
“Fuel” in the Index). Poor fuel quality will cause your
engine not to run as efficiently as designed. You may
notice this as stalling after start-up, stalling when
you
put the vehicle into gear, misfiring, hesitation on
acceleration or stumbling on acceleration. (These
conditions may go away once the engine is warmed up.)
This will be detected by the system and cause the light
to turn on.
If
you experience one or more of these conditions,
change the fuel brand you use. It will require at least
one
full tank of the proper fuel to turn the light off.
If none of the above steps have made the light turn
off,
have your dealer or qualified service center check the
vehicle. Your dealer has the proper test equipment and
diagnostic tools to fix any mechanical or electrical
problems that may have developed.
Oil Warning Light
73
OIL
If you have a problem with
your oil, this light may stay
on after
you start your
engine, or come
on when
you are driving.
This indicates that oil is not going through your engine
quickly enough to keep it lubricated. The engine could
be low on oil or could have some other oil problem.
Have it fixed right away.
The
oil light could also come on in two other situations:
When the ignition is on but the engine is not running,
the light will come on as a test to show you
it is
working, but the light will go
out when you turn the
ignition to
START. If it doesn’t come on with the
ignition on, you may have a problem with the fuse or
bulb. Have it fixed right away.
Page 116 of 358

Downloaded from www.Manualslib.com manuals search engine If you make a hard stop, the light may come on for a
moment. This is normal. Low Oil Level Light
Don’t keep driving if the oil pressure is low. If
you do, your engine can become
so hot that it
catches fire.
You or others could be burned.
Check your oil as soon as possible and have your
vehicle serviced.
I NOTICE:
Damage to your engine from neglected oil
problems can be costly and is not covered by
your warranty.
LOW
OIL
Your engine is equipped
with an oil level monitoring
system. When the ignition
key is turned on, the LOW
OIL light will briefly flash.
If the light does not flash,
have it fixed
so it will be
ready to warn you if there’s a problem.
If the light stays on, stop the vehicle on a level surface
and turn the engine off. Check the oil level using the
engine oil dipstick. (See “Engine Oil’’ in the Index.) If
the light does not flash, have the low oil level sensor
system repaired
so it will be ready to warn you if there’s
a problem.
The oil level monitoring system only checks the oil level
during the brief period between key
on and engine
crank. It does not monitor the engine oil level when the
engine is running. Additionally, an oil level check
is
only performed if the engine has been turned off for a
considerable period
of time, allowing the oil normally in
circulation to drain back into the oil pan.
Page 118 of 358
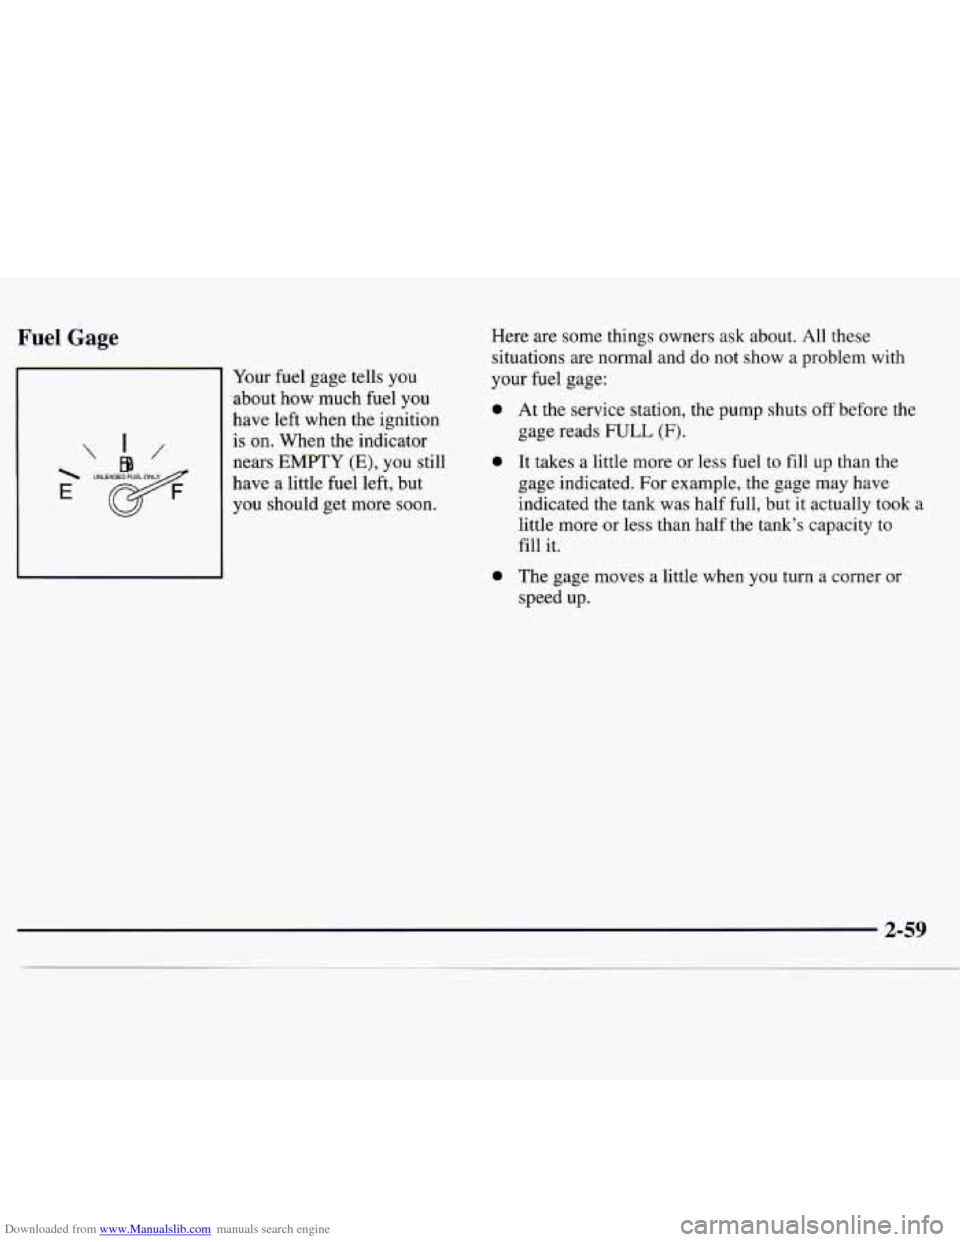
Downloaded from www.Manualslib.com manuals search engine Fuel Gage
E
Your fuel gage tells you
about
how much fuel you
have left when the ignition
is on. When the indicator
nears
EMPTY (E), you still
have a little fuel left, but
you should get more soon. Here
are some things owners ask about. All these
situations are normal and do not show a problem with
your fuel gage:
0
0
0
At the service station, the pump shuts off before the
gage reads
FULL (F).
It takes a little more or less fuel to fill up than the
gage indicated. For example, the gage may have
indicated the tank was half full, but
it actually took a
little more or less than half the tank’s capacity
to
fill it.
The gage moves a little when you turn a corner or
speed up.
Page 138 of 358
Downloaded from www.Manualslib.com manuals search engine Care of Your Cassette Tape Player
A tape player that is not cleaned regularly can cause
reduced sound quality, ruined cassettes or a damaged
mechanism. Cassette tapes should be stored in their
cases away from contaminants, direct sunlight and
extreme heat. If they aren’t, they may not operate
properly or may cause failure of the tape player.
Your tape player should be cleaned regularly after every
50 hours of use. Your radio may display CLN to indicate
that you have used your tape player for
50 hours without
resetting the tape clean timer. If this message appears
on the display, your cassette tape player needs to be
cleaned. It will still play tapes, but you should clean it
as soon as possible to prevent damage to your tapes and
player. If you notice a reduction in sound quality, try a
known good cassette to see if it
is the tape or the tape
player at fault. If this other cassette has
no improvement
in sound quality, clean the tape player. Cleaning
may be done with a scrubbing action,
non-abrasive cleaning cassette with pads which scrub
the tape head as the hubs of the cleaner cassette turn.
It is normal for the cassette to eject while cleaning.
Insert the cassette at least three times to ensure
thorough cleaning. A scrubbing action cleaning
cassette is available through your Chevrolet dealership.
You may also choose a non-scrubbing action, wet-type
cleaner which uses a cassette with a fabric belt to clean
the tape head. This type
of cleaning cassette will not
eject and,
it may not clean as thoroughly as the
scrubbing type cleaner.
After you clean the player, press and hold EJECT for
five seconds to reset the
CLN indicator. The radio will
display
--- to show the indicator was reset.
Cassettes are subject to wear and the sound quality
may degrade over time. Always make sure the cassette
tape is
in good condition before you have your tape
player serviced.
Page 160 of 358

Downloaded from www.Manualslib.com manuals search engine The exit speed is usually posted.
Reduce your speed according to your speedometer, not
to your sense of motion. After driving for any distance
at higher speeds, you may tend to think you are going
slower than you actually are.
Before Leaving on a Long Trip
Make sure you’re ready. Try to be well rested. If you
must start when you’re not fresh
-- such as after a day’s
work
-- don’t plan to make too many miles that first part
of the journey. Wear comfortable clothing and shoes you
can easily drive in.
Is your vehicle ready for a long trip? If you keep it
serviced and maintained, it’s ready to go.
If it needs
service, have it done before starting out.
Of course,
you’ll find experienced and able service experts in
Chevrolet dealerships all across North America. They’ll
be ready and willing to help if you need
it.
Here are some things you can check before a trip:
0
0
0
0
0
0
0
Windshield Washer Fluid: Is the reservoir full? Are
all windows clean inside and outside?
Wiper Blades: Are they in good shape?
Fuel, Engine Oil, Other Fluids: Have
you checked
all levels?
Lamps: Are they all working? Are the lenses clean?
Tires: They are vitally important to a safe,
trouble-free trip. Is the tread good enough for
long-distance driving? Are the tires all inflated to the
recommended pressure?
Weather Forecasts: What’s the weather outlook
along your route? Should you delay your trip a short
time to avoid a major storm system?
Maps:
Do you have up-to-date maps?
Page 161 of 358
Downloaded from www.Manualslib.com manuals search engine Highway Hypnosis Hill and Mountain Roads
Keep your eyes moving. Scan the road ahead and to
the sides. Check your rearview mirrors and your
instruments frequently.
If you get sleepy, pull off the road into a rest, service
or parking area and take a nap, get some exercise, or
both. For safety, treat drowsiness on the highway as
an emergency. Driving
on steep hills
or mountains is different from
driving in flat or rolling terrain.
Page 176 of 358
Downloaded from www.Manualslib.com manuals search engine When You Are Ready to Leave After
Parking on a
Hill
1. Apply your regular brakes and hold the pedal down
while you:
0 Start your engine;
0 Shift into a gear; and
Release the parking brake.
2. Let up on the brake pedal.
3. Drive slowly until the trailer is clear of the chocks.
4. Stop and have someone pick up and store the chocks.
Maintenance When Trailer Towing
Your vehicle will need service more often when you’re
pulling a trailer. See the Maintenance Schedule for more
on this. Things that are especially important in trailer
operation are automatic transaxle fluid (don’t overfill),
engine oil, belt, cooling system and brake adjustment.
Each
of these is covered in this manual, and the Index
will help
you find them quickly. If you’re trailering, it’s
a
good idea to review these sections before you start
your trip.
Check periodically
to see that all hitch nuts and bolts
are tight.
Page 184 of 358
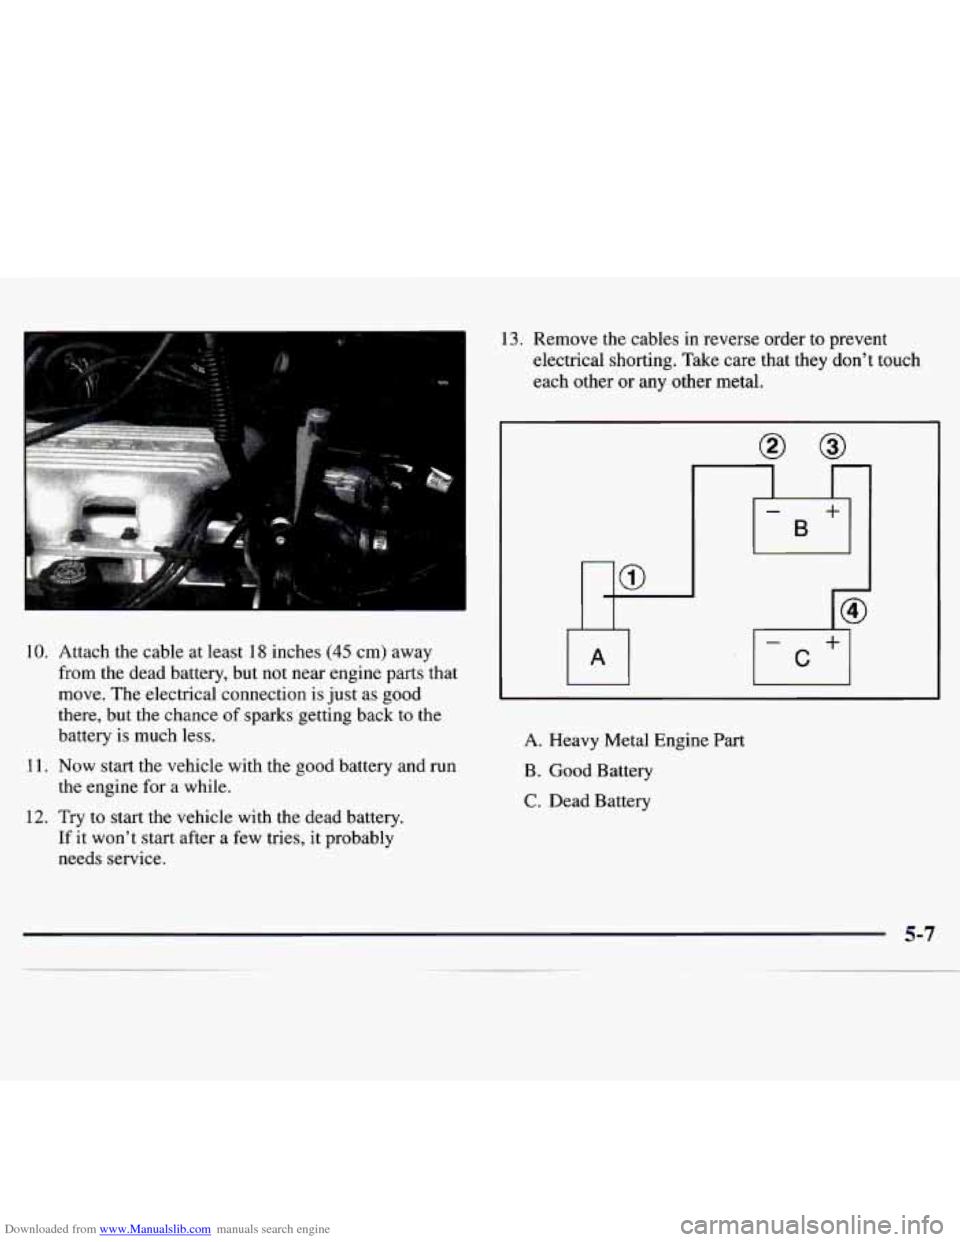
Downloaded from www.Manualslib.com manuals search engine 13. Remove the cables in reverse order to prevent
electrical shorting. Take care that they don't touch
each other or any other metal.
10. Attach the cable at least 18 inches (45 cm) away
from the dead battery, but not near engine parts that
move. The electrical connection is just as good
there, but the chance
of sparks getting back to the
battery is much less.
the engine for a while.
11. Now start the vehicle with the good battery and run
12. Try to start the vehicle with the dead battery.
If it won't start after a few tries, it probably
needs service.
A. Heavy Metal Engine Part
B
. Good Battery
C. Dead Battery
5-7